Table of Contents
Advertisement
Advertisement
Table of Contents

Related Manuals for Dell M318WL


Summary of Contents for Dell M318WL
- Page 1 Dell Mobile Projector M318WL User’s Guide...
- Page 2 Reproduction of these materials in any manner whatsoever without the written permission of Dell Inc. is strictly forbidden. Trademarks used in this text: Dell and the DELL logo are trademarks of Dell Inc.; DLP and DLP logo and DLP BrilliantColor are trademarks of TEXAS INSTRUMENTS INCORPORATED;...
-
Page 3: Table Of Contents
Contents About Your Dell Projector ....Projector Box Contents ..... -
Page 4: About Your Dell Projector
About Your Dell Projector Your projector comes with all the items shown below. Ensure that you have all the items, and contact Dell if anything is missing. Projector Box Contents Package Contents Power cable 1.0 m HDMI cable (1.4 spec) Carrying case User’s Guide and Documentation... -
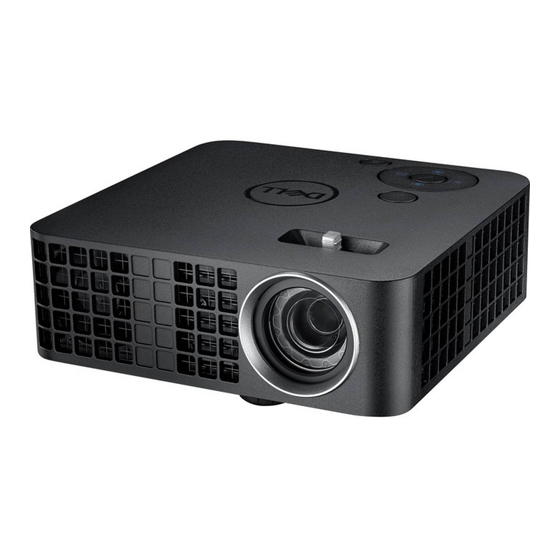
Page 5: Projector Top And Bottom View
Control panel Focus tab Lens Tilt adjusting wheel Mounting hole for tripod: Insert nut 1/4"*20 UNC CAUTION: Before you begin any of the procedures in this section, follow the Safety Instructions as described on page 7. About Your Dell Projector... -
Page 6: Projector Connections
*For USB display, multimedia playback (Video/Music/Photo/Office Viewer), USB memory storage access, firmware upgrade and optional wireless dongle. CAUTION: Before you begin any of the procedures in this section, follow the Safety Instructions as described on page 7. About Your Dell Projector... - Page 7 Do not use the wireless projector near medical equipment. Do not use the wireless projector near microwave ovens. NOTE: • For more information, see the Dell Support website at dell.com/support. • For more information, see the Safety Information that shipped with your projector.
-
Page 8: Remote Control (Optional)
Press to navigate through the On-Screen Display (OSD) Menu items. Right Press to navigate through the On-Screen Display (OSD) Menu items. Down Press to navigate through the On-Screen Display (OSD) Menu items. Volume down Press to decrease the volume. About Your Dell Projector... - Page 9 Press to activate the OSD. Enter Press to confirm the selection. Left Press to navigate through the On-Screen Display (OSD) Menu items. Mute Press to mute or un-mute the projector speaker. Blank Press to toggle between white/blank/resume Blank the image. About Your Dell Projector...
- Page 10 Remote Control Operating Range Operating range Angle ±30° Distance 7 m/22.97 feet NOTE: Actual operating range may slightly differ from the diagram. Weak batteries will also prevent the remote control from properly operating the projector. About Your Dell Projector...
-
Page 11: Adjusting Projector Image
Adjusting Projector Image Adjusting Projected Zoom Raising the Projector Height Raise the projector to the desired display angle, and use the front tilt adjustment wheel to fine-tune the display angle. Lowering the Projector Height Use the front tilt adjustment wheel to fine-tune the display angle. 6°... -
Page 12: Adjusting Projector Position
• Lens throw ratio: 0.52 You can set up or install the M318WL in the following ways: Case A Case B... - Page 13 Do not install the M318WL projector in the following ways: Case D Case C Upward Projection Ceiling Mount Projection Case F Case E Portrait Right Projection Portrait Left Projection Adjusting Projector Image...
-
Page 14: Adjusting Image Corners
Adjusting Image Corners Use Auto Adjust to automatically adjust the projector's Horizontal, Vertical, Frequency, and Tracking in PC mode. Dell M318WL HDMI Auto Adjust Presentation Mode Advanced Settings English Resolution : Adjusting Projector Image... -
Page 15: Adjusting Image Size
Adjusting Image Size 80" (203.2 cm) 70" (177.8 cm) 60" (152.4 cm) 50" (127.0 cm) 40" (101.6 cm) 30" (76.2 cm) 3.18' (0.97 m) Adjusting Projector Image... - Page 16 Adjusting Image Shape Screen size Height Desired Distance (m) Diagonal (inch) W (cm) x H (cm) From base to top of <A> <B> image (cm) <C> 0.97 65 x 40 1.29 86 x 54 1.61 107 x 67 1.94 129 x 81 2.26 151 x 94 2.58...
-
Page 17: Using Your Projector
Using Your Projector Connecting a Computer Using Optional Wireless Dongle Using Your Projector... - Page 18 Connect the wireless dongle to the USB-A port on the projector. Set the input source to Wireless Display in order to enter the wireless menu. Dell M318WL Wireless Display Auto Adjust Presentation Mode HDMI Advanced Settings English Resolution: In your device’s wireless menu, search for the projector by its ID. Then enter the PSK at the prompt to start sharing the same network with the projector.
- Page 19 Do one of the following: a If this is the first time you are connecting to the projector via wireless method, first open the web browser on your computer and enter the IP address 10.0.50.100. Continue to Step 5. b If you have previously connected your computer to the projector via wireless method, please continue to Step 6.
- Page 20 Open Dell Network Projection application on your computer. Find a Projector you connected with. Using Your Projector...
- Page 21 NOTE: Your projector must be installed with a wireless dongle if you want to use the wireless display. The wireless dongle is not shipped with your projector. You can purchase it on the Dell website at www.dell.com. Using Your Projector...
- Page 22 Connecting to Smartphone or Tablet Using Optional Wireless Dongle Install application EZCast Pro on your android or iOS device. In your device’s wireless menu, search for the projector by its ID. Then enter the PSK at the prompt to start sharing the same network with the projector. Launch the EZCast Pro application then click the top-right button to choose the device you connected with.
-
Page 23: Connecting To Multimedia
Dell M318WL supports EZView funtion. It is an application that transmits supported content from your Android or iOS devices wirelessly. For more Information, please visit the Dell Support site at dell.com/support. Supported file formats are listed on page 24 in Multimedia File Type Support section. -
Page 24: Using Pc-Free Presentation
Using PC-Free Presentation Multimedia File Type Support Photo Format Image Type Sub Type Encode Max Pixels Max Size (Ext Name) Type Jpeg/Jpg Baseline YUV420 No Limitation YUV422 YUV440 YUV444 progressive YUV420 64x panel resolution YUV422 YUV440 YUV444 64x panel resolution Video Format File Format Video... - Page 25 Power up the projector by pressing the power button. Access the Input Source menu, select the Internal Memory option, and press the button. Dell M318WL Internal Memory Auto Adjust Presentation Mode Advanced Settings English...
- Page 26 Select Storage Mode to access the internal memory as Removable Disk. Internal Memory Video Music Photo Document Setting Storage Mode To copy files to the projector's Internal Memory, first open a file explorer window. Go to Computer and locate a Removable Disk. This refers to the Internal Memory of the projector.
- Page 27 The Video Source Screen shown below appears: Video Video playback screen: 00:00:26 00:02:36 Press the button on the remote control or keypad to access the video playback control. Then you can use the following buttons on the screen to control video playback. Previous Rewind Play / Pause...
- Page 28 The Music Source Screen shown below appears: Audio Music playback screen: Fine Music Vol. 1 Maid with the Flaxen Hair.mp3 00:00:27 00:02:50 Press the button on the remote control or keypad to access the music playback control. Then you can use the following buttons on the screen to control music playback.
- Page 29 The Photo Source Screen shown below appears: Photo Slideshow screen: Press the button on the remote control or keypad to access the photo viewer control. Then you can use the following buttons on the screen to control photo viewer. Rotate - / + Zoom in / out Up / Down / Left / Right Reset...
- Page 30 The Settings Screen shown below appears: Version Upgrade NOTE: This is used for firmware upgrade via USB. Setting up to Present Using External USB Storage NOTE: A USB flash disk must be plugged into the projector if you want to use the multimedia USB function. Follow these steps to playback the Photo, Video, or Music files on your projector: Connect the power cable with AC adapter and turn on the projector by...
- Page 31 Plug in a USB flash disk to your projector. Access the Input Source menu, select the USB Viewer option, and press button. Dell M318WL USB Viewer Auto Adjust Presentation Mode Advanced Settings English Resolution: The USB Screen shown below appears:...
- Page 32 The Video Source Screen shown below appears: Video Video playback screen: 00:00:26 00:02:36 Press the button on the remote control or keypad to access the video playback control. Then you can use the following buttons on the screen to control video playback. Previous Rewind Play / Pause...
- Page 33 The Music Source Screen shown below appears: Audio Music playback screen: Fine Music Vol. 1 Maid with the Flaxen Hair.mp3 00:00:27 00:02:50 Press the button on the remote control or keypad to access the music playback control. Then you can use the following buttons on the screen to control music playback.
- Page 34 The Photo Source Screen shown below appears: Photo Slideshow screen: Press the button on the remote control or keypad to access the photo viewer control. Then you can use the following buttons on the screen to control photo viewer. Rotate - / + Zoom in / out Up / Down / Left / Right Reset...
- Page 35 The Settings Screen shown below appears: Version Upgrade NOTE: This is used for firmware upgrade via USB. Using Your Projector...
- Page 36 Setting up to Present Using USB Display Follow these steps to use Dell Network Projection application via USB cable. Connect power cable with AC adapter then usinig USB-A to USB-A cable to connect computer and projector. Power up the projector by pressing the power button.
- Page 37 Document Setting Storage Mode To use Dell Network Projection Lite application from the Internal Memory, first open a file explorer window on your computer. Go to Computer and locate a Dell Network Pro. Open Dell Network Pro and copy Dell Network Projection Lite application to your computer.
- Page 38 The USB Display screen shown below appears: Run the Dell Network Projection Lite application from your computer. Using Your Projector...
- Page 39 Find a Projector you connected with. Select Extend to share your content. Using Your Projector...
- Page 40 Powering up with Dell Power Companion Identifying Parts and Controls Power-in port (from laptop adapter) Power button/Battery-status button Battery-status lights (5) USB-out ports (2) Power-out port (to laptop) NOTE: Powering up the projector only works with the selected/compatible power bank.
- Page 41 Powering Your Projector Connect one end of the power-output cable to the power-out port of the power companion. Connect the other end of the power-output cable to the DC input connector of your projector. Press the power button to start powering your projector. NOTE: The battery-status light blinks amber when the power companion battery is low.
-
Page 42: Troubleshooting
Troubleshooting Troubleshooting Tips If you experience problems with your projector, see the following troubleshooting tips. If the problem persists, contact Dell (see Contacting Dell on page 52). Problem Possible Solution • Ensure that the projector is turned on. No image appears on the screen •... - Page 43 If you experience difficulty in changing resolutions, or if your monitor freezes, restart all the equipment and the projector. If you are not using a Dell portable computer, see your documentation. If images are not displayed properly, please upgrade the video driver of your computer.
- Page 44 CR2032 battery. USB Display not displaying Display over USB Should run automatically. To manually run USB display, go to My Computer and run "Dell Network Projection Lite.exe". NOTE: You may require administrator level access to install the driver.
-
Page 45: Guiding Signals
R-LED Air vents might be blocked driver or the R-LED driver has over- overheated. The projector heated will automatically shut AMBER AMBER down. Turn the display on again after the projector cools down. If the problem persists, contact Dell. Troubleshooting... -
Page 46: Maintenance
Maintenance Replacing the Remote Control Battery Rotate the battery lid counterclockwise to remove the battery cover. Insert a CR2032 coin cell battery and align the polarity correctly according to the marking in the battery holder. NOTE: When you use the remote control for the first time, there is a plastic sheet between the battery and its contact. -
Page 47: Specifications
Specifications Digital Light Processing 0.45" WXGA S450 DMD, DarkChip3™ Brightness 500 ANSI Lumens (Max.) Contrast Ratio 10000:1 Typical (Full On/Full Off) Uniformity 85% Typical (Japan Standard - JBMA) Number of Pixels 1280 x 800 (WXGA) Aspect Ratio 16:10 Internal Flash 7 GB Memory (Max.) Displayable Color 1.07 billion colors... - Page 48 Power Consumption Normal mode: 52 W ± 10% @ 110 Vac Eco mode: 42 W ± 10% @ 110 Vac Power saving mode: < 0.5 W (Fan speed at minimum) Standby mode: < 0.5 W Audio 1 speaker x 1 watt RMS Noise Level Normal mode: 36 dB(A) Typical Eco mode: 32 dB(A) Typical...
- Page 49 I/O Connectors USB (type A) port: One USB connector for supporting USB display, multimedia playback (Video/Music/Photo/Office Viewer), USB memory storage access (USB flash drive/internal memory), and supporting projector, media, and image processor firmware upgrade, and supporting optional wireless dongle. The USB thumb drive can support up to 32 GB. Wireless Dongle Wireless Standard: IEEE 802.11b/g/n (Optional)
-
Page 50: Compatibility Modes (Digital)
Compatibility Modes (Digital) Resolution Refresh Hsync Pixel Clock Rate (Hz) Frequency (KHz) (MHz) 640 x 350 70.087 31.469 25.175 640 x 480 59.940 31.469 25.175 720 x 480 p60 59.940 31.469 27.000 720 x 576 p50 50.000 31.250 27.000 720 x 400 70.087 31.469 28.322... -
Page 51: Additional Information
Additional Information For additional information on how to use your projector, please see the Dell Projectors User Guide at www.dell.com/support/manuals. Additional Information... -
Page 52: Contacting Dell
Dell provides several online and telephone-based support and service options. Availability varies by country and product, and some services may not be available in your area. To contact Dell for sales, technical support, or customer service issues: Visit www.dell.com/contactDell. - Page 53 AC adaptor 23 Power cord 23 Connection Ports DC input connector 6 Specifications HDMI connector 6 Aspect Ratio 47 Audio 48 Contact Dell 4 Brightness 47 Contrast Ratio 47 Digital Light Processing 47 Dimensions 48 Dell Displayable Color 47 contacting 51...
- Page 54 Power Supply 47 Projection Distance 47 Projection Lens 47 Projection Screen Size 47 Uniformity 47 Video Compatibility 47 Weight 48 support contacting Dell 51 telephone numbers 52 Troubleshooting Contact Dell 42 Index...
Need help?
Do you have a question about the M318WL and is the answer not in the manual?
Questions and answers