ComSonics QAM Sniffer User Manual
Dual frequency
Hide thumbs
Also See for QAM Sniffer:
- Quick reference manual (4 pages) ,
- Quick reference manual (5 pages)
Table of Contents
Advertisement
Advertisement
Table of Contents

Related Manuals for ComSonics QAM Sniffer


Summary of Contents for ComSonics QAM Sniffer
- Page 1 QAM Sniffer Dual Frequency User Guide CSI Doc. 101623-003 eRev. 1.0.5...
-
Page 2: Limited Warranty (Brief)
Fax: 1-540-432-9794, Email: tech-support@comsonics.com Copyright All material in this manual is the property of ComSonics, Inc. and protected under the United States copyright law. No material shall be reproduced or used in any form or by any means (graphic, electronic, or mechanical,... -
Page 3: Table Of Contents
Field Use Setup ............................... 9 Built-in Antenna ............................10 Vehicle Docking Cradle ..........................12 Vehicle Docking Cradle Installation ...................... 13 QAM Sniffer DF Configuration Utility ......................14 Configuration Utility Overview ........................14 Download and Install ..........................15 Configuration Utility Operation ........................18 QAM Sniffer Firmware Updates...................... -
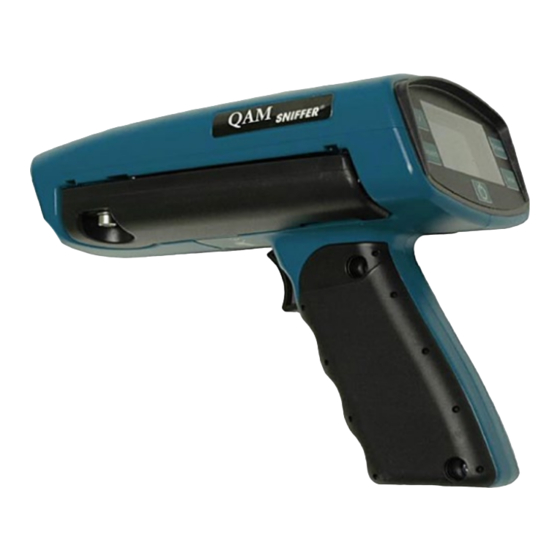
Page 4: Components
QAM Sniffer Components Function Buttons Display Panel Fold Out Trigger Antenna Hand Grips Battery Compartment Figure 1 Components AC or Vehicle Mini-B USB Adapter/Charger Interface Docking Cradle Interface Figure 2 Connections... -
Page 5: Introduction
Caution! Failure to properly charge the battery may result in reduced battery life. Only use the included AC Charger, the Docking Cradle, or the Vehicle Charger to charge the QAM Sniffer. Use of other AC adapters or chargers may cause equipment failure, create a safety hazard, and void the warranty. -
Page 6: General Operation
Figure 3 Control Panel and Display Power – Press the power button at the lower center of the control panel to turn the QAM Sniffer on or off. When powering the QAM Sniffer off remnants of the last display may be visible for a few seconds. -
Page 7: Display Panel
This is primarily used when the leakage level is too high for the QAM Sniffer to read and causes the display to rail at 1,999 uV/m. The 1’ setting allows the use of the QAM Sniffer to locate very large leaks at close proximity to the leak. - Page 8 Configuration Utility Application. Signal Validation - The QAM Sniffer contains methods to validate the received signal to be leakage or noise. Leakage is displayed if the received signal is the QAM Marker signal or a M3 signal. Noise is displayed when the Marker or M3 signal is not detected.
-
Page 9: Field Use Setup
1 foot setting, the displayed level is divided by 10 to get an approximate 10’ measurement. This setting may be useful when the QAM Sniffer as a near field probe (described later in this document.) Squelch Setting - The squelch setting determines the minimum displayed signal level required for the receiver to produce an audible warble tone. -
Page 10: Built-In Antenna
138 MHz accurate measurement values can be achieved only by extending the metal inner elements of each antenna approximately 21 inches (measured from the centerline of the QAM Sniffer body to the end of the antenna element). Extending the 5 largest diameter elements on each side will provide an approximate antenna length of 21 inches per side. - Page 11 This method significantly decreased the sensitivity of the QAM Sniffer and should only be used for finding leaks at a very close proximity. The 1 foot distance setting should only be used if the leak level is extremely high and is over ranging the display to 1,999 uV/m.
-
Page 12: Vehicle Docking Cradle
Set the Squelch, Sensitivity, and Audio Volume settings as needed. The vehicle speed should not exceed 30 miles per hour for optimum leakage monitoring. When the QAM Sniffer is placed into a vehicle powered Docking Cradle, the operating mode is as follows: ... -
Page 13: Vehicle Docking Cradle Installation
Note: Periodically remove the magnetic base antenna to clean dust and grit from the vehicle surface and the bottom of the base to maintain performance and to reduce abrasion on the vehicle finish. The RS-232 cable is not used with the QAM Sniffer at this time. -
Page 14: Qam Sniffer Df Configuration Utility
The QAM Sniffer DF is factory configured to the settings indicated throughout this guide. A Configuration Utility Application is used to reconfigure the QAM Sniffer DF. The utility application is available separately by download. The utility application requires a modern PC computer running MS Windows XP, Vista, or Windows 7;... -
Page 15: Download And Install
QAM Sniffer Download and Install The utility is available for download at www.ComSonics.org. New users must create a user ID and password to gain access to the site. On the Downloads tab under the “Software and Drivers” section, select the QAM Sniffer link. Locate and download the QAM Leakage Detector Configuration Utility Installation file to your PC. - Page 16 Connect the Interface Cable First, power the QAM Sniffer on. Plug the standard USB connector of the QAM Sniffer interface cable into an available USB port on the computer. Plug the Mini-B USB connector end into the USB interface on the QAM Sniffer.
- Page 17 Serial Number window. If the serial number does not automatically populate in the window, disconnect the QAM Sniffer from USB cable and close the configuration utility or you may select “Refresh” to establish communications.
-
Page 18: Configuration Utility Operation
Plug the standard USB connector end of the interface cable into an available USB port on the computer. Plug the Mini-B USB connector end into the USB port on the QAM Sniffer. If the QAM Sniffer is off, press the power button. Make sure the QAM Sniffer’s battery has sufficient charge or connect the AC charger when configuring the unit. -
Page 19: Qam Sniffer Firmware Updates
Once Firmware file is selected, follow instructions listed in FWUpdate window. QAM Sniffer Automatic Frequency Correlation (AFC) The QAM Sniffer Automatic Frequency Correlation (AFC) must the performed in the field with a KNOWN 612MHz Digital leak or test signal present. Recommended level 50 uV/m minimum on 10' setting. The higher the level, the better the response. -
Page 20: Battery Replacement
Everyday use of the unit and recharging will eventually require battery replacement. To replace the QAM Sniffer battery, remove the screws holding the hand grips in place. Remove the hand grips. Note the placement and orientation of the original battery. The battery may vary from the illustration below. -
Page 21: Specifications
QAM Sniffer Specifications Low: 136.5000 to 138.5000 MHz (138.0000*) Frequency High: 608.0000 to 614.0000 MHz (612.0000*) Marker Mode F1*, F2, or F3; F- for M3 Receiver Sensitivity -70 dBmV (-119 dBm) Selectivity 1.5 Hz (Virtual) Measurement Accuracy < ±2.0 dB 0, 5, 10, 20, 50*, 100, 1999 µV/m... -
Page 22: Parts/Accessories
Configuration Utility Application (available by download) Community Configuration Cable only (PC - USB to mini USB) CC-945 Battery - QAM Sniffer 101606-001 Vehicle Charging Adapter 101247-001 QAM Sniffer User Guide (available by download) 101623-003 * Vehicle Antenna Base requires Vehicle Antenna Element... -
Page 23: Limited Warranty
Exclusive Remedies: If a covered defect occurs during the warranty period and you notify ComSonics, your sole and exclusive remedy shall be, at ComSonics sole option and expense, to repair or replace the product. If ComSonics cannot reasonably repair or replace then ComSonics may, in its sole discretion, refund the purchase price paid for the product. -
Page 24: Software License Agreement
Carefully read the following terms and conditions before using this product. It contains software, the use of which is licensed by ComSonics, Inc. to you, the original end user, for your use only as set forth below. If you do not agree to the terms and conditions of this agreement, do not use the software. Using any part of the software indicates that you accept these terms. - Page 25 Entire Agreement: This License Agreement and the accompanying Limited Warranty set forth in the entire agreement between you and ComSonics, supersedes all prior agreements, whether written or oral, with respect to the Software, and may be amended only in a writing signed by both parties.
Need help?
Do you have a question about the QAM Sniffer and is the answer not in the manual?
Questions and answers