
Related Manuals for Wacom STU-520A


Summary of Contents for Wacom STU-520A
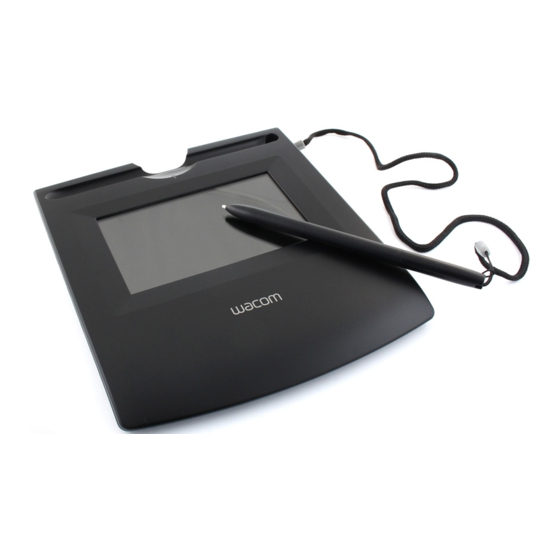
- Page 1 Instruction Manual LCD Signature Tablet STU-520A Ver. 1 26 Sep, 2010 WACOM Co., Ltd...
- Page 2 6. ACCESSORIES ..............................7 (STU-520A) ............................ 7 6-1 A CCESSORY ..............................8 6-2 P PECIFICATION (STJ-A299) .............................. 9 6-3 USB CABLE 7. FIXING STU-520A ............................10 8. REPLACING THE PEN TIP ......................... 13 9. HOW TO INSTALL PEN TETHER ......................14...
-
Page 3: Scope
LCD signature tablet to malfunction. Where use is prohibited, power off the STU-520A to prevent the possibility of it causing other electronic devices to malfunction. Wacom does not accept any liability for direct or consequential damages. - Page 4 Do not put heavy articles on the LCD signature tablet or push against it with a strong force; This may damage the display screen. Do not place heavy articles on the STU-520A cabling, repeatedly bend the cables sharply, or apply heavy stress to the cable connectors; this may damage the unit or cabling.
-
Page 5: Operation
Regular cleaning will help prolong the life of your LCD screen surface and pen. Keep the tablet and pen in a clean, dry place and avoid extremes in temperature. Room temperature is best. The STU-520A and pen are not made to come apart. Taking apart the product will void your warranty. -
Page 6: Product Specification
WACOM Co., Ltd. 5. Product specification 5-1 General Specifications Main body exterior color Black Size 160.0mm(W) X 177.3mm(D) X 15.5mm(H) Mass 300g Pen holder Tray and penholder hole Main body fixation Bottom fixation hole Status display Power Supply Voltage +5V DC 2.5 W Max... -
Page 7: C Oordinate
WACOM Co., Ltd. 5-3 Coordinate Coordinate Specifications Technology Electro-magnetic resonance technology Active Area 103.92 x 60.48 mm Maximum Coordinate (X)10400 (Y)6048 Resolution 0.01mm(2540ppi) ±0.5mm(tilted ±50°from vertical) Coordinate Accuracy Accuracy Assurance Height 0mm(Height from the protective plate) Reading Height 5mm or more(Height from the protective plate) Tilt range *1) ±50 degrees (from vertical) -
Page 8: C Onditions
Operation +5C ~ +35C Ambient Temperature Storage -10C ~ +60C Operation 20 ~80%(noncondensing) Relative Humidity Storage 20 ~90%(noncondensing) 6. Accessories 6-1 Accessory List (STU-520A) Parts number USB cable(1.5m) STJ-A299 1 pcs Manual PRN-A769 1 pcs UP-610-88A-1 1 pcs Pen tether... - Page 9 WACOM Co., Ltd. 6-2 Pen Specification NAME MODEL NUMBER REMARK Main body UP-610-88A-1 Electronic pen Φ9×140.5 mm Physical dimensions Weight 11 g Color Black Rear case Material Color Black Front case Material Color Black Material Color White...
- Page 10 WACOM Co., Ltd. 6-3 USB cable(STJ-A299) NAME MODEL NUMBER Length color TYPE USB Cable STJ-A299 1.5m Black USB standard...
-
Page 11: Fixing Stu-520A
WACOM Co., Ltd. 7. Fixing STU-520A STU-520A can be fixed on the table etc. Please refer for fixing STU-520A. The following; wood screw is recommended for fixing. Φdk Φk Φ dk: 4 ~ 5.8mm K: Less than 2mm L: 10mm is recommended (more than 10mm) Φ... - Page 12 WACOM Co., Ltd. Dimension of screwing (Top view)
- Page 13 Put STU-520A on the table and screws are match with fixation hole of STU-520A Please make sure that STU-520A isn’t lifted up or stressed. It may cause of damage of inside or case. Note) If STU-520A is stressed or tight, don’t force to fix. Please adjust height of screws again.
-
Page 14: Replacing The Pen Tip
Prevent children from swallowing the pen tip. The pen tip (nib) may accidentally be pulled out if children are biting on them. In the unlikely case a nib becomes angular due to wear off, it may damage the coating on the STU-520A display screen. To avoid any damage, nib replacement is recommended in this case. -
Page 15: How To Install Pen Tether
And Thread the other end of the pen tether through a lope of opposite pen tether end. b) Thread the end of the pen tether through the pen tether hole on the back side of STU-520A. And thread the pen through the end lope of the pen tether.
Need help?
Do you have a question about the STU-520A and is the answer not in the manual?
Questions and answers