Table of Contents
Advertisement
Quick Links
Advertisement
Table of Contents

Related Manuals for Digitus DN-16082-1


Summary of Contents for Digitus DN-16082-1
- Page 1 4MP WDR Rugged Dome IP Camera User’s Manual DN-16082-1 Ver. 1.0...
-
Page 2: Table Of Contents
Table of Contents Overview ..........................2 Features ........................2 Package Contents ....................... 3 Dimensions ........................4 Connectors ........................5 Camera Cabling ........................6 Connect Power ......................6 Connect Ethernet Cable....................6 Connect Alarm I/O ....................... 6 System Requirements ......................7 Access Camera ........................ -
Page 3: Overview
Overview The Hyper Mini Rugged Dome IP Camera is an easy setup camera with PoE supported to reduce complicated cabling without sacrificing performance. Quad Streams Compression (H.264 Baseline / Main / High Profile + MJPEG) are supported for efficient bandwidth and storage management. Up to 4K2K real-time resolution is offered for providing high definition images. -
Page 4: Package Contents
Package Contents Please check the package containing the following items listed below. Hyper Mini Rugged Dome IP Camera 2-Pin Power Terminal Block 3-Pin RS-485 Terminal Block (Cable included) Self Tapping Screws (x2) Plastic Screw Anchors (x2) Quick Guide (bundled software and documentation) -
Page 5: Dimensions
Dimensions The dimensions of the camera are shown below. -
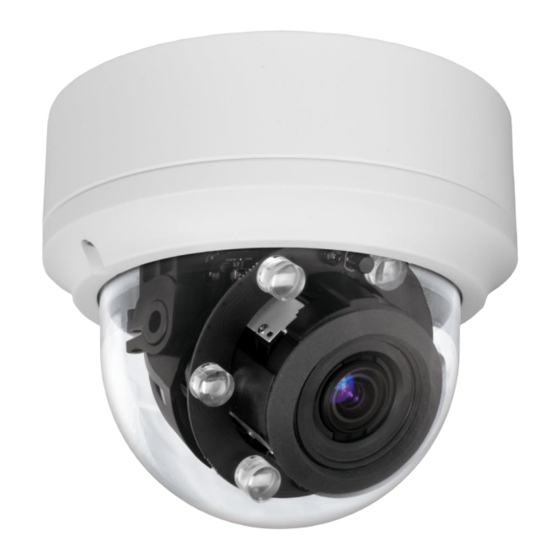
Page 6: Connectors
Connectors The diagram below shows the default button and various connectors of the camera. Definition for each connector is given as follows. Connector Definition Remarks RJ-45 For network and PoE connections BNC* For analog video output Power DC 12V AC 24V 1 Power connection (DC 12V / AC 24V) AC 24V 2... -
Page 7: Camera Cabling
Camera Cabling Before users connect cables, make sure that all cables and the power adaptor are placed in dry and well-waterproofed environments, e.g. waterproof boxes. The purpose is to prevent moisture accumulation inside the camera and moisture penetration into cables, which might lead to device breakdown. Please refer to the following sections for camera connection. -
Page 8: System Requirements
System Requirements To perform the IP camera via web browser, please ensure the PC is in good network connection, and meet system requirements as described below. Items System Requirement Minimum : 1. Intel® CoreTM i5-2430M @ 2.4 GHz 2. 4 GB RAM Personal Computer Recommended : 1. -
Page 9: Access Camera
Access Camera For initial access to the IP camera, users can search the camera through the installer program: DeviceSearch.exe, which can be found in “DeviceSearch” folder in the supplied CD. Accessing the Camera by Device Search Software Step 1: Double click on the program Device Search.exe. Step 2: After its window appears, click on the <Device Search>... - Page 10 Step 8: A prompt window requesting for default username and password will appear. Enter the default username and password shown below to login to the camera. Login ID Password admin admin NOTE: ID and password are case sensitive. NOTE: It is strongly advised that administrator’s password be altered for the security concerns.
- Page 11 Once the Viewer is successfully installed, the Home page of the IP camera will be shown as the figure below. Vari-focal Lens Models...
- Page 12 Motorized Lens Models...
- Page 13 AF Lens Models Zoom and Focus Adjustment The live image will be displayed on the Home page when the camera is successfully accessed. If zoom or focus is not at the desired position, please use the function buttons on the Home page for adjustment. Refer to the Camera’s Web UI Manual in the supplied CD for more details about the function buttons.
-
Page 14: Setup Video Resolution
Setup Video Resolution Users can setup video resolution on Video Format page of the user-friendly browser-based configuration interface. Video Format can be found under this path: Streaming> Video Format. The default values of video resolution are as below. 4M HDR H.264- 2560 x 1440 (15 fps) + H.264- 720P (15 fps) For more details about the combinations of video resolution, please refer to the Camera’s Web UI Manual in the supplied CD. -
Page 15: Configuration Files Export / Import
Configuration Files Export / Import To export / import configuration files, users can access the Maintenance page on the user-friendly browser-based configuration interface. The Maintenance setting can be found under this path: System> Maintenance. Users can export configuration files to a specified location and retrieve data by uploading an existing configuration file to the camera. -
Page 16: Tech Support Information
Tech Support Information This chapter will introduce how to delete previously-installed Viewer in the PC and how to setup the Internet security. Delete the Existing Viewer For users who have installed the Viewer in the PC previously, please remove the existing Viewer from the PC before accessing to the IP camera. Deleting the Viewer In the Windows <Start Menu>, activate <Control Panel>, and then double click on <Add or Remove Programs>. -
Page 17: Setup Internet Security
Setup Internet Security If ActiveX control installation is blocked, please either set Internet security level to default or change ActiveX controls and plug-ins settings. Internet Security Level: Default Step 1: Start the Internet Explorer (IE). Step 2: Click on the <Tools> tab on the menu bar and select <Internet Options>.
Need help?
Do you have a question about the DN-16082-1 and is the answer not in the manual?
Questions and answers