
Subscribe to Our Youtube Channel
Related Manuals for IRiver iFP-590


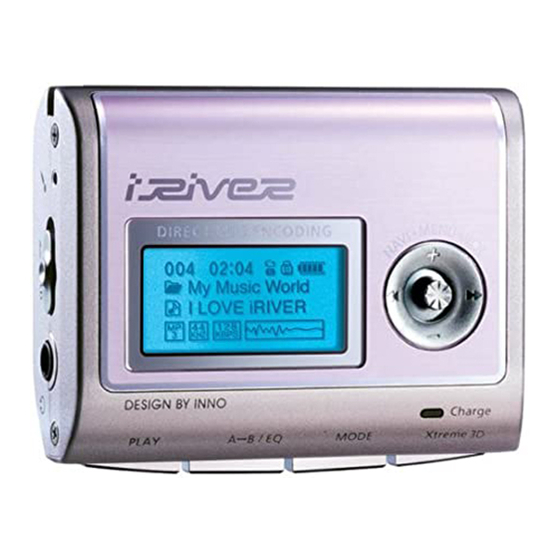
Summary of Contents for IRiver iFP-590
-
Page 1: Instruction Manual
Instruction Manual moodLogic MP3 PLAYER/FM TUNER Model iFP-500 Series iFP-500 Series Thank you for your purchase. Please read this manual carefully before using your new player. www.iRiverAmerica.com www.iRiverAmerica.com... - Page 2 THIS DEVICE COMPLIES WITH PART 15 OF THE FCC RULES. OPERATION IS SUBJECT TO THE FOLLOWING TWO CONDITIONS: (1) THIS DEVICES MAY NOT CAUSE HARMFUL INTERFERENCE, AND (2) THIS DEVICE MUST ACCEPT ANY INTERFERENCE, RECEIVED, INCLUDING INTERFERENCE THAT MAY CAUSE UNDESIRED OPERATION.
- Page 3 1. Getting started..........2. Locating the controls........1. GETTING STARTED 3. Basic Operation..........CONTENTS............INTERNET.............. 4. Convenient Functions........UNIQUE FEATURE..........5. Using Programs..........6. Others.............
- Page 4 Supports 8 levels of subfolders, 500 folders total and up to 1500 files at one time. iRiver is a registered trademark of iRiver Limited in the Republic of Korea and /or other countries and is used under license. Microsoft Windows Media and the Create your own playlists.
- Page 5 2. Locating the Controls Contents............... Front View, Rear View.......... Side View.............. LCD Window............
- Page 6 SIDE VIEW FRONT VIEW LCD Window 3D SOUND Volume + Mode/REC STEREO MEMORY/EQ Power ON/OFF A-B (Interval repeat) NAVI/MENU (Play/Stop) Charging indicator USB Connection Port Volume - REAR VIEW LINE IN/OPTICAL OUT Hold RESET Earphone...
- Page 7 LCD Window THE ORDER PLAY OF SONGS TIME PLAYBACK MODE HOLD BATTERY INDICATOR FOLDER NAME ARTIST/TITLE NAME VOLUME FILE BIT RATE EQUALIZER FORMAT VISUALIZATION SAMPLE RATE PROGRAM...
- Page 8 3. Basic Operation Contents............. Basic Operation..........3-1/3-4 Listening to Music..........3-5/3-6 Operating the FM Tuner........3-7/3-10 Recording FM............. 3-11 Recording Voice..........3-12/3-13 Recording External Audio source....3-14/3-17...
- Page 9 Basic Operation To adjust the volume Press + on volume button to increase volume and press – on button to decrease volume. Selecting FM Mode when listening FM : (Refer to page 47) To change Functions MP3 Playback FM Receiving Voice Recording LINE IN Conversion 1.
- Page 10 MENU DELETING FILES ON THE PLAYER A long press of NAVI/MENU button will enter menu system. Stop playback. Click the Select the files to delete by “NAVI/MENU” using VOL or VOL . button. Scrolling between menus : Press Exit : Push the VOL - switch down or hold down the NAVI/MENU button. Select Function: Press the NAVI/MENU button.
- Page 11 Put the HOLD switch to “OFF”. Connect the earphones as shown below. To turn on the player To play the next folder To play Press the PLAY/STOP button to To select music To play the previous folder turn on the player. : To select previous music Press it again to play.
- Page 12 Tune to your favorite station (FM 87.5~108MHz) While playing MP3, Press and hold the MODE/REC button. To change frequency, push the switch to the left or the right. (ex : 87.5 87.6) The function selection graphic displays LINE VOICE on the LCD. RADIO Push the button to select FM RADIO.
- Page 13 Memory Function (Save stations) Memory delete function (Delete saved stations) Select the station to be deleted at preset mode Select the station by pushing the switch to the left or the right. Press and hold the memory button. Push and select the again desired stations.
- Page 14 To record FM Recording Voice Press and hold the MODE/REC Press the switch to select Press the MODE/REC button during button. Voice mode. FM reception. To stop FM recording Press the MODE/REC button again to stop recording. The recorded file is saved as TUNER000.REC. LINE LINE VOICE...
- Page 15 To stop recording To play a recorded file Recording from the external audio source Press the MODE/REC button. Press the PLAY/STOP button. Connect LINE OUT jack of the external equipment to LINE IN jack of the player. To pause voice recording Press button during recording.
- Page 16 To stop recording Press the NAVI/MENU button (or Press the switch to PLAY/STOP) to go to Line-In select Line-In mode. recording mode. (Record Standby Press the MODE/REC button. Mode) STEREO 44.1KHz 128KBPS LINE NOTE - The recorded file is saved as AUDIO000.REC, AUDIO001.REC... in VOICE RADIO sequential order.
- Page 17 To play a recorded file < Method 2> After pressing the NAVI/MENU button, select a recorded file using VOL + VOL - button. Press the PLAY/STOP button. 3-17...
- Page 18 4. Convenient Functions Contents............. Navigation (Searching)........Playback Mode........... Program Mode............ EQ Mode............. MEMU..............
- Page 19 Please refer to the function controls (page 74) for user-defined configuration. Scroll up Select Folder or Scroll to Upper Folder When the MODE/REC I love iRiver button is pushed, the icon Select iFP-500 in the playback mode folder or indicator is changed.
- Page 20 REPEAT Program mode: Create your own playlists. Play a single track repeatedly. Play all tracks in the folder and stop. Play all tracks in the folder repeatedly. Activating Program mode Play all tracks in the player repeatedly. At stop mode SHUFFLE Randomly play all tracks in the player and stop.
- Page 21 Program Play Press the MEMORY/EQ button to save the program list. After programming, press to play the tracks in sequential order. The program mode icon appears To remove files from the program list. Cancel Program Mode Press the MODE/REC button after selecting the file to be deleted using the Press stop then MEMORY/EQ button.
- Page 22 Menu is subject to change with different firmware versions. EQ MODE Users can configure their own settings. CONFIGURATION Press and hold the MEMORY/EQ button to display the current EQ. Every time you click this button, the EQ mode scrolls in sequential order. NOTE Please refer to the Function Control (Page 75)
- Page 23 Enter Sub Menu MENU OPERATION MAIN MENU Press and hold the NAVI/MENU button to display the menu system. It is composed of 6 main menus with sub- menus. 1.00 Each control option is configured SUB MENU by following buttons. When you select a sub menu, you can set your preference to be displayed.
- Page 24 GENERAL LOAD DEFAULT VALUE : Initialize Menus to the original factory settings. Button operation order is as below. BEEP VOLUME Click NAVI/MENU (select default menu) (select : Set beep volume level. Set to "0" for OFF. YES) Click NAVI/MENU (select YES : Initialization) DISPLAY BACK LIGHT RESUME...
- Page 25 SCROLL SPEED TIMER (SET AUTO POWER OFF) Adjust scroll speed by 1x/2x/4x/Vertical/Horizontal. SLEEP POWER OFF Vertical : The scroll goes up and down : Automatically turns power off after a fixed Horizontal : The scroll goes from the left to time.
- Page 26 TUNER RECORDING MODE FF/RW SCAN SPEED You can adjust recording quality when TUNER RECORDING MODE recording from the FM Tuner. MONO STEREO The fast scan speed can range from 1x/2x/ 32KHz Bit Rate : 8Kbps~320Kbps 4x/6x. 128KBPS Sampling Frequency : 11.025KHz ~44.1KHz tuner recording mode LINE-IN RECORDING MODE You can adjust recording quality when...
- Page 27 MODE (PLAYBACK MODE) DOWNLOAD ACTIVITY REPEAT MODE / SHUFFLE MODE ext mic : A number of Repeat and Shuffle modes are available. Select the one you download activity want by pressing MODE button (Multi selecting available) How to select CAUTION After push name Setting the Recording Mode...
- Page 28 STUDY MODE (off) Xtreme EQ 1~60 You can adjust the sound to your preference. NAME There are 5 band frequency steps, set from You can input your name or custom text. -12dB to +12dB by 3dB step. When initial loading The saved text is displayed during initial loading of disc HOW TO SET Xtreme EQ...
- Page 29 XTREME 3D Xtreme 3D : Set the Concert DBE level SOUND BALANCE Balance your sound to the right or left or keep it in the center according to your preference. When Sound Balance bar is moved to L (Left, 0),the sound outputs at the left earphone.
- Page 30 Player & File Transfering........... 5-17/5-20 Handling Folders & Files........... 5-21/5-25 Additional Functions..........MACINTOSH 5-26/5-27 MAC Software Installation.......... 5-28/5-31 Using iRiver Music Manager on MAC....... MOODLOGIC 5-32 What is MoodLogic?........... 5-33/5-34 Software Installation 5-35 Connecting the Player/File Transfering....5-35/5-38 Player & File Transfering/Deleting......
- Page 31 USB port on the iFP-500 Series The player can store MP3 files or files of any type. You can upload files, other than music (MP3, WMA, ASF), to the PC using the iRiver Music Manager “USB CONNECTED” will appear on the Turn on the player, remove the Program.
- Page 32 Click “Next” to Install iRiver Music Click “Next” after selecting the Click “Install” to install. Installation is progressing. Manager. language to install. Click “Finish” Select the folder to Install. Completed the installation of “New Click “Next”. hardware”.
- Page 33 When installing in Windows XP 1. Basic operation After installing iRiver Music Manager from IRiver Music Manager version installed Double click the iRiver Music Manager the CD and connecting your player to your icon on the PC to start the Manager is displayed.
- Page 34 Firmware Upgrade...
- Page 35 5-10...
- Page 36 2. PLAYER & FILE TRANSFERING Download is completed. 1) Downloading from the PC Open the Manager program after connecting the USB cable between the player and PC. Select the folders or files on the PC to transfer to the player. And Click and Drag to move folders or files to the desired location on the player.
- Page 37 2) Uploading to the PC Activate the Manager program after connecting the USB cable between the player and PC. Select the folders or files on the player to transfer to the PC. Upload is completed. And Click and Drag to move folders or files to the desired location on the PC. Drag &...
- Page 38 3) Change position of folders or files on the player 4) Moving to upper folder (PC & Player) Click the move to “upper folder” icon in the menu bar of the iRiver Music Manager. Click and Drag to move folders or files to the desired location.
- Page 39 2) Making new folders on the PC 3. Managing files Only 8 levels of subfolders are allowed, beginning with the Root folder. 1) To make a new folder on the player New folder is created. Click the “New Folder” icon to make a new folder.
- Page 40 3) Deleting folders or files of the player 4) Deleting folders or files of the PC Click the “Delete” icon or the menu After starting the “Manager” program, After starting the “Manager” program, Click the “Delete” icon. option "File-Delete". select the files or folders to delete. select the files or folders to delete.
- Page 41 Locate and select the IFP-5XXT.HEX then click Open. 1) Upgrading the firmware manually Visit www.iRiver.com to download the latest firmware for your player. Unzip the downloaded firmware file and double click the EXE file. This will create the firmware file. (IFP-5XXT.HEX) The window below is displayed as the firmware upgrade is processing.
- Page 42 1) Upgrading the firmware through Internet Format will erase all the files and folders in your players memory. You can automatically upgrade the latest firmware for your player from iRiver Website. Click “Upgrade” icon on the iRiverMusicManager and click “Upgrde.
- Page 43 3) Modifying the Radio Stations 1. Mac Software Installation You can modify the FM Radio stations with the iRiver Music Manager. 1) Mac OS 9.2 Select “Transfer-Tuner Double click the "IRIVER MUSIC Copy the "MAC OS OS 9 Setting” in the menu to MANAGER FOR OS 9.SIT"...
- Page 44 Mac. Open the iRiver Music Manager Double click the "MAC OS OS X "drive" and move the iRiver Music IRIVER MUSIC MANAGER FOR Manger icon to your Dock or MAC OS X.DMG" in the MAC -OS Desktop.
- Page 45 7) Uploading to the Mac 4) Deleting folders or files 5) Format Format will erase all files in your player After selecting the files or folders to upload, drag and drop them to the folder memory. After selecting the files or folders to to upload on the Mac.
- Page 46 8) Firmware Upgrade What is MoodLogic? Download the latest Firmware from Click “Open” after selecting file to our website. Click “File Firmware update. Update” on the menu. With MoodLogic, you can - easily search for music files on your PC and create custom mixes. - easily manage music files.
- Page 47 Click “Next”. Click “Yes”. Click the “MLIFPGEN” on the Click “Next”. installation CD-ROM to install “MoodLogic” . Click “Next” after selecting folder to Click “Yes” to install. install. Setup is complete. Installation of MoodLogic is completed. Click “OK”. 5-33 5-34...
- Page 48 MoodLogic can not be open at the same time as iRiver Music Manager. NOTE Please close iRiver Music Manager before opening MoodLogic. Select 'Scan My Computer for music 1. Connecting the player to the PC using MoodLogic Select “File Add Music” to add files (Recommended) and click Next.
- Page 49 Use the panels on the right to To see the list of songs to be Click “OK” after selecting folders to save. navigate your music collection. To transfered to the MP3 player, click "MP3 player" on the left part of the transfer songs, highlight them, then screen.
- Page 50 6. Others Contents.............. Trouble Shooting..........Precautions............Accessories............Specifications.............
- Page 51 Should any problem persist after you have checked these symptoms, consult SAFETY your iRiver dealer or contact support at iRiverAmerica.com. Check whether the HOLD switch on the player is ON Avoid dropping or impacting the player. (Switch to OFF position)
- Page 52 USB cable Installation CD Earphone/ Earphone cover Memory 256 MB 512 MB 1 GB Model No iFP-599 iFP-590 iFP-595 Memory Upgrade is not supported. Category ITEM Specifications User Manual/ Neck strap for FMFrequencyrange Audio Cable 87.5 MHz ~ 108 MHz...
Need help?
Do you have a question about the iFP-590 and is the answer not in the manual?
Questions and answers