Table of Contents
Advertisement
Quick Links
Advertisement
Table of Contents

Related Manuals for Honda V45 Magna 1982


Summary of Contents for Honda V45 Magna 1982
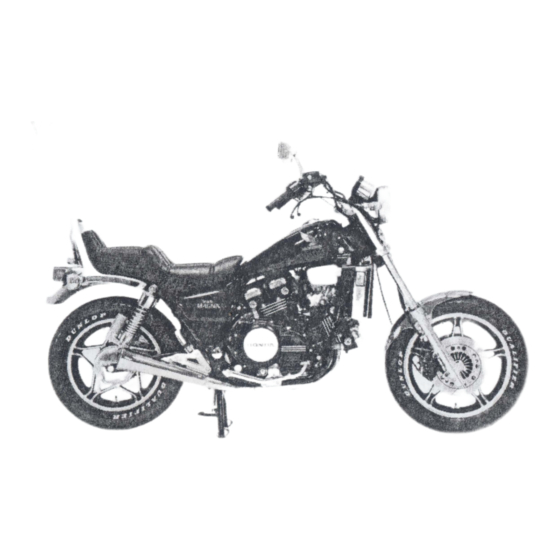
- Page 1 4f'HOND.A • Owner's Manu...
- Page 2 1982 OWNER'S MANUAL All information in this publication is based on the latest product information available at HONDA MOTOR CO., LTD. time of approval for printing. reserves the right to make tges at any time without notice and without incurring any obligation.
- Page 3 *Honda Motorcy cle , Distrib utor's Limit ed Warranty When service is required , re m e mber that your Honda d ealer knows what it takes t o keep your Hond a going strong. If yo u have the required me chanical "know- how " and too ls, your dealer can su pply you with an official Honda Sho p Man ual to help you perform maintenance and re pair tasks.
-
Page 4: Table Of Contents
Page Page MOTO RCY CL E SAFETY SPE C I A L PROCE D U R E S Safe Riding Rules Tool Kit Prot e ctive Apparel Front Wheel R e moval M o d i fications Rear Wheel Removal �.;... - Page 5 M OTO RCYC L E S A FE T Y I'JW!;iii@i Motorcycle riding requires special efforts on your part to ensure your safety. Know these requirements before you ride . FE RIDING RULES Obey all federal, state, and local laws •...
-
Page 6: Prot E Ctive Apparel
PROTECTIVE MODIFICATIONS APPAREL Most motorcycle accid ent fatalities are due to head inj uries : A LW A Y S wear a * Modification of the motorcycle, or helmet . You should also wear a face removal of original equipment may shie ld or goggle s, boots , gloves, and render the vehicle unsafe or illego' prote ctive clothing . - Page 7 Luggage racks lightweight by installation of non-Honda accesso it ems. Do not carry more than 30 lb s . ries, improper loading, worn tires and o f cargo o n a luggage r a c k b ehind the...
-
Page 9: Tubeless Tire S
. Check the rims for d ents or d e formatio n . If t here is any Dry weight kg (lbs) 219( 48 3) authorized Honda damage , your kg (Jbs) '"\irb weight (wet) 23 6 (520) -
Page 11: Suspension
SUSPEN SION 1 . Place the motorcy cle on its center stand. Do not use the side stand o r Front Suspension y o u w i l l g e t false pressure readings. The front suspension of this motorcycle can provid e the d e sired ride under vario us 2. - Page 13 T.R.A.C. Anti-dive Adjuster the fro n t fork, this adjuster c an b e set t o a n y o n e of f o u r positions. This adj uster ( I ) reduces nose- d ive d uring braking an d m ay be adjus t e d to t h e...
- Page 16 (5) Passenger footpeg (3) Side stand (1) Gearshift p edal (2) Footpeg ( 4) Center stand (6) Final drive gear oil filler cap (7) Helmet holder...
-
Page 18: Serial Numbers 1
SERIAL N UMBERS The YIN, Vehi cle Identifi cation Number ( I), is on the Safety Certification Lave! The frame and engine serial numbers are affixed to the left side of the steering required when regist ering your m otor head. - Page 19 The engine number ( 3 ) is stamped on top of the crankcase. ENGINE NO. (3) Engine number...
-
Page 20: Parts F Unction
PARTS F UNCTION Instruments and Indicators The ind icators and warnin g light s are grouped between the instruments. Their fu n ctions are described in the tables on the follo wing p ages . U SA model : Odometer and tripmeter read in mile s . Canadian m o d e l : Odometer and trip meter read in kilo... - Page 22 Function Ref. No. Description Shows engine rpm . Tachometer Avoid o perating the e n gin in the red zone . N E V E R operate b eyond the red zon e . Tachometer red zone CAUTIO N : *Exceeding engin e reco m m ended...
- Page 23 Coo lant Temperature Gauge When the needle e xceeds the b lue m ark , the engine is warm enough to rid e . Nor mal operating temperature is within the white b and. If the need le enters the red )ne , sto p the engine and che ck the ..- e serve tank coolant level.
- Page 24 Ignition Switch The ignition swit ch (I ) is below the indicator panel. Ignition switch Key Removal Function Key Position Ste e ring is locked . Engine and lights cannot b e LOCK (steer- Re move the key oper ated . ing lo ck) For parking the motorc y cle near traffic.
- Page 25 St ar te r Bu tto n En gin e Sto p Sw itc h gin e Th e st art er bu tto n ( 2 ) is b e low th e en Th e th ree po sit ion en gin e sto p sw itc h sto p sw itc h ( 1 ) (I ) is n e xt to th e th rot tle gri p.
- Page 26 three controls n e xt to the left handlebar grip are: He ad lig ht Di m m er Sw itch (I ) Se lec t Hi fo r hi gh b e a m , Lo fo r lo w be am .
- Page 28 Helmet Holder The helmet hold er ( I ) is on the left sid e below the se a t . Insert the ignition key (2) and turn it clock wise to unlock. Hang your helmet on the holder pin ( 3 ) and turn the key count erclockwise.
-
Page 30: Fuel
Fuel Tank or a research o ctane number of 9 1 or higher m ay used . If "kno cking" or 14 Q ( 3 . Fuel t a n k c a p a city is US gal) "pinging" o ccurs, try d iff nt brand of including... - Page 33 HYPOID Recommended oil: GEAR FINAL DRIVE OIL ( Above 5°C/4 l ° F) S A E ( Below 5 ° C/4l ° F) Oil Level Check S A E ec i Ch ec k t he fin al d riv e oil lev el w he n sp fie d by t he m ain ten an ce sch ed ule .
- Page 34 proper corrosion prote ction . During COOLANT fre e zing temperature s , check the cooling Coolant Recommendation syst e m frequent ly and add higher con The owner must properly m aint ain the centrations of antifree ze ( u p to a m axi coolant to prevent free zing , overheati ng , mum of 60% antifree z e ) if required .
- Page 37 STARTI NG THE ENGINE STARTI NG PROCEDURE To restart a warm engine , follo w the procedure for "High Air Temperature ." Never run the engine in a closed area. Normal Air Temperature The exhaust contains poisonous car bon monoxide gas. I .
-
Page 38: Engine Oil 2
NOTE: Low Air T e m perature Do not open the throttle when starting l0° C ( 50° F ) or below t he engine with t he choke open. This I . Follow st e ps 1 2 under Normal Air will lean the mixture, resulting in hard Temperature . - Page 40 BREAK-IN only. Do not e x ceed 7 ,000 rpm . 4 . Upon rea ching an o d o meter reading of During initial break-in, newly machine d 1,600 k m ( 1 ,000 mile s ) , you can sub surfaces will be in contact with each je ct the motorcycle to full throttle ot her and these surfaces will wear in...
- Page 42 Do not downshift when traveling at a speed that would force the engine to overrev in the next lower gear, or cause the rear wheel to lose traction. CAUTIO N : D o n o t shift gears with o u t disengaging the clu tch and closing the thro t tle.
- Page 43 High Altitude Riding When operating this m otorcycle at high altitud e , the air-fuel mixture becomes overly rich. Above 6 , 5 0 0 feet ( 2 , 00 0 m ) drivea bility and performance may be re duced and fue l consumption increas e d . See your authorized H o n d a dealer for high altitude adjustments.
- Page 45 PARKING 1. After stoppin g the motorcycle , shift the t ransmission into neutral, turn the ignition switch OFF and remove the key. 2. Use t he sid e or center stand to support the motorcycle while parked . CAUTIO N : Park the m o to rcycle o n firm, level ground to preve n t overturning.
- Page 46 ANTI-THEFT TIPS NAME: Always lock the st eerin g and never leave the key in the ignition switch. This sounds simple but people d o forge t . 2 . Be sure t h e registration in formation for your motorcycle is accurate and current .
- Page 47 . Refe r to " TI R E S " on pages 5-6 . Because of the c ritical nature o f wheel attachment , you should procee d t o an authorized Honda dealer a s soon a s po ssible Jfter rep air to verify pro per asse m b ly .
- Page 49 4 . Re move the front axle holding b o lt ( 5 ) FRONT WHEEL REMOVA L b y loosening the nut ( 6 ) . Unscrew and I . Raise t h e front wheel o f f the ground pull out the front axle ( 7 ).
- Page 50 Installation Notes : Fit the cali per over the disc taking care not to d amage the brake pad s . Install the T o install the front wheel assembly, insert caliper m ounting b o lt s and tighten to the the axle through the right fork leg and recommended torque 3 0 - 4 0 N·m ( 3.
- Page 51 If the feeler gauge cannot be inserted easily , pull the forks o utw ard or push Failure to provide adequate disc to inward until the gauge can b e inserted caliper holder clearance may damage and tighten the holding nut with the the b rake discs and impair braking effi...
- Page 52 REAR WHEEL REMOVAL 5 . Remove the a xle nut ( 7 ) . 6 . Pull out the axl e . 1 . Place the m otorcy cle on its center 7 . Move t h e w h e e l to t h e right t o sepa stan d .
- Page 53 Installation Notes : b o l t Axle holding torq u e : • 2 0 - 3 0 N ·m ( 2 . 0 - 3 . 0 kg-m , Reverse the re m oval proced ure . • 1 4 - 2 2 ft-lb ) Be fore installing the rear wheel , check Bra k e pa nel stopper bolt torque :...
- Page 54 Honda d ealer for repair. (3) Fuse box Spare fuse ( ! ) Main fuse ( 2 ) Spare main fuse...
- Page 56 . ( U SA O N LY) • When service is required , re m e m ber that your authorized Honda d e aler knows your motorcy cel b e st and is fully e q uipped to maint ain and repa ir it .
- Page 57 * Stop engine and support motorcycle securely on a level surface before performing any maintenance. Use new, genuine Honda parts or their equivalent for maintenance and repair, Parts which are not of equivalent quality may imparir the safety of your motorcycle and the effective operation of the emission control system.
- Page 59 AN AUTHORIZED HONDA DEALER. SH O U LD B E SERVICED BY AN AUTHO R IZED HONDA DEALER, UNLESS THE OWN ER HAS P RO P E R TOO L S AND SERVICE DATA AND I S M ECHANICALLY Q U A L I F I E D . R E F E R TO THE O F F IC IAL HONDA S H O P MANUAL.
-
Page 60: Break-In 3
MAINTENANCE RECORD Performed By Odometer Date Miles 4 ,000 8 ,000 1 2 ,000 1 6 ,000 2 0 ,000 2 4 ,000 • M ake sure whoever performs the m ainte an c e completes this record . All scheduled m aint enan ce , in clu d ing the 600 mile ( 1 ,000 km) break-in maintenan ce , is consid e red a normal owner o p e rating cost and will be charged for by your d e aler . - Page 62 5 . Check t hat t he s ealing washers ( 3 ) o n 7 . I nstall t he oil filler ca p . t he drain plugs a r e in g o o d condition 8 . Start t h e e n gi n e a n d l e t it idle f o r 2 - 3 and install t he plugs .
- Page 63 SPARK P LUGS 6. Tight en the spark p lugs 1 /2 t urn wit h a spark plug wench to compress the Recommended plugs : washer . Stand ard : 7 . Reinst all the spark plug caps. D P R 8 E A-9 ( N G K ) or CAUTIO N : X 2 4 E P R-U9 ( N D ) °...
-
Page 64: Riding 3
AIR CLEANER • Gasoline may leak past the fuel cap cleaner should be serviced at 54). the tank i s raised when full. Do not regular intervals (page When riding raise the fuel tank i f fulL dusty areas, more frequent service may be necessary. - Page 65 S. Take out and discard the air cleaner element (7). cover. tion . Tank...
- Page 66 See your authorized Honda dealer for regularly sched uled carburetor adj ust ments, in clud ing individ ual carb uretor adjust ment and syn chronization .
- Page 67 CARNKCASE B REATHER I . Remove the drain plug ( I ) from the tube and drain de posit s . 2 . R e install the d rain plug. NOTE : � Service more fre q uently when rid den in rain , at full t hrottle or after the motorcycle is washed or overturned .
-
Page 68: Maintenance
HYPO I D O I L FINA L DRIVE OIL Recommended oil: GEAR ( A bove 5°C/41 ° F ) S A E Change the oil when specified by the ( B elow 5 ° C / 4 1 ° F ) S A E maintenance sched ule . - Page 69 CLUTCH This m o t o r c y c l e has a h y d ra u lically acti Brake fluid may cause irrita tio n . void vated clutch. There are n o a dj u s t m e n t s t o c o n ta c t w ith s kin or eyes.
- Page 70 Use only D O T 3 brake fluid [rom a sealed con tainer. Handle brake fluid with care beacuse it can damage pai n t and instrucmen t lenses. Never allow con tamina n ts (dirt, wa ter, etc. ) to enter t h e clutch reservo ir. Ot her Checks : Make sure there are no fluid leaks.
- Page 71 ,page 6 8 ) , there is probably air in the brake system and it must be bled out. See your authorized Honda dealer for this service. Brake Fluid Level : Brake fluid may cause irritation. A void contact with skin or eyes.
- Page 72 B r a k e Pads : Use o n ly D O T 3 brake flu id from a sealed con tainer. Brake pad wear will de pend upon the Handle brake flu id w ith care because severity o f usage , type o f riding , and it can damage pain t and instrumen t co n d ition o f the road s .
- Page 73 REAR BRAKE Free play should be 2 0 - 30 mm ( 3 / 4 - 1 - 1 /4 in ) . If adjust ment i s n e cessary . Adj ustment : turn the rear b rake adjustin g nut ( 4 ) 1 .
- Page 74 4 . Apply the brake several times and Wear Indicat o r : che ck for free wheel rotation when W h e n the brake is a p p lie d , a n arrow ( I ) release d . attached t o the brake arm ( 2 ) m oves t o w ard...
- Page 75 , and the side stand asse mbly for ire e d o m of move m e n t . S e e your autho for r riz e d Honda dealer GOOD NO G O O D...
- Page 76 , to th e battery brea ther ou tle t. causing slow st arting or other e le ctrical NOTE : problems, see your authorized Honda Use only d istilled water in the battery . dealer for inspection. li fe...
- Page 78 Clean your motorcy cle regularly prot e ct the surface finishes and inspe ct Braking performance may be impaired for da mage , wear, and oil, coolant or immediately after washing the motor hydraulic fluid seepage . cycle. CAUTIO N: 3 .
- Page 79 4 . Remove the saprk plugs and pour a STORAGE tablespo on ( 1 5 - 2 0 cc) of clean engine Extended storag e , such as for winter, into each cylin d e r . Crank req uires that y o u take certain st eps to distribute severa l times...
- Page 80 5 . Remove the battery . Sto re in an area REMOVAL FROM STORAGE prot e cted fro m free zing tem peratures I . Un cover and clean the motorcycle . and direct sunlight . Che ck the ele ctro Change the engine oil if more than lyte level and slow charge the battery 4 months h ave passed sin ce t he start of...
- Page 81 O N LY ) - • Source of Emissions The combustion process produces carbon mono xide an d hydrocarbons. Control of hydro carbons is very important because under certain conditions , they react to form photo- emical smong when subj e c t e d to sunligh t . Carbon monoxide does not react in the sa me ay , but it is toxic .
- Page 82 • Cran kcase Emission Control System The engine is equipped with a close d crankcase system to prevent discharging cran kcase e missions in to the atmosphere . Blo w-by gas is returned to the com bustion chamber through the air cleaner an d the carbure tor .
- Page 83 Pro blems Which May Affe ct Motorcycle Emissions If you are aware o f any o f the follo wing sy mptoms , have the vehicle inspected and repaired by y o ur local Honda Motorcycle Deale r . Sy mptom s :...
- Page 84 CONSUME R INFORM ATION VEHICLE STOPPING D I STANC E This table indicates b raking performance t hat can be met or e x ceeded by the vehicles t o which it applie s , without lo cking the wheels under d ifferent con ditions o f loading.
-
Page 85: Engine Oil
ITEM DI M E N SI O N S Overall length 2 , 1 9 0 ( 8 6 . 2 in ) mm ( 3 3 . 5 Overall width 8 5 0 i n ) 1 , 1 9 5 mm Overall height ( 4 7 . -
Page 86: Spark Plug
I T E M E N G I N E B o r e a n d stroke 7 0 .0 x 4 8 . 6 mm ( 2 . 76 x 1 .9 1 in ) Com pression ratio 1 0 . - Page 87 ITEM CHASSIS A N D S U SPEN S I O N Caster Trail 1 0 5 ( 4 . 1 Tire size , front T U B E L E S S 0 / 9 0 - 1 8 61 H Tire size , rear Prim ary reduction 1 .
- Page 89 P a rt #: 3 1 M B 1 00 O e s c : O M , V F 7 5 0 C '8 & C u st : S /0 # : 7 7 5 1 7 6 31 M B 1 00 P R I NT�O I N U SA...
Need help?
Do you have a question about the V45 Magna 1982 and is the answer not in the manual?
Questions and answers