SonicWALL SonicWave 432e Getting Started Manual
Hide thumbs
Also See for SonicWave 432e:
- Safety and regulatory information manual (122 pages) ,
- Deployment manual (94 pages) ,
- Mounting and installation manual (2 pages)

Related Manuals for SonicWALL SonicWave 432e


Summary of Contents for SonicWALL SonicWave 432e
- Page 1 SonicWall™ SonicWave 432e and SonicWave 432i Getting Started Guide Regulatory Model Numbers: APL43‐0C2 (SonicWave 432e) APL43‐0C3 (SonicWave 432i)
- Page 2 Copyright © 2017 SonicWall Inc. All rights reserved. SonicWall is a trademark or registered trademark of SonicWall Inc. and/or its affiliates in the U.S.A. and/or other countries. All other trademarks and registered trademarks are property of their respective owners The information in this document is provided in connection with SonicWall Inc. and/or its affiliates’ products. No license, express or implied, by estoppel or otherwise, to any intellectual property right is granted by this document or in connection with the sale of SonicWall products. EXCEPT AS SET FORTH IN THE TERMS AND CONDITIONS AS SPECIFIED IN THE LICENSE AGREEMENT FOR THIS PRODUCT, SONICWALL AND/OR ITS AFFILIATES ASSUME NO LIABILITY WHATSOEVER AND DISCLAIMS ANY EXPRESS, IMPLIED OR STATUTORY WARRANTY RELATING TO ITS PRODUCTS INCLUDING, BUT NOT LIMITED TO, THE IMPLIED WARRANTY OF MERCHANTABILITY, FITNESS FOR A PARTICULAR PURPOSE, OR NON‐ INFRINGEMENT. IN NO EVENT SHALL SONICWALL AND/OR ITS AFFILIATES BE LIABLE FOR ANY DIRECT, INDIRECT, CONSEQUENTIAL, PUNITIVE, SPECIAL OR INCIDENTAL DAMAGES (INCLUDING, WITHOUT LIMITATION, DAMAGES FOR LOSS OF PROFITS, BUSINESS INTERRUPTION OR LOSS OF INFORMATION) ARISING OUT OF THE USE OR INABILITY TO USE THIS DOCUMENT, EVEN IF SONICWALL AND/OR ITS AFFILIATES HAVE BEEN ADVISED OF THE POSSIBILITY OF SUCH DAMAGES. SonicWall and/or its affiliates make no representations or warranties with respect to the accuracy or completeness of the contents of this document and reserves the right to make changes to specifications and product descriptions at any time without notice. SonicWall Inc. and/or its affiliates do not make any commitment to update the information contained in this document. For more information, visit https://www.sonicwall.com/legal/. Legend WARNING: A WARNING icon indicates a potential for property damage, personal injury, or death. CAUTION: A CAUTION icon indicates potential damage to hardware or loss of data if instructions are not followed. IMPORTANT, NOTE, TIP, MOBILE, or VIDEO: An information icon indicates supporting information. SonicWave 432e and SonicWave 432i Getting Started Guide Updated ‐ September 2017 232‐004036‐51 Rev A...
- Page 3 Introduction In this Guide This Getting Started Guide provides instructions for basic installation and configuration of the SonicWall™ SonicWave 432e and SonicWave 432i wireless access points in single‐unit or multi‐unit wireless deployments. For the latest product documentation, visit https://www.sonicwall.com/en‐us/support/technical‐documentation. Chapter 1 Topics Introduction on page 3 • SonicWave 432e Wireless Overview on page 6 • SonicWave 432i Wireless Overview on page 6 SonicWall SonicWave 432e and SonicWave 432i Getting Started Guide...
- Page 4 Chapter 2 Topics Initial Setup on page 11 • Check Package Contents on page 12 • Deployment Requirements on page 12 • SonicWave 432e and SonicWave 432i Available Ports/Status LEDs on page 13 • Installing SonicWave 432e Antennas on page 15 • Connecting Ethernet Cables on page 15 • Wireless Access Point Placement Considerations on page 17 • Mounting the SonicWave 432e and SonicWave 432i on page 19 Chapter 3 Topics Configuring SonicOS for Wireless Access on page 23 • Configuring SonicOS for SonicWave 432e or SonicWave 432i on page 23 • Verifying SonicWave Operation on page 28 • Troubleshooting Tips on page 29 Chapter 4 Topics Support and Product Registration on page 31 • Registration and Support on page 31 • Online Support and Training on page 32 SonicWall SonicWave 432e and SonicWave 432i Getting Started Guide...
- Page 5 Chapter 5 Topics Product Safety and Regulatory Information on page 33 • Safety Instructions for the SonicWave 432e and SonicWave 432i Appliances on page 34 • Sicherheitsanweisungen on page 35 • EU and EFTA on page 36 • Simplified EU/CE Declaration of Conformity on page 38 For general support information, see SonicWall Support on page 41. SonicWall SonicWave 432e and SonicWave 432i Getting Started Guide...
- Page 6 SonicWave 432e Wireless SonicWave 432i Wireless Overview Overview The SonicWave 432e is part of the next evolutionary The SonicWave 432i is part of the next evolutionary generation generation in wireless access points after the SonicWall in wireless access points after the SonicWall SonicPoint ACi. SonicPoint ACe. The SonicWave 432i provides physical layer enhancements for The SonicWave 432e provides physical layer enhancements for higher throughput with a maximum data rate of 1730Mbps for higher throughput with a maximum data rate of 1730Mbps for 5GHz and 800Mbps for 2.4 GHz. To achieve this, the SonicWave 5GHz and 800Mbps for 2.4 GHz. To achieve this, the SonicWave 432i uses: 432e uses: • Wider channels—80 MHz‐wide channels for the • More antennas—four antennas for the 5 GHz radio, and 802.11ac radio module, while continuing to support 20/ four more for the 2.4 GHz radio 40 MHz channels. This allows for dynamic per packet negotiation of channel widths so that when there is • Wider channels—80 MHz‐wide channels for the interference, the SonicWave can temporarily fall back 802.11ac radio module, while continuing to support 20/ to 40 or 20MHz channels. 40 MHz channels. This allows for dynamic per packet negotiation of channel widths so that when there is • More spatial streams—4X4 multiple‐input and interference, the SonicWave can temporarily fall back multiple‐output, (MU‐MIMO) for the 802.11ac radio to 40 or 20MHz channels. module, where the capacity of a radio link is multiplied using multipath propagation. • More spatial streams—4X4 multiple‐input and ...
- Page 7 SonicWall network security appliance. This traversal enables appliance. This allows complete control of the wireless space, security services to be enforced by SonicOS. including zone enforcement of security services and complete firewalling capabilities. Standard practice for wireless firewalling (where one wireless client is communicating with another) bypasses many of the Secure Wireless Firewalling critical security services. The following illustration shows the standard practice for wireless firewalling. Standard Wireless Firewalling SonicWall SonicWave Other Security Appliance Content Filtering Service SonicWall Appliance SonicWall Appliance Client Anti-Virus Enforcement Gateway Anti-Virus Content Filtering Service Content Filtering Service Gateway Anti-Spyware Client Anti-Virus Enforcement Intrusion Prevention Service...
- Page 8 Frequency Bands and Channels Currently five standards for 802.11 wireless network types have been widely adopted: a, b, g, n, and ac. 802.11n and 802.11ac are the newest and highest capacity standards, but older client devices might not be able to utilize the newer standards. Wireless Standards 802.11 (x) Frequency Standard Maximum Data Rate 802.11a 5 GHz 54 Mbps 802.11b 2.4 GHz 11 Mbps 802.11g 2.4 GHz 54 Mbps 802.11n 2.4 GHz and 5 GHz 450 Mbps 802.11ac 5 GHz + MU‐MIMO 2.34 ‐ 3.47 Gbps Different frequency bands provide varying signal strength and quality over different distance ranges. Signals in the 2.4 GHz range tend to pass through physical barriers better and carry farther than those in the 5 GHz range, but they do not provide as high a data rate. Signals in the 5 GHz range provide faster data rates for better throughput, but the signal attenuates faster and is best suited for open spaces. Strengths and Weaknesses of 5 GHz and 2.4 GHz Signals 5 GHz 2.4 GHz Strength Higher speed, more channels Longer range, stronger signal penetration Weakness Limited penetration of walls, client compatibility More sources of interference Refer to Radio Frequency Barriers and RF Interference on page 18 for detailed information about RF barriers and interference. SonicWall SonicWave 432e and SonicWave 432i Getting Started Guide...
- Page 9 To allow multiple separate wireless networks in a shared and confined space, the RF medium is divided into channels. For devices in the 5 GHz range (802.11a/n/ac), this means the possibility of up to 23 discrete channels. For devices using the 2.4 GHz range (802.11b/g/n), the wireless space is limited to a maximum of 14 overlapping channels. As a result of these overlapping channels, 2.4 GHz technology provides only a total of three discrete channels. 802.11 Signal Comparison Chart 802.11 Signal Characteristics 802.11a 802.11b 802.11g 802.11n 802.11ac # of Channels in USA # of Channels in EU # of Channels in Japan Frequency Band 5 GHz 2.4 GHz 2.4 GHz 2.4/5 GHz 5 GHz Max. Data Rate 54 Mbps 11 Mbps 54 Mbps 800 Mbps (For 1.7 Gbps (For QAM‐ 4X4 MU‐MIMO) 64, MU‐MIMO 4X4, and 80 MHz channels) Radius (Range) 90ft/25m 120ft/35m 120ft/35m 300ft/90m 120ft/35m NOTE: Although 802.11b/g/n standards provide between 11 and 14 channels, only three of those channels are fully discrete (non‐overlapping) channels. SonicWall SonicWave 432e and SonicWave 432i Getting Started Guide...
- Page 10 SonicWall SonicWave 432e and SonicWave 432i Getting Started Guide...
- Page 11 Initial Setup This section provides a basic checklist of materials, hardware information, and describes how to connect and configure physical aspects of the SonicWall SonicWave 432e and SonicWave 432i including LEDs, antennas, cabling, placement, and mounting. • Check Package Contents on page 12 • Deployment Requirements on page 12 • SonicWave 432e and SonicWave 432i Available Ports/Status LEDs on page 13 • Installing SonicWave 432e Antennas on page 15 • Connecting Ethernet Cables on page 15 • Wireless Access Point Placement Considerations on page 17 • Mounting the SonicWave 432e and SonicWave 432i on page 19 SonicWall SonicWave 432e and SonicWave 432i Getting Started Guide...
- Page 12 Check Package Contents Deployment Requirements Before continuing, ensure that your SonicWave 432e or SonicOS Firmware SonicWave 432i package contains the following materials: • SonicWall SonicWave 432e and SonicWave 432i access points are centrally managed by SonicWall network SonicWave 432e or SonicWave 432i Appliance Checklist security appliances running the following versions of SonicWave 432e (external antennas) or the SonicWave SonicOS: 432i (internal antennas) appliance • SonicOS 6.5 or higher Antennas: SonicWave 432e (8), or SonicWave 432i (0) Power Source Mounting hardware • Use a multi‐gigabit 802.3at compliant PoE injector or a CAT5e cable PoE switch to provide power to each SonicWave 432e SERI Guide or SonicWave 432i. Getting Started Guide Internet Connectivity • An active Internet connection is required for your NOTE: The SonicWave 432i is designed with internal firewall to download the latest SonicWave firmware. antennas. Gigabit Ethernet Connectivity Any Items Missing? • The SonicWave 432e or SonicWave 432i hardware requires more bandwidth than a 1 Gigabit Ethernet connection can If any of the items corresponding to your product are missing handle. SonicWall recommends connecting your from the package, contact Technical Support at: https:// SonicWave (through a PoE device) to a 2.5 Gb interface to ...
- Page 13 SonicWave 432e and SonicWave 432i Available Ports/Status LEDs Available Ports LAN2 port. Provides an additional Ethernet connection. Refer to the SonicOS Connectivity Administration documentation for use cases. LAN1/PoE port. Provides Ethernet and Power over Console port. Ethernet (PoE) connections. Provides a management connection using RJ45 to DB9 cable (for command line management only). SonicWall SonicWave 432e and SonicWave 432i Getting Started Guide...
- Page 14 Status LEDs LED (5G) LED (2.4G) ‐ On (solid green, 5 GHz radio link) ‐ On (solid green, 2.4 GHz radio link) ‐ Blinking green (5 GHz radio activity) ‐ Blinking (2.4 GHz radio activity) LED (lan1) LED (Tool) ‐ On (solid yellow or green, Ethernet link) ‐ On (solid yellow, error) ‐ Blinking yellow (2.5G Ethernet activity) ‐ Blinking (safe mode) ‐ Blinking green (1G/100M Ethernet activity) LED (lan2) LED (Power) ‐ On (solid yellow or green, Ethernet link) ‐ On (solid blue, power) ‐ Blinking yellow (1G Ethernet activity) ‐ Blinking (booting/FW upgrade) ‐ Blinking green (10/100M Ethernet activity) SonicWall SonicWave 432e and SonicWave 432i Getting Started Guide...
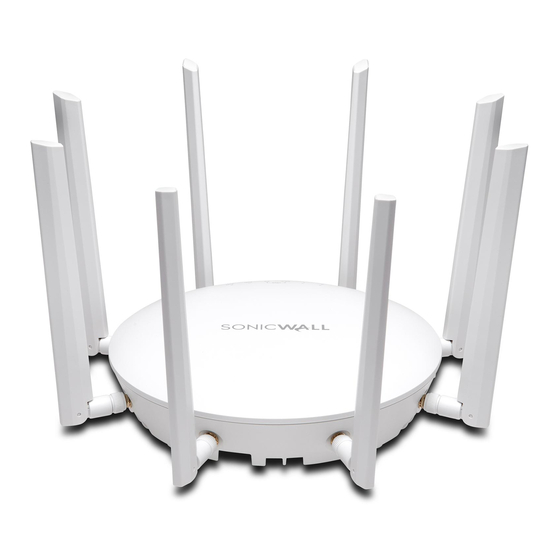
- Page 15 Installing SonicWave 432e Antennas To install the antennas on your SonicWave 432e: 1 Remove all eight antennas from their bags and place one on each connector. 2 Carefully finger‐tighten the fittings. 3 Adjust the antennas upright for optimal reception. For optimal wireless coverage, the SonicWave 432e antennas should be oriented vertically. The circular design of the SonicWave aides in creating a strong multi‐directional wireless CAUTION: Only antennas provided by SonicWall are signal pattern. In most cases, leaving the antennas straight up authorized for use with the SonicWave 432e. Be aware (as shown in the illustration) provides the best overall of the regulations in your region before using other coverage. antennas. TIP: There might be a “dead” zone directly underneath the SonicWave 432e when it is mounted on a ceiling Connecting Ethernet Cables with the antennas oriented vertically. You can mitigate this by slightly angling the antennas. The SonicWave 432e or SonicWave 432i are powered through Power over Ethernet (PoE), and should be cabled with CAT5e Ethernet cabling. SonicWall SonicWave 432e and SonicWave 432i Getting Started Guide...
- Page 16 X2 WLAN configured later in SonicOS. X0 LAN 2 Using a second Ethernet cable, connect the Data and PoE Injector Power out port on the SonicWall PoE injector to the or PoE Switch Local Network (LAN) LAN1/PoE port on your SonicWave 432e or SonicWave 432i. IMPORTANT: Be sure cables are connected Wireless Clients correctly. 3 Plug the power cord of the SonicWall PoE injector into CAUTION: A multi‐gigabit 802.3at compliant PoE an appropriate power outlet. injector or PoE‐capable switch is required to provide 4 Wait for the LAN1 LED on the SonicWave 432e or power to each SonicWave 432e or SonicWave 432i. SonicWave 432i to illuminate. This indicates an active connection. To maintain power to the SonicWave 432e or SonicWave 432i, the maximum length of CAT5e cable See Product Safety and Regulatory Information on page 33. from the 802.3at PoE injector to the SonicWave 432e or SonicWave 432i is 100 meters (333 feet). SonicWall SonicWave 432e and SonicWave 432i Getting Started Guide...
- Page 17 Physical placement of the SonicWave 432e or SonicWave 432i wireless access point has a measurable effect on who can and • Hubs / Switches – Your wireless deployment has to tie cannot access your wireless signal. back into your network security appliance and LAN resources. Consider where your key networking devices Access points should be kept clear of Radio Frequency (RF) are deployed and how they will connect efficiently with interference sources. RF barriers can be circumvented by your wireless appliances. What speed is needed for deploying multiple access points. your Ethernet connection to accommodate the number A site survey can help find the optimum wireless access point of access points you are installing? A Gigabit Ethernet placement, but you can find usable locations without it. interface is recommended when connecting a SonicWave 432e or SonicWave 432i to your SonicWall Considerations include: network security appliance. • Number of Access Points Versus User Density – If too • Legacy Clients ‐ Older laptops and mobile devices may many users are serviced by a single access point, not support 802.11ac. Although clients with 802.11a/g/ maximum transfer rates are reached and that access b hardware are supported by the SonicWall SonicWave point may become a bottleneck for the whole system. 432e and SonicWave 432i, the presence of these legacy • Bandwidth – How much data is moving upstream and clients within range of your wireless network could downstream for a given type of user? affect the connection speed of your 802.11ac clients. • Ethernet Cabling – Where are you running the powered For example, an 802.11b device authenticated to the Ethernet (PoE) cable to and how are you securing that ...
- Page 18 Barrier Type RF Signal Blocking Open air Very Low Interference Possible Range Bands Affected Source Glass, wood, drywall, cube partitions 2.4 GHz phones 100 feet 2.4 GHz Floors and outer walls, aquariums Medium (802.11 b/g/n) (brick/marble/granite/water) Bluetooth devices 30 feet 2.4 GHz Concrete, security glass, wire mesh, High (802.11 b/g/n) stacked books/paper Microwave oven 10‐20 feet 2.4 and 5 GHz, Metal partitions, desks, reinforced Very High depending on concrete shielding Scientific and Short distance, 2.4 and 5 GHz, medical varies depending on equipment shielding SonicWall SonicWave 432e and SonicWave 432i Getting Started Guide...
- Page 19 Mounting the SonicWave 432e to attach the large bracket to the SonicWave 432e and SonicWave 432i. and SonicWave 432i NOTE: Products may differ from illustrations. You can mount your SonicWave 432e and SonicWave 432i to a Holes for screws wall or ceiling, or you can simply set it on a flat surface. For safety tips when mounting the SonicWave 432e and SonicWave 432i, see Product Safety and Regulatory Information on page 33. Mounting using Ceiling Brackets The mounting kit includes a large ceiling bracket. Large Ceiling Bracket The underside of the SonicWave 432e and SonicWave 432i has two insertion points where you can insert the provided screws to help secure the bracket. You can use these insertion points SonicWall SonicWave 432e and SonicWave 432i Getting Started Guide...
- Page 20 To mount the SonicWave 432e or SonicWave 432i to a crossbar the left when looking up at it) until the bracket is between ceiling panels using the large bracket: securely attached to the crossbar. 1 Use the two provided screws to attach the large bracket to the underside of the SonicWave. NOTE: Products may differ from illustrations. Fasten the large ceiling bracket with screws. To remove the SonicWave 432e or SonicWave 432i from the ceiling crossbar, rotate it clockwise (to the right when looking up at it) until the bracket detaches from the crossbar. 2 Supporting the SonicWave in one hand, position the edge clips of the bracket over the edge of the ceiling crossbar and rotate the SonicWave counterclockwise (to SonicWall SonicWave 432e and SonicWave 432i Getting Started Guide...
- Page 21 Mounting using Anchor Screws To mount the SonicWave 432e or SonicWave 432i using anchor screws: 1 On the mounting surface, mark the location to make two screw holes. The marks should be horizontally parallel to each other. 2 Screw the anchor screws into the ceiling tile or drywall to their full depth. 3 Insert the screws into the anchors, and screw them in deep enough to leave minimal space between the screw heads and the wall surface. 4 Supporting the SonicWave in your hands, securely fit the underside slots of the SonicWave onto the screw heads. SonicWall SonicWave 432e and SonicWave 432i Getting Started Guide...
- Page 22 SonicWall SonicWave 432e and SonicWave 432i Getting Started Guide...
- Page 23 Configuring SonicOS for Wireless Access This section provides instructions for configuring SonicOS on your SonicWall network security appliance to connect your SonicWave 432e or SonicWave 432i to the WLAN zone and manage it as a Layer 2 device. For more advanced configurations, including Layer 3 management of your SonicWave 432e or SonicWave 432i on a LAN zone, refer to the SonicOS Connectivity Administration documentation available on the Support Portal • Configuring SonicOS for SonicWave 432e or SonicWave 432i on page 23 • Verifying SonicWave Operation on page 28 • Troubleshooting Tips on page 29 Configuring SonicOS for SonicWave 432e or SonicWave 432i You only need to complete three simple configuration tasks in SonicOS to prepare your SonicWave 432e or SonicWave 432i to provide secure wireless access. 1 Configure the network interface to which the SonicWave 432e or SonicWave 432i is connected. 2 Configure the WLAN zone for trust and security services. 3 Configure the SonicWave 432e or SonicWave 432i profile for the desired radio frequency, mode, and authentication type. SonicWall SonicWave 432e and SonicWave 432i Getting Started Guide...
- Page 24 Configuring the Network Interface SonicOS 6.5 Interface Settings Each SonicWave or group of SonicWaves must be connected to a physical network interface that is configured in a wireless zone. SonicOS provides a standard wireless zone (WLAN) which can be applied to any available interface. To configure the network interface in SonicOS: 1 Log into SonicOS as an administrator (default: admin / password). 2 In the MANAGE view, navigate to the System Setup | Network > Interfaces page and click Configure for the interface to which your SonicWave is connected. 3 Select Static IP Mode for the Mode/IP Assignment. 4 In the IP Address field, type in any private IP address that does not interfere with the IP address range of any other interfaces on the appliance. 5 Enter a Subnet Mask. The default is 255.255.255.0. Configuring the WLAN Zone 6 Use the default settings or select appropriate settings for the other fields and then click OK. To configure the WLAN zone in SonicOS: CAUTION: Allowing Management and User Login to the appliance from a wireless zone can pose a security threat 1 In the MANAGE view on the System Setup | Network > if you or your users have not set strong passwords. Zones page, click the Edit icon in the Configure column of the WLAN row. SonicWall SonicWave 432e and SonicWave 432i Getting Started Guide...
- Page 25 2 On the General page, under General Settings, select Anti‐Virus Service, Enable IPS, and Enable Anti‐ the Allow Interface Trust option to automate the Spyware Service. If your wireless clients are all running creation of Access Rules to allow traffic to flow between SonicWall Client Anti‐Virus, select Enable Client AV the interfaces within the zone, regardless of the Enforcement Service. interfaces to which the zone is applied. 4 In the Guest Services page, optionally configure guest For example, if the WLAN zone has both the X2 and X3 Internet access. For information about Guest Services, interfaces assigned to it, selecting Allow Interface Trust see the SonicOS Connectivity Administration creates the necessary access rules to allow hosts on documentation. these interfaces to communicate with each other. 5 In Wireless under SonicPoint/SonicWave Settings, select Only allow traffic generated by a SonicPoint/ SonicWave to allow only traffic from SonicPoint/ SonicWaves to enter the WLAN zone interfaces, providing maximum security. 6 When finished, click OK. Configuring the SonicWave 432e or SonicWave 432i Settings When a SonicWave 432e or a SonicWave 432i are initially connected to an interface, the firewall uses a default provisioning profile to create a SonicWave 432e or SonicWave 432i entry. It can take up to five minutes for the entry to be created. 3 Select the checkboxes to enable security services on this zone. Minimally, you would select Enable Gateway SonicWall SonicWave 432e and SonicWave 432i Getting Started Guide...
- Page 26 | Access Points > Base Settings page in the MANAGE view. In System Setup | Network > Zones page, you can This is the access point name that appears in clients’ edit the WLAN zone and specify this profile on the lists of available wireless connections. Wireless page. Any SonicWaves connecting to an 3 Verify the Country Code for the area of operation. interface in the WLAN zone can then be provisioned with the assigned profile. 4 Configure the remaining options as necessary. For more information, see the SonicOS Connectivity Administration You might want to use the new Floor Plan View and documentation Topology View features as well. See the SonicOS for more Connectivity Administration documentation Radio 0 Basic / Radio1 Basic Settings: information. 1 Click Radio 0 Basic, or Radio 1 Basic. To modify the SonicWave 432e or SonicWave 432i entry in SonicOS: 1 In the MANAGE view, navigate to the Connectivity | Access Points > Base Settings page. 2 In the SonicPoint/SonicWave Objects table, click the Edit icon in the row for the SonicWave 432e or SonicWave 432i entry you wish to modify. SonicWall SonicWave 432e and SonicWave 432i Getting Started Guide...
- Page 27 Radio 0 5 GHz 5GHz 802.11ac/n/a Mixed is enforced before the Allow List. Radio 1 2.4 GHz 2.4GHz 802.11n/g/b Mixed Virtual Access Point Encryption Settings: 2 Select Enable Radio. NOTE: This section displays only if a VAP was selected 3 Select a Mode or use the default. from the Radio 0 Basic/1 Virtual AP Group drop‐down menus in the Virtual Access Point Settings section of the 4 Under Wireless Security, select the Authentication General page. Type for your wireless network. SonicWall recommends using WPA2 as the authentication type if all client The Virtual Access Point Encryption Settings section of both devices support it. Radio 0 Basic and Radio 1 Basic are the same for the 802.11n TIP: PSK uses a personal passphrase for Radio. authentication, EAP uses an Enterprise RADIUS server. Radio 0 Advanced / Radio1 Advanced Settings 5 Select the Cipher Type. When using WPA and WPA2, 1 Click Radio 0 Advanced or Radio 1 Advanced. SonicWall recommends AES for maximum security. The configuration is very similar for Radio 0 Advanced NOTE: Older client devices might not support AES. and Radio 1 Advanced. For most advanced options, the default settings give optimum performance. For a full description of the fields on this page, see the SonicOS ...
- Page 28 The SSID refers to the access point name that appears To verify that the SonicWave is provisioned and operational, in in clients’ lists of available wireless connections. the MANAGE view, navigate to the Connectivity | Access Hiding the SSID provides additional security because it Points > Base Settings page in SonicOS. In the SonicPoint/ requires the user to know the access point name before SonicWave Objects table, the Status column displays the connecting. SonicWave 432e or SonicWave 432i status. It should say Operational. 3 When finished configuring all options, click OK. To verify Internet connectivity through the SonicWave: Sensor page 1 Connect a client device to the SonicWave by selecting On the Sensor page, enable or disable Wireless Intrusion the appropriate access point name (SSID). Detection and Prevention (WIDP) mode. NOTE: If this option is selected, Access Point or Virtual 2 Ensure that the client device is not connected to any Access Point(s) functionality is disabled automatically. other network connections (wired LAN, 3G/4G WWAN). 3 In a browser, enter “https://www.SonicWall.com/” in 1 Select Enable WIDP sensor to have the SonicWave the address bar and press Enter. The SonicWall website operate as a dedicated WIDP sensor. This option is not should display. If you are unable to browse to a website, selected by default. refer to Troubleshooting Tips. 2 From the drop‐down menu, select the schedule for when the SonicWave operates as a WIDP sensor or select Create new schedule... to specify a different time; default is Always on. SonicWall SonicWave 432e and SonicWave 432i Getting Started Guide...
- Page 29 Troubleshooting Tips If the SonicWave 432e or SonicWave 432i has an entry in the table, but reboots frequently or seems non‐functional: When the SonicWave 432e or SonicWave 432i is connected to • Verify that your PoE switch/injector is 802.3at a SonicWall network security appliance, the two units perform compliant and rated to deliver sufficient power to each an encrypted exchange, and an entry for the SonicWave 432e PoE port. 802.3af compliant PoE devices do not provide or SonicWave 432i is automatically created in the SonicPoint/ sufficient power to properly run current generation SonicWave Objects table. In the MANAGE view, navigate to 802.11 devices. A multi‐gigabit 802.3at compliant PoE the Connectivity | Access Points > Base Settings page in injector or switch is required to power the SonicWave SonicOS. 432e or SonicWave 432i over Ethernet. • Click Synchronize Access Points on the Connectivity | If the entry does not appear in the table within five minutes of Access Points > Base Settings page in MANAGE view to connecting the SonicWave 432e or SonicWave 432i: force SonicOS to download a new SonicWave firmware • Make sure the SonicWave 432e or SonicWave 432i is image from the SonicWall back‐end server. connected to an interface that is configured as part of a wireless zone. Either the default WLAN zone or a custom zone with type set to “wireless” is required. • Ensure that the SonicWave 432e or SonicWave 432i is properly connected with an Ethernet cable to an 802.3at compliant PoE device or to the supplied power adaptor. • If an 802.3at compliant PoE injector is being used, verify that the SonicWave 432e or SonicWave 432i is connected to the PoE port labeled Data & Power Out. SonicWall SonicWave 432e and SonicWave 432i Getting Started Guide...
- Page 30 SonicWall SonicWave 432e and SonicWave 432i Getting Started Guide...
- Page 31 Support and Product Registration This section provides information about registering your SonicWall SonicWave 432e and SonicWave 432i, requirements for receiving technical support, and other online support and training options. • Registration and Support on page 31 • Online Support and Training on page 32 Registration and Support All SonicWave 432e or SonicWave 432i wireless access points include an initial subscription to SonicWall 24x7 Support. SonicOS automatically registers your SonicWave 432e or SonicWave 432i on MySonicWall, if connected to the Internet. It could take up to 24 hours for your SonicWave 432e or SonicWave 432i to be automatically registered. Optionally, you can manually register the SonicWave 432e or SonicWave 432i on MySonicWall by logging into your account at: http://www.MySonicWall.com. The SonicWave 432e or SonicWave 432i is also associated in MySonicWall with the registered SonicWall network security appliance to which it is connected. See the Associated Products section at the bottom of the appliance Service Management page in MySonicWall. SonicWall SonicWave 432e and SonicWave 432i Getting Started Guide...
- Page 32 For the access point to operate, and to receive technical For more information, visit: https:// support, your SonicWave 432e or SonicWave 432i must have a www.sonicwall.com/support/knowledge‐base‐category current “Activation and Support” license. • Training IMPORTANT: If the license expires, the access point will SonicWall offers an extensive sales and technical cease to function until the license is renewed. training curriculum. SonicWall Training provides the E‐ Training, instructor‐led training, custom training, technical certification, and uses authorized training Online Support and Training partners. For more information, visit: https:// SonicWall offers a variety of online support and training www.sonicwall.com/support/sonicwall‐training‐ options for your convenience. certification • Customer Support • Related Documentation SonicWall offers telephone, email and Web‐based • SonicOS Connectivity Administration support to customers who have a valid Warranty or documentation who purchased a Support Contract. Review our Warranty Support Policy for product coverage. • SonicOS Release Notes, available on SonicWall also offers a full range of consulting services MySonicWall to meet your needs. • SonicOS Configuration or Deployment Guides For more information, visit: https:// For more information, visit: https:// www.sonicwall.com/support...
- Page 33 Product Safety and Regulatory Information This section provides product safety and regulatory information. • Safety Instructions for the SonicWave 432e and SonicWave 432i Appliances on page 34 • Sicherheitsanweisungen on page 35 • EU and EFTA on page 36 • Simplified EU/CE Declaration of Conformity on page 38 SonicWall SonicWave 432e and SonicWave 432i Getting Started Guide...
- Page 34 Products with “UL 2043” printed on their product labels are • Cable Connections on page 35 within the limit specified in the “UL 2043 Standard for Fire Test • Power Supply Information on page 35 for Heat and Visible Smoke Release for Discrete Products Installed in Air‐Handling Spaces” (Plenum). Applies only when powered through PoE. The PoE power supply is not covered Installation Requirements the by the UL 2043 evaluation of this Access Point. WARNING: NOTE: Additional regulatory notifications and The following conditions are required for proper installation: information for this product can be found online at: https://www.sonicwall.com/support/technical‐ • Mount in a location away from direct sunlight and documentation sources of heat. A maximum ambient temperature of 104º F (40º C) is recommended. SonicWave 432e and SonicWave 432i complies with FCC U‐NII • Route cables away from power lines, fluorescent New Rules. lighting fixtures, and sources of noise such as radios, transmitters, and broadband amplifiers Regulatory Model/Type Product Name APL43‐0C2 SonicWave 432e • Ensure that no water or excessive moisture can enter the unit. APL43‐0C3 SonicWave 432i • Allow unrestricted airflow around the unit and through the vents on the side of the unit. A minimum of 1 inch Safety Instructions for the ...
- Page 35 Anforderungen an die Installation on page 35 units. To avoid incommoding reflections at visual • Verwarnung Kabelverbindungen on page 36 display workplaces, this device must not be placed in the direct field of view. • Informationen zur stromversorgung on page 36 Cable Connections Anforderungen an die Installation WARNING: Verwarnung: All Ethernet and RS232 (Console) cables are designed for intra‐ Für eine ordnungsgemäße Montage sollten die folgenden building connection to other equipment. Do not connect these Hinweise beachtet werden: ports directly to communication wiring or other wiring that • Wählen Sie für die Montage einen Ort, der keinem exits the building where the appliance is located. direkten Sonnenlicht ausgesetzt ist und sich nicht in der Nähe von Wärmequellen befindet. Die Power Supply Information Umgebungstemperatur darf nicht mehr als 40 °C betragen. This product's power is provided by the Ethernet cable plugged • Führen Sie die Kabel nicht entlang von Stromleitungen, in to the “LAN” port, this is called “Power over Ethernet” or Leuchtstoffröhren und Störquellen wie Funksendern “PoE.” The PoE source should only be UL listed marked “Class oder Breitbandverstärkern. 2” or “LPS” with an output rated 48 VDC, minimum 0.6 A, Tma: minimum 40 degrees C. • Das im Lieferumfang enthaltene bzw. die im Lieferumfang enthaltenen Netzkabel sind nur für die Verwendung in bestimmten Ländern und Regionen zugelassen. Überprüfen Sie bitte vor der Verwendung SonicWall SonicWave 432e and SonicWave 432i Getting Started Guide...
- Page 36 Verwarnung Kabelverbindungen eins Netzkabels, ob es für die Verwendung in Ihrem Land oder Ihrer Region zugelassen ist und den geforderten Normen entspricht. Alle Ethernet‐ und RS232‐C‐Kabel eignen sich für die Verbindung von Geräten in Innenräumen. Schließen Sie an die • Stellen Sie sicher, dass das Gerät vor Wasser und hoher Anschlüsse der SonicWall keine Kabel an, die aus dem Luftfeuchtigkeit geschützt ist. Gebäude herausgeführt werden, in dem sich das Gerät • Stellen Sie sicher, dass die Luft um das Gerät herum befindet. zirkulieren kann und die Lüftungsschlitze an der Seite des Gehäuses frei sind. Hier ist ein Belüftungsabstand Informationen zur stromversorgung von mindestens 26 mm einzuhalten. • Prüfen Sie den Anschluss des Geräts an die Die Stromversorgung durch das Ethernet‐Kabel in die “LAN”‐ Stromversorgung, damit der Überstromschutz sowie Anschluss angeschlossen vorgesehen ist, wird dies als “Power die elektrische Leitung nicht von einer eventuellen over Ethernet” oder “PoE.” Dieses Produkt darf nur in Überlastung der Stromversorgung beeinflusst werden. Verbindung mit einem für den Europäischen Markt Prüfen Sie dabei sorgfältig die Angaben auf dem genehmigten und mit dem Logo „LPS.“ Ausgang: 48 VDC Aufkleber des Geräts. Überlasten Sie nicht den Gleichsspannung, mind. 0,6 A, mindest TMA mindestens 40° Stromkreis. Grad C, betrieben werden. • Dieses Gerät ist nicht zur Verwendung an Arbeitsplätzen mit visuellen Anzeigegeräten gemäß § 2 EU and EFTA der deutschen Verordnung für Arbeitsplätze mit visuellen Anzeigegeräten vorgesehen. Um störende Reflexionen am Bildshirmarbeitsplatz zu vermeiden, ...
- Page 37 Diese SonicWall Appliance enthält Funkanlagen zur SonicWave 432e (RM: APL43‐0C2) RF Transmitter Bands and Bereitstellung von RLAN/WLAN im Frequenzbereich von 2,4 Power GHz und 5 GHz. Verwenden Sie zur Einhaltung der Funkanlagenrichtlinie 2014/53/EU (Radio Equipment Directive Frequency Maximum Radio‐Frequency Power Transmitted Band – RED) ausschließlich SonicOS Software und Zubehör, das mit dieser Appliance und von SonicWall bereitgestellt wird. dBm EIRP 2412 ‐ 2472 19.48 To maintain safe exposure levels to electromagnetic fields, place appliance a minimum of 50 cm from all persons and 5180 ‐ 5240 22.35 domestic animals. 5260 ‐ 5320 Not enabled in the current SonicWave software. Zur Einhaltung unbedenklicher Expositionswerte durch 5500 ‐ 5700 Not enabled in the current SonicWave software. elektromagnetische Felder sollte sich die Appliance mindestens 50 cm von Personen und Haustieren entfernt SonicWave 432i (RM: APL43‐0C3) RF Transmitter Bands and befinden. Power This SonicWall wireless appliance is restricted to Frequency Maximum Radio‐Frequency Power Transmitted indoor use. Band Diese SonicWall Appliance ist auf die Nutzung in dBm EIRP Innenräumen beschränkt. 2412 ‐ 2472 18.84 5180 ‐ 5240 19.89...
- Page 38 Simplified EU/CE Declaration of Le soussigné, SonicWall Inc., déclare que l'équipement radioélectrique du type 2.4 GHz and 5 GHz RLAN/WLAN est Conformity conforme à la directive 2014/53/UE. Le texte complet de la déclaration UE de conformité est A “Declaration of Conformity” in accordance with the disponible à l'adresse internet suivante: https:// directives and standards has been made and is on file at: www.SonicWall.com/Support SonicWall International Limited, City Gate Park, Mahon, Cork, С настоящото SonicWall Inc. декларира, че този тип Ireland. радиосъоръжение 2.4 GHz and 5 GHz RLAN/WLAN е в Hereby, SonicWall Inc. declares that the radio equipment type съответствие с Директива 2014/53/ЕС. 2.4 GHz and 5 GHz RLAN/WLAN is in compliance with Directive Цялостният текст на ЕС декларацията за съответствие може 2014/53/EU. The full text of the EU declaration of conformity is да се намери на следния интернет адрес: https:// available at the following Internet address: https:// www.SonicWall.com/Support www.SonicWall.com/Support Tímto SonicWall Inc. prohlašuje, že typ rádiového zařízení 2.4 Hierbij verklaar ik, SonicWall Inc., dat het type radioapparatuur GHz and 5 GHz RLAN/WLAN je v souladu se směrnicí 2014/53/ 2.4 GHz and 5 GHz RLAN/WLAN conform is met Richtlijn 2014/ 53/EU. Úplné znění EU prohlášení o shodě je k dispozici na této De volledige tekst van de EU‐conformiteitsverklaring kan internetové adrese: https://www.SonicWall.com/Support worden geraadpleegd op het volgende internetadres: https:// www.SonicWall.com/Support Hermed erklærer SonicWall Inc., at radioudstyrstypen 2.4 GHz and 5 GHz RLAN/WLAN er i overensstemmelse med direktiv Hiermit erklärt SonicWall Inc., dass der Funkanlagentyp 2.4 2014/53/EU. GHz and 5 GHz RLAN/WLAN der Richtlinie 2014/53/EU entspricht. EU‐overensstemmelseserklæringens fulde tekst kan findes på ...
- Page 39 Με την παρούσα ο/η SonicWall Inc., δηλώνει ότι ο SonicWall Inc. ovime izjavljuje da je radijska oprema tipa 2.4 ραδιοεξοπλισμός 2.4 GHz and 5 GHz RLAN/WLAN πληροί την GHz and 5 GHz RLAN/WLAN u skladu s Direktivom 2014/53/EU. οδηγία 2014/53/ΕΕ. Cjeloviti tekst EU izjave o sukladnosti dostupan je na sljedećoj Το πλήρες κείμενο της δήλωσης συμμόρφωσης ΕΕ διατίθεται internetskoj adresi: https://www.SonicWall.com/Support στην ακόλουθη ιστοσελίδα στο διαδίκτυο: https:// SonicWall Inc. igazolja, hogy a 2.4 GHz and 5 GHz RLAN/WLAN www.SonicWall.com/Support típusú rádióberendezés megfelel a 2014/53/EU irányelvnek. Por la presente, SonicWall Inc. declara que el tipo de equipo Az EU‐megfelelőségi nyilatkozat teljes szövege elérhető a radioeléctrico 2.4 GHz and 5 GHz RLAN/WLAN es conforme con következő internetes címen: https://www.SonicWall.com/ la Directiva 2014/53/UE. Support El texto completo de la declaración UE de conformidad está Il fabbricante, SonicWall Inc., dichiara che il tipo di disponible en la dirección Internet siguiente: https:// apparecchiatura radio 2.4 GHz and 5 GHz RLAN/WLAN è www.SonicWall.com/Support conforme alla direttiva 2014/53/UE. Käesolevaga deklareerib SonicWall Inc., et käesolev Il testo completo della dichiarazione di conformità UE è raadioseadme tüüp 2.4 GHz and 5 GHz RLAN/WLAN vastab disponibile al seguente indirizzo Internet: https:// direktiivi 2014/53/EL nõuetele. www.SonicWall.com/Support ELi vastavusdeklaratsiooni täielik tekst on kättesaadav Aš, SonicWall Inc., patvirtinu, kad radijo įrenginių tipas 2.4 GHz järgmisel internetiaadressil: https://www.SonicWall.com/ and 5 GHz RLAN/WLAN atitinka Direktyvą 2014/53/ES. Support Visas ES atitikties deklaracijos tekstas prieinamas šiuo SonicWall Inc. vakuuttaa, että radiolaitetyyppi 2.4 GHz and 5 interneto adresu: https://www.SonicWall.com/Support GHz RLAN/WLAN on direktiivin 2014/53/EU mukainen. Ar šo SonicWall Inc. deklarē, ka radioiekārta 2.4 GHz and 5 GHz ...
- Page 40 B'dan, SonicWall Inc., niddikjara li dan it‐tip ta' tagħmir Celotno besedilo izjave EU o skladnosti je na voljo na naslednjem spletnem naslovu: https://www.SonicWall.com/Support tar‐radju 2.4 GHz and 5 GHz RLAN/WLAN huwa konformi mad‐Direttiva 2014/53/UE. Härmed försäkrar SonicWall Inc. att denna typ av radioutrustning 2.4 GHz and 5 GHz RLAN/WLAN It‐test kollu tad‐dikjarazzjoni ta' konformità tal‐UE huwa överensstämmer med direktiv 2014/53/EU. disponibbli f'dan l‐indirizz tal‐Internet li ġej: https:// www.SonicWall.com/Support Den fullständiga texten till EU‐försäkran om överensstämmelse finns på följande webbadress: https://www.SonicWall.com/ SonicWall Inc. niniejszym oświadcza, że typ urządzenia Support radiowego 2.4 GHz and 5 GHz RLAN/WLAN jest zgodny z dyrektywą 2014/53/UE. NOTE: Additional regulatory notifications and Pełny tekst deklaracji zgodności UE jest dostępny pod information for this product can be found online at: następującym adresem internetowym: https:// https://www.sonicwall.com/support/technical‐ www.SonicWall.com/Support documentation Prin prezenta, SonicWall Inc. declară că tipul de echipamente radio 2.4 GHz and 5 GHz RLAN/WLAN este în conformitate cu Directiva 2014/53/UE. Textul integral al declarației UE de conformitate este disponibil la următoarea adresă internet: https://www.SonicWall.com/ Support SonicWall Inc. týmto vyhlasuje, že rádiové zariadenie typu 2.4 GHz and 5 GHz RLAN/WLAN je v súlade so smernicou 2014/53/EÚ. Úplné EÚ vyhlásenie o zhode je k dispozícii na tejto internetovej adrese: https://www.SonicWall.com/Support SonicWall Inc. potrjuje, da je tip radijske opreme 2.4 GHz and 5 GHz RLAN/WLAN skladen z Direktivo 2014/53/EU. SonicWall SonicWave 432e and SonicWave 432i Getting Started Guide...
- Page 41 SonicWall Support Technical support is available to customers who have purchased SonicWall products with a valid maintenance contract and to customers who have trial versions. The Support Portal provides self‐help tools you can use to solve problems quickly and independently, 24 hours a day, 365 days a year. To access the Support Portal, go to https://www.sonicwall.com/support. The Support Portal enables you to: • View knowledge base articles and technical documentation • View video tutorials • Access MySonicWall • Learn about SonicWall professional services • Review SonicWall Support services and warranty information • Register for training and certification • Request technical support or customer service To contact SonicWall Support, visit https://www.sonicwall.com/support/contact‐support. SonicWall SonicWave 432e and SonicWave 432i Getting Started Guide...
- Page 42 SonicWall SonicWave 432e and SonicWave 432i Getting Started Guide...
- Page 43 SonicWave 432e and SonicWave 432i Getting Started Guide Updated ‐ September 2017 232‐004036‐51 Rev A...
Need help?
Do you have a question about the SonicWave 432e and is the answer not in the manual?
Questions and answers