Kathrein UFS 80si Operating Manual

Kathrein UFS 80si Operating Manual

Hdtv satellite receiver

Advertisement

Operating manual
Englisch
UFS 80si/sw
HDTV Satellite receiver

Advertisement

Table of Contents
loading
Need help?

Need help?

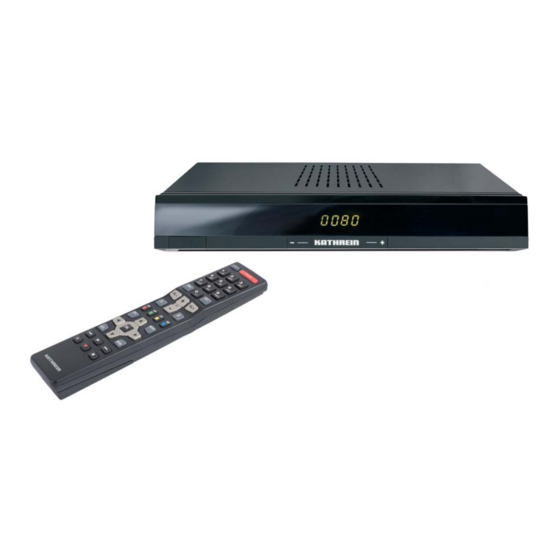
Do you have a question about the UFS 80si and is the answer not in the manual?

Questions and answers

Harald Strand
March 31, 2025

har kathrein 720 med dekoder kra 2009 kommer stadig flere krypterte kanaler. montert på bobil. er det på tide å bytte dekoder f.eks har brukt canal digital

1 comments:
Mr. Anderson
May 14, 2025

The context does not mention Canal Digital or encrypted channels specifically. However, it states that channel availability on satellites and transponders can change, and updates to the receiver or software may be required. It also mentions the use of smart cards to decrypt Pay TV channels. Therefore, if channels become encrypted and are no longer viewable, it may not be necessary to replace the decoder immediately. Instead, updating the software or checking compatibility with the smart card may resolve the issue. Replacing the decoder should only be considered if it no longer supports required updates or decryption methods.

Answer: No, not necessarily. Try updating software or checking smart card compatibility first.

This answer is automatically generated

Subscribe to Our Youtube Channel

Summary of Contents for Kathrein UFS 80si

  • Page 1 Operating manual Englisch UFS 80si/sw HDTV Satellite receiver...
  • Page 2 List of Contents List of Contents ........... 2 Recording “weekly” ........... 45 Timer list ............46 Preface............4 Timer overlap ............ 46 Safety Instructions - Important Notes ..5 MediaCenter ..........47 General multimedia information Connection and set-up ........ 9 (UFS 80) ............
  • Page 3 List of Contents Main Menu - Service Menu......69 Software update ........69 Software update over air ........69 Software update over USB ....... 71 Restore factory settings ......72 Main Menu - Language ......73 Operation Without the Remote Control ... 74 Backup operation ........
  • Page 4: Preface

    For shorter breaks, you can use the remote control to switch the receiver to standby, which uses only a minimal amount of energy. We wish you good reception and hope you will enjoy using your new HDTV receiver. Your KATHREIN team...
  • Page 5: Safety Instructions - Important Notes

    Safety Instructions - Important Notes These two pages contain important information about the operation, installation location and connection of the unit. Read these instructions carefully before setting up the unit. Mains cable antenna and to the TV set or the cable network and PC.
  • Page 6: Connection And Set-Up

    Safety Instructions - Important Notes Do not place any objects on top of Installation location the unit. Unless stated to the contrary All electronic equipment generates in the “Connection and set-up” and heat. The temperature rise of this “Installation” sections in the manual unit does however lie within the supplied, maintain a clearance of at permissible range.
  • Page 7 Any modifi cations to the receiver software, or the use of applications not provided by Kathrein will invalidate the warranty! You will have to bear the costs yourself for shipping and repairing any receiver that requires attention due to modifi cations to the software and use of applications other than those provided by Kathrein! Therefore use only software and applications provided by Kathrein for your receiver.
  • Page 8 This unit makes use of legally protected technologies, which are protected by patents in the USA and also by other intellectual property rights in other countries. KATHREIN-Werke KG has obtained licences from Audio MPEG Inc. and Societa‘ Italiana per lo sviluppo dell‘elettronica, S.I.SV.EL, S.P.A to use these technologies. These licences carry certain restrictions, which apply also to you as the customer.
  • Page 9 Connection and set-up Scop e of UFS 80 Operating Manual   Remote control RC 674 Safety instructions (multi-lingual)   HDMI cable  2 batteries AAA 1.5 V  Inse sert rtin batt tter erie into emot cont ntro Remove the cover on the rear of the remote control.
  • Page 10 Connection and set-up Fron ont/ t/re rear ecei eive On/Off switch Scart socket for TV connection Channel selection (P-) Digital data stream output (S/PDIF = Sony/ Philips Digital Interface Format) for Dolby 4-character display Digital AC 3 audio Channel selection (P+) Video output (CVBS) RF(IF) loop-through output Audio outputs (L/R) –...
  • Page 11 Connection and set-up LED in the front panel display: The LED lights up: Receiver is in standby mode Green Remote control has been pressed Conn nnec ecti ti ting ecei ei eive If you do not know the confi guration of your satellite reception system, contact your specialist dealer.
  • Page 12 Connection and set-up ideo ecor orde conn nnec ecti tion Connect the satellite receiver (HDMI or alternatively TV Scart socket) and the TV set using a HDMI or Scart cable (see “Connection Example”). Connect the satellite receiver (TV-Scart socket) to the Video/DVR recorder using a Scart cable (necessary only if the TV set and receiver are not already connected using a Scart cable).
  • Page 13 Connection and set-up Firs inst stal alla lati tion Before you start to use the UFS 80, read the sections “Safety Instructions - Important Instructions”, “Important Information” and “Connection and Set-Up” through to the item “First installation”. Do not connect the unit to the mains until all installation work has been properly carried out.
  • Page 14 Connection and set-up  Press the (green) button to move to the next menu. The following on-screen display appears:  Use the buttons to select whether to replace the factory pre-programmed channel list by a pre- sorted channel list for a specifi c country (at present only a limited number of pre-sorted channel lists are available).
  • Page 15 Connection and set-up HDMI SCART HDMI Format TV aspect ratio Here you can select the video resolution that will Here you can select the TV picture format. Either: be sent to your TV set. Either: - 4:3 or - 1080i (resolution 1920 x 1080, half-screen - 16:9 images) - 576p (resolution 720 x 576, full-screen...
  • Page 16: Connecting The Receiver

    Connection and set-up The following on-screen display appears: If your receiver is connected as in the connection example (see “Connecting the receiver” in this section), no changes are necessary in the rest of the fi rst installation. If you are not familiar with the details of your reception system, note the following: In many cases the satellite reception system is a DiSEqC™1.0 system.
  • Page 17 Connection and set-up B on only  Individual items are selected using the buttons. If you need to access sub-menus, they can be   called up using the button. Changes to the current settings can be made using the buttons or the number pad.
  • Page 18 Connection and set-up 22kHz This cannot be set and is not required LNB Power This is factory-set to “On”, but must be changed if your LNB has its own power supply. In most cases the LNB power supply is provided by the receiver. Test transponder Select the selection fi...
  • Page 19 Connection and set-up DiSE SEqC ™1 ™1 ™1.0  Individual items are selected using the buttons. If you require to access submenus, they can be   called up using the button. Changes to the current settings can be made using the buttons or the number pad.
  • Page 20 Connection and set-up LNB Type  If your reception system does not have a universal LNB, use the buttons to select the LNB types that are used in your reception system. You can choose from the following LNB types: - Universal or - Single LNB Low Frequency You only need to specify this data if your LNB type is not “Universal”.
  • Page 21 Connection and set-up e Ca Cabl e Sy stem  Individual items are selected using the buttons. If you require to access submenus, they can be   called up using the button. Changes to the current settings can be made using the buttons or the number pad.
  • Page 22 - KATHREIN UAS 481 (one cable LNB), - KATHREIN EXR 551, - KATHREIN EXR 552, - KATHREIN EXR 4 (Kathrein single cable matrices for four subscribers), - KATHREIN EXR 8 (Kathrein single cable matrices for eight subscribers), - KATHREIN EXU 908 or - User-defi...
  • Page 23 Connection and set-up Secure channel with PIN (not possible in every system) If your one cable system allows the transmission frequency to be protected by entering a PIN, this can be done in this menu. No other receiver can then use this transmission frequency unless the PIN is entered.
  • Page 24 Connection and set-up LNB Type  If your reception system does not have a universal LNB, use the buttons to select the LNB types that are used in your reception system. You can choose from the following LNB types: - Universal or - Single LNB Low Frequency You only need to specify this data if your LNB type is not “Universal”.
  • Page 25 Connection and set-up Chan anne Sear arch  Individual items are selected using the buttons. Changes to the current settings can be made  using the buttons. If you do not wish to perform a channel  search, press the (green) button and continue with the “Date and time”...
  • Page 26 Connection and set-up After completion of the search, you will following on-screen display (example):  Press the button. The newly found channels are added at the end of the existing overall list.
  • Page 27 Connection and set-up Date a nd  Individual items are selected using the buttons. Changes to the current settings can be made  using the buttons. Local time offset (GMT) Here you can select the local time offset from UTC (formerly GMT) (e.g. for Germany: + 1 hour). You can set the offset in 1 hour steps.
  • Page 28: Basic Functions

    Basic functions Remo mote ontr trol live V/ra radi dio) Currently unavailable Operation (on)/standby (off) Call up teletext Number pad Call up main menu Volume “+” (louder) Volume “-” (softer) Mute Channel selection  Call up channel information (info = Call up favourites list banner and detailed information) ...
  • Page 29 Basic functions want watc  - Press to increase and decrease the volume  - Press to switch channels  - Press to display and hide additional channel information  - Press to mute the sound   - Press to enter the channel number directly ...
  • Page 30 Basic functions want o li list sten radi  - Press (blue) to change to radio mode  - Press to increase and decrease the volume  - Press to switch channels  - Press to display and hide additional channel information ...
  • Page 31 Basic functions want acce cess elet etex  - Press to call up teletext   - Press to enter the required page directly  - Press browse forward/backward page-by-page   - Press to return to TV...
  • Page 32 Basic functions sele ctio s in enus some menus/on-screen displays this box is shown with a particular colour gradation. Each colour gradation represents a specifi c view/selection. The table below shows which colours are assigned to which buttons. Where the functions of these buttons are assigned for the current menu/view, they are also shown in the line at the bottom of the...
  • Page 33 Basic functions Chan anne sele lect ctio from hann nnel  Press the button to open the channel list. The following on-screen display appears: ture Call th the C urrently selected the selected complete list channel list chan anne  ...
  • Page 34 Basic functions Now use the respective coloured button to select the category in which you wish to open a channel list:  (red) button: Call up the category “Favouriteslist” Contains the following channel lists: - Favourites lists 1-8  (green) button: Call up the category “Complete List”...
  • Page 35 Basic functions Chan anne Info form rmat atio Channel information is shown for a few seconds each time the channel is changed (this can be changed  under “Settings”, “Suit screen menu”) or displayed for a few seconds by pressing the button.
  • Page 36 Basic functions Audi sele lect ctio   Press the (yellow) button, use the buttons to select “Select Audio track” and press the  button to confi rm your selection. The following on-screen display then appears (example):   Use the cursor ( ) buttons to select your desired soundtrack option, and press the button to confi...
  • Page 37 Basic functions Vide deot otex elet etex ext) This symbol in the channel OSD shows you whether teletext is available for the selected channel.  When you press the button, the receiver will prepare the teletext service data for your TV set to display, even if the signal is encrypted.
  • Page 38 The EPG data is not available immediately after the fi rst installation. The EPG data will only be updated when a channel is watched. Tested only with hard disks from Kathrein product range (see also: www.kathrein.de → Service → FAQs)
  • Page 39 Electronic Programme Guide (EPG) Call llin  The EPG is called up by pressing the button. Each time the EPG is called up, you will automatically be shown the “Preview” view (yellow) irrespective of which view you were shown the last time you exited the EPG.
  • Page 40 Electronic Programme Guide (EPG) Navi viga tion emot cont ntro butt tton  Call up the timer list (displays all pre- (red) button programmed recordings)  Navigation individual views (e.g. buttons 15 minutes skip forward in the “Current” view)  Call up a preview of the currently selected (yellow) button channel (Program guide)
  • Page 41 Electronic Programme Guide (EPG) view “P “P “Pre revi view ew” ” ” view ew ( Prog ide) The “Preview” view can be called up at any time in EPG by pressing the  (yellow) button. In the “Preview” view you can see the programs currently selected...
  • Page 42 Electronic Programme Guide (EPG) “C “C “Cur urre rent nt” ” ” vi view The “Current” view can be called up at any  time in EPG by pressing the (green) button. In the “Current” view you see all channels displayed in the order of the complete channel list.
  • Page 43 Electronic Programme Guide (EPG) Reco cord rdin sett ttin ings ramm mmin time mer)  (red dot) button allows you to set a programme for recording at any time. The programme to be recorded can be selected in any of the EPG ...
  • Page 44 Electronic Programme Guide (EPG) Programme not in EPG: Select any programme on the channel on which the desired programme is to be broadcast at a later date, and press the  (red dot) button. The following on- screen display appears (example): As there is no EPG data, you must enter the data (date, start, end) manually.
  • Page 45 Electronic Programme Guide (EPG) Reco cord rdin “d “d “dai aily ” ” ”  Use the buttons to select the “daily” recording mode (see screenshot on the right).  Then use the buttons to switch to the selection fi eld “Start” and use the ...
  • Page 46 Electronic Programme Guide (EPG)  fi eld “End” and use the buttons or the number pad to select the desired recording end time. In the next line you can also change the duration of the recording. The receiver automatically adjusts the end time for the recording to the duration you have selected. ...
  • Page 47 MediaCenter Gene nera mult ltim imed edia nfor orma mati tion The receiver offers the following multi-media functions. MP3 playback Picture playback The data to be played back must be on a USB storage medium connected to the receiver.  Press the button to call up the MediaCenter.
  • Page 48 MediaCenter Pict ctur back  Use the buttons to select the fi rst picture in your slide show. Press the  button to start the slide show. During playback, you have the following control options:  Pause  Start playback after pause ...
  • Page 49 MediaCenter back The MediaCenter has an integral MP3 player. MP3-specifi c information display is based on “IDTag Info V2.3”. Only fi les from the previously selected  folder are played back. Use the buttons to select the track with which you want to start your playback.
  • Page 50: Main Menu

    Main Menu Call llin menu ntro rodu duct ctio  The main menu is called up by pressing the button. The following on-screen display appears: The programme showing on the currently selected channel always appears the top right-hand corner of the main menu.
  • Page 51 Main Menu Menu verv rvie...
  • Page 52: Channel Selection From The Channel List

    Main Menu - Edit Channel List All changes to the channel lists and favourites lists which you can make as described in the following chapter are not saved by the receiver unless, when you  exit the menu by pressing the button, you answer “Yes, save changes”...
  • Page 53: Main Menu

    Main Menu - Edit Channel List Sele lect ctin chan anne nels dite Select a channel in the selected channel  list/favourites list using the cursor ( buttons (see example screenshot on the right). To select several channels that are listed directly following each other in the selected channel list, you can start block highlighting (see “Edit channels”...
  • Page 54: Main Menu - Edit Channel List

    Main Menu - Edit Channel List Dele lete Channels that are deleted from a list other than a favourites list are deleted irrevocably and can only be restored by performing a new channel search. Deletion of channels from a favourites list is the only circumstance in which the channels remain present in the complete list;...
  • Page 55 Main Menu - Edit Channel List Lock After selecting the channel(s) to be edited,  press the (red dot) button.  Use the buttons to select “Lock”  and confi rm your selection with the button. To lock the channel, you now need to enter your four-digit PIN code (factory setting: 0000).
  • Page 56: Move

    Main Menu - Edit Channel List Star bloc sele lect ctio  Press the (red dot) button.  Use the buttons to select “Start Blockselection” and confi rm your selection  with the button. You can now use the  buttons to start block selection in the previously selected channel.
  • Page 57 Main Menu - Edit Channel List Lock See “Edit channels (channel lists)”, “Lock”. Rena name me f avou ouri rite s li list A favourites list cannot be renamed unless it contains at least one channel assigned to it. After selecting the channel(s) to be edited, ...
  • Page 58 Main Menu - Search Channels After calling up the menu you will see the following on-screen display: You have three different search options: - Automatic Channel Search - Manual Channel Search - Search with Service ID  Automatic All transponders for the satellite Use the buttons to select the Channel...
  • Page 59 Main Menu - Search Channels to a multi-feed reception system (e.g. reception of ASTRA 19.2° East and HOTBIRD 13° East), you must repeat this procedure for each satellite. You can however start the fi rst installation again, in the course of which a channel search of all the satellites you selected is performed.
  • Page 60 Main Menu - Search Channels Manu nual hann nnel earc After calling up the menu you will see the following on-screen display:  buttons allow you to select different sets of parameters for the search. In this menu you can selectively search a transponder for the new channels.
  • Page 61 Main Menu - Search Channels Network Search  Use the buttons (On/Off) to select whether a network search should be performed. If you set the network search to “Off”, only the factory stored transponders of the satellites you previously selected will be searched for new as yet unlisted channels.
  • Page 62 Main Menu - Search Channels Polarisation  Press the buttons to select the correct polarisation (horizontal or vertical). Symbol Rate  Use the button or the number pad to enter the applicable symbol rate. Service ID Use the number pad to enter the service ID of the channel to be searched for. ...
  • Page 63: Skip

    Main Menu - Parental Control After calling up the menu you will see the following on-screen display: In order to access this menu, you must enter the four-digit PIN code (factory setting: “0000”). The following on-screen display then appears: In this menu you can set various restrictions/parental controls.
  • Page 64: Lock

    Main Menu - Parental Control Your device PIN code has now been changed. Keep your four-digit PIN code in a safe place, so that you always have access to your channels should you ever forget it. If you have forgotten your device PIN code, you must contact your dealer, who will be able to unlock your receiver for you.
  • Page 65 Main Menu - Settings After calling up the menu you will see the following on-screen display:  Use the buttons to select the desired menu and confi rm your selection  using the button. Firs inst stal alla lati tion See the section “Connection and Set-Up”, “First installation”.
  • Page 66 Main Menu - Settings HDMI Format TV aspect ratio Here you can select the video resolution that will Here you can select the TV picture format. Either: be sent to your TV set. Either: - 4:3 or - 1080i (resolution 1920 x 1080, half-screen - 16:9 images) - 576i (resolution 720 x 576, half-screen...
  • Page 67 Main Menu - Settings Suit cree menu After calling up the menu you will see the following on-screen display: Individual items are selected using the  buttons. The changes to the current settings can be made using the  buttons or the number pad. Functional range Here you can confi...
  • Page 68: Lock

    Main Menu - Settings Date After calling up the menu you will see the following on-screen display: Individual items are selected using the  buttons. The changes to the current settings can be made using the  buttons or the number pad. Local time offset (GMT) Here you can select the local time offset from UTC (formerly GMT) (e.g.
  • Page 69 Main Menu - Service Menu After calling up the menu you will see the following on-screen display:  Use the buttons to select the desired menu and confi rm your selection  using the button. Under the “USB Device Management“ selection, the following additional information is displayed: - Operating software version currently in use on the receiver - Hardware version of the receiver - Date of the last update of the receiver operating software...
  • Page 70 Check the time setting following a software update! You can also download the updates from the Internet. The address is: www.kathrein.de. You will fi nd the software under “Service” → “Software and Downloads” → “Receiver” → “UFS 80” You can also perform this update via the receiver’s USB port (see “Service Menu”,...
  • Page 71: First Installation

    USB port at the rear of the receiver. You can also download the updates from the Internet. The address is: www.kathrein.de. You will fi nd the software under “Service” → “Software and Downloads” → “Receiver” → “UFS 80”...
  • Page 72: Main Menu - Service Menu

    Main Menu - Service Menu Rest stor fact ctor sett ttin ings After you have called up this menu you need to input the four-digit PIN code (factory setting: “0000”) to access it. The following on-screen display then appears:  Now press the button to reset all the settings in the receiver to the as-delivered state, or abort the ...
  • Page 73: Main Menu - Language

    Main Menu - Language After calling up the menu you will see the following on-screen display:  Use the buttons to select the desired menu language and confi rm your selection using the  button. The following languages are available for selection: German, English, French, Italian, Spanish, Czech, Dutch and Turkish.
  • Page 74: Operation Without The Remote Control

    Operation Without the Remote Control If you have misplaced your remote control, or if the batteries are fl at, you can still operate your receiver (to a limited extent) from the front panel. Back ckup rati tion On/Off switch There are three buttons on the front of the receiver: On/Off switch This switch allows you to switch the receiver on and off again.
  • Page 75: Troubleshooting

    Troubleshooting In the event of a malfunction, fi rst check all the cable connections and operating states: 1. Receiver and TV set power plugs are connected to wall socket 2. Antenna cables are connected to the receiver input 3. Receiver and TV set are correctly connected to each other by a HDMI or Scart or cinch cable 4.
  • Page 76: Technical Appendix

    Technical appendix Alph anum umer eric e nt ries For entries such as names of favourites or search terms, use the keyboard displayed on the screen (see screenshot example). The letters assigned to the number pad also apply to your remote control. They are used very similarly to a mobile phone.
  • Page 77 Technical appendix  Cancel entry without saving  Cancel entry without saving  After you have entered the desired expression, press the button in order to load the name/search   expression or the button to abort the entry. vanc nced onne nect...
  • Page 78: One Cable Systems

    Technical appendix Tech chni nica ecifi ifi ifi ific atio ions Type UFS 80si UFS 80sw Part no. 20210210 20210211 Colour Silver Black RF section Sat IF band 950-2150 Input level range dBμV 44-83 TV system, video Modulation, FEC, demultiplexer...
  • Page 79 Technical appendix onne nect ctio exam ampl Indi divi vidu dual ecep ti tion te tems Sat-IF Comm mmun unit ante tenn netw twor k sy stem s (4 Sat-IF Sat-IF KAZ 11/KAZ 12 overvoltage protector...
  • Page 80 Technical appendix Comm mmun unit ante tenn netw twor stem mult lti- i-fe feed Sat-IF Comm mmun unit ante tenn netw twor k sy stem s (1 x Sa IF), m ul ulti ti-f -fee Sat-IF Sat-IF Sat-IF KAZ 11/KAZ 12 overvoltage protector...
  • Page 81 Technical appendix e Ca Cabl e Sy stem Sat-IF KAZ 11/KAZ 12 overvoltage protector...
  • Page 82 Technical appendix Sat-IF Sat-IF KAZ 11/KAZ 12 overvoltage protector...
  • Page 83 Short Technical Glossary AC 3 DiSEqC™ components Output for Dolby Digital signal If DiSEqC™ switching matrices are cascaded, the master receiver must transmit the DiSEqC™ ASTRA signal several times, so that all DiSEqC™ multi- SES (Société Européene des Satellites) satellite switches in the cascade receive their commands.
  • Page 84: Service

    Short Technical Glossary HDCP – High-bandwidth Digital Content Protection The channel identifi cation number is also referred Encryption system which protects the HDMI and to as the Network ID or NIT. DVI interfaces for secure transmission of video and audio data. NTFS File system for storage media HDMI –...
  • Page 85 HDTV the matrix. satellite transmission The Kathrein one cable system satisfi es the single- cable standard in accordance with EN 50494, i.e. all the components of a single-cable system that satisfy this standard can be installed in a satellite system.
  • Page 86 Service If, despite studying this operating manual, you still have questions about getting started with the unit or using it correctly, or if unexpected problems occur, please contact your specialist dealer.
  • Page 87: For Your Notes

    For your notes...
  • Page 88 Internet: www.kathrein.de KATHREIN-Werke KG • Anton-Kathrein-Straße 1 - 3 P.O. Box 100 444 • 83004 Rosenheim GERMANY...

This manual is also suitable for:

Ufs 80sw

Table of Contents