Ezviz T9 Quick Start Manual
Home sense.
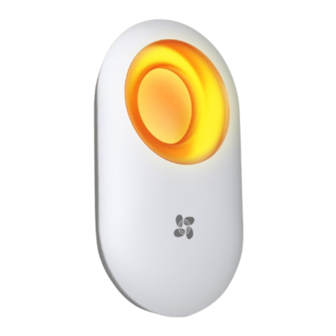
siren with strobe light
Hide thumbs
Also See for T9:
- Quick start manual (73 pages) ,
- Quick start manual (30 pages) ,
- Quick start manual (35 pages)
Table of Contents
Advertisement
Available languages
Available languages
Quick Links
Download this manual
See also:
Quick Start Manual
Advertisement
Table of Contents

Related Manuals for Ezviz T9


Summary of Contents for Ezviz T9
- Page 3 Adding to Internet Alarm Hub The Siren must be linked with the A1 Home Sense Alarm Hub and other detectors such as Open/Close and Motion Detectors. The EZVIZ Home Sense Alarm Hub and detectors are sold separately. • Option 1 (Recommended) Adding by EZVIZ App...
- Page 4 • Option 2 Adding by Operating the Home Sense Alarm Hub Enable the “Adding Detectors Mode” of your Home Sense Alarm Hub. Refer to Quick Start Guide of your Home Sense Alarm Hub for details. Bring the Siren close to the Alarm Hub (within 2in.) and press the button on Siren, the status indicator will flash a red light once indicating the adding signal is sent..
- Page 5 Step 3 Installing Siren Choose a clean flat surface to install the Siren Installing Siren Option 1 (Recommended) Option 2 Mount the Siren to the chosen location using the Use the supplied screw kit to hang the Siren onto supplied foam sticker as illustrated below. the chosen mounting location.
-
Page 6: Specifications
Appendix Box Contents Home Sense Siren with Strobe Lightx1 Foam Sticker x1 Screw Kit x1 Power Adapter x1 USB Cable x1 Quick Start Guide x1 Specifications Power Voltage DC 5V (Micro USB) Working Current Static: 22mA Maximum: 200mA Working Environment Indoor Working Temprature -10°C to 55°C (14°F to 131°F) - Page 7 Opción 1 (recomendada) Adición mediante la aplicación EZVIZ Instalación de la aplicación EZVIZ - Conecte el teléfono móvil a la red Wi-Fi. - Descargue la Aplicación Móvil EZVIZ buscando "EZVIZ" en App Store (versión iOS) y Google Play (versión Android).
- Page 8 • Opción 2 Adición mediante la central de alarmas por Internet Active el modo de adición de detectores en la central de alarmas por Internet. Consulte la Guía de inicio rápido del centro de alarmas por Internet para obtener información. Acerque el Sirena al centro de alarmas por Internet (en un área de 50 cm) y pulse el botón del dispositivo;...
-
Page 9: Conceptos Básicos
Paso 3 Instalación del Sirena Selección de una ubicación de instalación Elija un lugar limpio y plano para instalar el Sirena. Instalación del Sirena Opción 1 (recomendada) Opción 2 Pegue el adhesivo de espuma en la parte posterior - Perfore un agujero para tornillos en la ubicación del Sirena y fije el dispositivo en el lugar de de instalación. -
Page 10: Especificaciones
Apéndice Contenido del paquete Sirena x1 Adhesivo de espuma x1 Juego de tornillos x1 Adaptador de corriente x1 Cable USB x1 Guía de inicio rápido x1 Especificaciones Voltaje de fuente de alimentación DC 5 V (Micro USB) Corriente de trabajo Estático: 22 mA Máximo: 200 mA Entorno de trabajo Interior... - Page 11 Option 1 (recommandé) Ajout par l'application EZVIZ Installation de l'application EZVIZ - Raccordez votre téléphone portable au réseau Wi-Fi. - Téléchargez et installez l'application EZVIZ depuis App Store (version iOS) ou Google Play (version Android). - Démarrez l'application et ouvrez un compte d'utilisateur EZVIZ.
- Page 12 • Option 2 Ajout en actionnant le concentrateur d'alarme Internet Activez le mode Ajout de détecteurs de votre concentrateur d'alarme Internet. Pour plus de précisions sur le fonctionnement de votre concentrateur d'alarme Internet, reportez-vous au Guide de prise en main. Placez le Sirène à...
-
Page 13: Éléments De Base
Étape 3 Installation du Sirène sans-fil Choix d'un emplacement d'installation Installez le Sirène sur un emplacement propre et plat. Installation du Sirène sans-fil Option 1 (recommandé) Option 2 Collez le patin adhésif en mousse au dos du Sirène - Percez un trou pour vis à l'emplacement prévu puis collez celui-ci à... -
Page 14: Spécifications
Annexe Contenu de l'emballage Sirène sans-fil x1 Patin adhésif en mousse x1 Jeu de vis x1 Transformateur électrique x1 Câble USB x1 Guide de prise en main x1 Spécifications Tension d'alimentation 5 Vcc (Micro USB) Courant de service Fixe : 22 mA Maximum : 200 mA Environnement de fonctionnement Intérieur Température de fonctionnement... - Page 15 UD05541B...
-
Page 16: Limited Warranty
Your EZVIZ product is warranted for a period of one (1) year from the date of purchase against defects in materials and workmanship, or such longer period as may be required by law in the country or state where this product is sold, when used normally in accordance with EZVIZ’... - Page 17 ITEMS AND PETS, RESULTING FROM YOUR USE OF THE PRODUCT INFORMATION, DATA, OR PRODUCT. PRODUCT INFORMATION AND DATA PROVIDED BY EZVIZ IS NOT INTENDED AS A SUBSTITUTE FOR DIRECT MEANS OF OBTAINING THE INFORMATION. FOR EXAMPLE, A NOTIFICATION PROVIDED THROUGH THE PRODUCT IS NOT INTENDED AS A SUBSTITUTE FOR AUDIBLE AND VISIBLE INDICATIONS IN THE HOME AND ON THE PRODUCT, NOR FOR A THIRD PARTY MONITORING SERVICE.
- Page 18 LIABILITY FOR ALL DAMAGES EXCEED THE PURCHASE PRICE THE PRODUCT. EZVIZ does not undertake any liability for personal injury or property damage, as the result of product interruption or service termination cause by: a) improper installation or usage other than as requested; b) the protection of national or public interests;...
- Page 19 Note: This product has been tested and found to comply with the limits for a Class B digital device, pursuant to Part 15 of the FCC Rules. These limits are designed to provide reasonable protection against harmful interference in a residential installation. This product generates, uses, and can radiate radio frequency energy and, if not installed and used in accordance with the instructions, may cause harmful interference to radio communications.
Need help?
Do you have a question about the T9 and is the answer not in the manual?
Questions and answers