Ezviz A1 Quick Start Manual
Home sense alarm hub
Hide thumbs
Also See for A1:
- Quick start manual (106 pages) ,
- Quick start manual (29 pages) ,
- Quick start manual (86 pages)
Table of Contents
Advertisement
Quick Links
Advertisement
Table of Contents

Related Manuals for Ezviz A1


Summary of Contents for Ezviz A1
- Page 1 Home Sense Alarm Hub Quick Start Guide www.ezvizlife.com 102016176, E...
- Page 3 BY JURISDICTION. PLEASE CHECK ALL RELEVANT LAWS IN YOUR JURISDICTION BEFORE USING THIS PRODUCT IN ORDER TO ENSURE THAT YOUR USE CONFORMS TO THE APPLICABLE LAW. EZVIZ SHALL NOT BE LIABLE IN THE EVENT THAT THIS PRODUCT IS USED WITH ILLEGITIMATE PURPOSES.
-
Page 4: Ec Declaration Of Conformity
For more information see: www.recyclethis.info. EC DECLARATION OF CONFORMITY Hereby, Hangzhou EZVIZ Software Co., Ltd. declares that the radio equipment type [CS-A1-32W] is in compliance with Directive 2014/53/EU. The full text of the EC DECLARATION OF CONFORMITY is available at the following web link: http://www.ezvizlife.com/declaration-of-conformity. - Page 5 Neuerscheinung – Januar, 2019 Marken ™, ™ und andere Marken und Logos von EZVIZ sind das Eigentum von EZVIZ in verschiedenen Ländern. Andere nachstehend erwähnte Marken und Logos stehen im Besitz der entsprechenden Eigentümer. Haftungsausschluss SOWEIT GESETZLICH ZULÄSSIG WIRD DAS BESCHRIEBENE PRODUKT MIT SEINER HARDWARE, SOFTWARE UND FIRMWARE OHNE MÄNGELGEWÄHR, MIT ALLEN FEHLERN UND FEHLFUNKTIONEN GELIEFERT, UND EZVIZ GIBT KEINE AUSDRÜCKLICHEN ODER IMPLIZIERTEN...
-
Page 6: Eg-Konformitätserklärung
Ihren örtlichen Fachhändler zurück oder entsorgen Sie sie an einer der Sammelstellen. Weitere Informationen finden Sie unter: www.recyclethis.info. EG-KONFORMITÄTSERKLÄRUNG Hiermit erklärt Hangzhou EZVIZ Software Co., Ltd., dass der Funkgerätetyp [CS-A1-32W] mit der Richtlinie 2014/53/EU übereinstimmt. Der vollständige Text der EU-Konformitätserklärung ist unter folgendem Weblink verfügbar: http://www.ezvizlife.com/declaration-of-conformity. - Page 7 USB Data Cable Install the EZVIZ App - Connect your mobile phone to Wi-Fi or mobile network. - Download and install the EZVIZ app by searching the “EZVIZ” in App Store (iOS version) and Google Play (Android version). - Start the app and register for an EZVIZ user account following the start-up wizard.
-
Page 8: Quick Settings
- Hold and press the Setting Button on the Alarm Hub to enter Wi-Fi configuration mode. - Follow the EZVIZ app wizard to finish Wi-Fi configuration. • Make sure the mobile phone is connected to the 2.4GHz Wi-Fi network and the is not connected to any Wi-Fi network, or the connection fail. -
Page 9: Add Detectors
Step 3 Add Detectors Enable the Adding Detectors Mode Enable the adding detector mode by quickly pressing the Setting button of the Alarm Hub. The yellow and red indicators will start to blink. Follow voice prompt. Add Detectors Bring the detector close to the Alarm Hub (within 2ft) and then press the detector's alarm button to start the adding process. -
Page 10: Box Contents
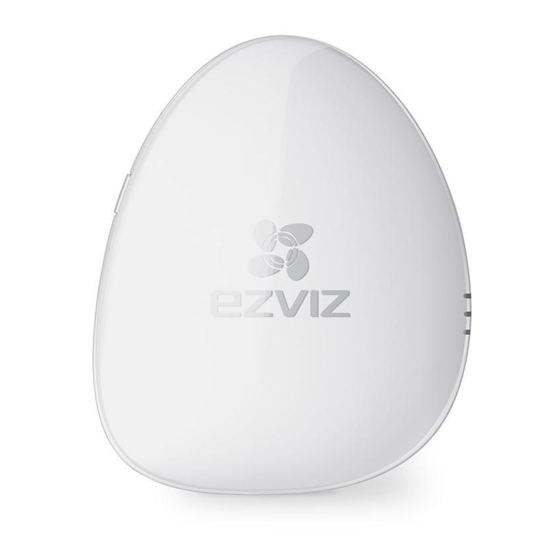
Power Adapter x1 (Power adapter type may vary according to countries.) Functionality Irreplaceable Home Guard Accessible to various EZVIZ wireless detectors and provide a comprehensive protection to your home. World’s leading Communication Technology Convenient security deployment with wireless detectors. Convenient Network Configuration One-push Wi-Fi connection (supports ONLY 2.4GHz Wi-Fi). - Page 11 Alarm Hub Basics Mounting Hole Setting Button LED Indicators Power Input (ALARM, LINK,and READY) Speaker RESET Button Name Description Power Input Power supply for the device (by USB port). ALARM LED Indicator Steady Red: The Alarm Hub is in the normal status. Red Flicker: An alarm occurs.
-
Page 12: Troubleshooting
Troubleshooting “The device is offline.” or “The device is not registered.” prompts when adding Alarm Hub by EZVIZ app. 1. Check the Wi-Fi is connected with the Alarm Hub and make sure it’s working. 2. Check whether the yellow indicator flickers; if not, please restart the Alarm Hub and connect to the Wi-Fi again. -
Page 13: Betrieb
• Luftfeuchtigkeit (Betrieb) 10% bis 90% (nicht kondensierend) A1 einschalten Schließen Sie den A1 mit dem USB-Datenkabel und am Netzteil und dieses dann an einer Steckdose an. Die weiße LED leuchtet als Hinweis darauf auf, dass der A1 aktiviert wird. Anschließend leuchtet die rote LED auf , wenn der A1 vollständig gestartet ist. - Page 14 • Der Abstand zwischen dem A1 und dem Smartphone darf nicht mehr als 50 cm betragen. Konfiguration abschließen Die LINK-LED blinkt gelb, wenn der A1 erfolgreich mit dem Wi-Fi (des Routers) verbunden ist. Wenn die Verbindung fehlgeschlagen ist oder Sie das WLAN neu konfigurieren möchten, drücken Sie die Zurücksetzen-Taste mit einem spitzen Gegenstand, bis die 3 LEDs gleichzeitig...
- Page 15 "Adding Detectors"-Modus aktiviert ist. Melder hinzufügen Bringen Sie den Melder nahe an den A1 (min. 50 cm) und lösen Sie manuell Alarm aus. Daraufhin bestätigt der Voice Guide Typ und Seriennummer des Detektors als Hinweis darauf, dass der entsprechende Melder hinzugefügt wurde (bis zu 32 Melder sind möglich).
- Page 16 Ermöglicht den Zugriff auf verschiedene drahtlose Melder und bietet einen umfassenden Schutz für Ihr Zuhause. Weltweit führende Kommunikationstechnologie Ein komfortables Sicherheitssystem mit drahtlosen Meldern. Bequeme Netzwerkkonfiguration Wi-Fi-Verbindung per Tastendruck EZVIZ Cloud P2P Service Alarmierung und Fernbedienung via Smartphone und PC.
- Page 17 Bezeichnung Beschreibung Versorgungseingang Spannungsversorgung für das Gerät (via USB-Port). ALARM LED-Anzeige Durchgehend rot: Der A1 befindet sich im Normalstatus. Blinkt rot: Ein Alarm ist aufgetreten. LINK LED Blinkt gelb: Das Wi-Fi-Netz ist verbunden. Aus: Das Wi-Fi-Netz ist nicht verbunden. READY LED Durchgehend weiß: Der A1 ist eingeschaltet (via USB-Port).
-
Page 18: Häufig Gestellte Fragen
Häufig gestellte Fragen Beim Hinzufügen des A1 mit der EZVIZ App erscheint die Meldung "The device is offline" oder "The device is not registered". 1. Überprüfen Sie, ob eine funktionierende Wi-Fi-Verbindung mit dem A1 besteht. 2. Überprüfen Sie, ob die gelbe LED-Anzeige blinkt. Falls nicht, starten Sie den A1 bitte neu und stellen die Wi-Fi-Verbindung wieder her. - Page 19 Inicio del A1 Conecte el A1 y el adaptador de corriente con el cable de datos USB y, a continuación, enchufe el adaptador de corriente a la toma de corriente. El indicador blanco se encenderá, lo que indica que el A1 se está...
-
Page 20: Configuración Rápida
- Siga las indicaciones del asistente de la aplicación EZVIZ para finalizar la configuración de la conexión wifi. • Asegúrese de que el teléfono móvil esté conectado al Wi-Fi y de que el A1 aún no se haya conectado a ninguna red Wi-Fi, ya que, de no ser así, se puede producir un error de conexión. - Page 21 Adición de detectores Acerque el detector al A1 (en un área de 50 cm) y dispare la alarma manualmente. Se emitirá un aviso de voz sobre el tipo y el número de serie del detector, lo que indica que se ha agregado el indicador correspondiente (se admiten hasta 32 detectores).
-
Page 22: Contenido Del Paquete
Tecnología de comunicación líder en el mundo Implementación de seguridad cómoda con detectores inalámbricos. Configuración de red cómoda Conexión Wi-Fi con un solo toque. Servicio P2P en la nube de EZVIZ Recepción de alarma y mando a distancia en el teléfono móvil y el PC. - Page 23 Amarillo intermitente: el dispositivo está conectado a la red Wi-Fi. alarma ALARM Apagado: el dispositivo no está conectado a la red Wi-Fi. Indicador LED de Blanco fijo: el A1 está encendido (mediante el puerto USB). disponibilidad READY Orificio de montaje Orificio para colgar el dispositivo.
- Page 24 El estado del detector se muestra como desconectado en la aplicación EZVIZ. 1. Asegúrese de que el estado de la red Wi-Fi conectada al A1 es normal. 2. Asegúrese de que la distancia entre los detectores y el A1 es inferior a 100 m y de que no hay ninguna barrera.
- Page 25 Starting A1 Branchez l'A1 et l'adaptateur électrique avec le câble données USB puis branchez l'adaptateur secteur dans la prise femelle. Le témoin blanc s'allume pour indiquer que l'A1 démarre ; lorsque la séquence de démarrage est terminée, le témoin rouge s'allume.
-
Page 26: Réglages Rapides
• La distance entre l'A1 et le téléphone portable ne doit pas dépasser 50 cm. Terminer la configuration Le témoin LINK clignote en jaune lorsque la liaison entre l'A1 et le réseau Wi-Fi (ou le routeur) est établie. Si la connexion échoue ou si vous voulez reconfigurer le réseau Wi-Fi, veuillez appuyer et maintenir le bouton RÉINITIALISER enfoncé... - Page 27 Appuyez sur le bouton des réglages pour désactiver le mode Ajout de détecteurs lorsque l'opération est terminée. • Le mode Ajout de détecteur est désactivé au bout de 3 minutes d'inactivité. • La distance maximale de fonctionnement entre les détecteurs et l'A1 est de 100 m (sans obstacle).
-
Page 28: Contenu De L'emballage
Déploiement pratique d'une solution de sécurité grâce à des détecteurs sans fil. Facilité de configuration du réseau Connexion Wi-Fi par simple pression sur un bouton. Service P2P de cloud EZVIZ Réception des signaux d'alarme et de télécommande sur un téléphone portable et un PC. - Page 29 Haut-parleur Bouton RESET Description Entrée d'alimentation Alimentation électrique de l'appareil (port USB). Diode témoin ALARM Rouge fixe : L'A1 est dans l'état normal. Rouge clignotant : une alarme est survenue. Diode témoin LINK Jaune clignotant : la connexion Wi-Fi est active. Éteint : La connexion Wi-Fi est inactive.
- Page 30 L'état du détecteur affiché est hors ligne dans l'application EZVIZ. 1. Vérifiez l'état de la connexion Wi-Fi et que l'A1 connecté est dans l'état normal. 2. Assurez-vous que la distance entre les détecteurs et l'A1 ne dépasse pas 100 m et qu'il n'y a aucun obstacle.
-
Page 31: Funzionamento
• Umidità di esercizio: da 10% a 90% (non condensante) Accendere A1 Collegare il cavo dati USB tra A1 e l'alimentatore, poi collegare l'alimentatore a una presa elettrica. L'indicatore bianco si accende ad indicare che A1 si sta accendendo; quando A1 si è avviato completamente si accende l'indicatore rosso. -
Page 32: Impostazioni Rapide
- Seguire la procedura guidata dell'app EZVIZ per completare la configurazione della rete Wi-Fi. • Assicurarsi che il telefono cellulare sia collegato alla Wi-Fi e che A1 non sia ancora collegato ad alcuna Wi-Fi, altrimenti la connessione non potrà essere stabilita. - Page 33 è abilitata. Aggiungere i rivelatori Avvicinare il rivelatore all'A1 (entro 50 cm) e far scattare allarme manualmente. Un messaggio vocale conferma il tipo e il numero di serie del rivelatore indicando che è stato correttamente aggiunto (è...
-
Page 34: Contenuto Della Confezione
La migliore tecnologia di comunicazione al mondo Pratica implementazione della sicurezza, con rivelatori senza fili. Pratica configurazione di rete Connessione Wi-Fi con un solo tasto. Servizio EZVIZ Cloud P2P Ricezione allarmi e controllo remoto da telefono cellulare, PC e tablet. - Page 35 Pulsante RESET Nome Descrizione Ingresso alimentazione Alimentazione del dispositivo (da porta USB). LED ALLARME Rosso fisso: L'A1 è nello stato normale. Rosso lampeggiante: Si è verificato un allarme. LED CONNESSIONE Giallo lampeggiante: la Wi-Fi è connessa. Spento: La Wi-Fi è disconnessa.
- Page 36 1. Assicurarsi che la Wi-Fi a cui è collegato A1 funzioni correttamente. 2. Assicurarsi che la distanza tra i rivelatori e A1 sia inferiore a 100 m e che non vi siano ostacoli. 3. Assicurarsi che la batteria del rivelatore non sia scarica.
- Page 37 USB-datakabel Installeer de EZVIZ-app - Verbind uw mobiele telefoon met een Wi-Fi- of mobiel netwerk. - Download en installeer de EZVIZ-app door “EZVIZ” te zoeken in de App Store (iOS-versie) of Google Play (Android-versie). - Start de app en meld u na het opstarten aan voor een EZVIZ-gebruikersaccount.
- Page 38 - Houd de Instellingenknop op de alarmhub 3 seconden ingedrukt om de Wi-Fi-configuratiemodus te openen. - Volg de wizard van de EZVIZ-app om de Wi-Fi-configuratie te voltooien. • Zorg ervoor dat de mobiele telefoon is aangesloten op het 2,4 GHz Wi-Fi-netwerk en de alarmhub niet is aangesloten op een Wi-Fi-netwerk, anders zal het verbinden mislukken.
- Page 39 Stap 3 Detectoren toevoegen De modus voor detectoren toevoegen inschakelen Schakel de modus voor detectoren toevoegen in door kort op de instellingknop van de alarmhub te drukken. De gele en rode indicatoren zullen gaan knipperen. Volg de instructies. Detectoren toevoegen Breng de detector in de buurt van de alarmhub (binnen 0,6 m) en druk vervolgens op de alarmknop van de detector om het toevoegproces te starten.
- Page 40 Bijlage Basisinformatie van de alarmhub Montagegat Instellingenknop LED-lampjes (ALARM, KOPPEL Voeding en GEREED) Luidspreker Resetknop Naam Beschrijving Voeding Voeding voor het apparaat (via USB-poort). ALARM-indicator Stabiel rood: De alarmhub staat in de normale status. Rood knipperend: Er gaan een alarm af. KOPPEL-indicator Geel knipperend: De Wi-Fi is verbonden.
- Page 41 Gniazdo sieci elektrycznej Przewód USB Instalowanie aplikacji EZVIZ - Połącz telefon komórkowy z siecią Wi-Fi lub siecią komórkową. - Wyszukaj „EZVIZ” w sklepie App Store (wersja iOS) lub Google Play (wersja Android), aby pobrać i zainstalować aplikację EZVIZ. - Uruchom aplikację i utwórz konto użytkownika EZVIZ przy użyciu kreatora startowego.
- Page 42 - Zeskanuj kod QR znajdujący się na podstawie koncentratora alarmowego. - Naciśnij przycisk konfigurowania na koncentratorze alarmowym i przytrzymaj go przez trzy sekundy, aby włączyć tryb konfiguracji Wi-Fi. - Postępuj zgodnie z instrukcjami wyświetlanymi w kreatorze aplikacji EZVIZ, aby zakończyć konfigurację Wi-Fi. • Należy upewnić się, że telefon komórkowy jest połączony z siecią Wi-Fi 2,4 GHz, a koncentrator nie jest połączony z żadną...
- Page 43 Krok 3 Powiązanie czujników Włączanie trybu powiązania czujników Aby włączyć tryb powiązania czujników, naciśnij przycisk konfiguracji koncentratora alarmowego. Żółte i czerwone wskaźniki zaczną migać. Postępuj zgodnie z monitem głosowym. Powiązanie czujników Umieść czujnik w pobliżu koncentratora alarmowego (w odległości maks. 50 cm), a następnie naciśnij przycisk alarmowy czujnika, aby rozpocząć proces powiązania. Zostanie odtworzony komunikat głosowy potwierdzający typ i numer seryjny powiązanego czujnika (obsługiwane są...
- Page 44 Załącznik Opis koncentratora alarmowego Otwór montażowy Przycisk konfiguracji Wejście Wskaźniki alarmu, połączenia i gotowości zasilania Głośnik Przycisk resetowania Nazwa Opis Wejście zasilania Zasilanie urządzenia (przez złącze USB). Wskaźnik alarmu Świeci na czerwono: prawidłowy stan koncentratora alarmowego. Migający czerwony: zgłoszono alarm. Wskaźnik połączenia Migający żółty: połączono z siecią...
- Page 45 Εγκατάσταση της εφαρμογής EZVIZ - Συνδέστε το κινητό σας τηλέφωνο σε δίκτυο Wi-Fi ή μέσω δεδομένων κινητής τηλεφωνίας. - Πραγματοποιήστε λήψη και εγκατάσταση της εφαρμογής EZVIZ, αναζητώντας τον όρο «EZVIZ» στο App Store (έκδοση iOS) και στο Google Play (έκδοση Android).
- Page 46 - Πατήστε παρατεταμένα το κουμπί Setting (Ρύθμιση) για 3 δ. στο Κέντρο Συναγερμού, για να εισέλθετε στη λειτουργία ρύθμισης παραμέτρων Wi-Fi. - Ακολουθήστε τον οδηγό της εφαρμογής EZVIZ για να ολοκληρώσετε τη ρύθμιση παραμέτρων Wi-Fi. • Βεβαιωθείτε ότι το κινητό τηλέφωνο έχει συνδεθεί στο δίκτυο Wi-Fi 2,4GHz και ότι δεν έχει...
- Page 47 Βήμα 3 Προσθήκη Ανιχνευτών Ενεργοποίηση Κατάστασης Προσθήκης Ανιχνευτών Ενεργοποιήστε την κατάσταση προσθήκης ανιχνευτών πατώντας το κουμπί Ρύθμιση στο Κέντρο Συναγερμού. Η κίτρινη και η κόκκινη ενδεικτική λυχνία αρχίζουν να αναβοσβήνουν. Ακολουθήστε τις φωνητικές οδηγίες. Προσθήκη Ανιχνευτών Μετακινήστε τον ανιχνευτή κοντά στο Κέντρο Συναγερμού (σε απόσταση έως 2 ποδιών) και στη συνέχεια...
- Page 48 Παράρτημα Βασικά στοιχεία Κέντρου Συναγερμού Οπή τοποθέτησης Κουμπί Ρύθμισης Ενδεικτικές λυχνίες LED Είσοδος (ΣΥΝΑΓΕΡΜΟΣ, ισχύος ΣΥΝΔΕΣΗ και ΕΤΟΙΜΟΤΗΤΑ) Ηχείο Κουμπί ΕΠΑΝΑΦΟΡΑ Όνομα Περιγραφή Είσοδος ισχύος Τροφοδοσία συσκευής (μέσω θύρας USB). Ενδεικτική λυχνία LED Κόκκινο συνεχώς αναμμένο: Το Κέντρο Συναγερμού είναι σε κανονική κατάσταση. ΣΥΝΑΓΕΡΜΟΥ...
- Page 49 Datový kabel USB Instalace aplikace EZVIZ - Připojte mobilní telefon k síti Wi-Fi nebo mobilní síti. - Stáhněte si a nainstalujte aplikaci EZVIZ tak, že vyhledáte text „EZVIZ“ v obchodech App Store (verze pro systém iOS) a Google Play (verze pro systém Android). - Spusťte aplikaci. Postupujte podle pokynů průvodce prvním spuštěním a zaregistrujte svůj uživatelský...
- Page 50 - Stiskněte a po dobu 3 s podržte stisknuté tlačítko nastavení na zařízení Alarm Hub. Zařízení přejde do režimu konfigurace sítě Wi-Fi. - Postupujte podle průvodce aplikace EZVIZ a dokončete konfiguraci sítě Wi-Fi. • Ujistěte se, že je mobilní telefon připojen k 2,4GHz síti Wi-Fi a zařízení Alarm Hub není...
- Page 51 Krok 3 Přidání detektorů Povolení režimu přidání detektorů Rychlým stisknutím tlačítka nastavení zařízení Alarm Hub povolte režim přidání detektoru. Žlutý a červený indikátor začnou blikat. Postupujte podle hlasové výzvy. Přidání detektorů Umístěte detektor do blízkosti zařízení Alarm Hub (do vzdálenosti max. 60 cm) a poté stiskněte tlačítko alarmu detektoru, čímž...
- Page 52 Příloha Popis zařízení Alarm Hub Montážní otvor Tlačítko nastavení Napájecí Indikátory LED (ALARM, vstup PŘIPOJENÍ a PŘIPRAVENO) Reproduktor Tlačítko RESETOVÁNÍ Název Popis Napájecí vstup Napájení zařízení (pomocí portu USB). Indikátor LED ALARM Trvalé červené svícení: Zařízení Alarm Hub je v normálním stavu. Červené...
-
Page 53: Limited Warranty
Your EZVIZ product is warranted for a period of two (2) years from the date of purchase against defects in materials and workmanship, or such longer period as may be required by law in the country or state where this product is sold, when used normally in accordance with user manual. - Page 54 Wiederverkäufer, Vertreter oder Mitarbeiter ist berechtigt, Änderungen, Erweiterungen oder Ergänzungen dieser Garantie vorzunehmen. Für Ihr EZVIZ-Produkt gilt eine Garantie von zwei (2) Jahren ab Kaufdatum gegen Material- und Verarbeitungsfehler oder eine längere Zeitspanne, die das Gesetz des Landes oder Bundesstaates, in dem dieses Produkt verkauft wird, vorschreibt, wenn es normalerweise gemäß...
-
Page 55: Garantía Limitada
Su producto EZVIZ tiene garantía, que cubre defectos de materiales y fabricación, por un periodo de (2) años desde la fecha de la compra o por un periodo mayor según lo requiera la legislación en el país o región donde se venda este producto, siempre que se utilice tal y como se indica en el manual de usuario. -
Page 56: Garantie Limitée
à la présente garantie. Votre produit EZVIZ est couvert par la garantie pour une période de (2) ans à compter de la date d’achat, contre les défauts matériels et de main-d’œuvre, ou durant une période plus longue telle que pourrait l’exiger la loi de l’État ou du pays où... -
Page 57: Garanzia Limitata
Il prodotto EZVIZ è garantito per un periodo di due (2) anni dalla data di acquisto per difetti nei materiali e nella lavorazione, o per un periodo maggiore che potrebbe essere richiesto dalla legge nel paese o nello stato in cui questo prodotto viene venduto, se usato normalmente in conformità... -
Page 58: Beperkte Garantie
BEPERKTE GARANTIE Dank u voor de aanschaf van de producten van Hangzhou EZVIZ Software Co.,Ltd. ("EZVIZ"). Deze beperkte garantie ("garantie") geeft u, de oorspronkelijke koper van het EZVIZ-product, specifieke wettelijke rechten. U kunt ook andere wettelijke rechten hebben die uiteenlopen per staat, provincie of rechtsgebied. Deze garantie is uitsluitend van toepassing voor de oorspronkelijke koper van het product. -
Page 59: Ograniczona Gwarancja
Produkt EZVIZ objęty jest gwarancją na okres dwóch (2) lat od daty zakupu na wypadek wad materiałowych i produkcyjnych, lub przez dłuższy okres, jeśli wymaga tego prawodawstwo kraju lub stanu, w którym produkt został... - Page 60 Κανένας διανομέας, μεταπωλητής, αντιπρόσωπος ή εργαζόμενος δεν είναι εξουσιοδοτημένος να προβεί σε οποιαδήποτε τροποποίηση, επέκταση ή προσθήκη στην παρούσα εγγύηση. Το προϊόν σας EZVIZ καλύπτεται με εγγύηση δύο (2) ετών από την ημερομηνία αγοράς του έναντι ελαττωμάτων σε υλικά και στην ποιότητα κατασκευής ή για μεγαλύτερη χρονική περίοδο, όπως...
-
Page 61: Omezená Záruka
Tuto záruku není žádný distributor, prodejce, agent ani zaměstnanec oprávněn jakkoli upravovat, rozšiřovat ani k ní přidávat dodatky. Na výrobek EZVIZ se poskytuje záruka o délce dvou (2) let od data zakoupení, která se vztahuje na vady materiálu a zpracování. Délka záručního období může být delší podle toho, jak je to vyžadováno zákonem dané...
Need help?
Do you have a question about the A1 and is the answer not in the manual?
Questions and answers