Dell S2815dn Installation And Configuration Manual
Cacstar smart card reader, document protection for cac/piv enabled multifunction devices
Hide thumbs
Also See for S2815dn:
- User manual (537 pages) ,
- Setup manual (44 pages) ,
- Setup manual (44 pages)

Related Manuals for Dell S2815dn


Summary of Contents for Dell S2815dn
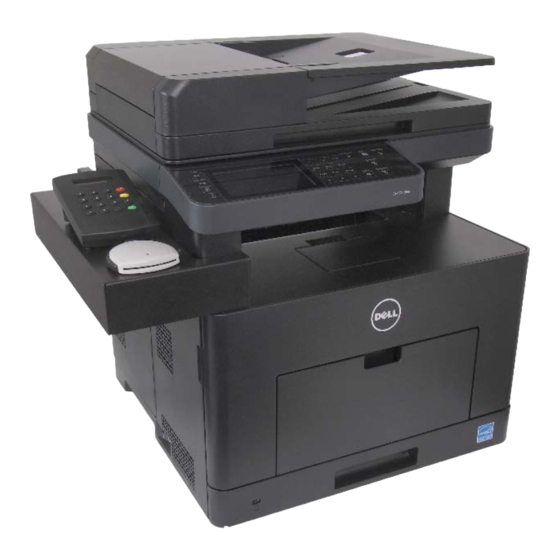
- Page 1 Dell™ S2815dn Star ™ Smart Card Reader Installation and Configuration Guide Document protection for CAC/PIV enabled Multifunction Devices CACStar User Guide Rev A27 Copyright 2017 Digital Imaging Technology Page 1...
- Page 2 CACStar User Guide Rev A27 Copyright 2017 Digital Imaging Technology Page 2...
-
Page 3: Table Of Contents
Table of Contents Introduction ..................5 Initial Setup ..................6 Accessing the MFD/Printer Web Site ..........9 Admin Login ..................9 Connectivity ..................10 LAN Side Configuration ..............10 Local Side Configuration ..............12 Security ....................13 MFD Function Enabling ...............13 Email Setup ..................15 Authentication Method ...............17 User Logging ................24 Upload Certificate ................24... - Page 4 CACStar User Guide Rev A27 Copyright 2017 Digital Imaging Technology Page 4...
-
Page 5: Introduction
Dell ProSupport Help Desk by calling 1-866-516-3115, or by sending email to Imaging_Solutions_Support_CAC@dell.com. This manual will guide you through installing the hardware, installing the software to convert the Dell S2815dn to be CACStar enabled, and configuration of the customer desired authentication control options. -
Page 6: Initial Setup
Initial Setup 1. The printer must be configured to use DHCP which is the default configuration. 2. Turn the power on. After initialization is complete, the Card Waiting For Card Reader display will say . This will take about 1 ½ minutes. Manual LAN IP Address Configuration: 3. - Page 7 k. If you wish to enter the gateway, press the F key again and enter it as you did the IP Address. Press the Exit key twice to return to Waiting for Card m. To confirm this operation was successful, you can ping the CACStar at its new IP address from your PC.
- Page 8 k. To confirm this operation was successful, you can ping the CACStar at its new IP address from your PC. Exit Backspace Function Enter Figure 1 – Keypad Function Buttons CACStar User Guide Rev A27 Copyright 2017 Digital Imaging Technology Page 8...
-
Page 9: Accessing The Mfd/Printer Web Site
Accessing the MFD/Printer Web Site If you wish to access the MFD/printer web site, go to the same URL but do not use port 8443. For example: http://192.168.1.23 https://192.168.1.23 Admin Login Login to CACStar as the Administrator by pointing your browser to the CACStar using a secure connection on port 8443 at the IP address you assigned in the steps above. -
Page 10: Connectivity
Connectivity LAN Side Configuration CACStar User Guide Rev A27 Copyright 2017 Digital Imaging Technology Page 10... - Page 11 Step 1 – MFD IP Address This is the IP address that is used for access to these administrator web pages. It is also used for host computer connection to the MFD/printer. This IP address was already set in the initial setup process using the card reader keypad.
-
Page 12: Local Side Configuration
Step 4 – Configure Default Domain This field is used for DNS Server Name resolution. Set this to the Default Domain name for the LAN. Step 5 – Press Update Local Side Configuration These settings define the IP addresses used for Local communication between the CACStar and the MFD/printer. -
Page 13: Security
Security MFD Function Enabling Check the boxes for Functions that require a validated CAC Card for use. If a box is un-checked the Function will always be allowed. For example: If you want the MFD Scan-to-Folder Function to only be available when a validated CAC Card is installed, check the CAC Enable Scan-To- Folder box. - Page 14 Hold Print If enabled, Print jobs will be held in the CACStar until the user is authenticated at the printer by inserting their CAC card. After authentication, the user’s jobs will be printed. CAC Print Server Set this to the IP address of the Secure Print server. Server Print Only If enabled, print jobs will only be allowed from the configured CAC Print Server.
-
Page 15: Email Setup
Email Setup If you have elected to control MFD generated email with your CAC cards, you will need to configure the item shown in the screen below. SMTP Address or Server Name Set the IP address or Server Name of the SMTP server. SMTP Port Number Set the TCP port number for SMTP communications. - Page 16 Force Email to Self Choose whether you want to force all emailed scans to the user’s own email address. If not checked, he can send to any email address. If this option is not selected, the user can select the recipient from the printer’s internal address book or he can use the printer to enter the email address he wants to use.
-
Page 17: Authentication Method
Kerberos Email Authentication Check this box if you want to use Kerberos for Email Login Authentication. If this box is checked, the "Kerberos" section of "Authentication Method" web page must be completed properly. Authentication Method CAC Validated Timeout This setting is the number of minutes of inactivity before a CAC Validated session will be terminated. - Page 18 Basic This includes PIN validation, card expiration check, and X.509 card certificate validation. If an NTP server is not configured on the LAN Side Configuration page, the expiration check is bypassed. The Basic level of authentication is always included and cannot be removed from the configuration.
- Page 19 LDAP Query Password: Password for the LDAP service account login. LDAP Search Base: Defines the location in the directory where a search will start. Example: OU=Users, DC=Itek, DC=com LDAP Search String: The Search String is used by the LDAP server to find users. In conjunction with User ID options below, this field helps create the query to the LDAP server to find users by name.
- Page 20 authentication to the SMB server if so configured. Multiple entries are allowed. KDC Server IP: IP address of the Kerberos server KDC Server Port: Port number of the Kerberos server. The default is 88. KDC Realm: Kerberos Realm KDC Realm Domains: This setting is used to map domains to the realm, and is usually only needed if multiple realms are defined.
- Page 21 Default SMB Server Address: The IP address or server name for the default SMB server. This address will be used if the SMB server address cannot be obtained from the printer. Default SMB Service Name: The Service Name for the default SMB server, e.g. myshare$.
- Page 22 SMB Folder LDAP Attribute: If a Folder Name is configured using %u, the LDAP Attribute defined here will be used to retrieve the path value for the %u field. Care should be taken when using "\" characters before or after the %u - based on whether the LDAP Attribute value includes "\"...
- Page 23 SMB Address Book SMB Address Book entries allow definition of multiple variable-based Server/Path destinations. Each destination name has the format "SMB-Book1" to "SMB- Book99" - this name should be used for the printer's "Server Address" configuration. The following sequences may be used to specify user-related data in the destination path: %F : First name, %M : Middle Name, %L : Last name, %E : Email Address, %e : EDI-PI, %I : PIC-Identification,...
-
Page 24: User Logging
User Logging User Logging provides a means to create, view or delete a user log file to track user activity. If this is enabled, it will log the date, user name, and other information. The log can be downloaded in a csv file format for viewing. - Page 25 Use this page to load Issuer and Root Certificate Authority Certificates into CACStar. PKCS7, X509, PEM and DER formats are supported. Use the Browse button to select the Certificate file on your PC; then click the Upload Certificate button. If your certificates are in a .txt file format, please send them to us, and we will convert them to a supported format.
-
Page 26: Administrator
Administrator Change Password Use this feature to change the password for the administrator. When the Change Password button is clicked, the next internal web page access will require this new password. Administrator Access CACStar User Guide Rev A27 Copyright 2017 Digital Imaging Technology Page 26... - Page 27 These settings allow the admin to provide additional security by limiting CACStar admin access to specified IP addresses. If the Allow all IPs box is checked, an admin can access the CACStar configuration items from a PC at any IP address if he knows the ID and password. If it is not checked, the admin must access the CACStar configuration pages from the IP addresses specified for Administrator #1 or #2.
-
Page 28: Firmware Update
Firmware Update Firmware is stored in flash memory and can be updated as necessary for addition of new features. The CACStar.cfg file may also be uploaded. It is a text file that contains the CACStar configuration items. For more details about how to update the firmware, please see the separate document “Firmware Update Procedure”. - Page 29 Create and Export Current Configuration Create Config File will create a configuration file containing all current settings except LAN IP Address, LAN Mask, and LAN Gateway. Thus, the Config file can be used to configure other CACStars. The passwords are encrypted so they may not be edited. The first line of the file must not be edited.
-
Page 30: Technical Support
Technical Support For help obtaining the correct firmware or documentation, contact Dell’s ProSupport Help Desk by calling 1-866-516-3115, or by sending email to Imaging_Solutions_Support_CAC@dell.com This page is used to obtain Log Files and Capture Files to help diagnose network and configuration concerns. Use of these features is normally in conjunction with technical support from your vendor. -
Page 31: Setup Test
Setup Test CACStar User Guide Rev A27 Copyright 2017 Digital Imaging Technology Page 31... -
Page 32: Date Time
Date Time This is used to set the system date and time in CACStar if necessary. The time zone should be set to your local time zone. CACStar User Guide Rev A27 Copyright 2017 Digital Imaging Technology Page 32... -
Page 33: Hold Print Files
Hold Print Files Hold Print Files Hold Print files will be stored encrypted in CACStar and can be printed with CAC authentication at the printer. Hold Print files expire after the set number of days. When the expiration date is reached, the file will be deleted without being printed. -
Page 34: Hold File Name Matching Format
Hold File Name Matching Format This field defines the format that will be used to associate the username in the Hold Print files with Card-Validated users. Any data can go into this field and keywords will be expanded. These keywords are: %F - the user's first name %f - the first character of the user's first name %M - the user's middle name... - Page 35 Export Hold Print Usernames If you want to copy the usernames from one CACStar to another, you can Export the usernames. You will get a ***.db file which you can then send to another CACStar to load them into the other CACStar. CACStar User Guide Rev A27 Copyright 2017 Digital Imaging Technology Page 35...
-
Page 36: Status
Status The Status pages offer three views of information about the current operations of CACStar. Number of successful card validations, number of unsuccessful card validations, network operations, date/time, and firmware version are all displayed. Card Reader CACStar User Guide Rev A27 Copyright 2017 Digital Imaging Technology Page 36... -
Page 37: Network
Network CACStar User Guide Rev A27 Copyright 2017 Digital Imaging Technology Page 37... -
Page 38: Other
Other CACStar User Guide Rev A27 Copyright 2017 Digital Imaging Technology Page 38... - Page 39 CACStar User Guide Rev A27 Copyright 2017 Digital Imaging Technology Page 39...
- Page 40 CACStar User Guide Rev A27 Copyright 2017 Digital Imaging Technology Page 40...
Need help?
Do you have a question about the S2815dn and is the answer not in the manual?
Questions and answers