Helmholz REX 100 WAN Quick Start Manual
Hide thumbs
Also See for REX 100 WAN:
- Quick start manual (24 pages) ,
- Quick start manual (24 pages) ,
- Quick start manual (25 pages)
Table of Contents
Advertisement
Advertisement
Table of Contents

Related Manuals for Helmholz REX 100 WAN


Summary of Contents for Helmholz REX 100 WAN
- Page 1 Quick Start Guide REX 100 WAN | WiFi Version FW 1.5.0 www.helmholz.com...
-
Page 2: Table Of Contents
7. Description of LEDs and buttons 7.1 LED description 7.2 Button description 8. Restoring the REX 100 router to its default settings 9. Load configuration/firmware update from USB stick 10. Technical specifications 10.1 UL Quick Start Guide REX 100 WAN | WiFi... -
Page 3: Introduction
IN2: When the alarm management in the device has been activated and configured, e-mails, for example, can be sent through an externally installed button or relay contact. Quick Start Guide REX 100 WAN | WiFi... -
Page 4: Creating A Rex 100 Configuration In The Myrex24 Portal
Note: Your login name is composed of a user name preceding the @ character and the name of your company. Example: admin@helmholz Other users can be created and administered after you log onto the myREX24 portal. Quick Start Guide REX 100 WAN | WiFi... -
Page 5: Creating A Router Configuration
REX 100 router's serial number. The purpose of the additional description fi eld is to make it possible to distinguish between several remote servicing units internally. Open the “Network” tab without clicking "Save". Quick Start Guide REX 100 WAN | WiFi... - Page 6 If you enable DHCP, make sure that the DHCP server does not assign the WAN port an IP address that is already in use on the LAN side. IP addresses from two different subnets must be assigned to every router's LAN and WAN ports. Quick Start Guide REX 100 WAN | WiFi...
-
Page 7: Router Configuration Transfer Options
The configuration is transferred via a local LAN connection of the computer on which shDIALUP is running (see chapter 4.3, page 14). You can use this option if the REX 100 router can be reached directly through the local network (LAN). Quick Start Guide REX 100 WAN | WiFi... -
Page 8: Transferring The Configuration Using A Usb Flash Drive
"Download to PC" option. Once the file has been stored on the local computer, carry out the steps as described in chapter 9 "Load configuration/firmware update from USB stick" on page 18. Quick Start Guide REX 100 WAN | WiFi... -
Page 9: Configuration Transfer Manager (Ctm)
In order to be able to reach the REX 100 router, the PC network adapter must also be set to the IP address space and subnet of the router. The device with serial number must be created in the myREX24 portal for successful commissioning. Quick Start Guide REX 100 WAN | WiFi... - Page 10 Enter the following standard login data for the login to the REX 100 required now: User name: helmholz Password: router The Internet connection path of the REX 100 is now defined uniquely at the "First Start" website. Quick Start Guide REX 100 WAN | WiFi...
- Page 11 The values for the statically set WAN port are established by the responsible network administrator. The settings for access through proxy servers are also are also stored in this input screen as needed. Quick Start Guide REX 100 WAN | WiFi...
- Page 12 As soon as all settings have been transferred and saved in the REX 100 router, the router will establish an Internet connection. Quick Start Guide REX 100 WAN | WiFi...
- Page 13 CTM, the icon will be shown on the “Device Administration” screen. Note: In order to establish a VPN connection with the REX 100, please read Chapter 5, page 15. Quick Start Guide REX 100 WAN | WiFi...
-
Page 14: Transferring The Configuration Using A Local Lan Connection
REX routers is carried out automatically in the following dialogue. The transfer can be started when the device with the corresponding serial number is found. The REX 100 uses the new confi guration following a restart. Quick Start Guide REX 100 WAN | WiFi... -
Page 15: Establishing A Vpn Connection To Your Rex 100
- In order to be able to establish a connection to the myREX24 server with shDIALUP, at least one of the TCP ports (80, 1194, or 443) required for the VPN tunnel must be open. - The required outbound TPC address is 5.39.123.5 Quick Start Guide REX 100 WAN | WiFi... -
Page 16: Remotely Servicing An Ethernet Plc
The SNAT function should be enabled under "General Firewall Settings" so that you will be able to reach devices in which a gateway IP has not been entered. This function is always enabled in myREX24 configurations. Quick Start Guide REX 100 WAN | WiFi... - Page 17 As soon as a VPN connection to the REX 100 unit has been established (see chapter 5, page 15), you can start working with the PLC from the project (e.g., transferring a hardware project, monitoring variables, etc.). Quick Start Guide REX 100 WAN | WiFi...
-
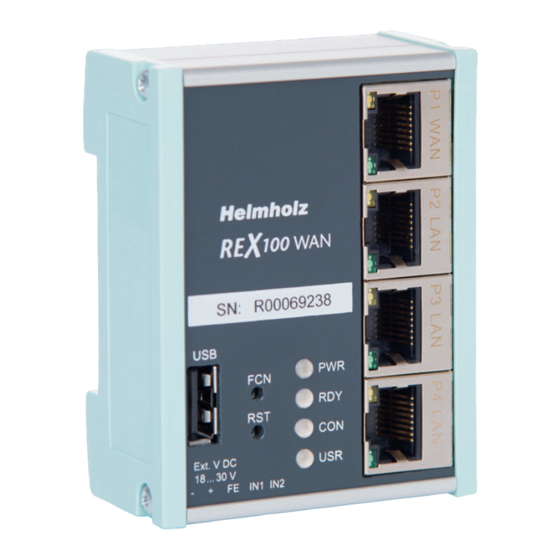
Page 18: Description Of Leds And Buttons
- The process is complete once the PWR and RDY LEDs light up again permanently Note: Once the configuration file has been successfully transferred, the file will auto- matically be renamed “Xmyrex24.mbn", making it impossible to accidentally reuse it a second time. Quick Start Guide REX 100 WAN | WiFi... -
Page 19: Technical Specifications
-40 – +85 °C -40 – +60 °C Humidity 0 to 95 %, non-condensing 0 to 95 %, non-condensing Location of use Dry location Dry location Protection rating IP20 IP20 Certifications CE, UL CE, UL Quick Start Guide REX 100 WAN | WiFi... - Page 20 This product was created with OpenSource software. The license terms of the open source software used can be found in the download area of the product on www.helmholz.de. You get a compilation of the used OpenSource software within the first three years after the purchase of the product for a cost contribution of 30 € plus shipping costs as a DVD if you send us an email.
Need help?
Do you have a question about the REX 100 WAN and is the answer not in the manual?
Questions and answers