
Related Manuals for HomeMatic HM-Sen-MDIR-O-2

Summary of Contents for HomeMatic HM-Sen-MDIR-O-2
- Page 1 Montage- und Bedienungs- anleitung Mounting instruction and operating manual p. 28 Funk-Bewegungsmelder, außen Wireless Motion Detector, outdoor HM-Sen-MDIR-O-2...
-
Page 2: Table Of Contents
Funktion ......5 1. Ausgabe Deutsch 10/2013 Allgemeine Systeminformation zu HomeMatic. 8 Dokumentation © 2013 eQ-3 AG, Deutschland Allgemeine Hinweise zum Funkbetrieb . -
Page 3: Hinweise Zu Dieser Anleitung
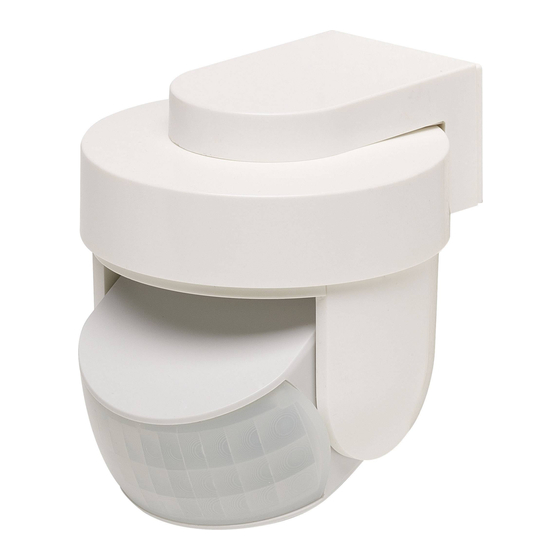
Hinweise zu dieser Anleitung Funktion Lesen Sie diese Anleitung sorgfältig, bevor Sie Ihre Der HomeMatic Funk-IR-Bewegungsmelder kann vor- HomeMatic-Komponenten in Betrieb nehmen. zugsweise für Außenbereiche eines Hauses eingesetzt Bewahren Sie die Anleitung zum späteren Nachschla- werden und trägt somit besonders zur Energieeinspa-... - Page 4 Aktors • Batteriebetrieb, Batterielebensdauer ca. 2 Jahre • Direktes Anlernen von Aktoren möglich Einige Funktionen sind nur mit einer HomeMatic- Zentrale verfügbar, siehe Anleitungstexte. (A) – PIR-Linse (B) + (C) – Montagebohrungen (D) – Anlerntaste (E) – Batteriefach, Batterien: 3 x LR6 / AA / Mignon...
-
Page 5: Allgemeine Systeminformation Zu Homematic
Allgemeine Systeminformation Elektromotoren oder defekte Elektrogeräte hervorge- rufen werden. zu HomeMatic Dieses Gerät ist Teil des HomeMatic-Haussteuersys- Die Reichweite in Gebäuden kann stark von tems und arbeitet mit dem bidirektionalen BidCoS der im Freifeld abweichen. Außer der ® Funkprotokoll. Sendeleistung und den Empfangseigenschaf- Alle Geräte werden mit einer Standardkonfiguration... -
Page 6: Verhalten Nach Dem Einlegen Der Batterien
Blinken signalisiert! In der Folge leuchtet die Geräte-LED weiter für 30 Sekunden orange und signalisiert damit die Wartezeit bis zur letztendlichen Betriebsbereit- schaft des HomeMatic Funk-IR-Bewegungs- melder außen. • Legen Sie die mitgelieferten drei Mignon Hinweis: Das Gerät benötigt nach dem Batterien Typ LR6 (AA) polrichtig entsprechend Einlegen der Batterien ca. -
Page 7: Batterien Wechseln
(zu steuerndes Gerät ist vom Netz einer Wandhalterung ausgestattet und für die Wand- getrennt, leere Batterien des Empfängers), können montage vorgesehen. Die Linse des HomeMatic Funk- Sie davon ausgehen, dass die Batterien verbraucht IR-Bewegungsmelders außen kann in der Wandhal- sind. - Page 8 Bewegungsmelder zu oder von ihm weg. • Wählen Sie einen passenden Montageort in 2,0 m bis 2,5 m Höhe. • Achten Sie bei der Montage darauf, dass der HomeMatic Funk-IR-Bewegungsmelder nicht direkt auf oder in der Nähe von großen Metallgegenständen (Heizung, alukaschierte Wände, etc.) montiert wird, da sich hierdurch die Funkreichweite reduziert.
- Page 9 Öffnung (1) und rasten frei von direkter Sonnen- und anderer es hinten ein (2): Wärmestrahlung sein. Gehen Sie wie folgt vor, um den HomeMatic Funk-IR- Bewegungsmelder zu montieren: • Positionieren Sie die Wandhalterung (F) mit der...
-
Page 10: Inbetriebnahme
Die Geräte dürfen bei Erreichung des 1 %-Limits so lange nicht mehr senden, bis diese zeitliche Begren- zung vorüber ist. HomeMatic-Geräte werden zu 100 % normenkonform entwickelt und produziert. Im normalen Betrieb wird der Duty Cycle in der Regel nicht erreicht. Dieses kann jedoch in Einzelfällen... -
Page 11: Anlernen
Melden Sie sich dazu bitte bei „Mein QIVICON“ (F) ab und öffnen Sie das Batteriefach (E). unter www.qivicon.com/login an. Wählen Sie • Drücken Sie die Anlerntaste (D) am HomeMatic dort „Gerät hinzufügen“ und folgen Sie den Funk-IR-Bewegungsmelder. Die Geräte-LED Anweisungen. -
Page 12: Sonstige Betriebshinweise
Nehmen Sie das Gerät von der Wandhalterung (F) ab und öffnen Sie das Batteriefach (E). • Bei Betrieb ohne Zentrale löst der Bewegungs- • Drücken Sie die Anlerntaste (D) am HomeMatic melder bei jedem Sensor-Impuls aus. Funk-IR-Bewegungsmelder ca. 4 Sekunden, bis • Bei Betrieb mit Zentrale kann dort das Ansprech- die Geräte-LED rot blinkt. -
Page 13: Wartung Und Reinigung
11 Wartung und Reinigung lerntaste (D). Die LED beginnt währenddessen schneller rot zu blinken. • Das Loslassen der Anlerntaste (D) schließt den Das Produkt ist für Sie bis auf einen eventuell erforder- Rücksetzvorgang ab und zur Bestätigung des lichen Batteriewechsel wartungsfrei. Überlassen Sie Zurücksetzens leuchtet die LED jeweils kurz rot, eine Wartung oder Reparatur einer Fachkraft. -
Page 14: Technische Daten
12 Technische Daten Entsorgungshinweis Gerät nicht im Hausmüll entsorgen! Elektro- Funkfrequenz: 868,3 MHz nische Geräte sind entsprechend der Richtlinie Betriebstemperatur: -10°C bis + 55°C über Elektro-und Elektronik-Altgeräte über die Protokoll: BidCoS örtlichen Sammelstellen für Elektronik-Altgeräte ® Erfassungswinkel: ca. 90° zu entsorgen. Erfassungsreichweite: ca. - Page 15 General system information about HomeMatic ......34 General information about radio operation. . . 34 1.
-
Page 16: Information About This Manual
(e.g. the outdoor lighting) automatically. When the person leaves the detection Note! This section contains additional important range, the HomeMatic wireless infrared motion detec- information! tor outdoor disconnects the load from the mains power supply again after a period of time preset by you. If there is any movement in the detection range during the on phase, the set time restarts from zero. - Page 17 Battery operation, battery life approx. 2 years • Actuators can be taught-in directly Some functions are only available in conjunction with the HomeMatic central control unit, refer to the manual for further information. (A) – PIR lens (B) + (C) – Mounting holes (D) – Teach-in button (E) –...
-
Page 18: General System Information About Homematic
General system information operations, electrical motors or defective electrical about HomeMatic4 devices. This device is a part of the HomeMatic home control The range of transmission within buildings system and works with the bidirectional BidCoS can greatly deviate from open air distances. -
Page 19: Response Once The Batteries Have Been In
• Turn the cover of the wireless infrared motion visible through the lens. detector outdoor anti-clockwise and lift if off. If an error occurs, this is indicated by the LED flashing red. The device LED will then light up orange for a further 30 seconds, which is the time you must wait for the motion detector to become ready for operation. -
Page 20: Installation
The HomeMatic wireless infrared motion detector out- door is equipped with a wall mount for wall mounting. The lens of the HomeMatic wireless infrared motion detector outdoor can be rotated through 360° and tilted through 45° in the wall mount. This means that the detection range can be set to virtually any angle to the wall and the floor and even adjusted after installation. -
Page 21: Installation
The HomeMatic wireless infrared motion detector outdoor is least sensitive to direct movement The mounting location should be protected towards or away from it. -
Page 22: Start-Up
To install the HomeMatic wireless infrared motion detector outdoor, proceed as follows: • Position the wall mount (F) with the plane surface upwards at a suitable point (see Section 7.1) on a wall or ceiling. • Mark through the screw holes where you will make the corresponding bore holes in the wall mount (F). -
Page 23: Teaching-In
HomeMatic actuator, the duty cyctle of If the check does not restore the device to readiness the HomeMatic acutator will be set to 5 min. Thus, e.g. for operation, it has exceeded the duty cycle and will an a interruption-free illumination during longer lasting be ready for operation again in an hour‘s time. - Page 24 (E). • Remove the device from the wall mount (F) and • Press the teach-in button (D) on the HomeMatic open the battery compartment (E). wireless infrared motion detector. The device • Press the teach-in button (D) on the HomeMatic LED flashes orange. The teach-in procedure can...
-
Page 25: Other Notes On Operation
Other notes on operation the reset has been successful. 9.1 Sensitivity Possible error messages: • If it is operated without the central control unit, (This error can only occur if you have a central control every sensor pulse causes the motion detector to unit to which you have taught-in the device.) If the LED trip. -
Page 26: Technical Data
12 Technical data Instructions for disposal Do not dispose off the device as part of Radio frequency: 868,3 MHz household garbage! Electronic devices are to Operating temperature: -10°C to + 55°C be disposed off in accordance with the Protocol: BidCoS guidelines concerning electrical and electronic ®... - Page 27 Bevollmächtigter des Herstellers: Manufacturer’s authorised representative: eQ-3 AG Maiburger Straße 29 26789 Leer / GERMANY www.eQ-3.de...
Need help?
Do you have a question about the HM-Sen-MDIR-O-2 and is the answer not in the manual?
Questions and answers