
Subscribe to Our Youtube Channel
Related Manuals for Insignia NS-CT1DC8


Summary of Contents for Insignia NS-CT1DC8
- Page 1 USER GUIDE Dash Camera NS-CT1DC8 Before using your new product, please read these instructions to prevent any damage.
-
Page 2: Table Of Contents
ONE-YEAR LIMITED WARRANTY ........14 Introduction Congratulations on your purchase of a high-quality Insignia product. Your NS-CT1DC8 represents the state of the art in dash camera design and is designed for reliable and trouble-free performance. www.insigniaproducts.com... -
Page 3: Important Safety Instructions
Dash Camera Important safety instructions • Always read the safety instructions and User Guide carefully. Keep the User Guide for future reference. • Do not drop or allow forceful impacts to the product, or install it in locations exposed to heavy vibrations. •... -
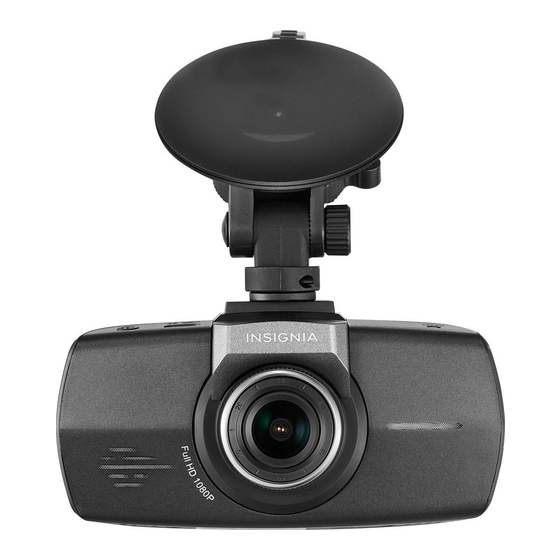
Page 4: Main Features
NS-CT1DC8 Main features Side Back Front Bottom ITEM DESCRIPTION Indicator LED Blue solid - Power on Red blinking - Video recording. Camera button In camera mode, press to take pictures. In video playback mode, press to delete the current file. -
Page 5: Installing Your Dash Camera
Dash Camera ITEM DESCRIPTION Turn on/off video While recording, press to stop recording. In stop mode, recording/OK button press to begin recording. In OSD mode, press to confirm selection. Turn on/off sound Press to turn the sound recording on or off. recording/ In OSD mode, press to go to the next page. -
Page 6: Using Your Dash Camera
NS-CT1DC8 Using your dash camera Charging your dash camera 1 To charge your dash camera, plug the USB cable (provided) into the mini USB jack on the top of the dash camera. 2 Plug the other end of the USB cable into a car charger (provided). -
Page 7: Recording Video With Your Dash Camera
Dash Camera SETTING OPTIONS Default settings Restores the dash camera to the factory settings. Version information Displays the current system version. Time setup Sets the system time setting. Headlights on Press to turn the headlight reminder on or off. reminder Motion detection When turned on, video recording is automatically initiated when a moving object is detected. -
Page 8: Using The Osd (On-Screen Display)
NS-CT1DC8 2 Download the files to your computer into a directory you can easily find. 3 Right click the device, then select Eject from the option list that appears. 4 Remove the memory card and replace it into your dash camera. - Page 9 Dash Camera ICON NAME DESCRIPTION Loop video time Indicates the length of time a video file will be saved. No SC card Indicates that no SD card is present in the dash camera. Microphone off This icon is displayed to indicate that the DASH CAM is not currently recording sound.
-
Page 10: Using The Menu Set Screen
NS-CT1DC8 Using the Menu Set screen # ICON NAME DESCRIPTION Setting Press to enter the Settings menu. Menu button Press to enter the OSD menus. In the System Settings menu, press to enter the Function Settings menu. In the Function Settings menu, press to switch to the video interface. -
Page 11: Using The Video Screen
Dash Camera Using the Video screen ICON NAME DESCRIPTION Speaker volume Press to cycle through the available speaker volumes. switch Back to previous Press to return to the previous page. page Delete files Press to delete the current file. Video play button Press to play video. -
Page 12: Troubleshooting
NS-CT1DC8 Troubleshooting Check the following guide for the possible causes and solutions for a problem before contacting the nearest service center or dealer for repairs. PROBLEM SOLUTION My dash camera won’t • Make sure that the power cord is properly connected. -
Page 13: Specifications
Dash Camera Specifications Display 2.7-inch TFT LCD (960 x 240 resolution) Video resolution 1080p 1920 x 1080 - 30 fps 720 1280 x 720 - 60 fps WVGA 848 x 480 - 30 fps VGA 640 x 480 - 30 fps Capture resolution 8 MP Photo format... -
Page 14: One-Year Limited Warranty
Product is determined to be defective by an authorized Insignia repair center or store personnel, Insignia will (at its sole option): (1) repair the Product with new or rebuilt parts; or (2) replace the Product at no charge with new or rebuilt comparable products or parts. - Page 15 Damage due to incorrect operation or maintenance • Connection to an incorrect voltage or power supply • Attempted repair by any person not authorized by Insignia to service the Product • Products sold "as is" or "with all faults" •...
- Page 16 1-877-467-4289 (U.S. and Canada) or 01-800-926-3000 (Mexico) INSIGNIA is a trademark of Best Buy and its affiliated companies. Distributed by Best Buy Purchasing, LLC V1 ENGLISH 7601 Penn Ave South, Richfield, MN 55423 U.S.A. 17-0513 ©2017 Best Buy. All rights reserved.
Need help?
Do you have a question about the NS-CT1DC8 and is the answer not in the manual?
Questions and answers