
Subscribe to Our Youtube Channel
Related Manuals for Aaronia spectran v4


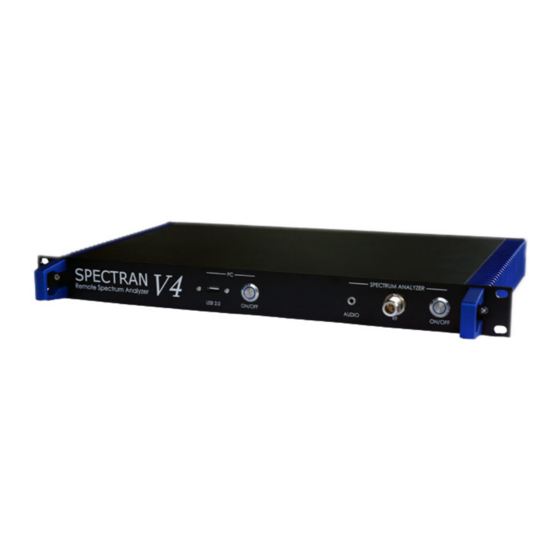
Summary of Contents for Aaronia spectran v4
- Page 1 Aaronia Remote Spectrum Analyzer (RSA) with EMF Monitor Software - Version 0.3.4-0 Users guide - v1.2.0 15.09.2015 Test Equipment Depot - 800.517.8431 - 99 Washington Street Melrose, MA 02176 TestEquipmentDepot.com...
-
Page 2: Table Of Contents
Table of Contents Quick Installation Guide ..........................4 1. Connecting the cables ........................5 2. Configure the RSA to client pc network connection ...............6 2.1 Configure your Windows 7 client PC for the RSA network connection ........7 2.2 Configure your MacOSX client PC for the RSA network connection ........11 2.3 Configure your Linux client PC for the RSA network connection ..........13 3. - Page 3 Server Commands (SERVER) ....................96 Information commands (SPECTRAN:INFO) ................98 Control commands (SPECTRAN:CTRL) ...................100 Calculation commands (SPECTRAN:CALC) ................106 Protocol types ..........................109 FAQ ..............................115 How to connect to the RSA when it is integrated into the network without monitor and keyboard? ..........................116 Operating System Updates .......................117 Administration page shows error instead of measurements .............118 We'd like use the RSA as desktop PC with MCS software, is it possible? .......120 Fix network problems ........................121...
-
Page 4: Quick Installation Guide
Quick Installation Guide This chapter guides you through the commissioning of the unit. Please read the instructions carefully. If you need further information about all configuration parameters in the RSA webinterface, please read the Users Guide. There you will also find find the protocol definitions and solutions for troubleshooting. Test Equipment Depot - 800.517.8431 - 99 Washington Street Melrose, MA 02176 TestEquipmentDepot.com... -
Page 5: Connecting The Cables
1. Connecting the cables ( figure 1.1) 1. Connect the power supply and the ethernet cable to the ports on the back side of the RSA unit. (see figure 1.1) (figure 1.2) 2. Plugin the ethernet cable to the ethernet port of your client computer / switch or router. This depends on your network infrastructure. -
Page 6: Configure The Rsa To Client Pc Network Connection
2. Configure the RSA to client pc network connection Your RSA unit has the default IP address 192.168.178.33 and the subnet mask 255.255.255.0. Now you have to configure your client pc to the same net/subnet to communicate with the RSA unit. The configurations of the network card are different on Windows , Linux and MacOSX . -
Page 7: 2.1 Configure Your Windows 7 Client Pc For The Rsa Network Connection
2.1 Configure your Windows 7 client PC for the RSA network connection (figure 2.1.1) 1. Open the Windows 7 control panel by pressing the button in the start menu like shown in the figure 2.1.1. (figure 2.1.2) 2. Move to the section Network and Internet (see figure 2.1.2). Test Equipment Depot - 800.517.8431 - 99 Washington Street Melrose, MA 02176 TestEquipmentDepot.com... - Page 8 (figure 2.1.2) 3. Click to enter the Network and Sharing Center (see figure 2.1.3). (figure 2.1.4) 4. In the Network and Sharing Center you can click the "LAN-Connection" to open the LAN connection status window (see figure 2.1.4).
- Page 9 (figure 2.1.5) 5. The status windows gives you the possibility to change the LAN properties of the LAN adapter. Please press the Properties button (see figure 2.1.5). (figure 2.1.6) 6. In the properties window (figure 2.1.6) activate the Internet Protocol Version 4 (TCP/IPv4) entry by clicking and press the properties button.
- Page 10 (figure 2.1.7) 7. Now you can change the IP address of the LAN adapter to a specific address. Activate the radio button Use the following IP address: and enter an address in the range 192.168.178.1 to 192.168.178.254 except the 192.168.178.33 because the RSA unit already uses this address (figure 2.1.7). 8.
-
Page 11: 2.2 Configure Your Macosx Client Pc For The Rsa Network Connection
2.2 Configure your MacOSX client PC for the RSA network connection (figure 2.2.1) 1. On MacOSX you find the System Settings Icon in the Dock. Press the icon to open the System settings window (see figure 2.2.1). (figure 2.2.2) 2. Click to the network item to open the network settings (see figure 2.2.2). - Page 12 (figure 2.2.3) 3. In the network window, choose the entry manually in the IPv4 dropdown box. Now you can change the IP address of the LAN adapter to a specific address. Activate the radio button Use the following IP address: and enter an address in the range 192.168.178.1 to 192.168.178.254 except the 192.168.178.33 because the RSA unit already uses this address (see figure 2.2.3).
-
Page 13: 2.3 Configure Your Linux Client Pc For The Rsa Network Connection
2.3 Configure your Linux client PC for the RSA network connection For Linux OS the network configuration and network tools depend on the Linux distribution. Most distributions has different network configuration components and different desktop environments. Please have a look into the man pages or documentation of the distribution your are running on your system. - Page 14 (figure 2.3.3) 3. Activate the Wired connection by mouse click and press the Edit button to open the configuration dialog for the wired connection (see figure 2.3.3). (figure 2.3.4) 4. Activate the panel IPv4 Settings (see 2.3.4). Test Equipment Depot - 800.517.8431 - 99 Washington Street Melrose, MA 02176 TestEquipmentDepot.com...
- Page 15 (figure 2.3.5) 5. Open the Method dropdown and select the Manual setting (see figure 2.3.5). (figure 2.3.6) 6. After selecting the Manual method, press the Add button to insert a configuration in the Addresses table. Enter the IP address ind the Address field, and the subnet mask in the Netmask field. Press the Save button to save the settings (figure 2.3.6).
-
Page 16: Remote Connection Via Mcs Software
After installation of the MCS software, you can find the MCS manual in the MCS installation directory or in the Start menu entry Aaronia AG -> MCS Spectrum Analyzer -> Documentation. 1. Launch the MCS software on your client PC. - Page 17 Ok button. Otherwise you have enter an username which is created on the RSA device (see figure 3.3). (figure 3.4) 6. Enter the user password (default aaronia ) in the next dialog and press Ok to establish the remote connection (see figure 3.4). (figure 3.5) 7.
- Page 18 If you get an error message you have to check your network connection parameters again. Test Equipment Depot - 800.517.8431 - 99 Washington Street Melrose, MA 02176 TestEquipmentDepot.com...
-
Page 19: Remote Connection Via Webbrowser (Emf Monitor Software)
4. Remote Connection via Webbrowser (EMF Monitor Software) It is not required to install our MCS software on the client PC. You have the possibility to see the current measurement data in the RSA Webinterface. Before you get access to to the webinterface, you have to configure the client PC network settings to the RSA settings. - Page 20 (figure 4.2) 2. Enter the username (default aaronia) and the password (default aaronia) in the username and password field. If you like to be logged in the next time you open the webinterface, set the checkbox Keep me logged in (uses cookies). Press the Login button to enter the RSA administration area of the webinterface (see figure...
- Page 21 (figure 4.3) 3. If the login was successfully, you can see the current measurement results, device settings and the spectrum view (see figure 4.3). If you need more functionalities for visualization, please use our MCS software. Test Equipment Depot - 800.517.8431 - 99 Washington Street Melrose, MA 02176 TestEquipmentDepot.com...
-
Page 22: Rsa - Defaults
RSA operating system: Linux root user password: aaronia RSA webinterface and MCS remote control users and passwords: Admin user: Webinterface & MCS default admin user: aaronia Webinterface & MCS default admin password: aaronia Readonly user: Webinterface & MCS default readonly user: aaronia1 Webinterface &... -
Page 23: Users Guide
Users Guide Aaronia Remote Spectrum Analyzer Series Our SPECTRAN RSA Series is available with three different Aaronia SPECTRAN spectrum analyzer (two high frequency analyzer and one low frequency analyzer). You can find all technical details in the specific datasheet on our website. -
Page 24: Requirements
Requirements • Remote Spectrum Analyzer Aaronia RSA series • Desktop computer or Laptop to install the client Spectrum Analyzer Software MCS • Local network with the IP range 192.168.178.xxx and subnet 255.255.255.0 or a crossover network cable to connect your computer to the RSA... -
Page 25: Hardware Overview
Hardware Overview The SPECTRAN RSA is usable in two different variations. First, you can use it as stand-alone compter. The RSA is installed with a Linux operating system with a graphical desktop environment. Our latest version of the MCS Spectrum Analyzer software is already installed on the system. You can connect a monitor, keyboard and mouse to the RSA and work with it like with a normal office computer. -
Page 27: Getting Started
Getting started First you have to configure your Aaronia RSA to your needs. Please start with the network configuration to make Network sure that the RSA is running and available in you local network. Follow the instructions in the chapter Configuration. -
Page 28: Stand-Alone Installation
Turn on the computer and the system will boot up. You'll see the desktop environment like shown on the image below. Linux desktop environment. Default user: aaronia Default password: aaronia Please change the password for security reasons. In the Linux desktop environment you can change the network settings if you are experienced in using Linux. -
Page 29: Assembly Instructions
Assembly Instructions First check if your delivery is complete. The delivery should include the 19" Aaronia SPECTRAN RSA, a power supply for the RSA computer part, a power supply for the spectrum analyzer device, a USB cable and the CD which contains the manuals and MCS software. - Page 30 Audio & Microphone DC Power supply SPECTRAN USB SPECTRAN Power supply Test Equipment Depot - 800.517.8431 - 99 Washington Street Melrose, MA 02176 TestEquipmentDepot.com...
-
Page 31: Rsa Webinterface
RSA Webinterface In this chapter you'll find a complete overview of the SPECTRAN RSA webinterface. The webinterface is used to configure the remote spectrum analyzer. It offers you also all necessary information about the state of your RSA. -
Page 32: Home (Index) Page
Home (Index) page Shows location This field shows the location, if the location is configured in the administration area. Recorder state Shows if the internal recorder is activated and if available, the current recording profile and mode (recording or batch recording). Measurement results... - Page 33 Shows the maxhold value and the frequency. Spectrum Analyzer settings With these controls, you can easily change the spectrum analyzer parameter. Enter all values you'd like to change, and press the Send Settings button. The page will reload after writing the settings. Sweep preview This window shows the "current, maximum, average and minimum"...
-
Page 34: System Overview
System Overview This chapter describes all system overview pages. -
Page 35: Spectran Server Overview
Spectran Server Overview Networkserver Settings Timestamp Device information... - Page 36 State of the RSA Current Device Setup Test Equipment Depot - 800.517.8431 - 99 Washington Street Melrose, MA 02176 TestEquipmentDepot.com...
-
Page 37: Clients Overview
Clients Overview Column Client IP IP address of connected client Column Port Client port number Column Client ID Unique identifier of client Column User User name with which the client is logged in. Column Privilege level Shows the privilege level of the user Column Comment Column to show the comments to the different users. - Page 38 List of clients Shows a list of currently connected clients. One row per client.
-
Page 39: Contact Information
Contact Information On this page you can enter and save company information. These settings are optional. Company Add your company name here Department Add the department Save Information button Email Add a contact email address. System Messages will be send to this address. If you use Trigger you have to configure the address. - Page 40 Phone Add a contact phone number Contact Add a contact person...
-
Page 41: Server Logfile
Server Logfile Shows information of the default logfile... - Page 42 Shows information of the error logfile Test Equipment Depot - 800.517.8431 - 99 Washington Street Melrose, MA 02176 TestEquipmentDepot.com...
-
Page 43: User Management
User Management On the user management page you can create, edit or delete users. Each user can login into the webinterface and can connect as a client to the Spectran network server. An administrator has full access to all webinterface and network server features. A "readonly" user isn't allowed to change the RSA configuration or to set parameter on the network servers SPECTRAN device. -
Page 44: Add New User
Add new user Dialog to add user Enter a username, password, comment and choose the permissions for the new user. Press the save button to create the user or cancel to close the dialog. -
Page 45: Edit User
Edit User To change user settings you have to enter the user password. Change the name, password, comment or the permissions and click the "Save" button to store the changes or "Cancel" to close the dialog. Edit user dialog Test Equipment Depot - 800.517.8431 - 99 Washington Street Melrose, MA 02176 TestEquipmentDepot.com... -
Page 46: System Configuration
System Configuration This chapter describes all system configuration pages. -
Page 47: Network Configuration
Network configuration To adjust the network settings of your device, we offer you two different options which are described in detail in the corresponding chapters. Please notice, your RSA comes with a default static IPv4 configuration (192.168.178.33, netmask 255.255.255.0). You have to change these settings first to integrade the RSA into your network. -
Page 48: Configure On Local Machine In The Desktop Environment
Configure on local machine in the desktop environment In this chapter you find all necessary information about the first configuration of your SPECTRAN RSA on it's installed desktop environment. Boot the system ............................49 Open Webbrowser ...........................51 Login page ...............................53 Administration area ..........................54 IPv4 Configuration ...........................56 IPv6 Configuration ...........................59... -
Page 49: Boot The System
Boot the system The first possibillity to configure your SPECTRAN RSA is to connect a monitor, keyboard and mouse directly to the pc. Turn on the computer and the system will boot up. You'll see the desktop environment like shown on the image below. - Page 50 Main menu Main program menu...
-
Page 51: Open Webbrowser
Open Webbrowser Enter localhost into the address bar and the main page of the RSA will be loaded. Navigate into the administration area by clicking the link Admin. Webbrowser... - Page 52 Addressbar of the browser Link to enter administration area Test Equipment Depot - 800.517.8431 - 99 Washington Street Melrose, MA 02176 TestEquipmentDepot.com...
-
Page 53: Login Page
Login page Please enter username and password and click the login button. Defaults: Username: aaronia Password: aaronia The default user has administration permissions. You can change, add or delete user in the administration area in the section User Management. -
Page 54: Administration Area
Administration area After login you will enter the Administration area where you are able to configure the hole system. The network configuration is located in the subsection System Configuration. Please click on the image to enter the section. Administration area... - Page 55 System configuration Test Equipment Depot - 800.517.8431 - 99 Washington Street Melrose, MA 02176 TestEquipmentDepot.com...
-
Page 56: Ipv4 Configuration
IPv4 Configuration If you enter the System Configuration section, the IPv4 Configuration is shown by default. Change the parameters to your needs and save it by clicking the Save Information button. If the IP address was changed, you will be redirected to the new address after a couple of seconds. - Page 57 Enable Configuration With the checkbox you are able to turn on / off the configuration. It is used to configure the network with IPv4 or IPv6 settings or to configure both at the same time. DHCP Option to enable / disable DHCP. The static IP configuration will be ignored if DHCP is enabled. IP Address Field to enter the IP Address.
- Page 58 Field to enter the gateway address. Primary DNS Field to enter the address of the primary DNS server Secondary DNS Field to enter the address of the secondary DNS server Save configuration Test Equipment Depot - 800.517.8431 - 99 Washington Street Melrose, MA 02176 TestEquipmentDepot.com...
-
Page 59: Ipv6 Configuration
IPv6 Configuration If required, it is also possible to configure the RSA with IPv6 settings. Change the parameters to your needs and press the save button. If the IP address was changed, you will be redirected to the new address after a couple of seconds. If you won't be redirected to the new IP after a minute, please enter the new IP address into browsers address bar to open the webinterface again. - Page 60 Enable Configuration With the checkbox you are able to turn on / off the configuration. It is used to configure the network with IPv4 or IPv6 settings or to configure both at the same time. DHPC Option to enable / disable DHCP. The static IP configuration will be ignored if DHCP is enabled. IP Address Field to enter the IPv6 address Subnet Mask...
-
Page 61: Configure With Remote Computer Over A Network Connection
Configure with remote computer over a network connection The second possibility to configure your SPECTRAN RSA is to connect a remote computer direcly to the RSA. For a network connection between to computers without a router or a switch, you need a Crossover Network cable. -
Page 62: Date And Timezone Configuration
Date and Timezone Configuration In administration area you can configure the date and timezone information. If you select the automatic option, you have to enter the address of the NTP server and to choose the timezone. To configure it manually, disable the checkbox automatic and enter / select data, time and timezone. - Page 63 Save Information...
-
Page 64: System Updates
System Updates Update dialog In this dialog you will see if a new version of software is available. Press download & Install Update to get the new version. A backup of the current installed version will be generated automatically. Restore Backup button If you have problems with the new version, you can restore the previous version from backup. -
Page 65: Spectran Server Configuration
Spectran Server Configuration This page contains the main configuration for the RSA. It isn't recommend to change pathes or file names, because it could cause trouble. Changing the IP address is disable on this page, because the IP will set in the network configuration. Also the analyzer type is logged. - Page 67 Test Equipment Depot - 800.517.8431 - 99 Washington Street Melrose, MA 02176 TestEquipmentDepot.com...
- Page 69 Save Information button...
- Page 70 Test Equipment Depot - 800.517.8431 - 99 Washington Street Melrose, MA 02176 TestEquipmentDepot.com...
-
Page 71: Email Notification
Email Notification On this page you can configure an email account to send notification emails. Section is currently under development. Therefor some fields like receiver are missing and will come in further versions. Main application will be Trigger. Mailhub Enter maihub for the email account Sender Sender email address Hostname... - Page 72 AuthUser Username for email account AuthPass Password for email account Connection Security Select the security type for the connection Save Information button Optional Commands Field for adding special commands which are not listed in the input fields. Syntax is parameter=value and , (comma) as seperator.
-
Page 73: Sweep Profile Editor
Sweep Profile Editor Profile selection Select an existing profile for editing or deleting. Profile name Enter a profile name. Profile will be saved with this name. If the profile already exists, it will be overwritten without warning. Startfrequency Enter the frequency with the frequency dialog. Make sure to select the right frequency unit for your device type (HF=MHz / NF=kHz). - Page 74 Stopfrequency Enter the frequency with the frequency dialog. Make sure to select the right frequency unit for your device type (HF=MHz / NF=kHz). RBW selection Choose the RBW from the dropdown box. VBW selection Choose the VBW from the dropdown box. Sweeptime Enter the Sweeptime in milliseconds.
- Page 75 Delete a selected profile from RSA. This can't be undone!
-
Page 76: Frequency Dialog
Frequency Dialog Frequency dialog Enter the frequency and press the "ok" button to set the frequency. Make sure to select the right frequency unit for your device type (HF=MHz / NF=kHz). The selected unit is red highlighted. Test Equipment Depot - 800.517.8431 - 99 Washington Street Melrose, MA 02176 TestEquipmentDepot.com... -
Page 77: Batch Recording Manager
Batch Recording Manager Recoder state Indicator of current recording state of the internal recorder. Stored processing lists In this section you can manage your stroed processing lists / tasks. Choose a list from the dropdown box and press the "Load" button to load it into the page. Load button Press the Load button to load a stored task into the page. - Page 78 Choose a profile from the dropdown and enter a number into the edit field. Now select the duration and press the "Add" icon. The "Idle" - profile is used to add a pause between profiles. Processing list / Task list The list shows all configured processing steps of the task with positon, name and duration.
- Page 79 Start Press the button to start processing the list. Stop Press button to stop processing. Test Equipment Depot - 800.517.8431 - 99 Washington Street Melrose, MA 02176 TestEquipmentDepot.com...
-
Page 80: Trigger Editor
Trigger Editor Development not finished complete at the moment. Triggers will work in tfuture versions. Please use the trigger functions of our MCS software. Column activated If checked, trigger is enabled. Column name Shows the names of the triggers. - Page 81 Column type Shows the type of the trigger. Columns start-/ stopfrequency For Min / Max trigers you set it as start- / stopfrequency, for type point you set it as center- / spanfrequency. Column value Set the level where the trigger should do something. On type point, you have to add a min - max level. Column unit...
- Page 82 Defines the unit of the value. Column action Action which will be executed by the trigger. Test Equipment Depot - 800.517.8431 - 99 Washington Street Melrose, MA 02176 TestEquipmentDepot.com...
-
Page 83: Manage Local Recordings
Manage Local Recordings Tree Expand / collapse folder tree. Delete Press to delete selected files and folders. Compress Compress selected files and folders to Zip package for download. The file is named "download.zip". Refresh Refresh page File list... - Page 84 The file list shows all recorded files in the selected folder. Folder list...
- Page 85 Shows a folder treeview. Disc info Multiselection Test Equipment Depot - 800.517.8431 - 99 Washington Street Melrose, MA 02176 TestEquipmentDepot.com...
- Page 86 You can multiselect items (files or folders) by pressing and holding the "CTRL" key and clicking with the left mouse button on a link free place in a row. Click properties on folders. Click on the folder icon will open a dialog. In the dialog you have different options. If you click on the folder name, the files of the folder will shown in the file list and sub folders where shown in the folder list.
-
Page 87: System Control
System Control Start Start Spectran network server Stop Stop Spectran network server Reboot System Reboots the operating system of the RSA Shutdown System Turns of the computer Console window... - Page 88 Console window shows the answers if you send a command request to the server. Send Sends the command from the command line field to the network server Command line field Enter commands like described in the commands documentation Server commands Shows available server commands.
-
Page 89: Demodulation Control
Example with default configuration: URL: http://192.168.178.33:8000/ Default user: admin Default password: aaronia-demod To connect to the audio stream, you have to enable the demodulation mode first, then open a client software ( VLC, or other) and use the URL: http://192.168.178.33:8000/rsa.ogg... - Page 90 Switch between the different demodulation modes. The mode will be activated automatically after selecting. The setting "Signal Detector" only works, if the option is installed in your device! Dial speed Options to adjust the scrolling speed for the frequency wheel. Frequency adjustment wheel Use the frequency wheel to adjust the frequency to your needs Frequency input field...
-
Page 91: Vlc Media Player Example
VLC media player Example How to connect to the demodulation audio stream: 1. Open VLC media player 2. Select Menu "Media -> Open Network Stream... (CTRL+N)" 3. Enter the URL in the input field and press the "Play" button Thats all! Play button Enter network URL <TODO>: Insert description text here... -
Page 92: Help & Information
Help & Information This page contains useful information and links. At the moment you'll find only placeholder. -
Page 93: Rsa Spectran Server Tcp/Ip Command Api
RSA SPECTRAN server TCP/IP Command API In this Chapter we'll give you an overview about the command interface of the SPECTRAN server. The command definition is divided into four main categories: • Server Commands (SERVER) • Spectran information commands (SPECTRAN:INFO) •... -
Page 94: Specific Commands Defined In Gpib Standard
Specific commands defined in GPIB standard This is a set of commands definded in the GPIB standard. Some of these commands are also supported by the SPECTRAN server. Overview: *IDN[ ?] (Identification string) Description: Sends idetntification string of the SPECTRAN server Answer: AINFO Package with message Format: AINFO:Description:<device_name>,<serial>... - Page 95 *SRE[ ?] Description: Service request enable (No operation on server) Answer: AINFO Package with message *STB[ ?] Description: Read status byte (No operation on server) Answer: AINFO Package with message Test Equipment Depot - 800.517.8431 - 99 Washington Street Melrose, MA 02176 TestEquipmentDepot.com...
-
Page 96: Server Commands (Server)
Server Commands (SERVER) The server commands are used to get information about the server, or to control the SPECTRAN / RSA server. Overview: SERVER:SHUTDOWN[ ?] (or SERV:SDN) Description: Trigger shutdown of the whole system. Answer: AINFO Package with message SERVER:RESTART[ ?] (or SERV:RST) Description: Trigger restart the whole system Answer: AINFO Package with message SERVER:CONFIG[ ?] (or SERV:CFG) - Page 97 SERVER:DISCONNECT_DEVICE[ ?] (or SERV:DCON_DEV) Description: Trigger disconnect of a connected SPECTRAN device. Answer: AINFO Package with message SERVER:SHUTDOWN:SPECTRAN_SRV[ ?] (or SERV:SDN:SPEC_SRV) Description: Shutdown the SPECTRAN server . Not the whole system. Answer: AINFO Package with message...
-
Page 98: Information Commands (Spectran:info)
Information commands (SPECTRAN:INFO) These commands are used to read the general SPECTRAN device information. Overview: SPECTRAN:INFO:DESCRIPTION (or SPEC:INFO:DESC) Description: Sends the SPECTRAN device description string. Answer: AINFO Package with message SPECTRAN:INFO:SERIAL (or SPEC:INFO:SER) Description: Sends the SPECTRAN device serial number. Answer: AINFO Package with message SPECTRAN:INFO:OPTIONS (or SPEC:INFO:OPT) Description: Sends the installed options of the SPECTRAN device as comma seperated list. - Page 99 SPECTRAN:INFO:RESETMAXHOLD (or SPEC:INFO:RSTMAXH) Description: Trigger, resets the max hold value. Answer: AINFO Package with message SPECTRAN:INFO:PROFILE (or SPEC:INFO:PROFILE) Description: Sends the current measurement profile if a profile is set. Answer: AINFO Package with message...
-
Page 100: Control Commands (Spectran:ctrl)
Control commands (SPECTRAN:CTRL) The SPECTRAN control commands are used to read or to write parameter of the device, like Startfrequency, Stopfrequency RBW, etc. They are different for the SPECTRAN HF and SPECTRAN NF devices. Therfore the overview is divided into the common part for all devices, and a HF / NF part with the additional device parameter. - Page 101 Answer: ACMD Package with message SPECTRAN:CTRL:RBW [ ? | value] (or SPEC:CTRL:RBW ) Description: Read or write Resolution Bandwidth Command parameter: read Resolution Bandwidth value write Resolution Bandwidth (value must be the index from the RBW / VBW table below) Answer: ACMD Package with message SPECTRAN:CTRL:VBW [ ? | value]...
- Page 102 SPECTRAN:CTRL:RBW_FREQUENCY_STEPS [ ? | value] (or SPEC:CTRL:RBW_FRQ_STEPS) Description: Readonly RBW frequency steps Command parameter: read value do nothing, because is a readonly variable Answer: ACMD Package with message SPECTRAN:CTRL:DEMODULATOR_MODE [ ? | value] (or SPEC:CTRL:DEMOD_MODE) Description: Demodulator Mode Command parameter: read Demodulator Mode value write Demodulator Mode (index: 0=OFF;...
- Page 103 read state disable preamplifier enable preamplifier Answer: ACMD Package with message SPECTRAN:CTRL:ENABLE_CACHE(or SPEC:CTRL:CACHE) Description: enable / disable internal cache Command parameter: read state disable cache enable cache Answer: ACMD Package with message SPEC:CTRL:RECEIVER Description: Read / write receiver configuration Command parameter: read state Spectrum Broadband...
- Page 104 SPECTRAN:CTRL:UNIT_SCALE (or SPEC:CTRL:USCALE) Description: Unit scaling Command parameter: read unsupported value write unsupported Answer: ACMD Package with message RBW and VBW table for HF devices: Full 3 MHz 1 MHz 300 kHz 100 kHz 30 kHz 10 kHz 3 kHz 1 kHz 120 kHz 9 kHz...
-
Page 106: Calculation Commands (Spectran:calc)
Calculation commands (SPECTRAN:CALC) The calculation commands don't work with the device direclty. They work on on a processing layer over the device layer. Therefore we use it in an extra command set to control functions on the processor layer to avoid conflicts between variable ids, and to have a abstraction layer for further calculation functions. - Page 107 Description: Sends the maximum sweep to requesting client Command parameter: read state Answer: AINFO Package with message, see format of sweep data below Traces will always be send with enabled peak suppession. It IS NOT possible to turn of the suppression on the traces! If you need the raw data, please use the measurement data stream of the ASWEEP packages! SPECTRAN:CALC:TRACE_MINIMUM [ ?] (or SPEC:CALC:TRACE_MIN)
- Page 108 SPECTRAN:CALC:TRACE_RESET_AVERAGE (or SPEC:CALC:TRACE_RST_AVG) Description: Reset average trace sweep data Answer: AINFO Package with message, see format of sweep data below SPECTRAN:CALC:TRIGGER_REFRESH (or SPEC:CALC:TRG_REF) (under development for future use) Description: Reloads trigger if configured via web interface Answer: AINFO Package with message, see format of sweep data below The TRACE sweep data arrive as AINFO package.
-
Page 109: Protocol Types
Protocol types The protocols are defined as plain text protocols. Maybe we will change it into binary protocols in future. Protocol seperator definitions AP_CMD_SEP seperates different commands in the protocol AP_FIELD_SEP seperates different fields in the protocol AP_ARG_SEP seperates arguments in the protocol AP_PKG_SEP = \n seperates the different packages... - Page 110 The RSA sends to answers to a SPECTRAN:CTRL command, first answer has type SpectranControlVariable and delivers the variable id as decimal value, the second answer has the type SpectranControlVariableText and delivers the variable as readable text. If you only need one answer,you have to create a filter and check the command type.
- Page 111 DEVICE_SETUP class DeviceClass features AP_ARG_SEP info AP_CMD_SEP info_list AP_ARG_SEP profile AP_CMD_SEP profile_id AP_AR info i1#i2#i3#... profile . List of manufacturer information of the SPECTRAN device, seperated by AP_FIELD_SEP . Predefined list of improtant SPECTRAN variables for initializing a client software. Format pairs of (variable_id:value) seperated by AP_FIELD_SEP.
- Page 112 0x06 ATTENFAC HF / HF-V4 / NF Attenuation factor -10=AUTO 0=OFF and Range 1 to 30 dBm. The Value is positive and is 'subtracted'. 0x07 REFLEVEL HF / HF-V4 / NF Reference level from -20 to 70dB 0x08 DISPRANGE HF / HF-V4 / NF Display range from 10 to 100dB 0x09 DISPUNIT HF / HF-V4 / NF Display unit...
- Page 113 0x1F SPANFREQ HF / HF-V4 / NF Modifies STOPFREQ as STARTFREQ + SPANFREQ. 0x10 PREAMPEN HF-V4 Internal Pre-amplifier 0=OFF 1=ON 0x11 SWPDLYACC HF-V4 Sweep delay for accuracy mode. 1 enables and 0 disables the delay. 0x12 SWPFRQPTS HF-V4 Sweep frequency points request 0x13 REFOFFS HF-V4...
- Page 114 0x60 RBWFSTEP HF / HF-V4 / NF RBW frequency in MHz, read only. The RBW can be set up by the RESBANDW var. 0x61 ANTGAIN HF / HF-V4 / NF Nominal antenna gain in dB. 0x80 PEAK1POW HF / HF-V4 / NF Peak 1 power (Read only). 0x81 PEAK2POW HF / HF-V4 / NF Peak 2 power (Read only).
-
Page 115: Faq
In this chapter you can find the answers to the frequently asked questions. If your are missing an answer feel free to contact us. 99 Washington Street Melrose, MA 02176 Phone 781-665-1400 Toll Free 1-800-517-8431 Visit us at www.TestEquipmentDepot.com... -
Page 116: How To Connect To The Rsa When It Is Integrated Into The Network Without Monitor And Keyboard
On a Linux OS you can use "ssh" in a terminal. If "ssh" isn't already installed, please install it before. Command to connect to the RSA: ssh <user>@<RSA_IP_ADDRESS> Example: (RSA is on IP 192.168.178.33, default user: aaronia, default password: aaronia) ssh aaronia@192.168.178.33 Open a terminal window and enter the command above to establish the connection. -
Page 117: Operating System Updates
CAUTION: If your are not familar with Linux operating system, please do not change any configuration file. Changes in configuration files as root user can destroy the whole operating system. Please ask your Linux system administrator if available or contact the Aaronia support. -
Page 118: Administration Page Shows Error Instead Of Measurements
Check if the analyzer is available in the system to make sure that it isn't an analyzer hardware problem. The terminal command sudo lsusb -v | grep Aaronia (root password required) should return you the analyzer device if it is connected correcly. If the command returns no result, the analyzer is not connected. Try another USB cable and check again with the command. - Page 119 No measurement data Page shows no measurement data or visualization of the current sweep. Typical error message if the Spectran server isn't running...
-
Page 120: We'd Like Use The Rsa As Desktop Pc With Mcs Software, Is It Possible
We'd like use the RSA as desktop PC with MCS software, is it possible? No, the RSA is developed as a remote spectrum analyzer. We don't recommend to install the MCS software on the device, because it can cause trouble with the common shared libraries. We don't build releases for all software solutions if one product has changed. -
Page 121: Fix Network Problems
<press enter key> sudo ifup eth2 <press enter key> You'll be asked for the root password (default password is aaronia). 7. Now you should have a working internet connection. Test it with the webbrowser. 8. Open the webinterface of the RSA by entering localhost into the address bar of the webbrowser. Login in and navigate to the page System Configuration ->... -
Page 122: How To Update To The Latest Version
How to Update to the latest version If you have an Aaronia RSA Version 1 with the old web interface we recommend to send the device for updating because it is not compatible with the new software of the RSAv2. - Page 123 Save changes and close the file. Update from version 0.3.1-0 to a newer version If you have a working internet connection, please navigate to "System Configuration -> System Updates" page in the RSA web interface. Press the "Download & Install Update" button. The system will update automatically. Without a working internet connection, you have to install the package manually.
Need help?
Do you have a question about the spectran v4 and is the answer not in the manual?
Questions and answers