Table of Contents
Advertisement
Quick Links
Advertisement
Table of Contents

Related Manuals for 2B Technologies POM


Summary of Contents for 2B Technologies POM
- Page 1 Personal Ozone Monitor™ Technologies, Inc. OPERATION MANUAL Model POM™ © Copyright 2016, 2B Technologies, Inc. All rights reserved. Technical Support: www.twobtech.com/techsupport techsupport@twobtech.com +1(303)273-0559 Personal Ozone Monitor Manual Rev. E-2...
-
Page 2: Table Of Contents
Contents IDENTIFICATION RECORDS PRINTING HISTORY WARRANTY STATEMENT WARNINGS viii PERSONAL OZONE MONITOR INTRODUCTION 1.1. Theory of Operation ......................... 1 1.2. Adaptive Filter .......................... 4 SPECIFICATIONS 2.1. Overview ..........................5 2.2. Table of Specifications: Personal Ozone Monitor (PAM) ............6 OPERATION 3.1. - Page 3 12.4. Calibration Curve ........................29 12.5. Periodic Zero and Span Checks .................... 29 13. MAINTENANCE/TROUBLESHOOTING 14. LABELED INSTRUMENT PHOTOS 15. PARTS LIST 16. SERVICE LOG Appendix A: Using the 2B Technologies Display and Graphing Software Personal Ozone Monitor Manual Rev. E-2...
-
Page 4: Identification Records
IDENTIFICATION RECORDS Record the following information for future reference: Serial number: ______________________________________ Warranty start date: _______________________________________ (date of receipt) Personal Ozone Monitor Manual Rev. E-2... -
Page 5: Printing History
PRINTING HISTORY This manual covers the Personal Ozone Monitor (POM) used for measurement of ozone concentrations in air. New editions of this manual are complete revisions that reflect updates to the instrument itself, as well as clarifications, additions, and other modifications of the text. -
Page 6: Warranty Statement
Initial support involves trouble-shooting and determination of parts to be shipped from 2B Technologies to the customer in order to return the product to operation within stated specifications. If such support is not efficient and effective, the product may be returned to 2B Technologies for repair or replacement. - Page 7 Shipping 2B Technologies will pay freight charges for replacement or repaired products shipped to the customer site. Customers shall pay freight charges for all products returning to 2B Technologies. Conditions The foregoing warranty shall not apply to defects resulting from improper or inadequate maintenance, adjustment, calibration or operation by customer.
-
Page 8: Warnings
WARNING: Si este instrumento se usa de una forma no especificada por 2B If this instrument is used in a manner not specified by 2B Technologies, Technologies, Inc., USA, puede desactivarse la protección suministrada Inc. USA, the protection provided by the instrument may be impaired. -
Page 9: Personal Ozone Monitor Introduction
1. PERSONAL OZONE MONITOR INTRODUCTION The 2B Technologies Personal Ozone Monitor (POM ) is designed to enable accurate measurements of ozone in air over a wide dynamic range extending from a limit of detection of 3 parts-per-billion by volume (ppb) to an upper limit of 10 parts- per-million (ppm) based on the well-established technique of absorption of ultraviolet light at 254 nm. -
Page 10: Personal Ozone Monitor Manual Rev. E
308 atm ), which is known with an accuracy of approximately 1%. The 2B Technologies instrument uses the same absorption cross section (extinction coefficient) as used in other commercial instruments. In order to convert this concentration to a mixing ratio (fraction of total air molecules that are ozone, we also measure the cell temperature and pressure, which determines the total concentration of air molecules. - Page 11 These results are used to calibrate the POM with respect to an offset and slope (gain or sensitivity). corrections for offset and slope are recorded in the instrument Birth Certificate. These calibration parameters are entered into the microprocessor prior to shipment.
-
Page 12: Adaptive Filter
1.2. Adaptive Filter The POM firmware processes sample concentration data through a built-in adaptive filter. During operation, the firmware may automatically switch between two different filter lengths based on the conditions at hand. During the measurement of stable concentrations, the firmware, by default, computes an average of the last 50 raw (2- second) measurements, or approximately 1.5 minutes. -
Page 13: Specifications
“U,” it was possible to achieve the same path length in the POM as in the Models 202, 205, and 106-L and thus have similar precision and accuracy (~1.5 ppb or better). The POM’s many possible applications include: •... -
Page 14: Table Of Specifications: Personal Ozone Monitor (Pam)
2.2. Table of Specifications: Personal Ozone Monitor (PAM) Measurement Principle UV Absorption at 254 nm Federal Equivalent Method (FEM) Yes, EQOA-0815-227 Linear Dynamic Range 0 ppb to 10 ppm Resolution 0.1 ppb Greater of 1.5 ppb or 2% of reading Precision (1σ;... -
Page 15: Operation
(red) and negative (black) wires correctly. Batteries and battery chargers are available from 2B Technologies. A circuit breaker and diode are installed on the circuit board in case of an electrical short or incorrect battery attachment. -
Page 16: Measurement Of The Zero Offset
The electronic zero of the instrument may be measured by attaching an ozone zeroing scrubber (2B Technologies part no. ZEREXTPOM or other ozone destruction cartridge) to the air inlet for a period of 5-10 minutes. For an accurate measurement, the instrument must have been turned on long enough for the internal temperature to stabilize. -
Page 17: Gps
To acquire satellite signals, go outdoors away from tall buildings and trees. Acquiring satellite signals may take 1-5 minutes. For best results, stand still in an open area with the POM powered on until an asterisk appears on the LCD as shown below. The asterisk denotes a valid satellite connection: * O3= 2.7 ppb... -
Page 18: Front Panel Menu
FRONT PANEL MENU 5.1. Menu Tree The following diagram summarizes the complete instrument Menu accessed via the LCD, Select, and Move buttons. Main Menu D/T: 10:32:21 14/10/2009 Figure 5.1. Instrument Menu. Personal Ozone Monitor Manual Rev. E-2... -
Page 19: Data Averaging And Data Logging Using The Menu
5.2. Data Averaging and Data Logging Using the Menu When first turned on, the instrument will start making measurements. Data may be logged in the internal data logger. Up to 8,192 data lines containing log number, ozone mixing ratio, internal cell temperature, internal cell pressure, photodiode voltage, power supply voltage, GPS latitude, GPS longitude, GPS altitude, GPS signal quality, time, and date may be stored in internal memory, corresponding to an operational time of 4.6 hours in the 2-s fast mode, and 22.8 hours in the 10-s... -
Page 20: To Begin Logging Data
Xmt Log End To make measurements without logging data, move the cursor to End and click to end the logging mode. Select to return to the main Menu, and select again to exit the Menu and start making measurements. Note that “” always takes you up one level in the menu. -
Page 21: To Stop Logging Data
If you have data in the logger that you want to keep, be sure to download it (see Section 5.9 below) before starting logging. Select Yes if you are sure you want to start logging new data. This will return you to the Dat submenu. Select to return to the main Menu, and select ... -
Page 22: To Average Data
If you fail to End logging prior to transmitting the data using the Xmt function, the instrument will automatically execute the End function for you prior to transmitting the data. 5.8. To Average Data Hold down the Select button to obtain the main Menu. Select Avg to obtain the Avg menu: Avg Menu 2s 10s 1m 5m 1h... -
Page 23: To Set The Calibration Parameters
Once the zero of the instrument is corrected, the slope may be adjusted so that the instrument readout agrees with a standard ozone source (such as 2B Technologies Model 306 Ozone Calibration Source) or with the readout from another instrument whose calibration is considered to be accurate. -
Page 24: To Set The Time And Date
from the current value of Z; e.g., if Z was set to 3 during the measurements, change Z to –1. For more details about calibrating the Personal Ozone Monitor against another instrument or calibrated ozone source, see the “Calibration” section of this manual or refer to Tech Note No. -
Page 25: Lamp Test
6. LAMP TEST If the instrument is excessively noisy (standard deviation greater than 2 ppb) when measuring clean or zero air, or always reads near zero in the presence of ozone, it is useful to perform the lamp test to make sure that the lamp is turning on and does not fluctuate too rapidly. -
Page 26: Quiet Mode
7. QUIET MODE The POM firmware allows the user to select a “quiet mode” where the pump will be throttled down to decrease the high pitch frequency sound output. This can be done one of two ways. The user can press and hold the Select button while powering on... - Page 27 Start logging and write over existing logged data. End logging and transmit logged data. End logging. Output serial data line header. Displays list of possible averaging times and waits for the user to enter the number to change to the desired averaging time. Displays current zero calibration setting and waits for new setting followed by a carriage return (must be entered in units of ppb).
-
Page 28: Usb Installation
“cdc_NTXP” and double click on it. 3. Unzip the contents to a folder on the desktop or any area you wish. 4. With the POM off, attach USB cable from the POM to a USB port on the computer. 5. Turn on POM. The install wizard should pop up as follows. Select “No, not this time”... - Page 29 7. Navigate to folder where you unzipped the cdc_NTXP. 8. Select “Continue Anyway” when this window appears. Personal Ozone Monitor Manual Rev. E-2...
- Page 30 9. After a few seconds, the driver will be finished installing. Personal Ozone Monitor Manual Rev. E-2...
-
Page 31: Using The Usb Connection
10. USING THE USB CONNECTION 10.1. Determine the Connection Port After installation is complete, determine which COM port the connection is using. This can be done by the following procedure. 1. If using Windows (10, XP, Vista, 7, 8), go to the control panel and select “System”. -
Page 32: Using The Connection
POM. 10.2. Using the Connection • Plug the USB cable in after the powering the POM to ensure correct functionality. • When setting up your software or terminal emulator, choose the correct COM port listed in the Device manager. -
Page 33: Calibration
An example of an ozone transfer standard is the 2B Technologies Model 306 Ozone Calibration Source. Ozone transfer standards must be certified before use in accordance with the procedures prescribed by the U.S. -
Page 34: Equipment Required
The manifold must be vented to atmosphere so that pressure does not build up in the calibration setup. Connection of the POM directly to a pressurized output of any device can damage the Personal Ozone Monitor. -
Page 35: Setup Check
To check the instrument linearity by dilution of an ozone measurement, generate and measure a concentration of ozone near the upper range of ozone concentrations to be measured using the POM. Additional ozone concentrations should be generated by accurately diluting the ozone flow with zero air and each concentration should be measured once the instrument reaches a stable response. -
Page 36: Intercomparison Test
Note that the inherent linearity of the POM is better than the error calculated in this linearity check due to the uncertainty introduced by the flow measurements. -
Page 37: Measurement Of Ozone Standards
The error may be due to the calibration setup or the Personal Ozone Monitor being calibrated. The most likely causes of problems for the POM are leaks, a malfunctioning ozone scrubber, a contaminated valve, or contamination in the optical setup. - Page 38 1. A zero check is performed by sampling zero air with the POM as described in Section 12.2 above, “Measurement of Zero Air.” 2. A span check is performed by sampling an ozone concentration at the high end of the concentration range of interest following the “Measurement of Ozone Standards”...
-
Page 39: Maintenance/Troubleshooting
(~4,000 hours) of operation. Return the instrument to 2B Technologies for replacement of the internal ozone scrubber. Also, the inlet filter (user supplied) should be changed as recommended by the filter manufacturer. - Page 40 Table 13.1. Troubleshooting the Personal Ozone Monitor for performance problems. Problem/symptom Likely cause Corrective action Instrument does not turn Power not connected Check external power properly or circuit breaker connection for reverse open. polarity or a short and wait a few minutes for the thermal circuit breaker to reset.
- Page 41 2B Technologies offers reasonably priced customer service for instrument repairs. The calibration service includes cleaning of the entire flow path with methanol, testing of all components for proper function, installation of a new internal ozone scrubber and calibration against a NIST-traceable standard. The best way to contact us for service is to log a customer service ticket at www.twobtech.com/techsupport.
-
Page 42: Labeled Instrument Photos
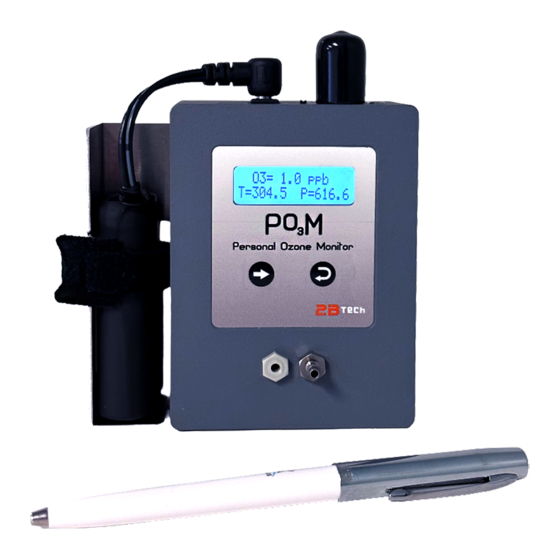
14. LABELED INSTRUMENT PHOTOS GPS Antenna Battery Holder Select Scroll Inlet Exhaust Battery Figure 14.1. Front Cover of the POM. Personal Ozone Monitor Manual Rev. E-2... - Page 43 Belt Clip Connector Serial Port Power In Power Switch Figure 14.2. Top View. Cell-pump Connection DewLine Cell Connection DewLine Valve Connection Figure 14.3. Inside View. Personal Ozone Monitor Manual Rev. E-2...
- Page 44 Scrubber- Valve_NO Connection Ozone Scrubber Inlet Connection Scrubber- Valve_NC Connection Figure 14.4. Inside view without Nafion DewLine UV-Lamp Photodiode Absorption Cell Pressure Sensor Clock Battery Temperature 3.3V Pump Sensor Figure 14.5. Inside view without Scrubber or Nafion DewLine Personal Ozone Monitor Manual Rev. E-2...
-
Page 45: Parts List
Or, contact us at sales@twobtech.com. Please see the 2B Technologies website for a full and updated list of parts and pricing for the Personal Ozone Monitor: http://twobtech.com/parts-online.html It is recommended that the instrument be sent to 2B Technologies servicing of any internal parts. -
Page 46: Service Log
16. SERVICE LOG Date/ New O New Pump Calibrated Cleaned Other Hours Scrubber (main) Lamp Personal Ozone Monitor Manual Rev. E-2... - Page 47 Date/ New O New Pump Calibrated Cleaned Other Hours Scrubber (main) Lamp Personal Ozone Monitor Manual Rev. E-2...
-
Page 48: Appendix A: Using The 2B Technologies Display And Graphing Software
.txt file and can optionally be saved to a .CSV file to be read in Excel. Saved data can be restored for later viewing and analyzing on the chart. By requesting an account with 2B Technologies, you can upload your data and view it on a Google Earth overlay. - Page 49 4. Click Start button in the Instrument Data Capture section in the upper left corner of the main screen. a) The “Save As” window will appear. A default file name will appear which is made of the date and time. You may change the filename and change where it is saved if you wish.
- Page 50 4. The data points will appear in a graph window in the middle of the screen. 5. Adjust the zoom level by pressing the + or – buttons under the Settings button (upper right side of screen). 6. Adjust the Y scale or set the Auto Range feature by pressing the Settings button a.
- Page 51 1. NOTE: To view weather data, you must open the corresponding .CSV file. 4. Choose the correct device associated with the file. a. If you are unsure, open the file in a text editor or Excel to determine which device. Serial and USB Commands The menu commands are the same as given in Section 8 of this manual.
Need help?
Do you have a question about the POM and is the answer not in the manual?
Questions and answers