
Related Manuals for Corsair 760T


Summary of Contents for Corsair 760T
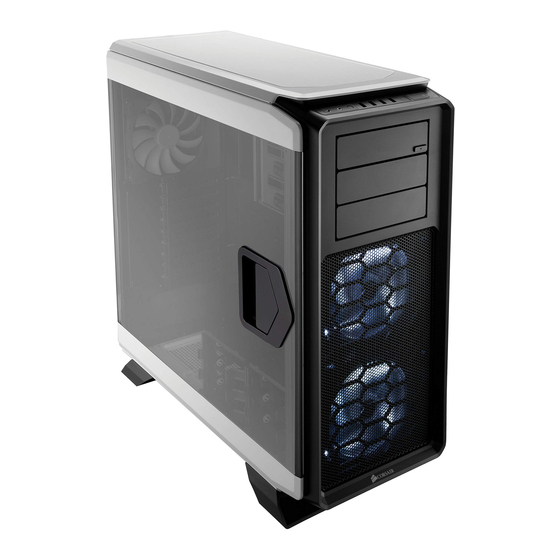
- Page 1 760T GRAPHITE S E R I E S ® GRAPHITE SERIES 760T FULL-TOWER PC CASE ® INSTALLATION GUIDE...
- Page 2 Accessory Kit MBD/HDD screws Long fan screws Short fan screws SSD/ODD screws The Graphite Series 760T full-tower PC 760T case has it all: a visually stunning design that’s a match for its stunning perfor- GRAPHITE mance potential. The smart features that S E R I E S ®...
- Page 3 GRAPHITE SERIES 760T FULL-TOWER PC CASE GRAPHITE SERIES 760T FULL-TOWER PC CASE ® ® (x3) Corsair AF140L fans included Top triple 120mm or dual 140mm fan mounts compatible with 240/280/360mm radiators Rear 120/140mm fan mounts compatible with 120/140mm radiators Front dual 120/140mm fan mounts compatible with 240/280mm radiators (x2) USB 3.0, (x2) USB 2.0, Headphone/Mic, Power/Reset...
- Page 4 GRAPHITE SERIES 760T FULL-TOWER PC CASE GRAPHITE SERIES 760T FULL-TOWER PC CASE ® ® Built-in cable routing cutouts with grommets (x3) Tool-free removable optical drive bays Tool-free 3.5" hard drive cages with 2.5" compatibility (x4) Tool-free 2.5" SSD side-mounted drive bays...
-
Page 5: Installing The Motherboard
Removing the windowed side panel Installing the motherboard > Install your motherboard's I/O shield > Pull the handle to open and release the side panel. (see your motherboard’s manual for guidance). > Lift the entire side panel up and out from the hinges to remove the side panel. >... - Page 6 Installing the power supply (PSU) Installing the PCI-E/PCI cards > Remove thumbscrews and corresponding slot cover(s). > Seat the PSU on the bottom of the case. > Install the add-on card and secure with thumbscrews. > Align holes and secure the PSU with screws. Note: PSU can be installed in either fan up or fan down orientations.
- Page 7 Installing a 5.25" drive/devices (ODD) Installing a 3.5" HDD/ 2.5" SSD > Remove the tool-free 3.5" HDD tray. > Remove the front panel 5.25" drive bay cover. > Insert the HDD into the HDD tray. > Insert the ODD into the drive bay until the tool-free >...
- Page 8 Installing a 2.5" SSD into tool-free expandable SSD cage Removing the solid top panel cover and bottom dust filter > To remove the magnetic solid top panel cover, > Pull down the tab and place the SSD into locate the top panel cut out and lift the top panel o the case the tool-free cage until you feel it secure.
-
Page 9: Installing The Front I/O Connectors
Attach case fan cables to motherboard headers Installing the front I/O connectors > See your motherboard’s manual for front panel header locations and pin-outs. > See your motherboard’s manual for fan header locations. USB 3.0 USB 2.0 POWER SW HDD LED POWER LED –... - Page 10 How to remove the SSD caddy How to remove the HDD cage > Locate and remove the two screws securing the > To remove the SSD caddy, locate the center tab to the right cage to the base on the bottom of the case. of the caddy and then pull the tab in and lift to release the caddy.
- Page 11 Installing the fan speed selector > Connect the SATA power connector to the PSU SATA power cable. > Connect the 3 or 4-Pin fan connecter to the case fan header. > Push the fan speed selector button on your case to toggle fan speed between “Quiet”...
Need help?
Do you have a question about the 760T and is the answer not in the manual?
Questions and answers