Advertisement
Advertisement
Table of Contents

Related Manuals for Corsair AIR740


Summary of Contents for Corsair AIR740
- Page 1 CARBIDE SERIES ® HIGH AIRFLOW MID-TOWER CASE INSTALLATION GUIDE...
- Page 2 Built for builders 426mm 340mm 426mm Like all Corsair cases, Carbide Series Air 740 is designed for fast, neat, and satisfying builds. You get tool-free PCI-E and storage installation, and more features for making assembly, upgrades, and maintenance quick and easy.
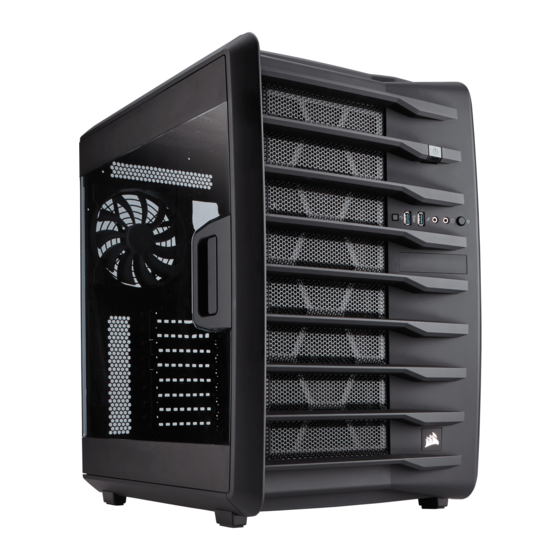
- Page 3 CARBIDE SERIES AIR 740 ® HIGH AIRFLOW MID-TOWER CASE Corsair AF140L (x3) fans included Top Dual 120mm/140mm fan mounts compatible with 240/280mm radiators Rear 120mm/140mm fan mounts compatible with 120/140mm radiators Front Triple 120mm/140mm fan mounts compatible with 240/280/360mm radiators USB 3.0 (x2) Headphone/Mic, Power/Reset...
- Page 4 CARBIDE SERIES AIR 740 ® HIGH AIRFLOW MID-TOWER CASE CPU backplate cutout Built-in cable routing cutouts with grommets Tool-free 3.5" hard drive caddy with 2.5" compatibility (x3) Tool-Free expandable 2.5" SSD removable cage 8 PCI-E expansion slots Removable Front Magnetic low restriction dust filter...
-
Page 5: Removing The Side Panels
Removing the side panels Installing the motherboard n Unscrew thrumbscrews and remove, then pull side panels outward n Install your motherboard’s I/O shield (see motherboard manual for guidance) NOTE: It is advised that both side panels are completely removed and set n Align motherboard with the standoffs in the case aside when building your system to avoid accidental damages n Secure with included screws (MBD/HDD screws) -
Page 6: Installing The Pci-E/Pci Cards
Installing the Power Supply (PSU) Installing the PCI-E/PCI Cards n Unscrew and remove PSU mounting bracket n Remove thumbscrews and corresponding slot cover(s) n Place the PSU on the bottom of the case with the fan side facing outwards n Install the add-on card & secure with thumbscrews n Align holes &... - Page 7 Installing 3.5" HDD/2.5" SSD n Remove Tool-free 3.5" HDD tray n Insert HDD into HDD tray n Align HDD holes with the tray pins to secure NOTE: Tool-free 3.5" HDD tray are also compatible with 2.5" SSD...
- Page 8 Installing 2.5" SSD into Tool-free expandable SSD cage Attach case fan cables to motherboard headers n Slide the SSD into the tool-free cage until it is latched into place n See motherboard manual for fan header locations n To remove the SSD, pull tab to release...
-
Page 9: Installing Front I/O Connectors
Installing front I/O connectors How to remove/install SSD Cage n See motherboard manual for front panel header locations and pin-outs n To remove, push the tab down to release the SSD cage n Lift SSD cage up to remove n To install, align the SSD cage with holes and slide down until secure HDD LED USB 3.0 POWER SW... - Page 10 How to remove front magnetic dust filter n Carefully pull the front panel from the main chassis n Pull the top dust filter back and upwards to remove n Peel back the magnetic dust filter to remove NOTE: Top dust filter must be removed first before front dust filter can be removed...
Need help?
Do you have a question about the AIR740 and is the answer not in the manual?
Questions and answers