Table of Contents
Advertisement
Advertisement
Table of Contents

Related Manuals for UBTECH Jimu


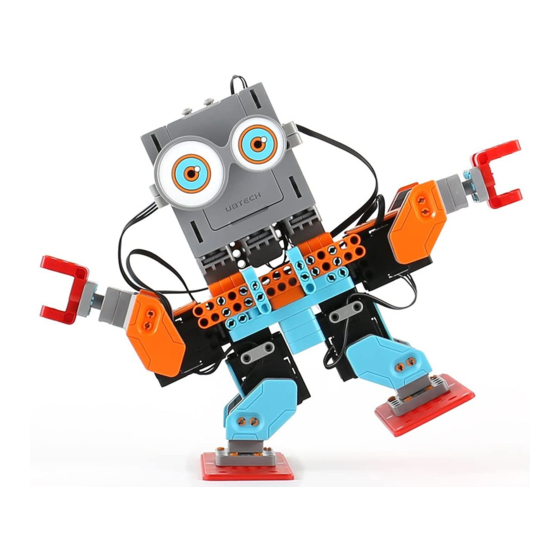
Summary of Contents for UBTECH Jimu
- Page 1 APP Instructions...
-
Page 2: Table Of Contents
Decorating Piece - Fasteners-----------------------------------------------------------------------------------------6 Connecting Cables-------------------------------------------------------------------------------------------------------7 Assembly Tool------------------------------------------------------------------------------------------------------------7 Assembly Introduction Key Parts-----------------------------------------------------------------------------------------------------------------8 Assembly Methods-----------------------------------------------------------------------------------------------------10 Jimu APP Getting the Jimu App-------------------------------------------------------------------------------------------------11 Using Ubtech Account to Log in-------------------------------------------------------------------------------------11 Learn to Build Tutorial-------------------------------------------------------------------------------------------------------------------12 Offcial Models----------------------------------------------------------------------------------------------------------12 Wireless Connection Wireless Connection Process and Connection Requirements--------------------------------------------------14 Remote Control --------------------... -
Page 3: Components Introduction
The brain of a Jimu robot is a Main control box. Once the mobile phone has connected over wireless to the main control box, it can be used to control the Jimu robot. There is an exclusive 1.Main Control Box MAC address for the controller on its back. -
Page 4: Battery
The battery comes factory-installed on the main control box. You can also replace the battery. Remove the plugs 2.Battery on the downside before disassembling the battery from the main control box. Install the replacement battery into the controller and then secure the plugs. Detaching the Battery Remove the plugs Gently lift up the battery... -
Page 5: Servos
3.Servos Servos are like human joints. They are the keys for the Jimu robot to perform movements. Servo external view Servo ID Each servo has an ID number to distinguish it from the other servos. Please see "Connecting Model - Changing Servo ID" for more details. - Page 6 Rotatable Rudders The rudders of the servo can rotate, and it can also be spliced with slots. "△□☆○" indicates different splicing directions. When "△" is aligned with the scale, the angle of the rotatable rudder is 0°. For more information regarding the use of servo rudders and other components assembly, please see: "Assembly Introduction: Splicing".
-
Page 7: Connectors
4.Connectors Connectors are the skeleton of the robot. Slots or rudders of connectors can be spliced together with other components' rudders or slots. Example: Connecting Servo with C3 Straighten the rudder and Gently widen both sides align the component. of the component. Push the right side of the Adjust the other side. -
Page 8: Power Switch
Power allows the Jimu robot to operate. Use the connecting cable to connect the 6.Power Switch power switch to the Main control box. Turn on/off the power using the power switch. 7.Decorating Piece - Fasteners Fasteners can integrate decorating pieces, connectors, the controller, and servos together through holes. -
Page 9: Connecting Cables
Connecting cables are like blood vessels of the Jimu robot. It can connect the controller 8.Connecting Cables with servos, and a servo with another servo. It can also transmit energy and commands between the controller and servos. 9.Assembly Tool The assembly tool can help you install and remove components, making the building process of your model simpler and easier. -
Page 10: Assembly Introduction
Assembly Introduction 1.Key Parts a. Slots: The slot is a groove in components, which usually appears on connectors and servos. When a component has multiple slots, the "ABCDE" naming method will be used to distinguish them. b. Rudders: Rudders are rectangular structures projecting from components. The symbols "△□☆○" are used to indicate the different directions. -
Page 11: Assembly Methods
2.Assembly Methods a. Splicing: Splicing refers to connecting rudders with slots. 1) "△□☆○" on the surface of the rudder correspond with different splicing directions of slots. Different splicing directions can yield different structures. Example of connecting other components with rudders 2) If a component has multiple slots, it can be assembled into different structures. - Page 12 b. Integration: Integration refers to the method of assembling different components through fasterners. c. Connection: Connection refers to the assembly method of connecting the Main control box with servos, servos with servos, the Main control box with sensors, or the Main control box with power switch using connecting cables. 1) Connection between the Main control box and servos, or servos and servos.
-
Page 13: Jimu App
Users can use the Ubtech account to log in and use our products, including the "Alpha1s App", "Alpha 2 App", and "Jimu" app. Within the Jimu app, you can select "Email", "Mobile phone", or "Third party account login" to register a Ubtech account. -
Page 14: Learn To Build
The Components section illustrates the appearance of all components and their functions to the users. The Assembly section describes the key parts of the components and how to assemble them. The Connection section covers the connection rules and procedures of Jimu. The Movement section introduces the principles and processes of movement design while the Programming section the functions and processes of each module. - Page 15 Select a specific model, and enter the Model Details page. Using the official 3D models provided, you can view the details of the model in 360° on your mobile phone. You can also use the Dynamic Drawings function, and follow the 3D interactive animation step-by-step to build the model.
-
Page 16: Wireless Connection
Selecting the Model You Want to Connect in the App; d. Finding the Controller When connecting for the first time, find the Bluetooth device called "Jimu". If you have renamed the Bluetooth device, then find the renamed Bluetooth device. - Page 17 e.Connecting the Controller Select the Bluetooth device you want to connect, and establish a connection with the controller. If you are using an Android device, please select and connect the model that has the same MAC address as your controller. Once the connection has been established, the controller will detect whether the hardware matches the model data in the app.
- Page 18 The servo firmware versions should be consistent If the servo firmware versions do not match, the app will perform a mandatory upgrade to the servo. During upgrading, battery power level has to be maintained at over 50%. If battery power is lower than 50%, upgrading cannot be completed, and the wireless connection will be disconnected. After your mobile device is successfully connected to the controller, you can view the battery power level of the model and the connection status on the connected Model Details page.
-
Page 19: Remote Control
Controller You can add movements to the controller. This way, you can control your robot as if you are playing a video game. "Remote control" icon a.Using the Controller Enter the remote control page. With the configured remote control, you can directly press the corresponding buttons to have the robot perform the corresponding movements. - Page 20 b.Editing the Controller If you have not configured the remote control, you can press the Settings button on the top right corner to enter the Remote Control Configuration page. In this page, all of the movements that you have added to the model will show up on the Movement bar at the bottom of the page.
-
Page 21: Movement Introduction
Before building a new movement, you might need to know the movement principle of Jimu. Movement refers to the process by which the model changes from one posture to another one within a period of time. The movement can be defined through time setting and posture adjustment. -
Page 22: Creating Movements
"Record movement" icon A Record Movement icon will appear on the movement axis after the Jimu robot is connected. Click the icon and the Jimu robot will automatically loosen the joint. You can now adjust the robot into the posture you want. Click the icon again and the posture will be added to the movement axis. - Page 23 c. Previewing a Movement Select the "Play" button in front of the movement axis to preview the movement. If you select a servo, the preview begins with the selected servo posture; if not, you can preview the entire movement. "Play" button d.
- Page 24 e. Saving a Movement After completing the design of the movement, choose a name and select an icon for your movement to save the movement. You can view your saved movements in the Movement Bar by their icons and the name of the movements. Save movements Input a name of the movement that needs to be saved f.
-
Page 25: Creating
Creating The official model is only for you to familiarize yourself with building and using Jimu. The most important recommendation is to apply what you learnt to your own design. You can add items in the Personal Model page to save the progress or result of the Jimu robots that you have built. -
Page 26: Sharing And Discovery
You can share the robot you built with the community Sharing and Discovery or on other social platforms. At the same time, you can also discover more models designed by other enthusiasts in our community. a. Sharing Models Enter the Personal Model page, click the share button at the bottom-right corner to enter the Model Sharing process. In this page, you can add four photos and a video, as well as a description for your model. -
Page 27: Faq
1.Hardware Q: After the robot is turned on, it has no response and the LED light on the Main control box is still off. A: 1. Please ensure the cable connecting the Main control box and the external switch box is properly installed and not damaged. 2. - Page 28 Q: The app displays abnormal temperatures. A: Please allow the robot to rest for half an hour, then you may continue to use it. Q: The app displays low voltage. A: Please recharge the robot, and do not use the robot while it is recharging. Q: The app displays no connection.
Need help?
Do you have a question about the Jimu and is the answer not in the manual?
Questions and answers