Table of Contents
Advertisement
Quick Links
Service and Repair Manual
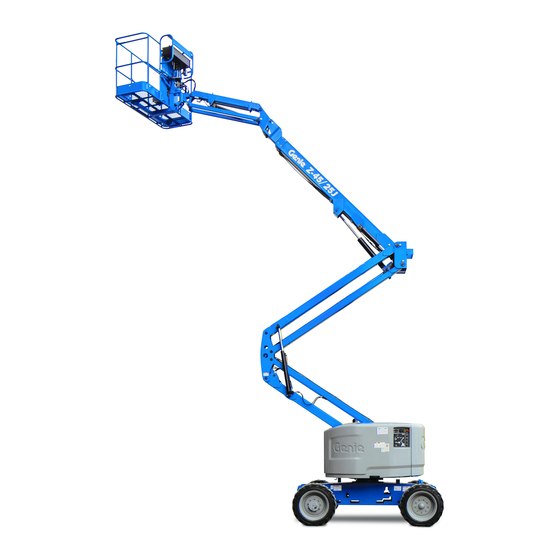
Z
-45/25
®
Z
-45/25J
®
Bi-Energy Power
Serial Number Range
from Z452513A
to Z452516N-57199
from Z4525N-57200
This manual includes:
Repair procedures
Fault Codes
Electrical and
Hydraulic Schematics
For detailed maintenance
procedures, refer to the
appropriate Maintenance
Manual for your machine.
Part No. 1268546GT
Rev A3
November 2017
Advertisement
Table of Contents

Related Manuals for Genie Z-45


Summary of Contents for Genie Z-45
- Page 1 Service and Repair Manual Serial Number Range -45/25 ® from Z452513A This manual includes: to Z452516N-57199 Repair procedures Fault Codes -45/25J ® from Z4525N-57200 Electrical and Hydraulic Schematics Bi-Energy Power For detailed maintenance procedures, refer to the appropriate Maintenance Manual for your machine. Part No.
-
Page 2: Find A Manual For This Model
Copyright © 2015 by Terex Corporation 1268546GT Rev A, September 2016 First Edition, First Printing Genie and “Z” are registered trademarks of Terex South Dakota, Inc. in the U.S.A. and many other countries. Z®-45/25 Bi-Energy • Z®-45/25J Bi-Energy Part No. 1268546GT... - Page 3 September 2016 Service and Repair Manual Introduction Revision History Revision Date Section Procedure / Page / Description 9/2015 Initial Release 9/2016 Introduction Serial Number Legend 9/2016 Repair 12-1 Machine Specifications 11-2017 Specifications Reference Examples: Electronic Version Section – Repair Procedure, 4-2 Click on any content or procedure in the Table of Contents to view Section –...
-
Page 4: Serial Number Legend
Service and Repair Manual September 2016 Introduction Serial Number Legend To August 31, 2016 1 Model 4 Sequence number 2 Model year 5 Serial label (located under cover) 3 Facility code 6 Serial number (stamped on chassis) From September 1, 2016 1 Model 4 Serial label (located under cover) 2 Facility code... -
Page 5: Safety Rules
September 2016 Service and Repair Manual Safety Rules Section 1 Safety R ules Danger Failure to obey the instructions and safety rules in this manual and the appropriate Operator's Manual on your machine will result in death or serious injury. Many of the hazards identified in the operator's manual are also safety hazards when maintenance and repair procedures are performed. - Page 6 Service and Repair Manual September 2016 Safety Rules Personal Safety Workplace Safety Any person working on or around a machine must Any person working on or around a machine must be aware of all known safety hazards. Personal be aware of all known safety hazards. Personal safety and the continued safe operation of the safety and the continued safe operation of the machine should be your top priority.
-
Page 7: Table Of Contents
September 2016 Table of Contents Introduction Introduction ......................ii Important Information ..................... ii Find a Manual for this Model .................. ii Serial Number Legend ..................iv Section 1 Safety Rules ......................v General Safety Rules ..................... v Section 2 Specifications ....................... 1 Machine Specifications ................... - Page 8 3-2 Jib Boom Lift Cylinder ..................21 Primary Boom Components ................23 4-1 Cable Track ....................23 How to Remove the Cable Track, Z-45/25 ............23 How to Remove the Cable Track, Z-45/25J ............ 25 How to Repair the Primary Boom Cable Track ..........27 4-2 Primary Boom ....................
- Page 9 September 2016 Table of Contents Generator ......................43 7-1 Generator Pulley .................... 43 How to Remove the Generator Pulley ............43 How to Install the Generator Pulley ..............43 7-2 Generator Belts ....................44 7-3 Generator Voltage Regulator ................. 44 How to Adjust the Generator Voltage Regulator ..........
- Page 10 September 2016 Table of Contents Section 4 Fault Codes ......................60 Introduction ......................60 Fault Code Charts ................... 62 Section 5 Schematics ......................66 Introduction ......................66 Electrical Symbol Legend ..................67 Hydraulic Symbols Legend ................... 68 Electrical Schematics – Options ............... 69 Platform Options Wiring Diagram .................
-
Page 11: Specifications
112.5 Nm Joystick function speeds, maximum from platform Lug nut torque, dry 110 ft-lbs controls 149 Nm Jib boom up, Z-45/25J 33 to 39 seconds Tire contact area 43.5 sq in Jib boom down, Z-45/25J 22 to 28 seconds 280 sq cm... -
Page 12: Hydraulic Oil Specifications
Hydraulic fluids may be incompatible due to the Hydraulic Fluid Specifications differences in base additive Genie specifications require hydraulic oils which are chemistry. When incompatible designed to give maximum protection to hydraulic fluids are mixed, insoluble systems, have the ability to perform over a wide... - Page 13 September 2016 Service and Repair Manual Specifications Chevron Rando HD Premium Oil Chevron 5606A Hydraulic Oil MV Fluid Properties Fluid Properties ISO Grade ISO Grade Viscosity index Viscosity index Kinematic Viscosity Kinematic Viscosity cSt @ 200°F / 100°C cSt @ 200°F / 100°C cSt @ 104°F / 40°C 33.5 cSt @ 104°F / 40°C...
- Page 14 Service and Repair Manual September 2016 Specifications Petro-Canada Environ MV 46 UCON Hydrolube HP-5046 Fluid Fluid Properties Properties ISO Grade ISO Grade Viscosity index Viscosity index Kinematic Viscosity Kinematic Viscosity cSt @ 200°F / 100°C cSt @ 149°F / 65°C cSt @ 104°F / 40°C 44.4 cSt @ 104°F / 40°C...
-
Page 15: Hydraulic Component Specifications
September 2016 Service and Repair Manual Specifications Hydraulic Component Manifold Component Specifications Specifications Plug torque SAE No. 2 36 in-lbs / 4 Nm Function pump SAE No. 4 10 ft-lbs / 13 Nm Type Fixed displacement gear pump SAE No. 6 14 ft-lbs / 19 Nm Displacement per 0.183 cu in... -
Page 16: Machine Torque Specifications
Service and Repair Manual September 2016 Specifications Machine Torque Specifications Generator Generator output with engine @ 3000 rpm 54V DC, Platform Rotator 100A 3/4 -10 center bolt, GR 8 380 ft-lbs Generator pulley to engine pulley offset, 1/16 inch 515 Nm maximum 1.6 mm 3/8 -16 bolts, GR 8... -
Page 17: Kubota Z482-E2B/E3B Engine Specifications
September 2016 Service and Repair Manual Specifications Kubota Z482-E2B Engine Fuel requirement Kubota Z482-E3B Engine For fuel requirements, refer to the engine Operator Manual for your engine. Displacement 29.23 cu in Injection system 0.48 liters Injection pump make Bosch MD Number of cylinders Injection timing 21°... -
Page 18: Hydraulic Hose And Fitting Torque Specifications
Your machine is equipped with Parker Seal-Lok™ SAE Dash Size Torque ORFS or 37° JIC fittings and hose ends. Genie 14 ft-lbs / 19 Nm specifications require that fittings and hose ends be torqued to specification when they are removed 23 ft-lbs / 31.2 Nm... -
Page 19: Torque Procedure
Note: The O-ring in Parker Seal Lok™ fittings and hose end are custom-size O-rings. They are not standard size O-rings. They are available in the O-ring field service kit (Genie part number 49612). Lubricate the O-ring before installation. Be sure the O-ring face seal is seated and retained properly. -
Page 20: September
Service and Repair Manual September 2016 Specifications Working clockwise on the body hex fitting, make a second mark with a permanent ink marker to indicate the proper tightening position. Refer to Illustration 2. Note: Use the JIC 37° Fitting table in this section to determine the correct number of flats, for the proper tightening position. -
Page 21: Sae And Metric Fasteners Torque Charts
September 2016 Service and Repair Manual Specifications Part No. 1268546GT Z®-45/25 Bi-Energy • Z®-45/25J Bi-Energy... -
Page 22: Repair Procedures
Be sure that all necessary tools and parts are available and ready for use. Use only Genie approved replacement parts. Read each procedure completely and adhere to the instructions. Attempting shortcuts may produce hazardous conditions. - Page 23 September 2016 Service and Repair Manual Repair Procedures About This Section Most of the procedures in this section should only be performed by trained service professional in a suitably equipped workshop. Select the appropriate repair procedure after troubleshooting the problem. Perform disassembly procedures to the point where repairs can be completed.
-
Page 24: Platform Controls
There are no adjustments needed on the drive above 24V DC. joystick controller. For further information or assistance, consult the Genie Product Support. Turn the key switch to platform controls and pull out the red Emergency Stop button to the on position at both the ground and platform controls. - Page 25 September 2016 Service and Repair Manual Platform Controls Disconnect the blk/red wire of the boom function speed controller from the wht/red wire. Connect the red (+) lead from an amp meter to the blk/red wire. Connect the black (-) lead to the wht/red wire.
-
Page 26: Platform Components
Specifications, Hydraulic Hose and Fitting Torque Place a block under the slave cylinder for Specifications. support. Protect the cylinder rod from damage. Z-45/25J: Extend the primary boom until the Z-45/25: Support the platform rotator with a slave cylinder barrel-end pivot pin is suitable lifting device. -
Page 27: How To Bleed The Slave Cylinder
September 2016 Service and Repair Manual Platform Components How to Bleed the Sl av e Cylinder How to Bleed the Slave Cylinder Use a soft metal drift to drive the rod-end pivot pin out. Note: This procedure will have to be preformed Crushing hazard. -
Page 28: Platform Rotator
Service and Repair Manual September 2016 Platform Components While still holding the function enable toggle switch, simultaneously activate the primary Platform Rotator boom down and platform level down toggle switches until the primary boom is fully lowered. How to Bleed the Platform The platform should be facing in a down Rotator position. - Page 29 September 2016 Service and Repair Manual Platform Components Open the bottom bleed screw on the rotator, but do not remove it. Bodily injury hazard. Spraying hydraulic oil can penetrate and burn skin. Loosen hydraulic connections very slowly to allow the oil pressure to dissipate gradually.
-
Page 30: Jib Boom Components
Service and Repair Manual September 2016 Jib Boom Components Remove the pin retaining fasteners from both platform rotator pivot pins. Do not remove the Jib Boom pins. Use a soft metal drift to remove the leveling How to Remove the Jib Boom arm pivot pin and let the leveling arms hang down. -
Page 31: Jib Boom Lift Cylinder
September 2016 Service and Repair Manual Jib Boom Components 16 Use a soft metal drift to remove the pin and let the cylinder hang down. Jib Boom Lift Cylinder Crushing hazard. The jib boom could fall when the barrel-end How to Remove the Jib Boom Lift pivot pin is removed if not Cylinder properly supported by the... - Page 32 Service and Repair Manual September 2016 Jib Boom Components Use a soft metal drift to tap the jib boom lift cylinder rod-end pivot pin half way out. Then lower one of the leveling arms to the ground. Tap the pin the other direction and lower the opposite leveling arm.
-
Page 33: Primary Boom Components
How to Remove the Cable Track, Tag, disconnect and plug the hydraulic hoses from the "PR1" and "PR2" ports on the Z-45/25 counterbalance valve manifold located on the platform rotator. Cap the fittings on the Note: When removing a hose assembly or fitting, manifold. - Page 34 Service and Repair Manual September 2016 Primary Boom Components Tag and disconnect the hydraulic hoses from 13 Remove the mounting fasteners from the the platform leveling slave cylinder and upper cable track at the platform end of the connect them together using a connector. Cap extension boom.
-
Page 35: How To Remove The Cable Track, Z-45/25J
How to R emove the Cable Track , Z- 45/25J How to Remove the Cable Track, Bodily injury hazard. Spraying hydraulic oil can penetrate and Z-45/25J burn skin. Loosen hydraulic connections very slowly to allow Note: When removing a hose assembly or fitting,... - Page 36 Service and Repair Manual September 2016 Primary Boom Components 11 Raise the boom to a horizontal position. 21 Raise the rod end of the primary boom lift cylinder back into position and install the 12 Place blocks between the upper and lower rod-end pivot pin.
-
Page 37: How To Repair The Primary Boom Cable Track
Z-45/25: Remove the platform rotator and platform mounting weldment. Repeat steps 1 and 2 for each link. Z-45/25J: Remove the jib boom. Refer to Repair Procedure, How to Remove the Jib Boom. Remove the cable track. Refer to Repair Procedure, How to Remove the Cable Track. - Page 38 Service and Repair Manual September 2016 Primary Boom Components Remove the pin retaining fastener from the 14 Attach a 5 ton / 5,000 kg overhead crane to master cylinder barrel-end pivot pin. Use a soft the center point of the primary boom. metal drift to remove the pin.
-
Page 39: How To Disassemble The Primary Boom
September 2016 Service and Repair Manual Primary Boom Components How to Dis ass embl e the Primary Boom How to Disassemble the Primary Remove the external snap rings from the extension cylinder rod-end pivot pin at the Boom platform end of the extension tube. Use a soft metal drift to remove the pin. -
Page 40: Primary Boom Lift Cylinder
Service and Repair Manual September 2016 Primary Boom Components Tag, disconnect and plug the primary boom lift cylinder hydraulic hoses. Cap the fittings on Primary Boom Lift Cylinder the cylinder. The primary boom lift cylinder raises and lowers Bodily injury hazard. Spraying the primary boom. -
Page 41: Primary Boom Extension Cylinder
September 2016 Service and Repair Manual Primary Boom Components Tag, disconnect and plug the primary boom extension cylinder hydraulic hoses. Cap the Primary Boom Extension fittings on the cylinder. Cylinder Bodily injury hazard. Spraying hydraulic oil can penetrate and The primary boom extension cylinder extends and burn skin. -
Page 42: Platform Leveling Master Cylinder
Service and Repair Manual September 2016 Primary Boom Components Remove the pin retaining fasteners from the master cylinder barrel-end pivot pin. Platform Leveling Master Cylinder Place a rod through the barrel-end pivot pin and twist to remove the pin. The master cylinder acts as a pump for the slave Remove the pin retaining fastener from the cylinder. -
Page 43: Secondary Boom Components
September 2016 Service and Repair Manual Secondary Boom Components Secondary Boom components 6 secondary boom lift cylinder (2) 1 upper secondary boom (number 1 arm) 7 lower secondary boom (number 4 arm) 2 upper tension link (number 2 arm) 8 turntable pivot 3 lower tension link (number 3 arm) 9 boom rest 4 mid-pivot... -
Page 44: Secondary Boom
Tag, disconnect and plug the hydraulic hoses Remove the platform. on both of the secondary boom lift cylinders. Z-45/25J: Remove the jib boom. Refer to Cap the fittings on the cylinders. Repair Procedure, How to Remove the Jib Bodily injury hazard. Spraying Boom. - Page 45 September 2016 Service and Repair Manual Secondary Boom Components 11 Attach a strap from an overhead crane to the 17 Attach a lifting strap from a second overhead lug on the rod end of one of the secondary crane to the number 1 arm at the mid-point boom lift cylinders for support.
- Page 46 Service and Repair Manual September 2016 Secondary Boom Components 23 Pull all of the cables and hoses out through 31 Insert a 4 x 4 x 81/2 inch / 10 x 10 x 22 cm the upper pivot. block between the number 3 arm and the number 4 arm at the mid-pivot end.
- Page 47 September 2016 Service and Repair Manual Secondary Boom Components 39 Use a soft metal drift to remove the upper 45 Using an approved hand-operated pump, compression link pivot pin from the number 2 drain the fuel tank into a container of suitable arm.
- Page 48 Service and Repair Manual September 2016 Secondary Boom Components 48 Remove the retaining fastener from the 56 Remove the secondary boom drive speed limit ground control box and function manifold pivot switch mounting fasteners from the number 4 plate. arm at the mid-pivot end. Do not disconnect the wiring.
-
Page 49: Secondary Boom Lift Cylinders
September 2016 Service and Repair Manual Secondary Boom Components Tag, disconnect and plug the hydraulic hoses on the secondary boom lift cylinder. Secondary Boom Lift Cylinders Bodily injury hazard. Spraying There are two secondary boom lift cylinders hydraulic oil can penetrate and incorporated in the structure of the secondary burn skin. -
Page 50: Engines
1G689-89160). Remove the engine pivot plate latch retainer. Kubota Z482-E2B Workshop Manual Open the engine pivot plate latch and swing Genie part number 52956 the engine out away from the machine to access the engine drive pulley. Kubota Z482-E3B Operator's Manual... -
Page 51: How To Install The Engine Drive Pulley
September 2016 Service and Repair Manual Engines How to Ins tall the Engi ne Drive Pull ey How to Install the Engine Drive Carefully tighten each bolt evenly until the engine drive pulley slides off the shaft. Pulley Component damage hazard. Note: The generator pulley must already be The engine drive pulley and/or installed before performing this procedure. - Page 52 Service and Repair Manual September 2016 Engines Tighten the set screw on the pulley bushing Check the alignment between the engine drive hand tight. pulley and the generator pulley using a straightedge. Refer to Specifications, Slide the engine pulley onto the pulley Generator.
-
Page 53: Generator
September 2016 Service and Repair Manual Generator How to Ins tall the Generator Pull ey How to Install the Generator Pulley Generator Pulley Note: The pulley on the generator must be installed How to R emove the Generator Pulley How to Remove the Generator before installing the engine drive pulley. -
Page 54: Generator Belts
Service and Repair Manual September 2016 Generator Generator Belts Generator Voltage Regulator w to Adjus t the Gener ator Voltage R egul ator How to Adjust the Generator How to Adjust the Generator Belts Voltage Regulator The voltage regulator regulates the output voltage Disconnect the battery packs. -
Page 55: How To Replace The Voltage Regulator
September 2016 Service and Repair Manual Generator How to R eplac e the Voltage Regulator How to Replace the Voltage Start the engine from the ground controls and move the rpm select toggle switch to the Regulator maintained high idle position. Check the voltage on the generator. - Page 56 Service and Repair Manual September 2016 Generator 10 Locate the 3 white wires that lead from the 12 Locate the red wire that leads from the voltage voltage regulator to the negative rectifier regulator to the positive rectifier assembly. assembly. 13 Remove the screw that attaches the red wire to the positive rectifier assembly.
-
Page 57: Hydraulic Pumps
September 2016 Service and Repair Manual Hydraulic Pumps Models without hydraulic tank shutoff valves: Remove the drain plug from the Auxiliary Pump hydraulic tank and completely drain the tank into a container of suitable capacity. Refer to Specifications, Machine Specifications. How to Remove the Auxiliary Pump Bodily injury hazard. -
Page 58: Function Pump
Service and Repair Manual September 2016 Hydraulic Pumps Models without hydraulic tank shutoff valves: Remove the drain plug from the Function Pump hydraulic tank and completely drain the tank into a container of suitable capacity. Refer to How to Remove the Function Specifications, Machine Specifications. -
Page 59: Manifolds
Turntable rotate left/right 25 ft-lbs / 34 Nm Solenoid valve, 3 position 4 way Platform rotate left/right andjib 25 ft-lbs / 34 Nm boom up/down (Z-45/25J) Solenoid valve, 3 position 4 way Platform level up/down 25 ft-lbs / 34 Nm Shuttle valve Platform level circuit 4-5 ft-lbs / 5.5-6.7... - Page 60 Service and Repair Manual September 2016 Manifolds Z®-45/25 Bi-Energy • Z®-45/25J Bi-Energy Part No. 1268546GT...
-
Page 61: Valve Adjustments - Function Manifold
September 2016 Service and Repair Manual Manifolds How to Adj ust the Sec ondary Boom D own R elief Valv e 9-2 Valve Adjustments - Function How to Adjust the Secondary Manifold Boom Down Relief Valve Note: Perform this procedure with the boom in the How to Adj ust the Sy stem Reli ef Valve stowed position. -
Page 62: Jib Boom / Platform Rotate Manifold Components
Service and Repair Manual September 2016 Manifolds Jib Boom / Platform Rotate Manifold Components The jib boom / platform rotate manifold is mounted to the platform support. Index Schematic Description Function Torque Item Solenoid valve, 2 position 3 way Jib boom / platform rotate select 20 ft-lbs / 27 Nm Z®-45/25 Bi-Energy •... -
Page 63: Turntable Rotation Manifold Components
September 2016 Service and Repair Manual Manifolds Turntable Rotation Manifold Components The turntable rotation manifold is mounted to the turntable rotation motor located in the boom storage compartment. Schematic Index No. Description Function Torque Item Shuttle valve 2 position 3 way Turntable rotation brake 10-13 ft-lbs / 14-18 Nm release... -
Page 64: Valve Coils
30%. Resistor, 10Ω Result: If the resistance is not within Genie part number 27287 specification, plus or minus 30%, replace the coil. Note: The battery should read 9V DC or more when measured across the terminals. - Page 65 September 2016 Service and Repair Manual Manifolds At the battery or coil terminals, reverse the connections. Note and record the current reading. Result: Both current readings are greater than 0 mA and are different by a minimum of 20%. The coil is good. Result: If one or both of the current readings are 0 mA, or if the two current readings do not differ by a minimum of 20%, the coil and/or its...
-
Page 66: Turntable Rotation Components
Service and Repair Manual September 2016 Turntable Rotation Components 10-1 Place a suitable container under the engine plate. Turntable Rotation Assembly Tag and disconnect the fuel hose from the fuel filter and drain the fuel tank into a suitable How to Remove the Turntable container. -
Page 67: Motor Controllers
There are no adjustments needed on Forward Bias: the drive joystick controller. For further information Test Desired result or assistance, consult the Genie Industries Service Positive Lead Negative Lead Department. 0.4 to 0.45 0.4 to 0.45 How to Test the Motor Controller 0.45 to 0.5... -
Page 68: Steer Axle Components
Service and Repair Manual September 2016 Steer Axle Components How to Ins tall the H ub and Bearings How to Install the Hub and 12-1 Hub and Bearings Bearings How to R emove the Hub and Bearings Note: When replacing a wheel bearing, both the How to Remove the Hub and inner and outer bearings, including the pressed-in Bearings... -
Page 69: September
September 2016 Service and Repair Manual Steer Axle Components Loosen the castle nut one full turn and then torque to 35 ft-lbs / 47 Nm. 10 Install a new cotter pin. Bend the cotter pin to lock it in place. Note: Always use a new cotter pin when installing a castle nut. -
Page 70: Fault Codes
Service and Repair Manual September 2016 Fault Codes Section 4 Faul t Codes Before Troubleshooting: Read, understand and obey the safety rules and operating instructions in the appropriate operator's manual on your machine. Be sure that all necessary tools and test Observe and Obey: equipment are available and ready for use. - Page 71 Note: Additional troubleshooting of the fault codes may by accomplished by using the hand-held pendant motor controller programmer (Genie part number 128551). Note: When using the hand-held pendant motor controller programmer, the M1 MAX SPEED needs to be set to 33.
-
Page 72: Fault Code Charts
Service and Repair Manual September 2016 Fault Codes Faul t Code C harts Fault Code Chart Fault Code Programmer Condition Possible Causes Solution Diagnostic Display Fault code LED COMMUNICATION Machine will not drive. The key switch or Push in the ground is off or is on, but ERROR Emergency Stop... - Page 73 Possible Causes Solution Diagnostic Display THROTTLE FAULT 1 Machine will not drive. Open in wht/red wire Consult Genie Product #32 at pin 14 or Support. red/wht wire #29 at pin 16 on the motor controller going from drive joystick to pins 14...
- Page 74 Programmer Condition Possible Causes Solution Diagnostic Display MISSING Machine will not drive. Motor controller does Consult Genie Product CONTACTOR not detect the main Support. contactor PR1 or brake release relay CR5. MAIN CONT DNC Machine will not drive. Main contactor PR1 or...
- Page 75 September 2016 Service and Repair Manual This page intentionally left blank. Part No. 1268546GT Z®-45/25 Bi-Energy • Z®-45/25J Bi-Energy...
-
Page 76: Schematics
Service and Repair Manual September 2016 Schematics About This Section Section 5 Schem atics There are two groups of schematics in this section. Electrical Schematics Electrocution/burn hazard. Contact with electrically charged Observe and Obey: circuits could result in death or serious injury. -
Page 77: Electrical Symbol Legend
September 2016 Service and Repair Manual Electrical Symbol Legend Battery Coil, solenoid or relay Horn or alarm Flashing beacon Gauge Diode Hour meter Fuse with amperage Foot switch T-circuits connect Limit Switch Power relay Coil with suppression Fuel or RPM solenoid T-circuits connect at Circuits crossing - no Quick disconnect... -
Page 78: Hydraulic Symbols Legend
Service and Repair Manual September 2016 Hydraulic Symbols Legend Orifice with size Check valve Shut off valve Brake Pump, bi-directional Motor, 2 speed Pump, fixed displacement Motor, bi-directional variable displacement bi-directional Pump, prime mover (engine Shuttle valve. 2 position, 3 Double acting cylinder Differential sensing valve or motor) -
Page 79: Electrical Schematics - Options
September 2016 Service and Repair Manual Platform Options Wiring Diagram... -
Page 80: Platform Options Wiring Diagram
Service and Repair Manual September 2016 Platform Options Wiring Diagram Z®-45/25 Bi-Energy • Z®-45/25J Bi-Energy Part No. 1268546GT... -
Page 81: Engine Panel Wiring Diagram
September 2016 Service and Repair Manual Engine Panel Wiring Diagram Part No. 1268546GT Z®-45/25 Bi-Energy • Z®-45/25J Bi-Energy... - Page 82 Service and Repair Manual September 2016 Engine Panel Wiring Diagram...
- Page 83 September 2016 Service and Repair Manual Power Panel Wiring Diagram...
-
Page 84: Power Panel Wiring Diagram
Service and Repair Manual September 2016 Power Panel Wiring Diagram Z®-45/25 Bi-Energy • Z®-45/25J Bi-Energy Part No. 1268546GT... -
Page 85: Cte Option Wiring Diagram, (Ce)
September 2016 Service and Repair Manual CTE Option Wiring Diagram, (CE) Part No. 1268546GT Z®-45/25 Bi-Energy • Z®-45/25J Bi-Energy... - Page 86 Service and Repair Manual September 2016 CTE Option Wiring Diagram, (CE)
- Page 87 September 2016 Service and Repair Manual Charger Interlock Option...
-
Page 88: Charger Interlock Option
Service and Repair Manual September 2016 Charger Interlock Option Z®-45/25 Bi-Energy • Z®-45/25J Bi-Energy Part No. 1268546GT... -
Page 89: Hydraulic Schematics
September 2016 Service and Repair Manual Hydraulic Schematic... -
Page 90: Hydraulic Schematic
Service and Repair Manual September 2016 Hydraulic Schematic Z®-45/25 Bi-Energy • Z®-45/25J Bi-Energy Part No. 1268546GT... -
Page 91: Electrical Schematics - Ansi And Csa Models
September 2016 Service and Repair Manual Electrical Schematic, (ANSI / CSA) -
Page 92: Electrical Schematic, (Ansi / Csa)
Service and Repair Manual September 2016 Electrical Schematic, (ANSI / CSA) Z®-45/25 Bi-Energy • Z®-45/25J Bi-Energy Part No. 1268546GT... - Page 93 September 2016 Service and Repair Manual Electrical Schematic, (ANSI / CSA) Part No. 1268546GT Z®-45/25 Bi-Energy • Z®-45/25J Bi-Energy...
- Page 94 Service and Repair Manual September 2016 Electrical Schematic, (ANSI / CSA)
- Page 95 September 2016 Service and Repair Manual Ground Control Box Terminal Strip Wiring Diagram, (ANSI / CSA)
-
Page 96: Ground Control Box Terminal Strip Wiring Diagram, (Ansi / Csa)
Service and Repair Manual September 2016 Ground Control Box Terminal Strip Wiring Diagram, (ANSI / CSA) Z®-45/25 Bi-Energy • Z®-45/25J Bi-Energy Part No. 1268546GT... -
Page 97: Ground Control Box Switch Panel Wiring Diagram, (Ansi / Csa)
September 2016 Service and Repair Manual Ground Control Box Switch Panel Wiring Diagram, (ANSI / CSA) Part No. 1268546GT Z®-45/25 Bi-Energy • Z®-45/25J Bi-Energy... - Page 98 Service and Repair Manual September 2016 Ground Control Box Switch Panel Wiring Diagram, (ANSI / CSA)
- Page 99 September 2016 Service and Repair Manual Platform Control Box Wiring Diagram, (ANSI / CSA)
-
Page 100: Platform Control Box Wiring Diagram, (Ansi / Csa)
Service and Repair Manual September 2016 Platform Control Box Wiring Diagram, (ANSI / CSA) Z®-45/25 Bi-Energy • Z®-45/25J Bi-Energy Part No. 1268546GT... -
Page 101: Electrical Schematics - Ce Models
September 2016 Service and Repair Manual Electrical Schematic, (CE) -
Page 102: Electrical Schematic, (Ce)
Service and Repair Manual September 2016 Electrical Schematic, (CE) Z®-45/25 Bi-Energy • Z®-45/25J Bi-Energy Part No. 1268546GT... - Page 103 September 2016 Service and Repair Manual Electrical Schematic, (CE) Part No. 1268546GT Z®-45/25 Bi-Energy • Z®-45/25J Bi-Energy...
- Page 104 Service and Repair Manual September 2016 Electrical Schematic, (CE)
- Page 105 September 2016 Service and Repair Manual Ground Control Box Terminal Strip Wiring Diagram, (CE)
-
Page 106: Ground Control Box Terminal Strip Wiring Diagram, (Ce)
Service and Repair Manual September 2016 Ground Control Box Terminal Strip Wiring Diagram, (CE) Z®-45/25 Bi-Energy • Z®-45/25J Bi-Energy Part No. 1268546GT... -
Page 107: Ground Control Box Switch Panel Wiring Diagram, (Ce)
September 2016 Service and Repair Manual Ground Control Box Switch Panel Wiring Diagram, (CE) Part No. 1268546GT Z®-45/25 Bi-Energy • Z®-45/25J Bi-Energy... - Page 108 Service and Repair Manual September 2016 Ground Control Box Switch Panel Wiring Diagram, (CE)
- Page 109 September 2016 Service and Repair Manual Platform Control Box Wiring Diagram, (CE)
-
Page 110: Platform Control Box Wiring Diagram, (Ce)
Service and Repair Manual September 2016 Platform Control Box Wiring Diagram, (CE) Z®-45/25 Bi-Energy • Z®-45/25J Bi-Energy Part No. 1268546GT... -
Page 111: Electrical Schematics - As Models
September 2016 Service and Repair Manual Electrical Schematic, (AS) -
Page 112: Electrical Schematic, (As)
Service and Repair Manual September 2016 Electrical Schematic, (AS) Z®-45/25 Bi-Energy • Z®-45/25J Bi-Energy Part No. 1268546GT... - Page 113 September 2016 Service and Repair Manual Electrical Schematic, (AS) Part No. 1268546GT Z®-45/25 Bi-Energy • Z®-45/25J Bi-Energy...
- Page 114 Service and Repair Manual September 2016 Electrical Schematic, (AS)
- Page 115 September 2016 Service and Repair Manual Ground Control Box Terminal Strip Wiring Diagram, (AS)
-
Page 116: Ground Control Box Terminal Strip Wiring Diagram, (As)
Service and Repair Manual September 2016 Ground Control Box Terminal Strip Wiring Diagram, (AS) Z®-45/25 Bi-Energy • Z®-45/25J Bi-Energy Part No. 1268546GT... -
Page 117: Ground Control Box Switch Panel Wiring Diagram, (As)
September 2016 Service and Repair Manual Ground Control Box Switch Panel Wiring Diagram, (AS) Part No. 1268546GT Z®-45/25 Bi-Energy • Z®-45/25J Bi-Energy... - Page 118 Service and Repair Manual September 2016 Ground Control Box Switch Panel Wiring Diagram, (AS)
- Page 119 September 2016 Service and Repair Manual Platform Control Box Wiring Diagram, (AS)
-
Page 120: Platform Control Box Wiring Diagram, (As)
Service and Repair Manual September 2016 Platform Control Box Wiring Diagram, (AS) Z®-45/25 Bi-Ener gy • Z ®-45/25J Bi-Energy Part No. 1268546GT Servic e and R epair M anual September 2016 Z®-45/25 Bi-Energy • Z®-45/25J Bi-Energy Part No. 1268546GT...
Need help?
Do you have a question about the Z-45 and is the answer not in the manual?
Questions and answers