Table of Contents
Advertisement
Quick Links
Advertisement
Table of Contents

Related Manuals for RS SAILING RS Neo


Summary of Contents for RS SAILING RS Neo
- Page 1 Rigging Manual V1 PLEASE FOLLOW RIGGING MANUAL IN THE CORRECT ORDER...
-
Page 2: Table Of Contents
Contents 1. Introduction ............. 1 2. Technical data ............2 3. Commissioning ............3 - 24 3.1 - Preparation .............. 4 3.2 - Unpacking ..............4 3.3a - Customer pack contents ......... 4-5 3.3b - Rope pack contents ..........5 3.4a - Adding the centre toestraps ........6-7 3.4b - Adding the side toestraps .........8 3.5 - Adding the mainsheet bridle ........ -
Page 3: Introduction
1. Introduction Congratulations on the purchase of your new RS Neo and thank you for choosing an RS product. We are confident that you will have many hours of great sailing and racing in this truly excellent design. The RS Neo is an exciting boat to sail and offers fantastic performance. This manual has been compiled to help you to gain the maximum enjoyment from your RS Neo, in a safe manner. -
Page 4: Technical Data
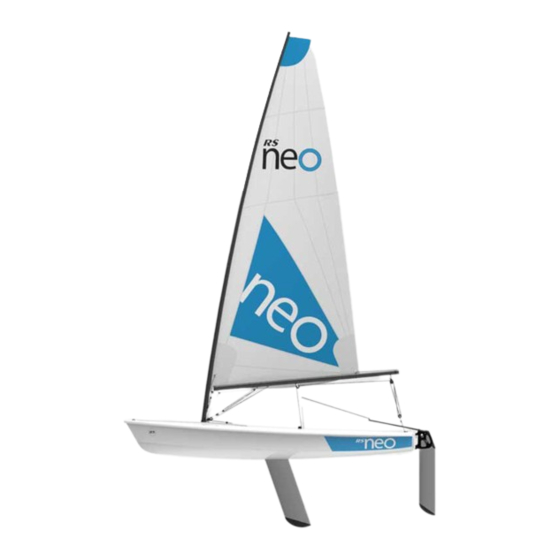
Technical Data Length Overall (LOA) 3.53 m Beam 1.42 m Hull Weight 60 kg Mainsail 6.0 m... -
Page 5: Commissioning
3. Commissioning PLEASE FOLLOW RIGGING MANUAL IN THE CORRECT ORDER... -
Page 6: Preparation
3.2 - Unpacking Having unpacked your RS Neo, you should check that you have all of the items listed before throwing away any of the packing, as there may be some small items still wrapped. -
Page 7: B - Rope Pack Contents
Tools Required: • #2 Pozidrive screwdriver • Pliers • Rope Cutter (or knife and flame) • Flat tip screwdriver 3.3a - Customer pack contents Mainsail Battens Dagger board retainer hook Centre toestrap Side toestrap Mainsheet traveller block 40mm single block 30mm single block 20mm single block 20mm single block... -
Page 8: A - Adding The Centre Toestraps
3.3b - Rope pack contents Mainsheet Dagger board retainer Cockpit bung string Rear mainsheet bridle Centre toestrap bungy Mainsheet block boom ties Downhaul control line Downhaul primary Outhaul Outhaul bungy Kicker control line Kicker primary Mast retainer bobble Mast retainer loop Main halyard tail Main halyard primary Clew strop... -
Page 9: A - Adding The Centre Toestraps
3.4a - Adding the centre toestraps Remove ONE of the screws from the toestrap retainer. Rotate the toestrap retainer outwards to allow you to slide the webbing loop on the toestrap over it. Rotate the toestrap retainer back into position and replace the screw. -
Page 10: B - Adding The Side Toestraps
3.4b - Adding the side toestraps Locate the side toestraps in the customer fittings pack. To add the side toestraps you will need a pozidrive screwdriver. The side toestraps have a loop at each end. These loops attach to the fittings on the side tanks in the same way as the front end of the centre toestrap. -
Page 11: Adding The Mainsheet Bridle
3.5 - Adding the mainsheet bridle Locate the mainsheet traveller block and rear mainsheet bridle from the packs. Tie a #3 knot (See section 8) in one end of the rear mainsheet bridle and pass it upwards through the hole in the gunwhale at the stern. -
Page 12: Rigging The Mast
3.6 - Rigging the mast Ensure that the sleeve and the inside of the tube are clean and free of debris. Neo rigs are designed with a tight engineering tolerance on the sleeve. Ensure the tubes are aligned and push together. (The first part is often the hardest due to misalignment). - Page 13 3.6 - Rigging the mast MAKE SURE THERE ARE NO OVERHEAD POWER LINES BE CAREFUL IN STRONG WINDS. Then step the mast in the boat. MAKE SURE THE MAST STEP IS FULLY LOCATED. Locate the mast retainer, orange bobble and mast retainer loop in the rope pack. #4 knot Tie a in one end of the mast retainer and pass it...
-
Page 14: Rigging The Boom
3.6 - Rigging the mast Pass the bobble on through the rope hoop on the starboard organiser to hold it tight. Take the end of the mast restrainer and pass it clockwise the whole way around the mast, passing above the mushroom on the back of the mast. - Page 15 3.7 - Rigging the boom Pass the end of the outhaul through the cleat on the boom. Join the outhaul rope to the elastic with knot Pass the elastic along the boom and through the eye at the forward end of the boom. Take the elastic back aft along the boom and tie it to the plastic fitting on top of the boom (which the mainsheet blocks are tied through) with knot...
- Page 16 3.7 - Rigging the boom Vang system Cow hitch on the single block to the front rope hoop on the boom. Cow hitch the single block with becket onto the other rope loop which emerges from the same hole in the boom. Fold vang strop, leaving one half 100mm longer than the other.
- Page 17 3.7 - Rigging the boom Cow hitch (knot #6) the vang strop onto the remaining rope hoop on the boom. Cow hitch Attach the shackle on the 40mm block to the mast kicker take off with knot Thread B through 40mm block Tie B onto 30mm block using knot #1 or...
- Page 18 3.7 - Rigging the boom Feed the end of A through the 30mm block and tie the double block onto the end using knot When pulled tight blocks should be 60mm apart. Before sailing hoist the sail and make final adjustments.
- Page 19 3.7 - Rigging the boom Take the tail of the vang coming from the single block and feed it through the starboard slot on the gooseneck, around the turning block and down the mast. Feed the tail of the vang around the rear block on the port organiser (A) and through the vang cleat (B).
-
Page 20: A - Rigging The Outhaul
3.7 - Rigging the boom Push boom to clip on. It will click into position. To remove again tug sharply backwards. MAINSHEET SYSTEM Tie a figure of eight in one end of the mainsheet. Feed the other end through the centre hole of the 40mm block on the end of the boom then thread through the blocks as shown. - Page 21 3.7a - Rigging the downhaul Pass the other end of the downhaul control line through the block which you added to the downhaul primary in step a. Pass the end of the control through the block on the starboard organiser. Pass the end of the control line through the downhaul cleat (on the starboard side of the foredeck).
-
Page 22: Mainsail
3.8 - Mainsail Sail numbers are not a requirement but have been supplied if necessary. Cut along dotted lines to form the correct sail numbers. Unroll your new sail. Stick the sail numbers on sail, higher on the starboard side of the sail than the port, in the positions marked by the faint pencil lines. - Page 23 3.8 - Mainsail Pass a loop of the outhaul rope Add the clew strap. through clew ring and over the bobble. Check there are no twists around the mast. Attach the main halyard to the sail. Make sure the boat is head to wind. Insert the mainsail into the track on the mast.
- Page 24 3.8 - Mainsail Cleat the main halyard in the Feed the main halyard tail cleat on the starboard side of around the mushroom on the the top mast. mast. Cleat the halyard tail in the cleat on the front of the mast and tidy into pocket on sail.
-
Page 25: Daggerboard
3.9 - Daggerboard To complete this section, you will need: • The daggerboard • Daggerboard retaining elastic • Daggerboard retaining clip knot #3 in the end of the daggerboard elastic and thread it through the hole in the handle. Tie the other end to the plastic clip using a knot Pass the end of the elastic around the mast... -
Page 26: Rudder
3.10 - Rudder To complete this section, you will require: • The rudder • The rudder stock • The Tiller • The Tiller retaining screw • The Tiller extension Remove the rudder assembly from the foil pack and locate the components. The self-tapping screw is in a small bag, in with the tiller arm. -
Page 27: Completion
4. Completion PLEASE FOLLOW RIGGING MANUAL IN THE CORRECT ORDER... -
Page 28: Completion
4 - Completion Now you are almost ready to go Neo sailing. All that is left to do is: • Fit the rudder to the back of the boat • Check that all the knots and shackles are tied securely. •... -
Page 29: Sailing Hints
5. Sailing Hints PLEASE FOLLOW RIGGING MANUAL IN THE CORRECT ORDER... -
Page 30: Introduction
5.1 - Introduction The RS Neo is a very rewarding boat to sail – to fully appreciate its handling, you should be comfortable with the basic techniques of sailing small boats. If you lack confidence or feel that a refresher is in order, there are many approved sailing schools which use the RS Neo. -
Page 31: Sailing Close Hauled And Tacking
5.4 - Sailing Close Hauled and Tacking When sailing close-hauled, or as close as possible to the wind, it is important to get the boom as near as possible to the centreline. The kicking strap should be firmly tensioned for upwind work. To pull it on, quickly put the boat head to wind. You should hold the tiller extension across your body, with a knuckles- up grip, enabling you to use one or two fingers as a temporary cleat when adjusting the mainsheet. -
Page 32: Maintenance
6. Maintenance PLEASE FOLLOW RIGGING MANUAL IN THE CORRECT ORDER... -
Page 33: Boat Care
RS Racing staff; however, the repair will never be invisible, due to the nature of the material. The joy of owning an RS Neo is that it is very hard wearing, and any dents and scratches it receives will not affect the structural integrity of the hull. -
Page 34: Foil Care
If you are going to trail your boat frequently, you may wish to invest in some RS Racing padded rudder bags. These will protect your RS Neo from any damage caused by the foils. 6.3 - Spar Care The mast and boom are made from carbon fibre. -
Page 35: Fixtures And Fittings
6.5 - Fixtures and Fittings All of the fixtures and fittings have been designed for a specific purpose in the boat. These items may break when placed under any unnecessary load, or when used for a different function to their intended purpose. To ensure optimum performance, wash the fixtures and fittings with fresh water regularly, checking shackles, bolts, etc. -
Page 36: Warranty
6. Warranty claims shall be made to RS Sailing as soon as practicable and, in any event, within 28 days upon discovery of a defect. No repairs under warranty are to be undertaken without written approval of RS Sailing. -
Page 37: Knots
8 - Knots Knot #1 Knot #2 Knot #3 Knot #4 Knot #5 Knot #6 Knot #1 - Knot on knot Knot #2 - Bowline... -
Page 38: Knots
8 - Knots Knot #3 - Figure of eight Knot #4 - Overhand knot Knot #5 - Double sheet bend Knot #6 - Cow hitch... -
Page 39: Glossary
9 - Glossary At the back Anchor Line Rope that attaches the anchor to the boat Astern Behind the boat Asymmetric Gennaker flown from a retractable pole at the bow Back To ‘back the sail’; allowing the wind to fill the back of the sail Bailer A bucket or other container used for bailing water Batten... - Page 40 Buoy Floating object attached to the bottom of sea – used variously for navigation,mooring, and to mark out a race course Buoyancy Aid Helps you to stay afloat if you fall in the water Buoyancy Compartment Water-tight compartment in the hull that maintains buoyancy Burgee Small flag at the top of the mast to show wind direction Capsize...
- Page 41 Draught The depth of the vessel below the surface Ease To ‘ease sheets’ means to let the sail out gently Fairlead A pulley block used to guide a rope to avoid chafing Foils The daggerboard and the rudder Foot The bottom edge of a sail Fore Towards the front of the boat Forestay...
- Page 42 ‘Head to Wind’ To point the bow in the direction that the wind is blowing from, causing the sails to flap ‘Heave to’ To stop the boat by easing the main sheet and backing the jib Heel A boat ‘heels’ when it leans over due to the sideways force of the wind Helm/Helmsman The person who steers the boat, or another name for the tiller...
- Page 43 Latitude Imaginary lines running parallel round the globe from east to west. They help you measure position and distance on a chart. Leech The back edge of the sail Leeward The part of the boat furthest away from the direction in which the wind is blowing Leeway The amount of sideways drift caused by the wind...
- Page 44 Mast Lower Section The bottom section of a two-piece mast Mast Step The fitting on the deck that the mast fits into Mast Top Section The top section of a two-piece mast Meteorology The study of weather forecasting Moor To tie the boat to a fixed object Mylar A brand of strong, thin, polyester film used to make racing sails National Sailing Federation Body that governs sailing in a nation.
- Page 45 Reef To make the sails smaller in strong winds Retaining Pin On a trolley, to hold the launching trolley to the road base Road Base A trolley that you place your boat and launching trolley upon to trail behind a vehicle Rowlocks U shaped fittings that fix onto the gunwale and holds your oars in position while rowing...
- Page 46 Slider Sliding fitting on the boom to which the gnav bar is attached Soundings The numbers on a chart showing depth Spars The poles, usually carbon or aluminium, to which the sail is attached Spreaders Metal fittings attached to the mast which hold the shrouds out Spring Tide The tides with the biggest range and strongest currents Starboard.
- Page 47 ‘Under Weigh’ A term derived from the act of ‘weighing’ anchor, meaning to be in motion Upwind To sail against the direction in which the wind is blowing Wetsuit Neoprene sailing suit designed to keep you warm when wet Windward The part of the boat closest to the direction in which the wind is blowing...
Need help?
Do you have a question about the RS Neo and is the answer not in the manual?
Questions and answers