Televic Confidea Installation And User Manual
Wireless conference system
Hide thumbs
Also See for Confidea:
- Installation and user manual (116 pages) ,
- Installation and user manual (93 pages) ,
- Installation & user manual (45 pages)
Table of Contents
Advertisement
Quick Links
Advertisement
Table of Contents

Related Manuals for Televic Confidea


Summary of Contents for Televic Confidea
- Page 1 Confidea Wireless Conference System Installation and User Manual...
- Page 2 Confidea Wireless System Installation and User Manual Televic Conference Systems 2008-09-05...
-
Page 3: Table Of Contents
General System Architecture ..................16 4.1.1. Components .......................... 16 4.1.2. Stand-alone system ....................... 16 4.1.3. Connected to Televic wired conference system ..............16 Wireless networks and frequency bands ............... 17 5.1. Wireless LAN ........................ 17 5.2. Televic Confidea system ....................17 5.3. - Page 4 Confidea Wireless System Installation and User Manual 6.5. Maintenance ........................ 23 6.5.1. General ..........................23 6.5.2. Cleaning ..........................23 Microphones ........................ 24 7.1. Introduction ......................... 24 7.2. Electrical and acoustic properties ................. 24 7.3. Microphone connector ....................24 7.4. Operation ........................25 7.5.
- Page 5 Confidea Wireless System Installation and User Manual 11.2.3. Step 3 – Cable Setup ......................38 11.2.4. Step 4 – Accessing WCAP ...................... 38 11.2.5. Step 5 – Default Screen ......................38 11.3. Setting the IP address ....................39 Web server ........................40 12.1.
- Page 6 Confidea Wireless System Installation and User Manual 14.1. Introduction ......................... 53 14.2. Default encryption ......................53 14.3. Setting the default encryption ..................53 14.4. Custom encryption ....................... 54 14.5. Setting a customized encryption ................... 54 14.6. Adding a unit with a customized encryption ..............56 14.7.
-
Page 7: Section 1 - General Information
Confidea Wireless System Installation and User Manual Section 1 – General Information Televic Conference Systems 2008-09-05... -
Page 9: Copyright Statement
However, the information in this manual is supplied without warranty, either express or implied. Neither the authors, Televic NV, nor its dealers or distributors will be held liable for any damages caused or alleged to be caused either directly or indirectly by this book. -
Page 10: Trademarks
All terms mentioned in this manual that are known to be trademarks or service marks have been appropriately capitalized. Televic NV cannot attest to the accuracy of this information. Use of a term in this book should not be regarded as affecting the validity of any trademark or service mark. -
Page 11: Safety Instructions
3. Safety Instructions or more of the following measures: Reorient or relocate the receiving antenna. The Confidea Wireless Conference system is state of the art and has been designed to meet quality. Increase the separation between the equipment Nevertheless, the individual components of the and receiver. -
Page 12: Important Safety Instructions
Confidea Wireless System Installation and User Manual Unplug this product from the wall outlet before cleaning. Do not use liquid cleaners or aerosol Radiofrequency radiation exposure cleaners. Use a damp cloth for cleaning. Information: This Wireless discussion units and the 6. - Page 13 Confidea Wireless System Installation and User Manual 11. Moving 16. Lightning A product and cart combination should be moved For added protection for this product during a with care. Quick stops, excessive force, and uneven lightning storm, or when it is left unattended and...
- Page 14 Confidea Wireless System Installation and User Manual 22. Damage Requiring Service 25. Coax Grounding Unplug this product from the wall outlet and refer If an outside cable system is connected to the servicing to qualified service personnel under the apparatus, be sure the cable system is grounded.
-
Page 15: Power Connections
Confidea Wireless System Installation and User Manual 3.3. Power Connections Warning: To reduce the risk of fire or electric For permanently connected equipment, a shock, do not expose this appliance to readily accessible disconnect device shall be rain or moisture. Do not open the incorporated in the fixed wiring;... -
Page 16: Confidea System Information
Installation and User Manual 4.1.3. Connected to Televic wired Confidea System conference system Information As part of a wired system, the Confidea offers full functionality such as extended voting 4.1. General facilities and language distribution. When System Architecture connected to a TCS2500 or TCS9000 central... -
Page 17: Wireless Networks And Frequency Bands
5.2. Televic Confidea system and frequency bands The wireless network of the Televic Confidea system is based on the 802.11 a/g standards. 5.1. Wireless LAN Additional protocols have been added on top of the 802.11 a/g standards to provide high robustness against interference from other wireless devices. -
Page 18: Frequency Planning
CONFIDEA system will be set automatically to different frequencies. 5.3. Frequency Planning When the CONFIDEA system is set to manually select the wireless carrier frequency, you must make sure 5.3.1. Use with WiFi base stations the CONFIDEA wireless carriers of the different nearby rooms do not overlap each other. -
Page 19: Section 2 - System Components
Confidea Wireless System Installation and User Manual Section 2 – System Components Televic Conference Systems 2008-09-05... -
Page 21: Confidea Wireless Units
6.1. Introduction Channel selection buttons: Changes the audio channel sent to the The wireless Confidea units consist out of Delegate headphones. Each button has a blue indication and Chairman units. Both are used as speech LED. Pressing these buttons affects the enforcement in a conference meeting. - Page 22 Confidea Wireless System Installation and User Manual Figure 6.1: Confidea DD Figure 6.4: Confidea CD Figure 6.2: Confidea DV Figure 6.5: Confidea CV Figure 6.3: Confidea DIV Figure 6.6: Confidea CIV Televic Conference Systems 2008-09-05...
-
Page 23: Installation
Confidea Wireless System Installation and User Manual 6.3. Installation 6.5. Maintenance In order to use the wireless units the battery and 6.5.1. General microphone need to be installed. For instructions see install the microphone and install Caution: the battery. Do not put any objects on top of the units. -
Page 24: Microphones
Microphones 7.3. Microphone connector Figure 7.1: Connector pin layout (bottom view) 7.1. Introduction The CONFIDEA-MICL and CONFIDEA-MICS pluggable microphones are used with the different delegate- and chairman units. These microphones have a uni- directional response for optimum performance even in noisy conditions. Both types have a very low susceptibility to interference from mobile phones. -
Page 25: Operation
Confidea Wireless System Installation and User Manual The color of the microphone ring shows the status of 7.4. Operation the microphone (refer to Table 7.2: LED ring status). The microphone contains following elements (refer Table 7.2: LED ring status to Figure 7.2):... -
Page 26: Battery Pack
Installation and User Manual Battery Pack 8.2. Safety Figure 8.1: Battery label 1 8.1. Introduction The Confidea battery pack is used with the wireless conference units. Refer to Table 8.1 for the list of compatible devices. Table 8.1: Compatible devices Type... -
Page 27: Controls And Indicators
To connect the charger plug Note: The battery capacity as listed in Table 8.3 Figure 8.3: Confidea battery pack has an accuracy of 20%. After the display of the battery condition (for 4-5 seconds), the first three LEDs (LED1 to LED3) will indicate the status of the charge circuitry (refer to Table 8.4). -
Page 28: Wall Plug Battery Charger
Refer to Table 9.2 for the compatible battery packs. Table 9.1: Electrical properties Input: 90-264V(AC) 50-60Hz Output: 15V(DC), 2A Caution: To avoid damage, use only the charger delivered by Televic to charge the Confidea Battery Packs. Table 9.2: Compatible battery packs Type Art-nr Description Rechargeable Confidea BP 71.80.9121... -
Page 29: Charging A Battery Pack
A battery pack can be charged separately, or when inserted in a wireless unit. Note: The wall plug charger can be used to power a Confidea wireless unit. In this case the battery pack needs to be installed in the unit. Televic Conference Systems 2008-09-05... -
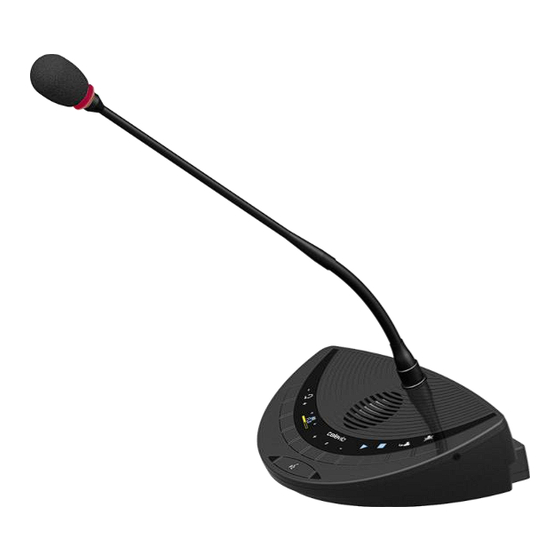
Page 30: Wireless Conference Access Point (Wcap)
Confidea Wireless System Installation and User Manual Figure 10.1: Wall mounting 10. Wireless Conference Access Point (WCAP) 10.1. Introduction All communication to and from the wireless units is controlled by the WCAP. 10.2. Installation 10.2.1. General 10.2.3. Table or Ceiling Mounting Caution: Do not open the wireless access point. -
Page 31: Tripod Mounting
. (see also Chapter 4) Caution: 3. Digital Bus Connection Only use antennas supplied by Televic. Digital Bus connection is done through RJ45- Use of other antennas can cause damage connectors at the back of the WCAP. - Page 32 Confidea Wireless System Installation and User Manual Figure 10.6: LED indicators Table 10.1: LED 1 (Blue) - Mode SLOW BLINKING Slave mode BLINKING Standalone mode Table 10.2: LED 2 (Red) - RF link quality RF LINK OK SLOW BLINKING 10<SNR <15...
-
Page 33: Section 3 - System Configuration
Confidea Wireless System Installation and User Manual Section 3 – System Configuration Televic Conference Systems 2008-09-05... -
Page 35: Accessing The Built-In Web Server
Confidea Wireless System Installation and User Manual Follow these steps to reset the access point (WCAP) 11. Accessing the built- Unplug ALL connections in web server Connect the power cord Activate the WCAP by flipping the power switch 11.1. Introduction to the “on”... -
Page 36: Step 2 - Pc Or Mac Tcp/Ip Setup
Confidea Wireless System Installation and User Manual 11.2.2. Step 2 – PC or MAC TCP/IP Double-click on Properties Figure 11.4: Network Connections setup Note: The WCAP has a default fixed IP address and subnet mask: 192.168.0.10 Subnet mask: 255.255.255.0 In order to access the built-in web server for the first time the TCP IP settings from the PC or MAC must be modified. - Page 37 Confidea Wireless System Installation and User Manual Figure 11.5: TCP/IP properties Assigning a Static IP Address with MACINTOSCH OSX Go to the Apple Menu and select System Preferences Click on Network Select Built-in Ethernet in the Show pull-down menu Select Manually in the Configure pull-down...
-
Page 38: Step 3 - Cable Setup
Confidea Wireless System Installation and User Manual 11.2.3. Step 3 – Cable Setup 11.2.5. Step 5 – Default Screen After successfully establishing a connection to the WCAP and passing the password screen, the default WCAP screen appears. Figure 11.8: WCAP default screen Connect your computer (PC or MAC) to the LAN port using a straight-through cable. -
Page 39: Setting The Ip Address
4. Here you can enter the desired fixed IP address. “Setup” menu (refer to Figure 11.9) Only applicable in fixed IP address mode. Figure 11.9: Confidea Setup menu 5. Here you can enter the desired subnet mask. Only applicable in fixed IP address mode. -
Page 40: Web Server
Confidea Wireless System Installation and User Manual RF hardware 1 Version: Displays the RF hardware 12. Web server version for the active module. RF hardware 2 Version: Displays the RF hardware 12.1. Setup version for the passive module. RF Firmware 1 Version: Displays the RF firmware 12.1.1. -
Page 41: Admin
This is the help text for the Admin page. Change password Only users that know the password are authenticated to use and consult the Confidea WCAP web pages! In this section the password can be redefined: 1. Enter the OLD password 2. -
Page 42: Rf Configuration
Note: 12.2.1. General The channel availability check takes 60 seconds. During that time delegate units Power cannot connect to the Confidea Access Point Room size: the transmitted output will be adjusted to cover the configured room size. Frequencies listed in color. -
Page 43: Quality 5.8 Ghz Ism
RED, and thus the more likely interference will occur with other systems. Note: From time to time, the Confidea system will also measure its own activity in the channel on which it is currently operating. This results in a RED indication on the... -
Page 44: Conference Management
NEXT button or by clicking the green microphone on the computer screen in case the When the maximum allowed number of Confidea system is connected to a central unit microphones are switched on, activation of an and PC control software is used. - Page 45 Note: marked in red! If the Confidea system is connected to a Televic conference system central unit, the conference mode settings will be managed from that central unit.
-
Page 46: Unit Monitoring
Link Quality: Init Control: Displays an indication of the quality of the radio link the unit and the Confidea access point. The Open Access: quality is expressed as Excellent, Good, Fair and When the system is set to ‘Open Access’ any Low. -
Page 47: Service
Start: This button starts capturing the access point To ensure a highly secured wireless system, the events. Confidea system uses an encryption algorithm and mechanism that is fixed and cannot be changed. Stop: This button stops capturing the access point The information that is sent over the radio link is events. - Page 48 Confidea Wireless System Installation and User Manual access the system and participate in the conference ‘Calculate128 bit full’ key: Pressing this button will randomly generate a 128 bit key. The key appears in the window and can still be edited by the user.
-
Page 49: Initialization
13.2. Stand-alone mode 13.2.1. Access modes 13.1. Introduction When you use the Confidea system in stand-alone The system can be controlled by the WCAP in stand- mode, i.e. with no connection to a TCS2500 or alone mode or together with the TCS2500 / TCS5500 TCS5500 central unit, the WCAP is responsible for the Central unit in coupled mode. -
Page 50: Unit Initialization In 'Open Access' Mode
Note: Avoid using Open Access in areas with Take the following steps to initialize all units: more than one active Confidea system, 7. Switch on all wireless units and wait a few as there is no control over which WCAP seconds until the units have discovered the the delegate units will connect to. -
Page 51: Adding A New Unit In 'Open Access' Mode
Confidea Wireless System Installation and User Manual Only the units that are have been initialized and 13.2.6. Adding a new unit in listed in the Init List will now be able to join the ‘Controlled Access’ mode conference. In a ‘Controlled Access’ set-up, adding a unit requires... -
Page 52: Reviewing Init Information
Confidea Wireless System Installation and User Manual 13.2.7. Reviewing Init information 13.3. Coupled mode At any time it is possible to see how many units are If the WCAP is used in combination with a wired known by the system, “Units in Init List”, and to see central conference unit, e.g. -
Page 53: Encryption
This further enhances the confidentiality, but can also be used to control access in an environment The following screen will appear: where multiple adjacent rooms are using a Confidea conference system. In this way, access can be Figure 14.2: Key assignment page restricted to a single room or a selection of rooms. -
Page 54: Custom Encryption
Installation and User Manual 14.4. Custom encryption 14.5. Setting a customized encryption The Confidea wireless conference system can be personalized by defining and selecting a unique To set up your system with a custom encryption key, encryption key. carefully follow these steps:... - Page 55 Confidea Wireless System Installation and User Manual Caution: Caution: Only use hexadecimal characters i.e. Only the units that are connected with choose 32 characters from the the WCAP can receive the newly following list: generated encryption key. 0, 1, 2, 3, 4, 5, 6, 7, 8, 9, a, b, c, d, e, f.
-
Page 56: Adding A Unit With A Customized Encryption
Confidea Wireless System Installation and User Manual 14.6. Adding a unit with a 14.7. Using multiple customized encryption customized keys Televic Conference Systems 2008-09-05... -
Page 57: Section 4 - Use Cases
Confidea Wireless System Installation and User Manual Section 4 – Use Cases Televic Conference Systems 2008-09-05... -
Page 59: Stand Alone System
Confidea Wireless System Installation and User Manual via a standard web browser. (See chapter system 15. Stand alone system configuration) 15.1. Basic discussion In a basic setup where only discussion is applicable, Note: the Wireless Conference Access Point WCAP (see link In this case the chairman needs to guide to chapter WCAP) acts as a central control unit. -
Page 60: Basic Voting And Opinion Polling
Units applicable to this setup are listed below: application. Confidea DV (Figure 6.1 and Figure 6.4) Confidea CV In a standalone configuration power needs to be supplied to the WCAP separately. (see chapter WCAP power supply) Figure 15.2: Stand alone set up for opinion polling... - Page 61 Confidea Wireless System Installation and User Manual Chairman has control over the voting session. With the voting session control buttons (see Confidea Wireless units - Controls and indicators) he can start, pause or stop a voting session. Figure 15.3: Voting control buttons...
-
Page 62: Connected To Ce2500 Or Cpu5500
CE2500 or CPU5500 Connecting the Confidea access point to the central control equipment of the TCS5500 requires an As the Confidea system is an addition to the Televic additional splitter unit (SPL5525). product family it is also possible to combine the... -
Page 63: Discussion
Several criteria can influence the choice of the Televic central control unit to be used. The criteria described below should guide you in designing the best possible system architecture for a given project. - Page 64 External Audio Peripherals Connectivity PA systems: Operator Control: Whereas the Confidea units have a build in Systems requiring a great degree of control can be loudspeaker, some meeting rooms are equipped equipped with the Televic software suite. with external PA systems with loudspeakers This application makes it possible, depending on installed on walls or in ceilings.
-
Page 65: Advanced Voting
Systems with simultaneous interpretation as a requirement always require a central control unit in informal voting session. combination with the interpreter desks. Making use of a Televic voting software suite enables following features: Installation Voting agenda Whereas the TCS2500 interpreter desks are of the... - Page 66 Confidea Wireless System Installation and User Manual possible to use the Confidea system without the need to change all the interpreter desks. The PIO unit of the TCS5500 plays an imported role in such configuration handling the floor and interpretation languages between the two systems.
-
Page 67: Section 5 - Appendix
Confidea Wireless System Installation and User Manual Section 5 – Appendix Televic Conference Systems 2008-09-05... - Page 69 Confidea Wireless System Installation and User Manual Televic Conference Systems 2008-09-05...
Need help?
Do you have a question about the Confidea and is the answer not in the manual?
Questions and answers