
Related Manuals for Salvis CucinaEVO 623T


Summary of Contents for Salvis CucinaEVO 623T
-
Page 1: Operation Instructions
SALVIS Combi-Steamer CUCINA Easy CUCINA 623 611 1011 T 611 621 1011 1021 QT 2011 2021 QT Operation instructions... -
Page 2: Table Of Contents
Table of contents page User information ............. Information about the instructions for the appliance . - Page 3 Table of contents page Creating, changing, deleting products in the cookbook ......Creating, saving and assigning products .
-
Page 4: User Information
Translation of the original operating instructions Operating Instructions User information Information about the instructions for the appliance These operating instructions contain important information on the safety, operation, settings and cleaning of the appliance. Refer to the installation instructions for information on the setup and installation of the unit. Read the operating and installation instructions carefully before starting to use the appliance. -
Page 5: Use As Intended
Operating Instructions Use as intended D The appliance is for commercial use and may only be operated − by trained personnel, − if the appliance is supervised, − for the purpose designated in the operating instructions. D The appliance may only be used for the preparation of foodstuffs. E. g. for the steaming, stewing, frying, grilling, baking, defrosting, warming and keeping warm of meet, fish, potatoes, vegetables, con... - Page 6 Operating Instructions Risk of injury D During operation there is a risk of burns from − hot surfaces, − hot cooked products, − hot removable racks, − hot rack trolleys and − hot escaping steam when opening the cooking chamber door. D Scalding hazard! Containers with liquids or products to be boiled, becoming liquid during the cooking process, may only be pushed into the slot that can be easily viewed by the operating personnel.
-
Page 7: Description Of The Appliance
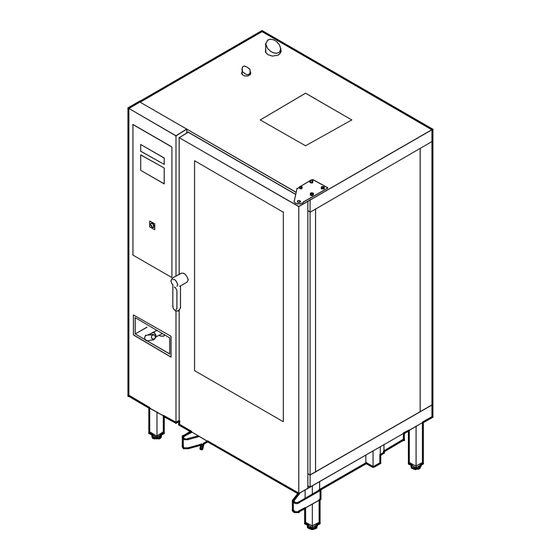
Operating Instructions Description of the appliance Operating principle − The heat in the cooking chamber is supplied via electrically heated heating elements. − According to the different operating modes and settings by the user, a defined volume of water is evaporated via the heating elements. -
Page 8: Description Of The Functional Components, Type 2011, 2021
Operating Instructions Description of the functional components, Type 2011, 2021 (1) Exhaust air, vapour (2) Cooking chamber supply air (3) Display and control panel (Touch-screen) (4) Main appliance On/Off switch (5) Door catch (6) USB connection (option) (7) Pull-out spray (8) Adjustable feet (19) (11) -
Page 9: Opening The Cooking Chamber Door
Operating Instructions Opening the cooking chamber door WARNING! Scalding hazard! Open carefully! Allow steam and hot air to escape to prevent a hazard to any person! D Opening the cooking chamber door during a coo Operating the door handle king process shuts off the ventilator and heater. The cooking process continues automatically after closing the door. -
Page 10: Familiarise Yourself With The Operating And Display Panel
Operating Instructions Familiarise yourself with the operating and display panel. Overview of control versions After the control system is switched on and has powered up different user interfaces appear according to the appliance features. Control system operating features "Easy" Control system operating features "Pro" With four modes of operation: The control system permits many different −... -
Page 11: Notes On Using The Touch-Screen
Operating Instructions Notes on using the touch-screen Operating and display panel: Touch-screen D The control system of the appliance is operated via the touch-screen. D The touch-screen may be operated only with the fingers. Brief tapping is sufficient. D Do not operate the operating panel with ballpoint pens or other objects. -
Page 12: Mode Settings "Steam, Hot Air Steam, Hot Air
Operating Instructions Mode settings “Steam, Hot Air Steam, Hot Air” “Modes” window Steaming Temperature range 30 - 130°C Moisturization 100% (not adjustable) Core temperature range 0 - 99 °C “Settings” window The adjustable fan speed is limited: 3 - 4 - 5 Hot air steaming Temperature range 30 - 250 °C Moisturization 0 - 100%... -
Page 13: Commissioning
Operating Instructions Commissioning . Before using the appliance for the first time, clean with a cleaning product that dissolves grease. For cleaning, see page 71, Chapter 13. Only for appliances with automatic cleaning system, not for Types 2011: . Before initial commissioning or after extended operating breaks, fill approx. 5 litres of water into the cooking chamber drain (overheating protection/odour trap). -
Page 14: Inserting The Grease Filter (Optional)
Operating Instructions Air baffle (at left in cooking chamber) Inserting the air baffle type 611, 621QT, 1011, 1021QT Seat for guide pin, top . Insert air baffle into the guide pins: 1. Insert at top 2. Lift air baffle 3. Insert at bottom Guide pin Air baffle (at left in cooking chamber) Inserting the air baffle, Type 2011, 2021QT... -
Page 15: Inserting The Removable Racks
Operating Instructions 5.1.5 Inserting the removable racks Suspension pin in cooking chamber (only on Inserting the air baffle type 623T, 611T, and top) 1011T . Push removable racks into suspension pins − at the rear, − hook in place in the front. D The removable racks are identical at the left and Rear right. -
Page 16: Inserting/Removing Removable Racks/Rack Trolleys (Option)
Operating Instructions Inserting/removing removable racks/rack trolleys (option) Slide-in rack WARNING! Risk of injury! Rack trolleys/ Holes for engage transport carts as well as appliances on wheels may ment lever tip over when transported across slanted surfaces or thresholds! Guide pin in Caution hot! Wear protective gloves to move re... -
Page 17: Switching On The Device
Operating Instructions Switching on the device . Open the water tap. . Switch on the mains switch for the appliance. The appliance is equipped with different main switches, depending on the type of appliance and year of manufacture: Touch-key with LED indicator light Switch with LED ring indicator light . -
Page 18: Loading
Operating Instructions Loading D Use only heat-resistant containers and GastroNorm containers (EN631). D Grease dripping down during the cooking process must not enter the cooking chamber drain; a GN container must therefore be inserted in the lowest shelf for these types of food. Otherwise there will be a risk of clogging the water drainage system. -
Page 19: Starting / Ending The Cooking Process
Operating Instructions Starting / ending the cooking process 5.6.1 Starting the cooking process Select products / make settings, see from Page 22 Chapter 6. Start cooking process D The symbol in the key glows green. . Tap the key "Start/Stop". D The symbol in the "Start/Stop"... -
Page 20: End Of The Cooking Process
Operating Instructions 5.6.2 End of the cooking process WARNING! Scalding hazard! Carefully open the cooking chamber door! Allow steam and hot air to escape to prevent a hazard to any person! End of cooking process D After expiry of the cooking process, an acoustic si gnal sounds. - Page 21 Operating Instructions Selecting auxiliary functions Example: “Steaming” window is selected. . Tap the “Auxiliary functions” key. D The window "Auxiliary functions" is displayed. Setting the auxiliary “Cooling” function (Temp-Active) . Touch the “Temp-Active” key. D The key is highlighted in colour. .
-
Page 22: Using Operating Modes, Cooking Programs
Operating Instructions Using operating modes, cooking programs All options are described in this Chapter 6.. The figures and functions can deviate from the figures presented here, depending on the equipment of the appliance. Setting the cooking process - manual settings With this function you work with the four operating modes steaming, hot air, combi-steaming and vitalisa... - Page 23 Operating Instructions Changing values with the numeric keypad . Enter the required value. . Confirm the value entered with "Enter". D The numeric keypad is closed. The value has been saved. Key functions info: Delete from right to left Close numeric keypad without saving Confirm entry and close numeric keypad.
- Page 24 Operating Instructions Selecting auxiliary functions Auxiliary functions . Tap the required "Auxiliary Functions". D The key is shaded dark grey and framed. . Confirm the set auxiliary function with "Enter". D The "Settings" window will be displayed again. D The auxiliary functions set are displayed again in the window.
- Page 25 Operating Instructions Selecting the "Start time/end of cooking" auxiliary Auxiliary functions function The start time or the end of cooking can be preset. When using the core temperature, the end of cooking setting is not available. . Tap the "Start time/end of cooking" key. D The key is shaded dark grey and framed.
-
Page 26: Cooking Steps To Add / Combinations
Operating Instructions Cooking steps to add / combinations Up to 20 cooking steps can be combined. Option cookbook: The cooking steps can be stored in the cook book (refer to Page 42 Chapter 7.1). Selecting the operating mode (1. cooking step) . - Page 27 Operating Instructions Display/change of cooking steps in overview window Touch the value . Tap the "Cooking steps overview" key. D The "Cooking steps overview" window will be dis played. If more cooking steps are created than can be shown on the display screen: .
- Page 28 Operating Instructions Deleting individual cooking steps in the overview window . Tap the "Cooking steps overview" key. D The "Cooking steps overview" window is displayed. If more cooking steps are created than can be shown on the display screen: . Tap the screen with finger and move the cooking steps displayed up or down.
-
Page 29: Using Vitalising
Operating Instructions Using vitalising If this function is enabled, the key "Vitalising" is displayed. Add the key "Vitalising" in the home screen, see from Page 56 Chapter 10. (Figure 13). With these functions you can prepare the foods ready-to-serve specifically for the à la carte or banquet business Start Vitalising . -
Page 30: Cooking Process Application
Operating Instructions Cooking process application If this function is enabled, the key "Cooking process" is displayed. Add the key "Cooking process" in the home screen, see from Page 56 Chapter 10. (Figure 13). Nine preset cooking processes are set in the cooking process feature. Start cooking process . -
Page 31: Special Programs Application
Operating Instructions Special programs application The "Special programs" key is displayed and enabled if the appliance is equipped with this option. Add the key "Special programs" in the home screen, see from Page 56 Chapter 10. (Figure 13). Start manual settings . -
Page 32: Working Using Slide-In Times
Operating Instructions Working using slide-in times This function is included in the special programs. A cooking time can be allocated to each slide-in level for the operating mode used. Add the key "Special programs" in the home screen, see from Page 56 Chapter 10. (Figure 13). Start manual settings . - Page 33 Operating Instructions End of cooking process D After expiry of a slide-in time, an acoustic signal sounds. D The corresponding symbol for "Slide-in level" flashes. . Open the cooking chamber door. D The expired slide-in time/cooking time goes out. D Whilst the cooking chamber door is open, the slide-in times do not run.
-
Page 34: Using Combi-Cooking
Operating Instructions Using combi-cooking This function is a part of the cookbook. It permits the simultaneous cooking of different products at different times. Programs in the cookbook are available for combi-cooking, according to the cooking chamber climate selected. Display cookbook D Combi-cooking is possible in manual mode and cookbook. - Page 35 Operating Instructions Slide-in levels window D The time runs down. The remaining time is dis played. D The progress bar indicates the time progression graphically. Changing the slide-in times, refer to the following Figure 8! D After expiry of a slide-in time, an acoustic signal sounds.
-
Page 36: Applying The Smartcooking Program
Operating Instructions Applying the SmartCooking program If the appliance is equipped with this option and it is enabled, the key "SmartCooking" is displayed. Add the key "SmartCooking" in the home screen, see from Page 56 Chapter 10. (Figure 13). SmartCooking offers a selection of automated cooking processes depending on product, product size, and cooking mode. - Page 37 Operating Instructions Starting the cooking process D The selected functions are displayed in pictograms. . Make adjustments if necessary. . Tap the key "Start/Stop". D The symbol in the key "Start/Stop" changes from green to red. D A preheating process starts. D After the preheating process has expired, an acous...
-
Page 38: Using Cooking Programs From The Cookbook
Operating Instructions Using cooking programs from the cookbook If the appliance is equipped with this option and it is enabled, the key "Cookbook" is displayed. Add the key "Cookbook" in the home screen, see from Page 56 Chapter 10. (Figure 13). Products can be entered, changed and deleted in the cookbook (refer to Page 42 Chapter 7.). - Page 39 Operating Instructions Switching the cookbook view Cookbook . Tap the "Change view" key. D The display switches to pictogram view. Key functions info: Cookbook Switching to pictogram view. Switching to the list view. Display/change of cooking steps in overview window Cookbook .
-
Page 40: Working With Categories (Menu Groups)
Operating Instructions 6.10 Working with categories (menu groups) This function is a part of the cookbook. Creating or deleting categories, refer to Page 48 Chapter 7.4! Start categories . Tap the "Category" key. D The "Categories" (product groups) list is displayed. Moving the display If more categories are created than can be shown on the display screen:... -
Page 41: Working With Favourites (Preferred Products)
Operating Instructions 6.11 Working with favourites (preferred products) This function is a part of the cookbook. In order to display favourites, these must be previously allocated. Assigning products to favourites, see from page 42Chapter 7.1 (Figure 7). Starting favourites . Tap the "Favourites" key. D The "Favourites"... -
Page 42: Creating, Changing, Deleting Products In The Cookbook
Operating Instructions Creating, changing, deleting products in the cookbook This function is a part of the cookbook. Creating, saving and assigning products Up to 20 cooking steps can be combined. Start manual settings . Tap the "Hand" key. D The "Operating Modes" window will be displayed. Selecting the operating mode . - Page 43 Operating Instructions Adding a cooking step . Tap the "New cooking step" key. D The "Operating Modes" window will be displayed. . Select the second mode of operation. D The "Settings" window is displayed. D The "1/1" display switches to "2/2". D If you require additional cooking steps, repeat this step until all desired cooking steps are created.
- Page 44 Operating Instructions Adding an information item Name Here you can enter your additional information. . Tap the "Info" key. Info Category D A box for entering text is displayed. Info . Enter the desired text. . Tap the "Confirm" button. Name Info Key functions info:...
- Page 45 Operating Instructions Adding an image No. Name Images for meals are already created as factory defaults. If you would like to use your own images, you first have Info Category to import them into the memory. To import digital photos, refer to Page 65 Figure 18 .
-
Page 46: Changing The Settings Of Products In The Cookbook
Operating Instructions Storing the settings . Tap the key "Save". Note D The product is stored in the cookbook and assigned Cookbook has been saved to the allocated category of favourites. D The window for confirming the save process is dis played. -
Page 47: Deleting A Product From The Cookbook
Operating Instructions Changing the settings Name Here changes can be made to No., Name, Info, Cate gory/Favourites and Image. For more details, refer to Page 43 from Figure 5. . Tap the key "Save". D The changes are stored in the cookbook. D The window for confirming the save process is dis... -
Page 48: Creating And Deleting A Category
Operating Instructions Selecting and deleting the product Cookbook . Tap the product to be deleted. D The product is framed. . Tap the "Delete" key. D A window for the security request is displayed. . Tap the key "Confirm". Note D The window for confirming the save process is dis... -
Page 49: Delete Category With Products
Operating Instructions Input the designation Name . Input the designation for the category. . Tap the key "Enter". D An overview of all existing images is displayed. Key functions info: Switching the key assignment. Move the cursor to the left or right. Delete text from right to left. - Page 50 Operating Instructions Selecting the category . Tap the category to be deleted. D The category is framed. D The key "Delete" is only active when the category contains no more products. . Tap the key "Confirm". D The products allocated to this category are dis played.
- Page 51 Operating Instructions Saving the change Note . Touch "Confirm". Program exists with same D The allocation to the category is deleted in the cook number book. Confirm overwriting by pres sing OK D The window for confirming the save process is dis played.
-
Page 52: Using Baking
Operating Instructions Using baking Option: Easy Select baking . Tap the key "Baking". D The window "Baking" is displayed. Start the baking process . Tap the key "Start/Stop". D The symbol in the "Start/Stop" key changes from green to red. D Moisture is dosed into the cooking chamber (refer to the following Figure 4)! Or set the additional functions:... - Page 53 Operating Instructions Start time/end of cooking preselection: Pre-select start or end of the cooking process. Using start time, end of cooking, refer to page 25 Figure 8! Temp-Active: Preheating / Cooling before the cooking process. D After a heating or cooling process the controller waits for an entry confirmation. Displayed by blue symbol in the key "Start/Stop".
-
Page 54: Displaying Haccp Protocols
Operating Instructions Displaying HACCP protocols HACCP is the abbreviation for Hazard Analysis Critical Control Points. D The HACCP protocol is required in order to check the process characteristics. D The protocols are a decisive means for the persons responsible to be able to verify that they have ful filled their obligations. -
Page 55: Reading Haccp Protocols On A Usb Stick
Operating Instructions Reading HACCP protocols on a USB stick Only possible with the option USB connection! Requirements of the USB stick D Formatting the USB stick: file system = FAT32/FAT32 (standard), size of assignment units = standard/ standard size. D The USB stick must not contain any data. During the read-out process, a new directory is created. . -
Page 56: Setup Of The Control And User Interface
Operating Instructions Setup of the control and user interface All possible settings are shown in the following figures. Depending on the appliance equipment, several setup options have no function, e.g. presented grey and cannot be selected or the window is not displayed on the control panel. - Page 57 Operating Instructions Setting the display for Display - screen brightness - allocating the keys to the keyboard Brightness - cookbook sort order . Setting screen brightness - Tap the slider control and Keyboard move to the left or right. Cookbook −...
- Page 58 Operating Instructions Calibrating/aligning the display Caution! An incorrect calibration will result in an inability to work Calibrate Touch touch auto zero the buttons by tapping them! In that case, the calibration process must be carried out with a mouse! Connect the PC mouse via the USB connection and follow the on-screen instructions using the cursor.
- Page 59 Operating Instructions Setting the acoustic signals (tones) Sounds Several sound files are included as factory default. These can Program end be used for a variety of messages in different ways. Step change . Turn the volume up so that a the selected sound can Warning be heard when a sound file is selected.
- Page 60 Operating Instructions Adjusting the language/region and program security Language/region . Tap arrow key (e.g. language or cookbook). Temperature Celsius Fahrenheit D The available files are displayed. Language German D A scrollbar will be shown if there are a large number Cookbook Cookbook of files available.
- Page 61 Operating Instructions Adjusting the preheating process User . Tap the desired increment type "Temperature or per Delete PIN cent" Water supply adjust D The selected unit is displayed. ment Temperat. Percent. . Tap the value in the "Preheating increment" or "Pre Preheating increment heating hold time"...
- Page 62 Operating Instructions Disabling/deleting the PIN User This function is used to delete a previously saved PIN. The Delete PIN delete process is necessary for example, if a new PIN is to be Water supply adjust created, or the limitation on modification permissions is to be ment lifted.
- Page 63 Operating Instructions Setup the home screen / Allocating and arranging Start Standard functions on the display window This setting can be used to specify which functions should be Start screen configuration displayed in the display area, and whereabouts. Vitalising Manual Cooking process The specifications set here are displayed after the Home key is...
- Page 64 Operating Instructions Reset to factory settings Other Settings that have been made by the user are reset, e.g. Factory cookbook and user settings. As a precaution, save the user settings settings to a USB stick. Data export refer to Page 65 Figure 19 Technician popup (USB connection optional).
- Page 65 Operating Instructions Switching the pull-out shower on/off Info service If the pull-out shower is leaking, it can be switched off with this Pull-out shower function. . Tap the "Pull-out shower" key. D Red frame, indicates pull-out shower is switched on. .
-
Page 66: Exporting And Importing Data
Operating Instructions Setting standard cooking data Standard settings operating parameters Here you can adapt cooking data to your own operational Steaming (manual) conditions. These are shown after the relevant operating mode, Hot air (manual) cooking process, or the special programme is selected. Hot air steaming (manual) Vitalising (manual) Gratinate (manual) -
Page 67: Data Export: Information About The Data Structure On The Usb Stick
Operating Instructions USB stick requirements USB stick formatting: file system = FAT32/FAT32 (standard), size of assignment units = standard/standard size. Connection USB ports Type QT Type: 2011/2021 Slide the cover to the left Type: T For special formats of USB sticks, which cannot be USB extension cable inserted into the USB port, use the USB extension lead with the type A plug as an adapter. -
Page 68: Data Import: Information About The "Replace/Add" Option
Operating Instructions 11.2 Data import: information about the "Replace/Add" option Import Area Sounds When you call up the menu, "Add" is enabled. Images Cookbooks Attention: with the "Replace" function, the folder content is first User configuration deleted, then data is copied from the USB stick. Import options Replace Import... -
Page 69: Exporting Data - Example: Saving Data
Operating Instructions 11.3 Exporting data - example: saving data Examples of using exported data: − To back up sounds, images, cookbooks and the user configuration. − To import into other appliances for standardized user interfaces within a company. Start screen settings/setup . -
Page 70: Importing Data - Example: Replacing A Cookbook/Cookbooks
Operating Instructions 11.4 Importing data - example: replacing a cookbook/cookbooks Use this function, for example, to standardize cookbooks across multiple appliances. Before replacing data, export the existing data to a separate USB stick as a precaution (exporting, see Chapter 11.3) Requirements for data import, see page 67 Chapter 11.1 Start screen settings/setup . -
Page 71: Completion Of Operation
Operating Instructions Completion of operation . Cleaning the appliance (See the following 13. "Cleaning and Care" chapter. The appliance is equipped with different main switches, depending on the type of appliance and year of manufacture: Touch-key with LED indicator light Switch with LED ring indicator light . -
Page 72: Notes On Cleaning
Operating Instructions 13.2 Notes on cleaning D Clean the appliance / cooking chamber a minimum of once a day, depending on the level of soil ing. Here, use the cleaning program of the appliance, e.g. option Autoclean! D Also if only cooking in steaming mode, the cooking chamber must be cleaned a minimum of once a day using the cleaning program. -
Page 73: Cleaning The Water Manifold
Operating Instructions 13.3.1 Cleaning the water manifold CAUTION Risk of burning! Wear protective gloves and protective clothing! Mounting screw for water D The water manifold must be cleaned before manifold at the top centre in starting the automatic cleaning process! the cooking chamber . -
Page 74: Cleaning The Cooking Chamber - Without Automatic Cleaning System
Operating Instructions 13.4 Cleaning the cooking chamber - without automatic cleaning system If no automatic cleaning system is in place or if it is defective, the cooking chamber must be cleaned as follows. D WARNING! Caustic substances! Wear safety goggles, protective gloves and protective clothing when handling cleaning and rinse-aid products. - Page 75 Operating Instructions Starting the cleaning process Cleaning in progress / Keep door closed . Tap the "Start/Stop" key. D A cooling or heating process takes place if the tem perature in the cooking chamber is too high or too low. D Duration of the automatic cool-down until cleaning - - - commences: At cooking chamber temperatures...
-
Page 76: Cleaning The Cooking Chamber - Automatically, With Powdered Cleaner (Optional)
If the cooking chamber door must be opened in exceptional cases, the automatic cleaning process must first be stopped (see page 87 Chapter 13.9). 13.5.1 Dosing quantities for powdered cleaner: SALVIS Cleaner Powder, 1 kg tin with 35 g measuring spoon, item number 885278 Appliance type Cleaning level 1: Cleaning level 2:... -
Page 77: Starting The Automatic Cleaning Process (Powdered Cleaner)
Operating Instructions 13.5.2 Starting the automatic cleaning process (powdered cleaner) WARNING! Danger of chemical burns! Warning of possible injuries through escaping hot steam with caustic cleaning agents! Do not open the cooking chamber door during the automatic cleaning process! . Preparing the appliance for cleaning the cooking chamber (see page 72 Chapter 13.3). . - Page 78 Operating Instructions Starting the cleaning process . Tap the "Start/Stop" key. D The symbol in the "Start/Stop" key changes from green to red. D A cooling or heating process takes place if the tem perature in the cooking chamber is too high or too low.
-
Page 79: Cleaning The Cooking Chamber - Automatically, With Liquid Cleaner (Optional)
13.6.1 Connecting or replacing the cleaning agent and rinse-aid canisters Only for appliances with "Liquid cleaning" feature. Liquid cleaner: SALVIS Cleaner Fluid, canister 10 litres, item number ET100021 Liquid rinse-aid SALVIS Rinser Fluid, canister 10 litres, item number ET100023 623T, 623, 611T, 611, 1011T... -
Page 80: Filling The Suction Hoses With Cleaning Agent And Rinse-Aid
Operating Instructions 13.6.2 Filling the suction hoses with cleaning agent and rinse-aid. Only for appliances with "Liquid cleaning" feature. D The lines and pumps must be completely filled with cleaning agent and rinse-aid. For this purpose, per form a suction procedure before the initial commissioning or after connecting the canisters. Starting the suction process . -
Page 81: Starting The Automatic Cleaning Process (Liquid Cleaner)
Operating Instructions 13.6.3 Starting the automatic cleaning process (liquid cleaner) WARNING! Danger of chemical burns! Warning of possible injuries through escaping hot steam with caustic cleaning agents! Do not open the cooking chamber door during the automatic cleaning process! . Preparing the appliance for cleaning the cooking chamber (see page 72 Chapter 13.3). . - Page 82 Operating Instructions Starting the cleaning process . Tap the "Start/Stop" key. D The symbol in the "Start/Stop" key changes from green to red. D A cooling or heating process takes place if the tem perature in the cooking chamber is too high or too Auto Clean 3 low.
-
Page 83: After Completion Of Automatic Cleaning
1-2 weeks. SALVIS Non-Stick, Protection and Care (care emulsion) 0.5 l - item no. ET100060 . Spray the cooking chamber, removable racks and air baffles using cooking oil or cream cleaner. -
Page 84: Cleaning The Glazing, Cooking Chamber Door And Seal
Operating Instructions 13.7.1 Cleaning the glazing, cooking chamber door and seal Cleaning the glazing surfaces . Do not use any abrasive and acid-containing cleaning agents. . Clean the glazing with grease-dissolving cleaning agent and a soft cleaning cloth. Cleaning the control and display panel, see page 87 section 13.7.6 Cleaning the door seal Food greases and cleaning agents attack the seal Glazing... -
Page 85: Cleaning The Cooking Chamber Behind The Air Baffle
Operating Instructions 13.7.3 Cleaning the cooking chamber behind the air baffle. . Switch the appliance off. . Switch off the mains switch and secure it against being switched back on. D The air baffle may not be dismantled or mounted while the ventilator is still running! D The device may not be operated without air baffle! Air baffle (at rear of cooking chamber) Removal of the air baffle... -
Page 86: Clean Air Filter
Operating Instructions Air baffle (at left in cooking chamber) Swivelling the air baffle Type 2011, 2021QT Seat for guide pin, top . Remove four screws and U washers. . Swivel in air baffle. Inserting the air baffles Inserting the air baffles and grease filter, see page 13 section 5.1.3 U washer Screw... -
Page 87: Cleaning The Control/Display Panel And The Key "On/Off
Operating Instructions 13.7.6 Cleaning the control/display panel and the key "On/Off" D The control/display panel and the "On/Off" button have to be free of any detergent residues after cleaning. D The mixture of detergent residues and precipitating humidity affect the reaction of the control/display panel. -
Page 88: Errors And Remedies
Operating Instructions Errors and remedies Check any faults in the appliance against the following table: Fault Possible cause Remedy No response appears on Main switch in building Turn on main switch. the display screen after not turned on before switching on the appli switching on the appli... - Page 89 Operating Instructions Fault Possible cause Remedy Fault report: The safety temperature Turn the appliance off and on. limiter has tripped. No. 3001 Contact the authorized Customer Service if the fault recurs. Fault report: Temperature sensor in Turn the appliance off and on. the cooking chamber in...
-
Page 90: Service
Operating Instructions Service DANGER! Electrical voltage! Risk of electric shock that may result in serious injury or death! Installation, service and repair tasks may only be carried out by authorised Customer Service. D Have the appliance inspected and serviced on a regular basis by the authorised Customer Service. Maintenance tasks are, e.g. -
Page 91: Eu Declaration Of Conformity
Operating Instructions EU Declaration of Conformity This declaration relates only to the appliances in the condition in which they were placed on the market. The declaration is invalidated if the product has been converted or modified without consent. We hereby declare that the machines identified below comply with the appropriate provisions of the Ma chinery Directive 2006/42/EU on the basis of their design and construction and in the versions placed on the market by us. - Page 92 Translation of the original operating instructions 878970 / 7.11 / V26 / 5.17 SALVIS AG Nordstrasse 15 CH-4665 Oftringen Tel. +41 (0)62 788 18 18 Fax. +41 (0)62 788 18 98 Internet: www.salvis.ch E-Mail: info@salvis.ch...
Need help?
Do you have a question about the CucinaEVO 623T and is the answer not in the manual?
Questions and answers