
Related Manuals for iDevices IDEV0008


Summary of Contents for iDevices IDEV0008
- Page 1 I N S TA L L AT I O N & S E T U P G U I D E F O R S I N G L E P O L E & 3 - WAY C O N F I G U R AT I O N S I N WA L L S O L U T I O N S...
- Page 2 Tungsten: 1800W @ 277VAC A working knowledge of electrical installation is required to install this product. If you are not Motor: 1HP @ 120-277VAC comfortable working with electricity do not attempt to install the iDevices ® Wall Outlet and seek Ballast: 10A @ 277VAC professional assistance from a qualified electrician.
-
Page 3: Before You Start
• Read through this Installation Guide in its entirety before starting installation of your iDevices Wall Switch or removal of your old ® • Check that your mobile device is compatible with the iDevices ® switches. Incorrect installation can be dangerous and can damage Wall Switch at iDevicesinc.com/Compatibility your iDevices ®... -
Page 4: G E T T I N G T O K N O W T H E
G E T T I N G T O K N O W T H E Pairing Setup Button. Used to wireless pair between multiple i D E V I C E S WA L L S W I T C H ®... - Page 5 I N S TA L L AT I O N - S I N G L E P O L E LOAD STEP 1 Turn off the power at the circuit breaker. LOAD NEUTRAL STEP 2 Remove the existing switch from the gang box. LINE STEP 3 Confirm that each gang box contains a neutral wire (typically white).
- Page 6 STEP 4 LOAD Remove both wires from the terminals of the existing switch and cap with the provided wire nuts. Note: If you have more than 2 wires connected to your switch (not including the bare copper or green-coated ground wire), please see the 3-way, 4-way installation NEUTRAL instructions.
- Page 7 STEP 5 LOAD Turn the power back On at the breaker. Using your voltage detector, identify which of the 2 wires you removed is energized. This is the “Line” wire. The wire that is not energized is the “Load” wire. Note these two wires for future reference.
- Page 8 STEP 6 LOAD Turn the power back Off at the breaker and install the iDevices Wall ® Switch according to the diagram. Ensure all wire nuts are securely fastened. NEUTRAL LOAD LINE LINE GROUND...
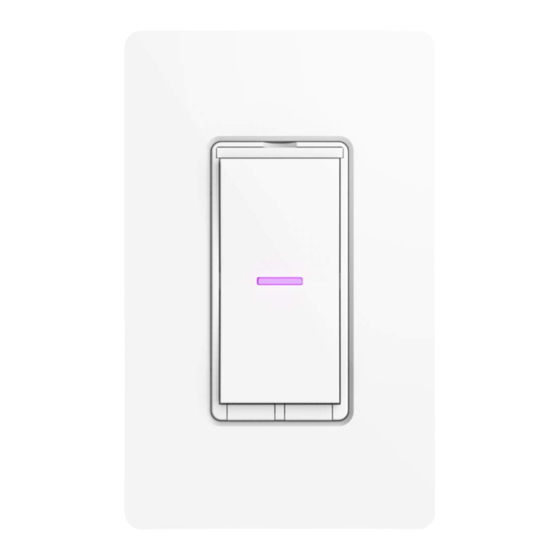
- Page 9 STEP 7 Install the Wall Switch into the gang box and install the faceplate. STEP 8 LED will light up purple Turn the power back On at the circuit breaker and confirm that the LED on the Wall Switch lights up purple.
-
Page 10: W I R E L E S S C O M M U N I C At I O N S E T U P
W I R E L E S S C O M M U N I C AT I O N S E T U P STEP 1 Ensure power/breaker is turned back on and the LED on the Wall Switch is solid purple. Ensure LED STEP 2 is purple... - Page 11 Launch the iDevices Connected app and you will be guided ® through the process of connecting your Wall Switch. For iOS Wall Switch - Model: IDEV0008 devices, you will need the HomeKit setup code on the pull out tab ™...
- Page 12 I N S TA L L AT I O N - 3 - WAY STEP 1 LINE LOAD Turn off the power at the circuit breaker. STEP 2 COMMON Remove the existing switches from the gang boxes. NEUTRAL NEUTRAL STEP 3 COMMON Confirm that each gang box contains a neutral wire (typically white).
- Page 13 STEP 4 LINE LOAD Remove the wires from the Common terminal on both of the existing switches and cap with the provided wire nuts. Note: The common terminals usually have a screw that is either black or copper in color. NEUTRAL NEUTRAL COMMON...
- Page 14 STEP 5 LINE LOAD Turn the power back on at the breaker. Using your voltage detector, identify which of the 2 common wires you removed is energized. This is the “line” wire. Mark this wire as the Secondary (S) Switch Position.
- Page 15 STEP 7 Install the iDevices Wall Switches according to the diagram. Ensure ® SECONDARY SWITCH LINE LOAD PRIMARY SWITCH the wire nuts are securely fastened. NEUTRAL NEUTRAL TRAVELER TRAVELER LOAD COMMON LINE GROUND GROUND Ensure you install a wire nut on the red lead on the secondary switch...
- Page 16 STEP 8 Install the Wall Switches into the gang boxes. Pull out tab Wall Switch - Model: IDEV0008 XXX-XX-XXXX Primary Secondary STEP 9 Extend the pull out tab on the front of the Wall Switch connected to the Line wire (identified in step 5), Using a pen, put a “X” in the box...
- Page 17 Extend the pull out tab on the front of the Wall Switch connected to the Load wire (identified in step 5), Using a ball point pen, put a “X” Wall Switch - Model: IDEV0008 in the box on to indicate that this is the Primary Switch.
- Page 18 W I R E L E S S C O M M U N I C AT I O N S E T U P The wireless setup is a 2 step process for a 3-way Switch configuration. First you will pair the Primary Switch to the Secondary Switch, then you will add the Primary Switch to your Wi-Fi network.
- Page 19 STEP 2 Locate the “primary” Switch. Hold “6” until the LED rapidly flashes blue (5 sec) then release. Next tap “1” to enter pairing mode. The LED will flash blue slowly. Next Locate the “secondary” Switch. Repeat the steps above on the Secondary Switch by holding “6”...
-
Page 20: C O N N E C T I N G T O T H E W I R E L E S S N E T W O R K
C O N N E C T I N G T O T H E W I R E L E S S N E T W O R K STEP 1 On the “Primary” switch press and hold “6” for 5 seconds and Ensure LED release when the LED rapidly flashes blue. - Page 21 STEP 2 Launch the iDevices Connected app and you will be guided ® Wall Switch - Model: IDEV0008 through the process of connecting your wall switches. For iOS Wall Switch - Model: IDEV0008 devices, you will need the HomeKit ™...
-
Page 22: Reference Information
R E F E R E N C E I N F O R M AT I O N LED COLOR CODES LED State Description LED State Description When Wall Switch joins a Wi-Fi network, (i.e., the link is up) the LED flashes ®... - Page 23 S U P P O RT If at any time you require assistance, please contact our Customer Experience Team. Call: 888.313.7019 Email: Support@iDevicesinc.com Visit: iDevicesinc.com/Support...
-
Page 24: Regulatory Information
However, there is no The iDevices ® Wall Switch IDEV0008 is certified to comply with applicable guarantee that interference will not occur in a particular installation. If this FCC and IC rules and regulations governing RF and EMI emissions. - Page 25 IC Notice References This Class B digital apparatus complies with Canadian ICES-003. Requires the iDevices Connected app. For warranty information please visit ® Cet appareil numérique de la classe B est conforme à la norme NMB- iDevicesinc.com/Warranty.
- Page 26 Apple, the Apple logo, iPhone, and iPod touch are trademarks of Apple Inc., registered in the U.S. and other countries. App Store is a service mark of Apple Inc. HomeKit is a trademark of Apple Inc. Controlling HomeKit- enabled accessories away from home requires an Apple TV (3rd generation or later) with Apple TV software 7.0 or later and an iPhone, iPad, or iPod touch with iOS 8.1 or later.
Need help?
Do you have a question about the IDEV0008 and is the answer not in the manual?
Questions and answers