Table of Contents
Advertisement
Advertisement
Table of Contents

Subscribe to Our Youtube Channel
Related Manuals for Medrad Spectris Solaris EP


Summary of Contents for Medrad Spectris Solaris EP
- Page 3 The Netherlands Tel: +31 (0) 43-3585600 Fax:+31 (0) 43-3656598 © 2009-2012 MEDRAD, INC. All rights reserved. Reproduction of this manual is strictly prohibited without express written consent of MEDRAD, INC. For more information about MEDRAD products and services, please visit www.medrad.com...
-
Page 5: Table Of Contents
TABLE OF CONTENTS 1 - Introduction......................1-3 Important Safety Notice ...................... 1-3 Certifications ........................1-3 Indications for Use ......................1-3 Contraindications ........................ 1-3 Restricted Sale........................1-3 Required Training ....................... 1-3 Trademarks......................... 1-3 Disclaimers ......................... 1-3 The Equipotential Connector (EPC)..................1-4 Understanding Symbols...................... 1-4 Warnings.......................... - Page 6 MEDRAD Spectris Solaris EP MR Injection System Storing a Protocol ......................3-33 Recalling a Stored Protocol ....................3-34 4 - Arming and Injecting ..................4-35 Arming..........................4-35 Single and Multi-Arm......................4-35 Insufficient Volume......................4-36 Injecting..........................4-36 Disarming.......................... 4-37 Injection History ........................ 4-39 Clean Up ...........................
-
Page 7: Introduction
IEC 60601-1-1. To obtain on-site consulting or consulting references, contact MEDRAD Service. The MEDRAD Spectris Solaris EP MR Injection System is not intended for portable use. 1 - 3... -
Page 8: The Equipotential Connector (Epc)
The EPC’s function is to minimize any voltage potentials differences between all connected equipment. The EPC is not designed to be an electrical safety ground. Understanding The following symbols are used on the MEDRAD Spectris Solaris EP Mobile Symbols MR Injection System and components.: Attention, consult accompanying instructions. - Page 9 1 - Introduction Indicates the current charge level of the system battery. Identifies Integrated Continuous Battery Charger system activity on Graphical User Interface. When illuminated yellow this indicates that the Continuous Battery Charger system is present and functioning. Indicates the AIR EXPELLED button on the injector head. When illuminated yellow on the touch screen, also indicates that the operator has acknowledged inspecting the fluid path for air.
-
Page 10: Warnings
This manual contains important information about use of the MEDRAD Spectris Solaris EP MR Injection System. MEDRAD urges you to read this manual carefully, become familiar with the procedures and system functions that it describes, and follow its recommendations to assure proper use of the system. - Page 11 Contact MEDRAD for service or replacement. The MEDRAD Spectris Solaris EP MR Injection System is a dual syringe system. Always ensure that the proper syringes are loaded with contrast media and flush solution prior to the injection. Failure to properly load and install the syringes may require the procedure to be repeated.
-
Page 12: Cautions
Third Edition Standards. Special precautions regarding ElectroMagnetic Compatibility (EMC), are required for installation and use of this injector system. Detailed EMC information can be found in the MEDRAD Injector Service Manual - Addendum, (label number: 202559). Damage can occur as a result of incorrect voltage. Before plugging in the system, check the following: •... -
Page 13: System Basics
2 - System Basics 2 - System Basics About the Injection The MEDRAD Spectris Solaris EP MR Injection System is a programmable, System dual syringe system, designed to accurately administer controlled doses of intra-venous MR contrast agents and common flushing solutions to patients undergoing a contrast enhanced MR scan. -
Page 14: Pressure Safety Limit
MEDRAD Spectris Solaris EP MR Injection System Pressure Safety The MEDRAD Spectris Solaris EP MR Injection System is designed to allow Limit varied flow rates for contrast injections. By automatically reducing the flow rate, the system can limit the pressure produced during an injection to prevent damage or failure of any connecting devices or tubing. -
Page 15: Control Room Unit
2 - System Basics Control Room Unit 1. Handswitch 2. System Power Switch 3. Touch Screen At rear of Touch Screen Assembly - Display Contrast Controls 2 - 11... -
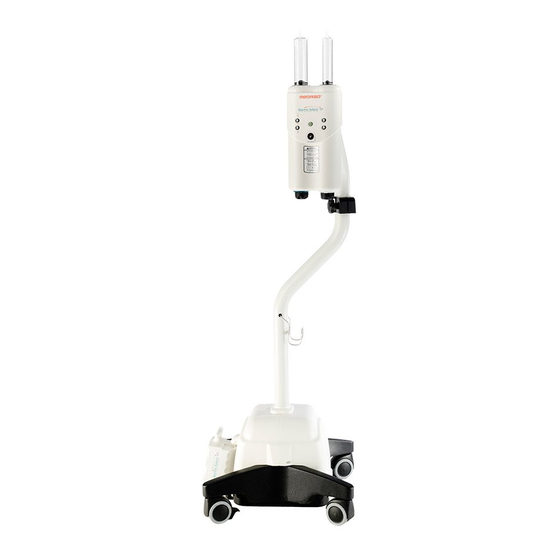
Page 16: Scan Room Unit
MEDRAD Spectris Solaris EP MR Injection System Scan Room Unit 1. Injector Head 2. Handswitch 3. Lower Console 4. System Battery Pack 5. Middle Pivot Clamp Not shown - Contrast Holder (optional) 2 - 12... -
Page 17: Injector Head
2 - System Basics Injector Head 1. Manual piston movement knobs 2. Armed indicator lights 3. ENABLE button - Used to activate the forward/reverse controls - the appropriate direction must be selected within 5 seconds. 4. Syringe A forward/reverse controls 5. -
Page 18: Battery Charger
MEDRAD Spectris Solaris EP MR Injection System Battery Charger 1. Battery Pack 2. Battery Charging Unit 3. Charging Indicator - Amber 4. Power Indicator - Green 5. Battery Charger Head 2 - 14... -
Page 19: Optional Control Room Unit Accessories
2 - System Basics Optional Control Room Unit Accessories Adjustable Height Pedestal WARNING: Injury or equipment damage may result if the adjustable height pedestal is taken into the scanner room. Do not take the adjustable height pedestal in the scanner room. It contains ferrous material that could be attracted toward the magnet. -
Page 20: Touch Screen Calibration
MEDRAD Spectris Solaris EP MR Injection System Touch Screen To enter Touch Screen Calibration mode, simultaneously press both the Calibration Contrast UP and DOWN keys on the rear of the touch screen housing. A series of screens with instructions to press the appropriate calibration circles will appear. -
Page 21: Setup Mode
2 - System Basics Setup Mode The Setup screen can be accessed by pressing the SETUP button at the lower right corner of the Main screen. The Setup screen allows user configurable options and preferences to be selected, along with setting of date and time parameters. - Page 22 MEDRAD Spectris Solaris EP MR Injection System 2 - 18...
-
Page 23: Preparing To Inject
3 - Preparing to Inject 3 - Preparing to Inject Applying Power Place the power switch located on the right side of the Control Room Unit in the ON position. The System Logo screen will appear while the system performs a series of self diagnostic tests. Note: Do not touch the screen or activate any controls while self diagnostics are in progress. -
Page 24: Main Screen
MEDRAD Spectris Solaris EP MR Injection System Main Screen The Main screen is entered from the Safety screen after power-up. The Main screen is used during programming, arming, and injecting, with applicable screen controls made visible based on the task currently being performed. -
Page 25: Battery Maintenance
WARNING: Explosion Hazard. Serious injury or death may result from improper use of the battery charger. The battery charger, MEDRAD Catalog Number 3012424, is intended for use in a well ventilated area, with the injection system battery, MEDRAD Catalog Number 3012070, only. Do not use the charger with non-rechargeable batteries. -
Page 26: Syringe And Disposable Accessory Installation
MEDRAD Spectris Solaris EP MR Injection System Syringe and Disposable Accessory Installation Retracting the Fully retract each piston by using the reverse switches on the injector head. Pistons Note: When using the reverse switches, first press the Enable switch; then within 5 seconds, press the reverse switch(es). -
Page 27: Installing A Syringe
3 - Preparing to Inject Installing a Syringe WARNINGS: Patient or operator injury may result if damaged components are used. Do not use damaged components. Visually inspect all components before use. Patient infection may result from the use of non-sterile components. - Page 28 To help avoid air injection, MEDRAD syringes are equipped with FluiDot indi- cators. These FluiDot indicators should be observed as part of an arming pro- cedure.
-
Page 29: Loading A Syringe
ENABLE. 3. Attach a sterile filling device (spike or Female-to- Female Adaptor - MEDRAD Catalog Number FFA 50) onto the tip of the syringe. If loading contrast media and/or saline from a bag or bottle, use a spike. - Page 30 MEDRAD Spectris Solaris EP MR Injection System 6. Attach the long end of the T-connector to syringe B. 7. While the injector head is still in a vertical position, attach the short section of the T- connector to syringe A.
-
Page 31: Reinstalling A Syringe
3 - Preparing to Inject Reinstalling a WARNING: Patient injury could result if the syringe is not Syringe properly engaged. Ensure the alignment marks on the syringe and injector head are properly aligned, and the piston and plunger are interlocked. Improper engagement may cause syringe damage or under-volume delivery. -
Page 32: Programming
MEDRAD Spectris Solaris EP MR Injection System Programming If a program has not been previously entered or stored on the Main screen when the unit is powered up, the Main screen will display default settings; 1.0 ml/s flow rate and 1.0 ml volume, KVO off and No Delay. -
Page 33: Multiple Phases
3 - Preparing to Inject Multiple Phases If appropriate, select a second phase for the injection protocol by pressing the triangle block below the first phase of the injection. The Phase Type selector will appear in order to select the function of the new phase. Hold and Pause A Hold or Pause phase can be programmed into a multi-phase injection. -
Page 34: Programmed Delay
MEDRAD Spectris Solaris EP MR Injection System Programmed Delay After entering Flow Rate and Volume parameters, press SET in the Delay Timer field to select the delay type (Scan Delay, Inject Delay, Stopwatch, or No Delay.) Note: There is no direct interface between the scanner and the injector. -
Page 35: Stopwatch
3 - Preparing to Inject Stopwatch The Stopwatch function initiates an incremental count of elapsed time from initial fluid injection. After selecting the delay type, enter the delay duration on the numeric keypad. To lock in values, press ENTER. Press CANCEL to eliminate a selection if an error is made. - Page 36 MEDRAD Spectris Solaris EP MR Injection System The KVO field displays the time available to support KVO based on the configured interval and the volume remaining in syringe B less any volume programmed from syringe B in the protocol. Starting KVO: On the Main Screen, press START in the KVO field to initiate KVO.
-
Page 37: Storing A Protocol
3 - Preparing to Inject Storing a Protocol To store a protocol for future use, press the STORE button on the upper right corner of the Main screen. An alpha-numeric keypad will appear with a flashing cursor in the title block. Type in a title of up to 20 characters, including spaces. -
Page 38: Recalling A Stored Protocol
MEDRAD Spectris Solaris EP MR Injection System Recalling a Stored To access program memory, press RECALL on the Main screen. Protocol Select a previously stored injection protocol by pressing one of the names on either side of the screen. Key parameters of the selected injection will be displayed in the center of the screen. -
Page 39: Arming And Injecting
4 - Arming and Injecting 4 - Arming and Injecting Before beginning the arming process, ensure that the casters on the Scan Room Unit are locked, verify that all air has been expelled from the fluid path, and that the programmed parameters are correct. Carefully inspect all tubing and syringe(s), then acknowledge that the inspection has occurred by pressing the AIR EXPELLED button/indicator on the injector head. -
Page 40: Insufficient Volume
MEDRAD Spectris Solaris EP MR Injection System Insufficient Volume If an insufficient volume condition occurs during a multi arm sequence, the system will remain armed to permit the injection of the remaining volume. However, the screen will update to display only the phases that are achievable with the volume that remains. -
Page 41: Disarming
4 - Arming and Injecting On the Injecting Screen: • As each phase is activated, the phase parameters will be highlighted to display injection progress. • The Duration window will also increment to display elapsed time. • The Delivered window will increment as the injection proceeds to display volume delivery (including KVO volume, if selected in Setup mode). - Page 42 MEDRAD Spectris Solaris EP MR Injection System Note: A MEDRAD SSIT 96VLD low pressure connector tube (LPCT) holds approximately 7 ml of fluid. If syringe B is used to flush, use at least 8 ml of flush to deliver this volume to the patient.
-
Page 43: Injection History
4 - Arming and Injecting Injection History To review injection parameters used in a procedure, along with actual achieved values for the injection, press the HISTORY button on the Main screen. The Injection History screen displays an injection summary block containing the following data: •... -
Page 44: Clean Up
System malfunction may be caused by failure to perform regular maintenance. Regular preventive maintenance is recommended to ensure that the system stays calibrated and functions properly. Refer to Appendix B of this manual or contact MEDRAD for additional information. Do not expose system components to excessive amounts of water or cleaning solutions. - Page 45 4 - Arming and Injecting Scan Room Unit Using a soft non-abrasive cloth, warm water, and a mild disinfectant, carefully clean the assembly, paying particular attention to the following: • Injector Head • Syringe Piston Plunger • Syringe Interface • SRU Lower Console covers To clean the injector head, piston, and syringe interface: 1.
- Page 46 MEDRAD Spectris Solaris EP MR Injection System 4 - 42...
-
Page 47: Appendix A: System Messages
If a fault message is displayed that cannot be corrected, and/or the system is not operating correctly, do not use the injection system. Call MEDRAD for assistance. Type 1 Messages Type 1 messages are messages which provide information regarding the current status of the system, and will clear automatically from the screen. -
Page 48: Type 2 Messages
MEDRAD Service for assistance. System Error Detected Immediately disconnect the patient from the injector. Record the code below and contact MEDRAD Service. Symcode = HSW Errnum = -2600 Refer to the operation manual or www.Medrad.com for contact information. A - 44... -
Page 49: Appendix B: Maintenance And Checkout
Ensure continued performance of the injection system • Reduce the possibility of equipment malfunction Recommended Your MEDRAD Spectris Solaris EP MR Injection System must be properly Maintenance maintained to ensure that it is in peak operating condition. Your individual Schedule maintenance system and schedule depends upon how your injection system is used, the type of procedures performed, and frequency of use. -
Page 50: Inspection Procedures
Inspection Procedures The following procedures are recommended for daily inspection of all components in the MEDRAD Spectris Solaris EP MR Injection System. If any defects are detected, either repair the system, or call MEDRAD for service. Do not use the system until the problem is corrected. - Page 51 Appendix B: Maintenance and Checkout Wall Mount Bracket 1. Inspect all parts of the bracket for cracks and other defects that would weaken the assembly. 2. Ensure that the bracket is securely attached to the wall. 3. Ensure that all cables are secured to the display control unit and do not interfere with the movement of the mounting bracket.
-
Page 52: Cleaning Guidelines
Operational Checkout A basic functional checkout of the MEDRAD Spectris Solaris EP MR Injection System should be included as part of regular maintenance. Verifying proper operation of the injection system will help in detection of any problems that may not be noticed in day to day operation. - Page 53 Appendix B: Maintenance and Checkout System Labels Ensure that all system safety and warning labels are in place and legible. Power Up Apply power to the system. Verify that the Safety screen is displayed after system diagnostics occur. Press OK to acknowledge the messages on the Safety screen.
- Page 54 MEDRAD Spectris Solaris EP MR Injection System Verify that when the injection completes, KVO resumes. Remove and discard the syringe. Remove power from the system. B - 50...
-
Page 55: Scan Room Unit
Appendix C: Specifications Appendix C: Specifications Scan Room Unit Weight: 60 lbs. (27.3 kg.) 18.5" 46.99 cm 12.75" / 32.28 cm 51.75" 131.45 cm 21.75" 19.0" 55.25 cm 48.26 cm C - 51... -
Page 56: Control Room Unit
MEDRAD Spectris Solaris EP MR Injection System Control Room Unit Weight: 15 lbs. (6.8 kg.) 11.995" 30.46 cm 11.80" 29.97 cm 2.375" 6.03 cm 10.922" 27.91 cm 9.25" 23.5 cm 2.50" 6.35 cm Battery Dimensions Weight: 7.7 lbs. (3.5 kg.) 2.1"... -
Page 57: Battery Charger
Appendix C: Specifications Battery Charger Weight: 2 lbs. (0.9 kg.) 2.765" 3.05" 7.02 cm 7.74 cm 4.664" 5.5 ft 5.08" 11.84 cm 1.68 m 12.90 cm 1.114" 1.59" 2.90 cm 4.03 cm Power Cords American 12 ft. (3.6 m), Continental 9.8 ft. (3 m) C - 53... -
Page 58: System Capabilities
Executable Flow These Flow Rates, with pressure safety limit set to 325psi/2240kPa, are Rates achievable with the MEDRAD Spectris Solaris EP MR Injection System, using the Becton Dickinson catheters listed below and the SSQK 65/115VS MEDRAD Syringe/Disposables Kit. 18 g IV Catheter 20 g IV Catheter 22 g IV Catheter 24 g IV Catheter... -
Page 59: System Performance
Appendix C: Specifications Multihance, Gadovist, Magnevist, Optimark, Prohance, and Omniscan are trademarks of their respective companies. System Performance Volume Accuracy: Syringe A: +/- (1% + 0.1 ml) Syringe B: +/- (5% + 0.1 ml) Flow Rate Accuracy +/- (10% + 0.005 ml/s) when rate is 0.01 to 0.99 ml/s +/- (10% + 0.02 ml/s) when rate is 1 to 10 ml/s Programmed Delay/ +/- (5% + 0.2 second) -
Page 60: Emi/Rfi
MEDRAD Spectris Solaris EP MR Injection System EMI/RFI The MEDRAD Spectris Solaris EP MR Injection System is designed to be in compliance with IEC/EN 60601-1 Second/Third Edition, EN 60601-1-2 Second Edition and IEC 60601-1-2 Second/Third Edition. Electrical 100-240 VAC Requirements... -
Page 61: Classifications
Appendix C: Specifications Classifications Protection Against Electrical Shock: Per IEC/EN 60601-1, the MEDRAD Spectris Solaris EP MR Injection System is designed as Class 1 equipment with Type BF applied parts. Type BF corresponds to the degree of protection against electrical shock via the applied parts. - Page 62 MEDRAD Spectris Solaris EP MR Injection System C - 58...
-
Page 63: Appendix D: Options And Accessories
Appendix D: Options and Accessories Appendix D: Options and Accessories Catalog Number Part Number Power Cord American SPC 300A 535-0243-012 Continental SPC 300C 535-0127-012 Integrated Continuous Battery Charger 3012080 3012080 System Battery Charger Kit 3012424 3012424 Enhanced Battery Pack 3012070 3012070 Handswitch SSMR START... - Page 64 MEDRAD Spectris Solaris EP MR Injection System D - 60...
-
Page 65: Appendix E: System Installation
Plug the system directly into a properly grounded AC outlet or contact MEDRAD for installation assistance. Injury or equipment damage may result from improper placement of the Battery Charger. Do not install the Battery Charger in the Scan Room. -
Page 66: Unpacking The Injection System
MEDRAD Spectris Solaris EP MR Injection System Unpacking the The entire standard configuration of the MEDRAD Spectris Solaris EP MR Injection System Injection System is shipped in one shipping carton. The optional Control Room Unit mounting accessories, the Adjustable Height Stand and the Wall Mounting Bracket, along with the optional IV Pole, are packaged individually and shipped in separate cartons. -
Page 67: Installation Considerations
Appendix E: System Installation Installation Considerations WARNING: Injury or equipment damage may result from use of tools containing ferrous materials. Use only non-magnetic tools to install any scanner/magnet room components. NOTE: System Installation requires that the suite have a 1.5 inch (3.81 cm) minimum tuned port (either separate or within the penetration panel) available for connections between the Scan and Control rooms. - Page 68 MEDRAD Spectris Solaris EP MR Injection System Review the following general connections prior to installing the MEDRAD Spectris Solaris EP MR Injection System. Be sure to consider all specifica- tions and requirements outlined in Appendix C of this manual, and follow all applicable regulations of your locality.
-
Page 69: Fiber Optic Cable Installation
Appendix E: System Installation Fiber Optic Cable Connection at the Scan Room Unit: Installation Special care should be taken with routing the fiber optic cable to ensure: • there is no bend radius less than 1 in. (2.54 cm) • the connector dust caps are not removed until connections are made •... -
Page 70: Control Room Unit Setup
MEDRAD Spectris Solaris EP MR Injection System Strain Relief The strain relief should be placed 17" (43 cm) inches form the end of the Fiber Location optic connectors. This ensures there is sufficient length to maneuver the cable and minimize severe cable bends, which may damage the Fiber Optic cable. -
Page 71: Handswitch Mounting
Appendix E: System Installation the equal potential stud, and the equal potential bus. 6. Plug the AC power cord into an appropriate AC power outlet. 7. Insert a fully charged system battery in the Scan Room Unit battery receptacle 8. Apply system power at the Control Room Unit power switch, then perform an system operation checkout as outlined in Appendix B of this manual. - Page 72 MEDRAD Spectris Solaris EP MR Injection System E - 68...
Need help?
Do you have a question about the Spectris Solaris EP and is the answer not in the manual?
Questions and answers
what is the code for disposable syringe kits used for Medrad Spectris Solaris EP injector
The code for disposable syringe kits for the Medrad Spectris Solaris EP injector is SSQK 65/115VS.
This answer is automatically generated