dji spark User Manual
Hide thumbs
Also See for spark:
- User manual (123 pages) ,
- Quick start manual (55 pages) ,
- Manual (25 pages)
Table of Contents
Advertisement
Quick Links
Advertisement
Table of Contents

Related Manuals for dji spark


Summary of Contents for dji spark
- Page 1 SPARK User Manual V1.0 2017.03...
-
Page 2: Using This Manual
We recommend that you watch all tutorial videos on the official DJI website and read the Disclaimer before you fly. Prepare for your first flight by reviewing the Spark Quick Start Guide and refer to the User Manual for more details. -
Page 3: Table Of Contents
Using this manual ..........................2 Lengends ........................... 2 Read Before the First Flight ....................... 2 Video Tutorials .......................... 2 Download the DJI GO 4 App ...................... 2 Product Profile ..........................4 Introduction ..........................4 Aircraft Diagram ........................4 Aircraft .............................. 5 Gimbal and Camera ........................ -
Page 4: Product Profile
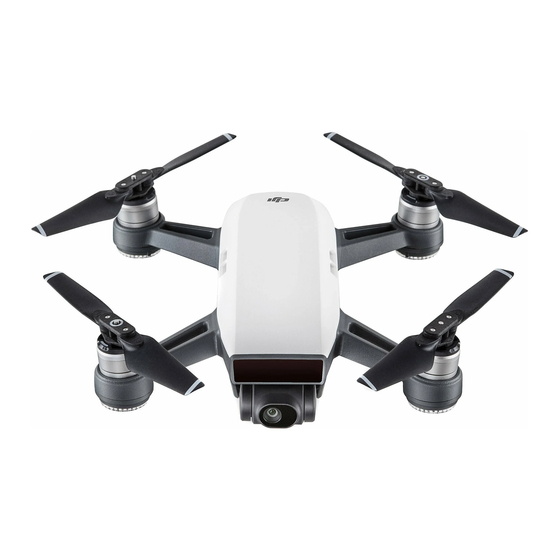
12 megapixel photos, and is capable of both ActiveTrack and TapFly making complex shots effortless. Spark boasts a maximum flight speed of 29 mph (46.8 kph) and a maximum flight time of 16.5 minutes*. Aircraft Diagram 1. Propeller 2. Motor 3. -
Page 5: Aircraft
The gimbal can tilt the camera within a 85˚ range. Go to Camera View in the DJI GO 4 app, tap and hold on the screen until a blue circle appears, then drag the circle to control the camera’s tilt. -
Page 6: Attaching And Detaching The Propellers
To store your photos and videos, insert the Micro SD card into the slot, as shown below, before turning on the Spark. The Spark supports Micro SD cards up to 64 GB. A UHS-1 Micro SD card is recommended due to their fast read and write speeds allowing you to save high-resolution video data. -
Page 7: Intelligent Flight Battery
Intelligent Flight Battery Introduction The DJI Intelligent Flight Battery has a capacity of 1480 mAh, a voltage of 11.4 V, and a smart charge/ discharge functionality. It should only be charged using an appropriate DJI approved charger. The Intelligent Flight Battery must be fully charged before using it for the first time. - Page 8 1. Connect the Battery Charger to a power source (100-240V, 50/60Hz). 2. Connect the Micro USB port on the Spark to the Charger to start charging. 3. The Battery Level Indicator will display the current battery level as it is charging.。...
-
Page 9: Vision System And Infrared Sensing System
The downward Vision System uses 3D infrared modules and image data to help the aircraft maintain its current position. With the help of the Downward Vision System, your Spark can hover in place more precisely and fly indoors or in other environments where a GPS signal is not available. -
Page 10: Flight Mode
You may use the Wi-Fi connection on the mobile device to control the aircraft. Follow the instructions below to learn how to control the aircraft over Wi-Fi. 1. Power on the aircraft. 2. Turn on your mobile device's Wi-Fi and enter the Wi-Fi password. 3. Launch DJI GO 4. - Page 11 4. Tap icon to take off the aircraft automatically. Tap on the screen and use the Virtual Joysticks to navigate the aircraft. Using Virtual Joysticks Ensure the mobile device has been connected to the aircraft before using the Virtual Joysticks. The illustrations below are based on Mode 2 (left stick as throttle).
-
Page 12: Dji Go 4 App
Equipment, Editor, SkyPixel and Me sections, which are used for configuring your aircraft, editing and sharing your photos and videos with others. Equipment Enter Camera View by tapping Camera on the DJI GO 4 welcome screen. Camera View 1. System Status :This icon indicates aircraft flight status and various warning messages. - Page 13 different functions. 4. Flight Mode :The text next to this icon indicates the current flight mode. Tap to configure the MC (Main Controller) Settings. These settings allow you to modify flight limits and set gain values. 5. Camera Parameters Displays camera settings parameters and capacity of the Micro SD card. 6.
- Page 14 13. Auto Exposure Lock :Tap to lock the exposure value. 14. Gimbal Slider :Displays the pitch of the gimbal. 15. Photo/Video Button :Tap to switch between photo and video recording modes. 16. Shoot / Record Button :Tap to start shooting photos or recording video. 17.
-
Page 15: Flight
The Front LEDs glow solid red when the aircraft is turned on to indicate the front (or nose) of the aircraft (the Front LED can be turned off in the DJI GO 4 app). The Aircraft Status Indicator communicates the system status of the flight controller. Refer to the table below for more... -
Page 16: Calibrating The Compass
Calibrating the Compass Only calibrate the compass when the DJI GO 4 app or the status indicator prompt you to do so. Observe the following rules when calibrating your compass: DO NOT calibrate your compass where there is a chance of strong magnetic interference, such as magnetite, parking structures, and steel reinforcements underground. - Page 17 3. Hold the aircraft vertically, with nose pointing downward, and rotate it 360 degrees around the center axis. 4. Re-calibrate the aircraft if the aircraft status indicators blink red. If the Aircraft Status Indicator blinks red and yellow after the calibration procedure, move your aircraft to a different location and try again.
-
Page 18: Appendix
Appendix Specifications Aircraft Weight 296 g Dimensions 143x143x53 mm Diagonal Length 172 mm (propellers excluded) Max Ascent Speed 9.8 ft/s (3 m/s) in Sport Mode Max Descent Speed 9.8 ft/s (3 m/s) Max Speed 29 mph (46.8 kph) in Sport Mode without wind Max Service Ceiling 9843 feet (3000 m) Above Sea Level... - Page 19 ≤ 22.4 mph (36 kph) at 6.6 ft (2 m) above ground Velocity Range Altitude Range 0 - 33 feet (0 -10 m) Operating Range 0 - 33 feet (0 -10 m) Sensing Range 1 - 43 feet (0.3 - 13 m) Operating Environment Surfaces with a clear patterns and adequate lighting (lux >...
-
Page 20: Compliance Information
FCC Compliance Notice This device complies with Part 15 of the FCC Rules. Operation is subject to the following two conditions: (1) This device may not cause harmful interference, and (2) This device must accept any interference received, including interference that may cause undesired operation. Any changes or modifications not expressly approved by the party responsible for compliance could void the user’s authority to operate the equipment. - Page 21 第十四條 低功率射頻電機之使用不得影響飛航安全及干擾合法通信; 經發現有干擾現象時, 應改善至無干擾時方得繼續使用。前項合法通信,指依電信法規定作業之無線電通信。低功 率射頻電機須忍受合法通信或工業、科學及醫療用電波輻射性電機設備之干擾。 EU Compliance Statement: SZ DJI TECHNOLOGY CO., LTD. hereby declares that this device is in compliance with the essential requirements and other relevant provisions of the Directive 2014/53/EU. A copy of the EU Declaration of Conformity is available online at www.dji.com/euro-compliance Declaración de cumplimiento UE: SZ DJI TECHNOLOGY CO., LTD.
- Page 22 Una copia della dichiarazione di conformità UE è disponibile online all'indirizzo Web www.dji.com/eurocompliance Déclaration de conformité UE: Par la présente, SZ DJI TECHNOLOGY CO., LTD déclare que cet appareil est conforme aux principales exigences et autres clauses pertinentes de la directive européenne 2014/53/EU.
Need help?
Do you have a question about the spark and is the answer not in the manual?
Questions and answers