Table of Contents
Advertisement
Advertisement
Table of Contents

Related Manuals for Dell S518WL


Summary of Contents for Dell S518WL
- Page 1 Dell Professional Projector S518WL User’s Guide...
- Page 2 Reproduction of these materials in any manner whatsoever without the written permission of Dell Inc. is strictly forbidden. Trademarks used in this text: Dell and the DELL logo are trademarks of Dell Inc.; DLP and DLP logo are trademarks of T ;...
-
Page 3: Table Of Contents
Contents About Your Dell Projector ....Projector Box Contents ..... -
Page 4: About Your Dell Projector
About Your Dell Projector Your projector comes with all the items shown below. Ensure that you have all the items, and contact Dell if anything is missing. Projector Box Contents Package Contents Power cable VGA cable (VGA to VGA) Remote control (CR2032 x 2pcs) -
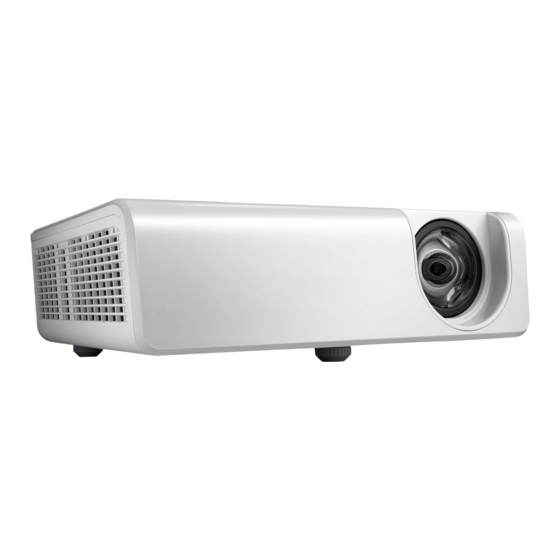
Page 5: Projector Top And Bottom View
IR receivers Power button Lens Tilt adjustment wheel Mounting holes for wall mount Mounting holes for ceiling mount NOTE: Wall mount screw hole M4 x 8 mm depth. Ceiling mount screw hole M3 x 8 mm depth. About Your Dell Projector... -
Page 6: Projector Connections
6 RJ45 connector 13 Power cord connector 7 USB Type A Power (+5V/ 1.8A) 14 VGA output connector CAUTION: Before you begin any of the procedures in this section, follow the Safety Instructions as described on page 7. About Your Dell Projector... - Page 7 •Recommended Projector Wall Mount Kit. For more information, see the Dell Support website at dell.com/support. •For more information, see the Safety Information that shipped with your projector. •The S518WL projector can only be used indoors. About Your Dell Projector...
- Page 8 •Follow the control, adjustment, or operation procedures to avoid damage or injury from exposure of laser radiation. •The instructions for the assembly, operation, and maintenance include clear warnings concerning precautions to avoid possible exposure to hazardous laser radiation. About Your Dell Projector...
-
Page 9: Remote Control
Press to navigate through the On-Screen Display (OSD) Menu items. Right Press to navigate through the On-Screen Display (OSD) Menu items. Down Press to navigate through the On-Screen Display (OSD) Menu items. Volume down Press to decrease the volume. About Your Dell Projector... - Page 10 Press to activate the OSD. Enter Press to confirm the selection. Left Press to navigate through the On-Screen Display (OSD) Menu items. Mute Press to mute or un-mute the projector speaker. Blank Press to toggle between white/blank/resume Blank the image. About Your Dell Projector...
- Page 11 Remote Control Operating Range Operating range Angle ±30° Distance 7 m/22.97 feet NOTE: Actual operating range may slightly differ from the diagram. Weak batteries will also prevent the remote control from properly operating the projector. About Your Dell Projector...
-
Page 12: Adjusting Projector Image
Adjusting Projector Image Adjusting Projected Zoom Raising the Projector Height Raise the projector to the desired display angle, and use the rear tilt adjustment wheel to fine-tune the display angle. Lowering the Projector Height Lower the projector, and use the front tilt adjustment wheel to fine-tune the display angle. -
Page 13: Adjusting Projector Position
• Lens throw ratio: 0.52 You can set up or install the S518WL in the following ways: Case A Case B... - Page 14 Case D Case C Rear Projection Upward Projection Do not install the S518WL projector in the following ways: Case F Case E Portrait Left Projection Portrait Right Projection Adjusting Projector Image...
-
Page 15: Adjusting Image Corners
Adjusting Image Corners Use Keystone adjustment feature to get perfect, rectangular images. Adjusting Projector Image... -
Page 16: Adjusting Image Size
Adjusting Image Size 100" (254 cm) 90" (228.6 cm) 80" (203.2 cm) 70" (177.8 cm) Adjusting Projector Image... - Page 17 Adjusting Image Shape Screen Size W*H (Projection (Offset) Diagonal Length (Width) (Height) Distance) of image inch inch inch inch inch 1778 1508 2032 1723 1077 2286 1939 1212 1008 2540 2154 1346 1120 * This graph is for user reference only. * Offset Ratio: 115 +/- 5% Adjusting Projector Image...
-
Page 18: Using Your Projector
Using Your Projector Using Network Display Configure Your Projector for Network Display Connect Projector to the Network Connect the power cable and turn on the projector by pressing the power button. Press the Menu button on your projector control panel or remote control. NOTE: buttons to navigate and select. - Page 19 Ensure DHCP option is Off from LAN settings of Advanced Settings menu. Access the Input Source menu, select Network source. The Network Guide Screen shown below appears: Using Your Projector...
- Page 20 Connect Projector Directly to the Computer A.Direct cable connection Connect the LAN cable to the projector and the computer. B.Network switch Connect the LAN cable to the projector and the computer via the switch source. DHCP of LAN Settings switches to On. NOTE: If the DHCP setting is set to On, the IP sharing device will automatically assign a set of IP Address, Subnet Mask, and Gateway.
- Page 21 Sharing Center > Change Adapter Setting > Local Area Connection Open the Internet browser on your computer, and enter 10.0.50.100 (default) in the browser's address bar. You will be directed to the Dell S518WL Web Management page. The S518WL Web Management page opens. For first-time use, click Download.
- Page 22 Click Run to proceed with the one-time installation of the software. The installation software will launch. Follow the on-screen instructions to complete setup. NOTE: Alternatively you can download the latest version of the Dell Network Projection application from dell.com/support Using Your Projector...
- Page 23 Steps: Go > Applications > System Preferences > Network Open the Safari browser on your Mac computer, and enter 10.0.50.100 (default) in the browser's address bar. You will be directed to the Dell S518WL Web Management page. The S518WL web management page opens. For first-time use, click Download.
- Page 24 At the Download page, click You can also download for Mac OS and install to your computer. NOTE: If you are unable to install the application because of inadequate rights on the computer, please contact your network administrator. Running Dell_Network_Projection_Mac.pkg from Downloads folder. Using Your Projector...
- Page 25 The installation software will launch. Follow the on-screen instructions to complete setup. Using the Dell Network Projection App (Windows) Once the installation is completed, you can double-click icon on the desktop to start the application. The Dell Network Projection Screen shown below appears: Using Your Projector...
- Page 26 At Dell Network Projection screen, click Find a Projector, and then select Dell_42FE21E1 (random code). This is the name & code that will be projected, when your projector is set to the 'Network' source. Click Mirror Off option to start presenting.
- Page 27 Using the Dell Network Projection App (Mac) 1.Go to Applications folder, and then open the Network Projection folder. Run the Network Projection application from Network Projection folder. The Dell Network Projection Screen shown below appears: Using Your Projector...
- Page 28 On the Dell Network Projection screen, click Find a Projector, and then select Dell_CCDDEE01 (random code). This is the name & code that will be projected, when your projector is set to the 'Network' source. Click Mirror Off option to start presenting.
- Page 29 Split Screen After the network projection connects, click Conference button to activate the split screen feature. Using Your Projector...
- Page 30 Understanding the Buttons Item Description Control Toolbar Click to toggle network projection On/Off and Mirror Off/On screen extension. Quality Click to toggle High/Low quality. Audio Click to toggle audio On/Off. Conference Click to activate the conference control. Preference Click to activate the fast connection settings. Using Your Projector...
-
Page 31: Using Pc-Free Presentation
Using PC-Free Presentation Multimedia File Type Support Photos Media Ext Name Version Detailed Specification Notes Type Support JPEG jpg/jpeg Baseline mode: size <=65536 Support x 65536 baseline mode & Progressive baseline: progressive • color mode=444, size <= baseline 2080 x 2080 •... - Page 32 Audio File Type File Version Detailed Specification Notes Extension Support Mpeg-1 VBR: bit rate: 8~320 Kbps Layer 3 wma/asf WMA 7~9.1 Bit rate: CBR up to 320 1. Microsoft kbps, VBR up to 256 kbps Licensee only 2. WMA 7~9.1 is WMA2 Sampling rate: 8KHz;...
- Page 33 Video File Type Video Audio Type Detailed Specification Notes Type MPEG-4 LPCM H.264: ADPCM: (.mov, 1. Microsoft ADPCM 1. Main and High Profile @ .mp4) (H.264) ADPCM level 4.2 MPEG-Audio 2. IMA ADPCM 2. Baseline @ level 3 (DVI_ADPCM) 3. 4K@24P 3.
- Page 34 Office Viewer File Type Support The office viewer feature allows you to play the MS Excel, MS Word, MS PowerPoint, and PDF files. File Type Support Version Pages/Lines Limitation Size Notes Limitation Adobe PDF Up to 1000 pages (One Up to file) 75 MB MS Word...
- Page 35 Setting up to present using External USB Storage NOTE: A USB flash disk must be plugged into the projector if you want to use the USB media playback feature. Follow these steps to play the Video, Audio, Photo, or PDF files on your projector: Connect the power cable and turn on the projector by pressing the power button.
- Page 36 Go to USB Viewer menu: a You can play Photo, Music, or Video files, or select Setting option to change multimedia settings. Video Source Screen: Using Your Projector...
- Page 37 Music Source Screen: Photo Source Screen: Input Source Setting: Using Your Projector...
-
Page 38: Troubleshooting
Troubleshooting Troubleshooting Tips If you experience problems with your projector, see the following troubleshooting tips. If your problem persists, please contact Dell. Problem Possible Solution • Ensure that you have chosen the correct No image appears on the screen input source on the INPUT SOURCE menu. - Page 39 Problem (continued) Possible Solution (continued) Partial, scrolling, or If you are using a Dell laptop computer, set incorrectly displayed image the resolution of the computer to WXGA (1280 x 800): Right-click the unused portion of your ® ® Microsoft Windows...
- Page 40 TEMP light is solid amber The projector has overheated. The display automatically shuts down. Turn the display on again after the projector cools down. If the problem persists, please contact Dell. TEMP light is blinking If the projector fan fails, the projector will amber automatically shut down.
-
Page 41: Guiding Signals
The projector will automatically shut AMBER AMBER down. Turn the display on again after the projector cools down. If the problem persists, please contact Dell. Color Wheel Color wheel cannot start. The breakdown projector has failed and the projector automatically shuts down. Unplug the... -
Page 42: Maintenance
Maintenance Replacing the Remote Control Battery Rotate the battery lid counterclockwise to remove the battery cover. Insert a CR2032 coin cell battery and align the polarity correctly according to the marking in the battery holder. NOTE: When you use the remote control for the first time, there is a plastic sheet between the battery and its contact. -
Page 43: Specifications
Specifications Light Valve 0.65 WXGA S450 DMD, DarkChip3™ Brightness 3200 ANSI Lumens (Max.) Contrast Ratio 1800:1 Typical (Full On/Full Off) 100000:1 High Contrast Ratio Uniformity 80% Typical (Japan Standard - JBMA) Number of Pixels 1280 x 800 (WXGA) Aspect Ratio 16:9 Displayable Color 1.07 billion colors... - Page 44 Noise Level Normal mode: 36 dB(A) Eco mode: 32 dB(A) Projector Weight < 12 lb (5.5 Kg) Dimensions (W x D x H) 1.26 x 0.99 x 0.37 inches (386.5 x 303.2 x 115 0.37"(115 mm) Environmental Operating temperature: 5 °C - 40 °C (41 °F- 104 °F) Humidity: 80% maximum Storage temperature: 0 °C to 60 °C (32 °F to...
- Page 45 USB (mini type B) port: One mini type B connector for firmware upgrade. USB Power (5V/1.8A): One USB Power (5V/1.8A) for power only RS232 port: One 9-pin D-sub for RS232 communication. RJ-45 port: One RJ-45 connector for build-in for network control and LAN display. Light Source Up to 20,000 hours in Normal mode Specifications...
-
Page 46: Compatibility Mode (Digital)
Compatibility Mode (Digital) H Sync Refresh Rate Pixel Clock Support HDMI Resolution Frequency (Hz) (MHz) 1.4 or 2.0 (KHz) 640 x 480 59.940 31.469 25.175 HDMI 1.4 & 2.0 640 x 480 75.000 37.500 31.500 HDMI 1.4 & 2.0 640 x 480 85.008 43.269 36.000... - Page 47 3840 x 2160 50.000 112.500 594.000 HDMI 2.0 3840 x 2160 60.000 135.000 594.000 HDMI 2.0 4096 x 2160 24.000 54.000 297.000 HDMI 1.4 & 2.0 4096 x 2160 25.000 56.250 297.000 HDMI 1.4 & 2.0 4096 x 2160 30.000 67.500 297.000 HDMI 1.4 &...
-
Page 48: Additional Information
Additional Information For additional information on how to use your projector, please see the Dell Projectors User Guide at www.dell.com/support/manuals. Additional Information... -
Page 49: Contacting Dell
Dell provides several online and telephone-based support and service options. Availability varies by country and product, and some services may not be available in your area. To contact Dell for sales, technical support, or customer service issues: 1 Visit go to www.dell.com/contactDell. - Page 50 Remote Control 9 Power cord connector 6 Replacing 42 RJ45 connector 6 RS232 connector 6 USB Type A Power (+5V/ 1.8A) connector 6 Specifications VGA input 6 Aspect Ratio 43 VGA output 6 Audio 43 Contact Dell 4 Brightness 43 Index...
- Page 51 Light Valve 43 Noise Level 44 Number of Pixels 43 Power Consumption 43 Power Supply 43 Projection Distance 43 Projection Lens 43 Projection Screen Size 43 Projector Weight 44 Uniformity 43 Video Compatibility 43 support contacting Dell 48 telephone numbers 49 Index...
Need help?
Do you have a question about the S518WL and is the answer not in the manual?
Questions and answers