Table of Contents
Advertisement
Quick Links
Download this manual
See also:
User Manual
Zaxcom TRX900/900AA Transmitter Guide
Zaxcom Inc. 230 West Parkway, Unit 9, Pompton Plains, NJ 07444 - 973-835-5000
This guide assumes the firmware version displayed above is installed. The firmware revision
code is displayed shortly every time the transmitter is turned on.
Important Note for TRX900AA Wireless Transmitters
NiMH should be used in these models. Any other battery chemistry (including Alkaline and
"Ultra" batteries) will have a substantially reduced run-time compared to Lithium or
rechargeable NiMH cells. This is true for all Zaxcom transmitter models that accept AA
batteries. Never use any battery that is missing insulation on its body. This can allow a
short circuit in the battery compartment causing damage to the transmitter.
TRX900 Power up
Install 1 CR123 battery into the TRX900 transmitter. Install 2 AA batteries into the TRX900AA
Close the battery door. Be sure to install the batteries with the correct polarity. Damage to
the unit may result if the batteries are installed backwards. The negative contact always
connects to the spring contact. For maximum transmitter time use Energizer Lithium batteries.
This should give a transmitter time of 10 hours for TRX900AA (5 hours TRX900) . On power up
the transmitter will display the version number of the software in the top right corner of the
display.
The power switch is located on the top of the transmitter. Slide it to the on position to turn on the
unit.
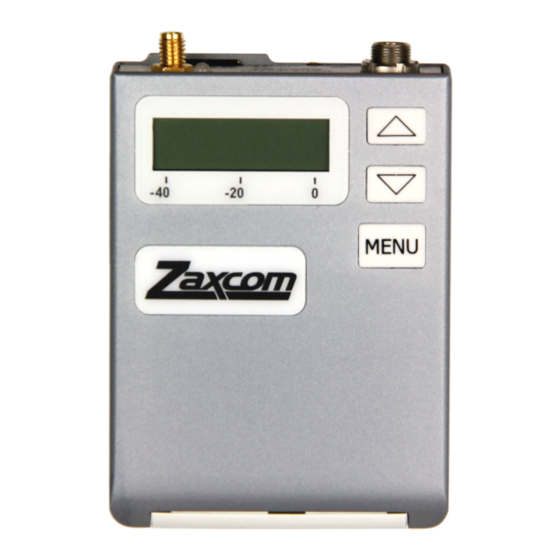
The user interface for the transmitter consists of a graphic LCD display and 3 buttons:
MENU = Function/menu page select: Press to cycle through each menu page.
UP/INC = Increment the current parameter selected by the MENU key.
DOWN/DEC = Decrement the current parameter selected by the MENU key.
The transmitter has a few menu pages that allow the user to change various settings. Note that
the transmitter will store the user's settings in FLASH ROM when power is removed. There is no
secondary memory battery so the settings will always remain secure without any power. The
available menu pages are summarized below.
AUDIO GAIN PAGE:
TXCHANNEL SELECT PAGE: Selects TX channel center frequency.
RXCHANNEL SELECT PAGE: Selects RX channel center frequency.
LOCK MODE PAGE:
mode.
Document Revision 1.02
For Firmware Revision 33 and Higher
Transmitter Menu System
Indicates TX frequency battery level and record mode.
Allows user to change the mic preamp gain.
Staying here locks out key presses. MENU+INC exits lock
: Only Lithium or rechargeable
Advertisement
Table of Contents

Related Manuals for Zaxcom TRX900


Summary of Contents for Zaxcom TRX900
- Page 1 For maximum transmitter time use Energizer Lithium batteries. This should give a transmitter time of 10 hours for TRX900AA (5 hours TRX900) . On power up the transmitter will display the version number of the software in the top right corner of the display.
- Page 2 The last seven menu pages are infrequently used special functions. In order to get to those pages the MENU key must be held while powering up the transmitter. To exit this special menu system cycle power off then back on. ID CODE #0 SELECT PAGE: Changes the security0 code (normally should be set to zero) ID CODE #1 SELECT PAGE:...
- Page 3 Since this interference is transmitted into the air there is no way for the Zaxcom receiver to reject this interference. The Zaxcom transmitters do not suffer from this problem.
- Page 4 The TRX990/TRX990AA can be programmed by downloading the operating program from the Zaxcom web site and loading it onto a Mini SD memory card. Once the program is on the card insert the card in the TRX900. Hold down the “Increment and Decrement” key at the same time and switch on the power.
- Page 6 Wire Clip The TRX900 and TRX900AA transmitters use a wire belt clip. Attach the clip to the transmitter by inserting the clip into the 2 holes in the sides of the transmitter. Hold the clip carefully in order to not scratch the side of the transmitter.
- Page 7 Each microphone connected to the TRX900/TRX900AA must have a bias resistor inside the microphone connector. This bias resistor allows the use of any type of LAV microphone with the TRX900/TRX900 AA. Two wire microphones are typically biased to the 3.3V supply pin. Three wire microphone are typically biased to ground.
- Page 8 A transmitter with the CNR option is merely a stereo transmitter with special software installed. In the extended menu pages the user may choose between 3 transmission formats (Fo0, Fo1, Fo2): Format 0 (US): This setting transmits in wideband CNR mono mode This mode is recommended for US customers or other countries where a 200kHz channel bandwidth is legal.
Need help?
Do you have a question about the TRX900 and is the answer not in the manual?
Questions and answers