Dolce Gusto MINI ME User Manual
Hide thumbs
Also See for MINI ME:
- User manual (18 pages) ,
- User manual (82 pages) ,
- User manual (18 pages)
Table of Contents
Advertisement
Advertisement
Table of Contents

Related Manuals for Dolce Gusto MINI ME


Summary of Contents for Dolce Gusto MINI ME
- Page 1 MI NI ME U S ER MA N U AL ww w. d o lc e -g u s to . co m...
-
Page 2: Table Of Contents
TA B L E O F C ON T E N TS 1. S A F E T Y PR E CAU T IO N S ............. 3 2 . MAC HIN E OV E RV IE W ............5 3. -
Page 3: Sa F Ety P R E C A U Ti O Ns
SA F ETY P R E C A U TI O NS 1. Read all instructions and keep these safety instructions. Any 12. This appliance is not intended for use by children or persons type of misuse of the appliance may result in a potential injury. with reduced physical, sensory or mental capabilities, or lack 2. - Page 4 1 . SA F E T Y P R E C A U T I ON S light blinking. This is to protect your appliance from overheating. 37. Packaging is made of recyclable materials. Contact your local Switch the appliance off for 20 minutes to let it cool down. council / authority for further information on recycling programs.
-
Page 5: Mac Hin E Ov E Rv Ie W
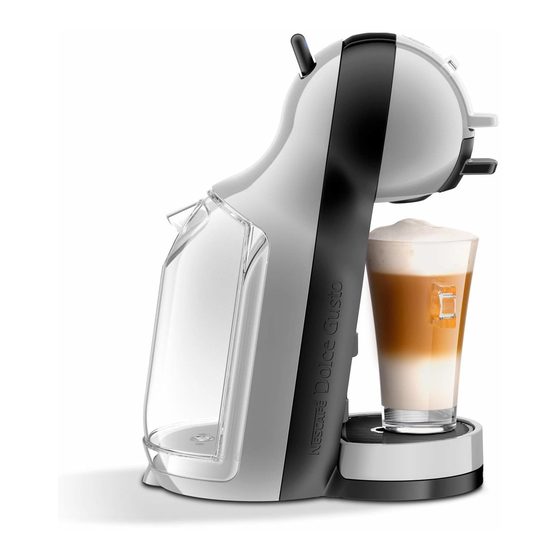
MA C H IN E OV E RV I E W Water tank 2 Selection lever 3 Cold 4 Stop 5 Hot 6 Power button / STOP Error signal Volume selector 8 Locking handle 9 Rinsing tool 10 Capsule holder 11 Cleaning needle 12 Injector 13 Drip grid... -
Page 6: Be V E R Age E X Am P L Es
B E V E R A G E E X A M PL E S Adjust drip tray Select volume Choose hot or cold ESPRESSO CAPPUCCINO CHOCOCINO CAPPUCCINO ICE... -
Page 7: R E Comm E Nd At Ion S F Or S Af E Use
RE C O M M E N D AT I ON S F O R S A F E US E After finishing preparation the power Never add hot water to the water tank! Always keep the machine upright! button blinks red for about 5 seconds. During that time do not open locking For rinsing and beverage preparation handle! -
Page 8: F Ir S T U S E
F I R S T U S E Rinse water tank manually with fresh drinking Open locking handle. Make sure that rinsing Ensure to use the correct mains voltage as given water. Fill water tank with fresh drinking water. in “OVERVIEW“. Connect power plug to mains tool is in capsule holder and capsule holder Insert water tank into machine. -
Page 9: P R E Par In G A B E Ve Ra Ge
PR E PAR I N G A BE V E R A G E 6. 1 ON E CA P S U L E (E . G . L U N GO ) Check if the water tank contains enough fresh Adjust drip tray position. -
Page 10: T W O C Ap Su L Es (E .G. Ca Ppucc I No )
P R E PA RI N G A BEV E RA GE 6. 2 T W O C A P S UL E S ( E. G. CA PPUC CIN O) Check if the water tank contains enough fresh Adjust drip tray position. Place cup with Open locking handle. - Page 11 PR E PAR I N G A BE V E R A G E 6. 2 TW O C A P S U L E S (E . G . C A PPU C CIN O) STOP Push selection lever to the “HOT” or “COLD” After finishing preparation the power button After extraction is finished remove cup from blinks red for about 5 seconds.
-
Page 12: Cl E A N In G
C L E A N I N G Rinse and clean water tank. Use a clean food- Rinse drip tray and rinsing tool with fresh Clean with washing-up liquid and fresh safe brush and washing-up liquid as needed. drinking water. Clean drip tray with clean food- drinking water both sides of capsule holder. -
Page 13: De Scal In G At L E As T E V Er Y 3 - 4 Mo Nth S
D ES C A L I N G AT L E A S T EV E RY 3 – 4 MON THS www.dolce-gusto.com Use NESCAFÉ Dolce Gusto Do not use vinegar for Avoid contact of descaling Do not push power button ®... - Page 14 D E S C A L I N G AT L EA S T EVERY 3 – 4 MONT HS STOP Empty and clean container. Rinse and clean Push selection lever to the “COLD” position. For a better effect of the descaler, the machine water tank.
-
Page 15: T R Ou Bl E S Hoot In G
TR O UB L E S HO O T IN G 9. 1 N O L I QU I D C OM E S O U T – N O WATER? STOP No liquid comes out: Beverage preparation stops Push selection lever to the “STOP” position. Check if the water tank contains enough fresh drink- ing water. -
Page 16: Various
Machine cannot be switched on. Check if the power plug is correctly plugged If machine still cannot be switched on, call the into a mains power socket. If yes, check your NESCAFÉ Dolce Gusto hotline. For hotline ® ® electricity supply. - Page 17 Water accumulates underneath or around Unplug power plug! Call the NESCAFÉ® Dolce Gusto® Hotline or machine. Clear water leaks around capsule go on the NESCAFÉ® Dolce Gusto® website. holder during beverage preparation.
- Page 20 H OTL IN ES Middle East: +971 4- 8100081 800348786 0800 707 6066 080 45 05 01800 365 2348 0842 640 10 800 11 68068 0800 135 135 0800 00 200 0800 999 81 00 1-800-299-0019 0800 000 100 80074114 0800 365 23 48 2179 8888 800-6179...
Need help?
Do you have a question about the MINI ME and is the answer not in the manual?
Questions and answers