
Related Manuals for Insignia NS-HAIOR18-C


Summary of Contents for Insignia NS-HAIOR18-C
- Page 1 USER GUIDE All-In-One Shelf System NS-HAIOR18/NS-HAIOR18-C Before using your new product, please read these instructions to prevent any damage.
-
Page 2: Table Of Contents
Legal notices ...........18 ONE-YEAR LIMITED WARRANTY - INSIGNIA ..... .19 Introduction Congratulations on your purchase of a high-quality Insignia product. -
Page 3: Safety Information
All-In-One Shelf System Safety information CAUTION RISK OF ELECTRIC SHOCK DO NOT OPEN This symbol indicates that dangerous voltage constituting a risk of electric shock is present within your shelf system. This label is located on the back of your shelf system. This symbol indicates that there are important operating and maintenance instructions in the literature... -
Page 4: Features
NS-HAIOR18/NS-HAIOR18-C 9 Do not defeat the safety purpose of the polarized or grounding-type plug. A polarized plug has two blades with one wider than the other. A grounding type plug has two blades and a third grounding prong. The wide blade or the third prong are provided for your safety. If the provided plug does not fit into your outlet, consult an electrician for replacement of the obsolete outlet. -
Page 5: Package Contents
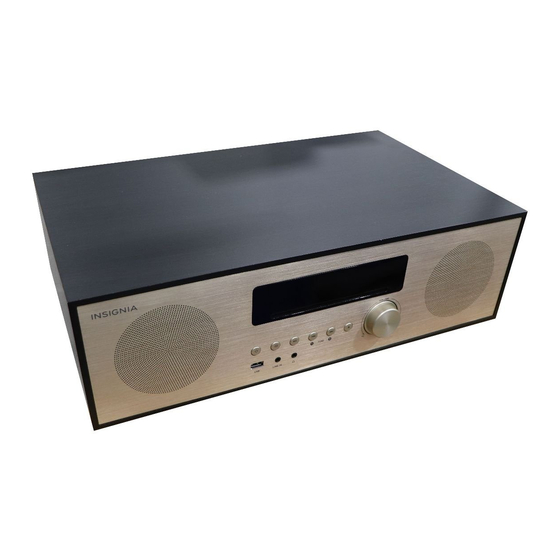
All-In-One Shelf System Package contents • All-In-One Shelf System • Power cord • FM antenna • Remote control • AAA batteries (2) • Quick Setup Guide Front view Speaker Remote sensor Volume -/+ Display Play/Pause Speaker Disc slot Source Standby Line in Eject disc Previous... -
Page 6: Remote Control
NS-HAIOR18/NS-HAIOR18-C Remote control Standby Eject disc Source (input) Repeat Auto/Stop Play/Pause Raise volume Fast forward/ Rewind/Previous/ Next/Tune + Tune- Lower volume Preset - / Preset + / Skip back 10 tracks Skip forward 10 tracks Brighten display/ Dim display/ Open next folder... -
Page 7: Setting Up Your Shelf System
All-In-One Shelf System Setting up your shelf system Turning on your shelf system 1 Connect the power cord to the AC jack on the back of your shelf system, then plug the other end into a power outlet. 2 Flip the power switch on the back to turn your shelf system ON. 3 Press (standby) on your shelf system or remote. -
Page 8: Connecting The Fm Antenna
NS-HAIOR18/NS-HAIOR18-C Connecting the FM antenna 1 Connect the FM antenna (included) to the ANTENNA jack on the back of your shelf system. 2 Adjust the antenna until you find the best reception. FM antenna jack FM antenna Setting the clock... -
Page 9: Inserting Remote Control Batteries
All-In-One Shelf System Inserting remote control batteries 1 Remove the remote’s battery cover. 2 Insert two AAA batteries into the compartment. Make sure that the + and – symbols on the battery match the symbols in the compartment. 3 Replace the cover. Cautions •... -
Page 10: Selecting The Sound Equalization
NS-HAIOR18/NS-HAIOR18-C Selecting the sound equalization • Press EQ repeatedly to select the sound equalization you want. Choose one of the following preset options: CLASSIC, POP, JAZZ, ROCK, or FLAT. Setting an alarm 1 In standby mode, press and hold PROG on your remote. -
Page 11: Using The Cd Player
All-In-One Shelf System To automatically program stations: • Press and hold AUTO. Your shelf system automatically assigns a program number to each available station. Improving FM reception • For improved FM reception, raise and extend the FM antenna on the back of your shelf system. -
Page 12: Using Bluetooth
NS-HAIOR18/NS-HAIOR18-C Using Bluetooth Pairing your Bluetooth device 1 Make sure that your Bluetooth device (like a music player or phone) is turned on and within 33 ft. (10 m) of your shelf system. 2 On your Bluetooth device, navigate to your Bluetooth settings: •... -
Page 13: Reconnecting Your Device
All-In-One Shelf System Reconnecting your device If you move out of range or turn off Bluetooth on your Bluetooth device, the shelf system disconnects from your device and beeps twice. To restore the connection: • Move the audio device back into range (within 33 feet), and make sure there is a clear line of sight and there are no obstructions between the shelf system and the device. -
Page 14: Using A Usb Device
NS-HAIOR18/NS-HAIOR18-C Using a USB device Note You can charge USB devices through the USB port (5V/1A output). 1 Connect a USB flash drive to your shelf system’s USB port. 2 Press SOURCE repeatedly until the display says “USB. ” 3 Use your speaker system or remote to control playback and adjust the volume: •... -
Page 15: Connecting Headphones
All-In-One Shelf System Using an AUX device 1 Connect a 3.5 mm audio cable (not included) from your audio device to the shelf system’s LINE IN jack. 2 Press SOURCE repeatedly until the display says “LINE IN. ” 3 Use the controls on your audio device to control playback and the controls on your shelf system to adjust the volume. -
Page 16: Troubleshooting
NS-HAIOR18/NS-HAIOR18-C Troubleshooting Problem Solution No power. • Make sure that the power cord is securely connected to your shelf system and the power outlet. • Make sure that the power switch on the back of the unit is turned on. -
Page 17: Cleaning Your Shelf System
• Make sure that the Bluetooth device is in pairing mode, then select NS-HAIOR18/NS-HAIOR18-C on the Bluetooth device. See the instructions that came with the Bluetooth device. • The Bluetooth device may be too far away from your shelf system. Move the Bluetooth device within 33 ft. -
Page 18: Specifications
NS-HAIOR18/NS-HAIOR18-C Specifications Dimensions (HxWxD) 55 x 112.2 x 185 in. (140 x 285 x 470 mm) Weight 4 lbs. (1.8 kg) Power supply ~100-240V AC, 50/60Hz Audio output power 20W × 2 + 40W Frequency response 20Hz~20kHz (±3dB) CD compatibility CDs, CD-Rs, CD-RWs in standard or 3”... -
Page 19: One-Year Limited Warranty - Insignia
Products and parts replaced under this warranty become the property of Insignia and are not returned to you. If service of Products or parts are required after the Warranty Period expires, you must pay all labor and parts charges. This warranty lasts as long as you own your Insignia Product during the Warranty Period. - Page 20 FOR THE BREACH OF ANY EXPRESS OR IMPLIED WARRANTY ON THIS PRODUCT, INCLUDING, BUT NOT LIMITED TO, LOST DATA, LOSS OF USE OF YOUR PRODUCT, LOST BUSINESS OR LOST PROFITS. INSIGNIA PRODUCTS MAKES NO OTHER EXPRESS WARRANTIES WITH RESPECT TO THE PRODUCT, ALL EXPRESS AND...
- Page 21 1-877-467-4289 (U.S. and Canada) or 01-800-926-3000 (Mexico) INSIGNIA is a trademark of Best Buy and its affiliated companies. V1 ENGLISH Distributed by Best Buy Purchasing, LLC 16-1140 ©2017 Best Buy. All rights reserved. Made in China.
Need help?
Do you have a question about the NS-HAIOR18-C and is the answer not in the manual?
Questions and answers
cd disc stuck in NS-HAOIR18 player......screen reads 'no disc'. have turned off power to reset and have pressed power and eject buttons at same time, both to no avail. suggestions??
The provided context does not include specific instructions for removing a stuck CD from an Insignia NS-HAIOR18 player that displays "no disc."
However, general steps you can try include:
1. Make sure the unit is powered on.
2. Press the eject button to attempt removal.
3. If the disc does not eject, turn the unit off, unplug it, wait several minutes, plug it back in, and try ejecting again.
4. Do not use force or insert objects into the slot.
If the disc still cannot be removed, service may be required.
This answer is automatically generated
How .u h does this system cost