
Related Manuals for Fimap Fv30 WD


Summary of Contents for Fimap Fv30 WD
- Page 1 USE AND MAINTENANCE MANUAL Fv30 WD Fv60 WD Fv80 WD ED. 09-2014 ORIGINAL INSTRUCTIONS Doc. 10047904 Ver.
- Page 2 The descriptions contained in this document are not binding. The company therefore reserves the right to make any modifications at any time to elements, details, or accessory supply, as considered necessary for reasons of improvement or manufacturing/commercial requirements. The reproduction, even partial, of the text and drawings contained in this document is prohibited by law. The company reserves the right to make any technical and/or supply modifications.
- Page 3 QUICK REFERENCE (ELECTRONIC DOCUMENT): Link Page: To view the desired paragraph in the content of the document, simply click on the title of the paragraph that will take you to the desired destination. For quick reference of the electronic documents, use the Bookmarks and Link Pages: Bookmarks: Activate the "Bookmarks"...
-
Page 4: Table Of Contents
CONTENTS ON CONSIGNMENT OF THE EQUIPMENT ............................4 INTRODUCTORY COMMENT ................................4 INTENDED USE ....................................4 SERIAL NUMBER PLATE ................................. 4 TECHNICAL DESCRIPTION ................................4 SYMBOLS USED ON THE MACHINE ..............................5 GENERAL SAFETY REGULATIONS ..............................6 PREPARING THE MACHINE ................................7 1. -
Page 5: On Consignment Of The Equipment
Any other use must be considered incorrect and hence dangerous. Make sure the working machine does not come too close to delicate organs like the ears, mouth, eyes, etc. TECHNICAL DESCRIPTION Fv30 WD Fv60 WD Fv80 WD Power supply voltage 230-240... -
Page 6: Symbols Used On The Machine
SYMBOLS USED ON THE MACHINE Main switch symbol. Used on the vacuum head, to indicate the main switch. Symbol of the vacuum filter cleaning button. Used on the vacuum head, to indicate the button for cleaning the vacuum filter. Page 5... -
Page 7: General Safety Regulations
GENERAL SAFETY REGULATIONS The regulations below must be carefully followed in order to avoid harm to the operator and damage to the machine. WARNING: Carefully read the warnings in this booklet. Keep it in a safe place for future consultation. •... -
Page 8: Preparing The Machine
ATTENTION: the packaged machine must be handled in accordance with the legal regulations relating to accident prevention and the size and weight of the package itself. The dimensions of the package are as follows: Fv30 WD Fv60 WD Fv80 WD A : 430 mm... -
Page 9: Machine Components
PREPARING THE MACHINE 3. Insert the machine in the box, taking care not to damage either of them.Remember to place the machine wheel restraint in the bottom of the box. 4. Wind the vacuum hose around the collection tank. 5. Close the box. 4. -
Page 10: Float Components (For Vacuuming Liquids)
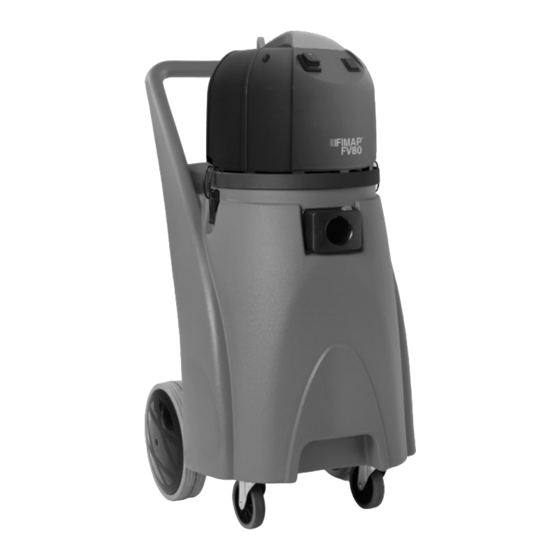
PREPARING THE MACHINE 6. FLOAT COMPONENTS (FOR VACUUMING LIQUIDS) The float kit components are: 1. Float 2. Sponge filter 7. VACUUM HEAD COMPONENTS The vacuum head components are: 1. Main switch 2. Vacuum head lifting handle bar 3. Vacuum filter cleaning button 4. -
Page 11: Inserting The Filter/Collection Bag (Optional)
PREPARING THE MACHINE 9. INSERTING THE FILTER/COLLECTION BAG (OPTIONAL) To insert the filter/collection bag in the collection tank, proceed as follows: 1. Make sure the machine is in a safe condition (read “MACHINE SAFETY”). ATTENTION: you are advised to always wear protective gloves, to avoid the risk of serious injury to your hands. -
Page 12: Inserting The Permanent Fabric Filter (Optional)
PREPARING THE MACHINE 2. Free the vacuum head from the collection tank by releasing the hooks (1) on the side of the tank. Rotate the levers as shown by the arrow in the picture on the right. 6. Use the handle (2) on the vacuum head unit to remove it from the collection tank. 7. - Page 13 PREPARING THE MACHINE 3. Use the handle (2) on the vacuum head unit to remove it from the collection tank. 4. Rest the head carefully on the ground. 5. Insert the permanent fabric filter (3) in the tank. 6. Insert the filter tensioner (4) in the permanent fabric filter. 7.
-
Page 14: Fixing The Front Squeegee Kit (Optional)
PREPARING THE MACHINE 12. FIXING THE FRONT SQUEEGEE KIT (OPTIONAL) FV80 Proceed as follows to fix the squeegee kit at the front of the machine: 1. Make sure the machine is in a safe condition (read “MACHINE SAFETY”). ATTENTION: you are advised to always wear protective gloves, to avoid the risk of serious injury to your hands. - Page 15 PREPARING THE MACHINE 7. Use a suitable tool to fix the squeegee support (3) to the collection tank with the screws (5) and washers (4). ATTENTION: remember to spread a bit of thread-locking fluid (medium resistance) on the threaded part of the screws before tightening them on the collection tank. 8.
-
Page 16: Preparing To Work
PREPARING TO WORK 13. PREPARING THE MACHINE Before beginning to work, it is necessary to: 1. Before use, it's important to check the good condition and working safety of the device with the work equipment (especially the power supply cable and extension cable) connected. If the conditions are not perfect, any use of the machine is forbidden. -
Page 17: Work
WORK 14. DRY VACUUM CLEANER To start working, proceed as follows: 1. Make all the checks indicated in “PREPARING THE MACHINE”. 2. Free the vacuum head from the collection tank by releasing the hooks (1) on the side of the tank. Rotate the levers as shown by the arrow in the picture on the right. -
Page 18: Wet Vacuum Cleaner
WORK 8. Insert the plug (3) of the power cable (4) in the mains socket (5). 9. Switch on the machine by bringing the main switch (6) to the work position “I”. 10. Carry out the cleaning work. ATTENTION: if the vacuuming intensity diminishes while you are working, read “IMPROVING THE VACUUMING CAPACITY”. - Page 19 WORK 6. Use the handle (2) on the vacuum head unit to position it above the collection tank.Make sure the machine's power supply cable is in the rear part of the tank. 7. Fix the vacuum head to the collection tank by coupling the hooks (1) on the side of the tank. Rotate the levers as shown by the arrow in the picture on the right.
-
Page 20: Wet Vacuum Cleaner With Optional Front Squeegee Kit
WORK 16. WET VACUUM CLEANER WITH OPTIONAL FRONT SQUEEGEE KIT FV80 To start working as a wet vacuum cleaner with the optional front squeegee kit, proceed as follows: Make all the checks indicated in “PREPARING THE MACHINE”. Free the vacuum head from the collection tank by releasing the hooks (1) on the side of the tank. Rotate the levers as shown by the arrow in the picture on the right. -
Page 21: Improving The Vacuuming Capacity
WORK 8. Insert the plug (3) of the power supply cable (4) in the mains socket (5). 9. Switch on the machine by bringing the main switch (6) to the work position “I”. 10. Bring the front squeegee into contact with the ground by lightly pressing downwards on the squeegee command pedal (7) then moving it to the left just enough to release it from its restraint. - Page 22 WORK If the above procedure doesn't produce a good result, proceed as follows: 1. Switch the machine off via the main switch (2) on the vacuum head (bring the switch to “0”). 2. Press the button (3) on the vacuum nozzle (4). 3.
-
Page 23: At The End Of The Work
AT THE END OF THE WORK At the end of the work, and before carrying out any type of maintenance, perform the following operations: 1. Make sure the machine is in a safe condition (read “MACHINE SAFETY”). 2. Take the machine to the designated collection tank emptying place. 3. -
Page 24: Daily Maintenance
DAILY MAINTENANCE PERFORM ALL MAINTENANCE OPERATIONS IN SEQUENCE 18. EMPTYING THE COLLECTION TANK To remove solid waste from the collection tank, proceed as follows: 1. Take the machine to the designated recovery tank drainage place. 2. Make sure the machine is in a safe condition (read “MACHINE SAFETY”). - Page 25 DAILY MAINTENANCE 3. Remove the collection tank vent cap (1) by rotating it anticlockwise. 4. Remove the collection tank drainage tube (2) (on the back of the machine) from its restraint. 5. Put the tube on the drainage surface and unscrew the cap. ATTENTION: the place designated for this purpose must comply with the current environmental protection regulations.
-
Page 26: Cleaning The Accessories
DAILY MAINTENANCE 6. Taking care not to tear the paper bag, remove it from inside the collection tank. ATTENTION: the filter/collection bag must only be removed when it is completely full. 19. CLEANING THE ACCESSORIES The good condition of the accessories ensures better vacuuming and floor cleaning, as well as a longer working life for the vacuum motor. - Page 27 DAILY MAINTENANCE 3. Bring the front squeegee to its resting position by lightly pressing downwards on the squeegee command pedal (1) then moving it to the right just enough to hook it up to its restraint. ATTENTION: you are advised to always wear protective gloves, to avoid the risk of serious injury to your hands.
-
Page 28: Weekly Maintenance
WEEKLY MAINTENANCE 21. CLEANING THE COLLECTION TANK The thorough cleaning of the collection tank will ensure a longer working life for the machine. To clean the tank, proceed as follows: 1. Take the machine to the designated maintenance area. 2. Make sure the machine is in a safe condition (read “MACHINE SAFETY”). -
Page 29: Cleaning The Sponge Filter
WEEKLY MAINTENANCE 22. CLEANING THE SPONGE FILTER The thorough cleaning of the sponge filter will ensure a longer working life for the machine. To clean the sponge filter, proceed as follows: 1. Take the machine to the designated maintenance area. 2. -
Page 30: Cleaning The Cartridge Filter
WEEKLY MAINTENANCE 23. CLEANING THE CARTRIDGE FILTER The thorough cleaning of the cartridge filter will ensure a longer working life for the machine. To clean the filter, proceed as follows: 1. Take the machine to the designated maintenance area. 2. Make sure the machine is in a safe condition (read “MACHINE SAFETY”). -
Page 31: Cleaning The Float
WEEKLY MAINTENANCE 24. CLEANING THE FLOAT The thorough cleaning of the float will ensure a longer working life for the machine. To clean it, proceed as follows: 1. Take the machine to the designated maintenance area. 2. Make sure the machine is in a safe condition (read “MACHINE SAFETY”). -
Page 32: Cleaning The Permanent Fabric Filter (Optional)
WEEKLY MAINTENANCE 25. CLEANING THE PERMANENT FABRIC FILTER (OPTIONAL) The thorough cleaning of the permanent fabric filter will ensure a longer working life for the machine. To clean the filter, proceed as follows: 1. Take the machine to the designated maintenance area. 2. -
Page 33: Cleaning The Nylon Filter (Optional)
WEEKLY MAINTENANCE 26. CLEANING THE NYLON FILTER (OPTIONAL) The thorough cleaning of the nylon filter will ensure a longer working life for the machine. To clean the filter, proceed as follows: 1. Take the machine to the designated maintenance area. 2. -
Page 34: Extraordinary Maintenance
EXTRAORDINARY MAINTENANCE 27. REPLACING THE SPONGE FILTER The good operation of the sponge filter will ensure a longer working life for the machine. To replace the filter, proceed as follows: 1. Take the machine to the designated maintenance area. 2. Make sure the machine is in a safe condition (read “MACHINE SAFETY”). -
Page 35: Replacing The Cartridge Filter
EXTRAORDINARY MAINTENANCE 28. REPLACING THE CARTRIDGE FILTER The good operation of the cartridge filter will ensure a longer working life for the machine. To replace the filter, proceed as follows: 1. Take the machine to the designated maintenance area. 2. Make sure the machine is in a safe condition (read “MACHINE SAFETY”). -
Page 36: Replacing The Permanent Fabric Filter (Optional)
EXTRAORDINARY MAINTENANCE 29. REPLACING THE PERMANENT FABRIC FILTER (OPTIONAL) The good operation of the permanent fabric filter will ensure a longer working life for the machine. To replace the filter, proceed as follows: 1. Take the machine to the designated maintenance area. 2. -
Page 37: Replacing The Nylon Filter (Optional)
EXTRAORDINARY MAINTENANCE 30. REPLACING THE NYLON FILTER (OPTIONAL) The good operation of the nylon filter will ensure a longer working life for the machine. To replace the filter, proceed as follows: 1. Take the machine to the designated maintenance area. 2. -
Page 38: Replacing The Rubber Blades Of The Front Squeegee (Optional)
EXTRAORDINARY MAINTENANCE 31. REPLACING THE RUBBER BLADES OF THE FRONT SQUEEGEE (OPTIONAL) FV80 The good operation of the whole vacuum unit ensures better drying and cleaning of the floor, as well as a longer vacuum motor life. To replace the squeegee rubbers, proceed as follows: 1. - Page 39 EXTRAORDINARY MAINTENANCE Proceed as follows for replacing the front rubber blade of the squeegee body: Release the hinge (6) on the front part of the squeegee. Slide the rubber-pressing blades (7) outwards to free the squeegee rubber. Remove the rubber (8) and replace it. Proceed in reverse to replace the rubber.
-
Page 40: Troubleshooting
TROUBLESHOOTING 32. THE MACHINE DOES NOT SWITCH ON If the machine does not switch on, check the following: 1. Make sure the main switch is on "I". 2. Make sure the plug (2) on the power supply cable (3) is correctly inserted in the mains socket (4). If necessary, connect it. -
Page 41: Disposal
DISPOSAL To dispose of the machine, take it to a demolition centre or an authorised collection centre. Before scrapping the machine, it is necessary to remove and separate out the following materials, then send them to the appropriate collection centres in accordance with the environmental hygiene regulations currently in force: •... -
Page 42: Choosing And Using The Accessories
CHOOSING AND USING THE ACCESSORIES Flat lance: when you need to vacuum in fissures or very narrow gaps. Brush with bristles: for removing solid waste from surfaces where you want to not only vacuum but also dust. Flexible vacuum hose: for connecting the extensions to the collection tank. - Page 43 CHOOSING AND USING THE ACCESSORIES Front squeegee kit (optional): an optional kit, to be used only for vacuuming large amounts of liquid substances. Paper filter/collection bag (disposable): for collecting solid waste. Facilitates waste disposal. Nylon filter (optional): for collecting damp solid waste. Must only be used together with the filter/float kit or the permanent fabric filter.
-
Page 44: Ec Declaration Of Conformity
Santa Maria di Zevio, 10/04/2014 FIMAP S.p.A. Legal representative Giancarlo Ruffo FIMAP spa Via Invalidi del Lavoro, 1 - 37050 S.Maria di Zevio (Verona) Italy Tel. +39 045 6060411 r.a. - Fax +39 045 6060417 - e-mail: fimap@fimap.com - www.fimap.com Page 43...
Need help?
Do you have a question about the Fv30 WD and is the answer not in the manual?
Questions and answers