Table of Contents
Advertisement
Quick Links
Instruction Manual
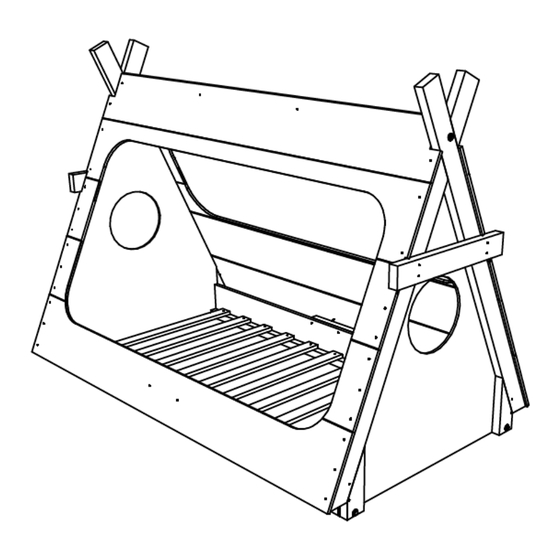
Bed Frame For Twin Mattress
Model TEEPEE-1
Due to the presence of small parts during assembly, keep
out of reach of children until assembly is complete.
Model TEEPEE-1 Teepee Style Bed Frame
Read all instructions before assembly and use.
Keep instructions for future use.
ADULT ASSEMBLY REQUIRED
Lancaster, PA 17601
tradecraftspecialties@gmail.com
www.tradecraftspecialties.com
Revised 06/04/2017
1900 Alfa Drive
(717) 269-8934
Page
1 of 10
Advertisement
Table of Contents

Related Manuals for Tradecraft Specialties TEEPEE-1


Summary of Contents for Tradecraft Specialties TEEPEE-1
- Page 1 Due to the presence of small parts during assembly, keep out of reach of children until assembly is complete. 1900 Alfa Drive Lancaster, PA 17601 (717) 269-8934 tradecraftspecialties@gmail.com www.tradecraftspecialties.com Page Model TEEPEE-1 Teepee Style Bed Frame Revised 06/04/2017 1 of 10...
-
Page 2: General Specifications
● Do not allow hanging, swinging, or leaning from or through any part of the bed or bed structure. General Specifications Assembled dimensions (approximate): 82" long, 49" wide, 62" high. Page Model TEEPEE-1 Teepee Style Bed Frame Revised 06/04/2017 2 of 10... -
Page 3: Care And Maintenance
We use low-odor, zero VOC paint where possible and do our best to keep unpleasant odors to a minium. Disassembly To disassemble, reverse order of steps for assembly. Page Model TEEPEE-1 Teepee Style Bed Frame Revised 06/04/2017 3 of 10... -
Page 4: Parts List
Parts List Page Model TEEPEE-1 Teepee Style Bed Frame Revised 06/04/2017 4 of 10... - Page 5 Part #: Quantity: Description: Reference image only (not to scale): Bottom panel 1 Bottom panel 2 End crossbar Frame side Frame top Page Model TEEPEE-1 Teepee Style Bed Frame Revised 06/04/2017 5 of 10...
-
Page 6: Assembly Steps
[F], (3) lag bolt per side with a washer on each lag bolt. Also fasten frame sides to ends with long screws [D], (4) per end. Do not yet fully tighten hardware. Page Model TEEPEE-1 Teepee Style Bed Frame Revised 06/04/2017 6 of 10... - Page 7 Start at rear of bed and work towards front. Leave 4.5” gaps between each support bar (approximately 7” center-to-center). Ensure that bed frame remains square as supports are added. When completed and square, fully tighten end hardware from previous step. Page Model TEEPEE-1 Teepee Style Bed Frame Revised 06/04/2017 7 of 10...
- Page 8 Note that each top panel is matched to a bottom panel: both will be marked on the inside either '1' or '2'. These should be placed on the same side. It may be easier to insert the mattress at this step before proceeding. Page Model TEEPEE-1 Teepee Style Bed Frame Revised 06/04/2017 8 of 10...
- Page 9 Use assmbly jig [G] below panels to temporarily support during assembly. Jig height may not be exact and final panel positioning may require adjustment. Page Model TEEPEE-1 Teepee Style Bed Frame Revised 06/04/2017 9 of 10...
- Page 10 Step 6: Fasten end crossbar [K] to end panels [A] using long screws [D], (4) per side through pre- drilled holes. Step 7: Make sure all hardware is tight and secure. Page Model TEEPEE-1 Teepee Style Bed Frame Revised 06/04/2017 10 of 10...
Need help?
Do you have a question about the TEEPEE-1 and is the answer not in the manual?
Questions and answers