Table of Contents
Advertisement
Quick Links
HW Series Instruction Manual
02
Precautions for Safe Use
04
Cautions during Operation
05
Terms of Parts
06
How to Assemble: Chamber
08
How to Assemble: Body
09
How to Use
10
How to Use Control Lever
Hurom Juicer (Warranty Included)
01 Read 'Precautions for safe use' (Page 2) and use the appliance properly.
02 After finish reading the manual, keep it in a convenient location for future reference.
03 Do not use it abroad which has different power supply and voltage.
04 Any quality improvements are subject to change without notice.
11
How to Use Control Lever by Ingredients
12
When Squeezing Screw Stops during Operation
13
How to Prepare Ingredients
14
How to Disassemble and Clean
15
Before Requesting Repair
16
Product Specifications / Warranty
18
HUROM JUICE RECIPES
Advertisement
Table of Contents

Subscribe to Our Youtube Channel
Related Manuals for HUROM HW Series


Summary of Contents for HUROM HW Series
- Page 1 HW Series Instruction Manual Precautions for Safe Use How to Use Control Lever by Ingredients Cautions during Operation When Squeezing Screw Stops during Operation Terms of Parts How to Prepare Ingredients How to Assemble: Chamber How to Disassemble and Clean...
-
Page 2: Precautions For Safe Use
Precautions for safe use 1. You should read <Precautions for safe use>. 2. You should follow <Precautions for safe use>. 3. Precautions are classified as following. Caution When violating the labeling require- Warning When violating the labeling require- ment, it may cause serious injury or damage to ment, it may cause serious injury or death. - Page 3 Precautions for safe use Caution When violating the labeling requirement, it may cause serious injury or damage to the appliance. Do not operate without loCking the hopper properly. It may cause an injury or a failure. when DeteCting a gas leak, Do not insert the power CorD into its slot. open the winDow to Ventilate Fully anD iMMeDiately.
-
Page 4: Cautions During Operation
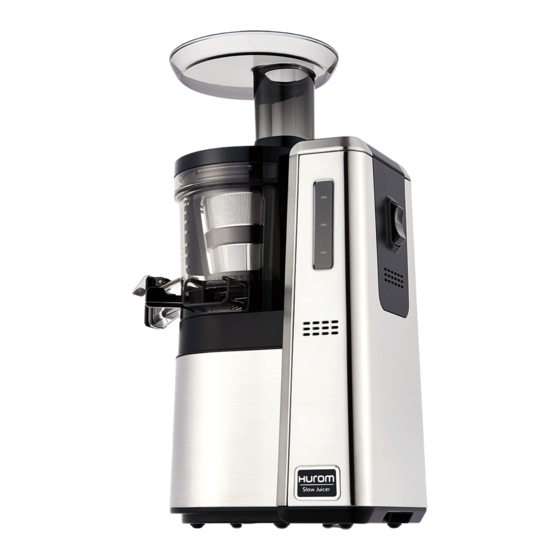
Cautions during operation · For stalk vegetables with strong fiber such as water parsleys, celery etc. should be cut into small size about 3~4cm before putting into the hopper chute. · Fruits with hard seeds such as persimmon, Japanese apricot, lemon, plum, peach etc. that are hard to chew with our teeth should be taken out before extraction. - Page 5 terms of parts 01 Hopper Chute Pusher Hopper Small Cleaning Brush Squeezing Screw Cleaning Brush Fine Strainer Pulp Container 16 06 Coarse Strainer Spinning Brush Silicon Brush 17 Juice Container Chamber Pulp Outlet Control Lever Juice Outlet Juice Cap Safety Sensor (▲) Body 19 Display Operating Switch...
- Page 6 How to assemble: Chamber STEP STEP Assemble Strainer and Spinning Place the assembled parts from Brush as shown in the picture. [1 STEP] into the chamber just like the same place in the picture. After attaching the assembled parts onto the chamber, rotate them left and right to make sure their position is fixed.
- Page 7 How to assemble: Chamber STEP STEP Press the squeezing screw Insert the hopper onto the chamber into the strainer. and turn clockwise to lock completely. Note It may operate even when the hopper is assembled in the opposite direction.
- Page 8 How to assemble : Body 1. Place the control lever into position before operating. When the Control Lever is placed on the Chamber Set cannot be attached to the Body. 2. Assemble the Chamber Set on the Body. Assemble the Chamber Set on the Body. After assembling the Chamber Set, please attach it to the Body.
-
Page 9: How To Use
How to use Place the control lever position before operating. Press [ON] button to start. 작동스위치 Press 정회전 [ON] status light will be turned on. 누름 [ON] 정회전 The Body will not operate by itself for safety. It will only operate when the Chamber Set is attached. -
Page 10: How To Use Control Lever
How to use control lever How to use control lever You can open and close the extraction packing easily. Preparation, Extraction Mode For general ingredients, the extraction rate is good when you close ( ) the control lever during operation. However, for juicing the fruits with hard seeds, such as grapes, rubus coreanus, and pomegranates, place the control level into close (... -
Page 11: How To Use Control Lever By Ingredients
How to use control lever by ingredients ingredients Apple, pear, melon, watermelon, strawberry, blueberry, orange, grapefruits, lemon, mango, plum, peach, cherry, persimmon, pineapple, wheat-grass, parsley, celery, dandelion, carrot, ginger, potato, beet, tomato, paprika, broccoli, cauliflower, cabbage, kale, spinach (Cooked sweet potato, pumpkin and bean) 2. -
Page 12: When Squeezing Screw Stops During Operation
When squeezing screw stops during operation Press [REV] button on the oper- ating switch for 2~3 seconds and stop it. Repeat this 3~5times. [REV] is the button to push back the in- gredients upward. [REV] only works while pressing the button, and the rotation of the squeezing screw stops If you release the button. -
Page 13: How To Prepare Ingredients
How to prepare ingredients apple, pear, kiwi, oriental melon Fruits like apple, pear, kiwi, oriental melon, etc. put them with seeds and peels. However, apple seeds contain toxicity, so it better to remove them. Pomegranate, grapes Separate each grape from the cluster. Peel the pomegranate and use flesh only. Watermelon, orange, grapefruit Peel off the skin of watermelon, orange, grapefruit and cut them into right size. -
Page 14: How To Disassemble And Clean
How to Disassemble and Clean 01. Unplug the power cord with dry hands after the unit has been completely stopped. 02. Remove the chamber set from the main body. Twist the hopper to open and lift up the parts in order to disassemble the unit. - Page 15 How to Disassemble and Clean : Silicone Juice Cap Packing Open the juice cap, hold the chamber and juice cap with one hand, and remove the juice cap packing with your other hand to disassemble. Please be careful not to drop or damage the juice cap and chamber when disassembling the unit.
-
Page 16: Before Requesting Repair
Please check the following before requesting repairs. For requests or inquiries on A/S while using the unit, please contact us through our customer service center or our website (http://www.hurom.com). Please check the serial number or barcode when you request A/S or components. - Page 17 Please check the following before requesting repairs. For requests or inquiries on A/S while using the unit, please contact us through our customer service center or our website (http://www.hurom.com). Please check the serial number or barcode when you request A/S or components.
- Page 18 Hurom provides warranty for one (1) year for the motor, chamber, and squeezing screw(except other parts) from the date of purchase by the original purchaser. Coverage is valid only with proof of purchase from an Authorized Local Distributor.
- Page 19 Good HealtH StartS Here Good HealtH StartS Here HuroM JuiCE rECiPES inDEX HUROM GUIDE WHITEGRAPES kALE APPLEMINT APPLE PINEAPPLE PLUM CARROT PINE PAPRIkA ORANGE POMEGRANATE ORANGE PINE RASPBERRY APPLE GRAPEFRUIT TRIPLE PINEAPPLE CUCUMBER ORANGE PINE kALE CELERY WHEAT GRASS PEAR...
- Page 20 Good HealtH StartS Here HUROM Guide Please read before use ※ How to use recipes ▶ Please use the product after thoroughly reading the user manual. ▶ Please refer to ‘How to Prepare Ingredients(P.13)’ and prepare accordingly. ▶ Please insert the ingredients according to the extraction order shown in the recipes.
- Page 21 Peel orange and cut into appropriate sizes. Put control lever on "close." and take turns in inserting paprika and orange. Once the last of the ingredients is extracted, place the control lever on “half-open(◐)” and allow pulp to be expelled. Hurom Juice reciPeS...
- Page 22 Remove the peel of the pineapple then slice into appropriate sizes. Put control lever on "close." and take turns in inserting cucumber and pineapple. Once the last of the ingredients is extracted, place the control lever on “half-open(◐)” and allow pulp to be expelled. Hurom Juice reciPeS...
- Page 23 Put control lever on “close.” First extract about half of the prepared apple, then insert beet and lemon. Finish inserting the rest of the apple and put lever to “half-open(◐)” position. Allow pulp to be expelled from chamber. Hurom Juice reciPeS...
- Page 24 Wash pears thoroughly and slice into appropriate sizes, with peel intact. Put control lever on "close." Insert and Extract pineapple, banana and pear in order. Once the last of the ingredients is extracted, place the control lever on “half-open(◐)” and allow pulp to be expelled. Hurom Juice reciPeS...
- Page 25 Wash bokchoy thoroughly and slice into appropriate sizes. Put control lever on "close." and take turns in inserting orange, bokchoy, banana and frozen orange. Once the last of the ingredients is extracted, place the control lever on “half-open(◐)” and allow pulp to be expelled. Hurom Juice reciPeS...
- Page 26 Remove the peel of the pineapple then slice into appropriate sizes. Put control lever on “close.” Insert and Extract blueberry, mango and pineapple. Once the last of the ingredients is extracted, place the control lever on “half-open(◐)” and allow pulp to be expelled. Hurom Juice reciPeS...
- Page 27 Put control lever on “close.” First extract about half of the prepared pineapple, then insert plum and carrot. Finish inserting the rest of the pineapple and put lever to “half-open(◐)” position. Allow pulp to be expelled from chamber. Hurom Juice reciPeS...
- Page 28 Wash carrot thoroughly and cut into appropriate sizes. Put control lever on "close." Insert and Extract grapefruit, orange, pineapple and carrot in order. Once the last of the ingredients is extracted, place the control lever on “half-open(◐)” and allow pulp to be expelled. Hurom Juice reciPeS...
- Page 29 Put control lever on "close." and take turns in inserting beet, cherry tomato, pineapple and frozen raspberry. Once the last of the ingredients is extracted, place the control lever on “half-open(◐)” and allow pulp to be expelled. Hurom Juice reciPeS...
- Page 30 Remove grapes from the stem and wash each grape thoroughly. Put control lever on "close." Insert and Extract pear, blueberry, celery and grapes in order. When the 2/3 of the ingredients is extracted, place the control lever on "half-open(◐) " and allow pulp to be expelled. Hurom Juice reciPeS...
- Page 31 Clean off soil on the fresh ginseng and wash thoroughly. Cut into appropriate sizes. Put control lever on "close." and insert pear and fresh ginseng. Insert and extract the boiled white bean with milk at the end and operate the juicer until well blended. Hurom Juice reciPeS...
- Page 32 Remove grapes from the stem and wash each grape thoroughly. Put control lever on "close." and insert paprika, cranberry, grape. Insert and extract the boiled white bean at the end and operate the juicer until well blended. Hurom Juice reciPeS...
- Page 33 Remove white grapes from the stem and wash each grape thoroughly. Put control lever on "close." and take turns in inserting pear, angelica and grapes. When the 2/3 of the ingredients is extracted, place the control lever on "half-open(◐)" and allow pulp to be expelled. Hurom Juice reciPeS...
- Page 34 | Made in Korea Copyright© All Rights Reserved by HUROM 4DC010429_V.01...
Need help?
Do you have a question about the HW Series and is the answer not in the manual?
Questions and answers