
Subscribe to Our Youtube Channel
Related Manuals for BCP SKY1829


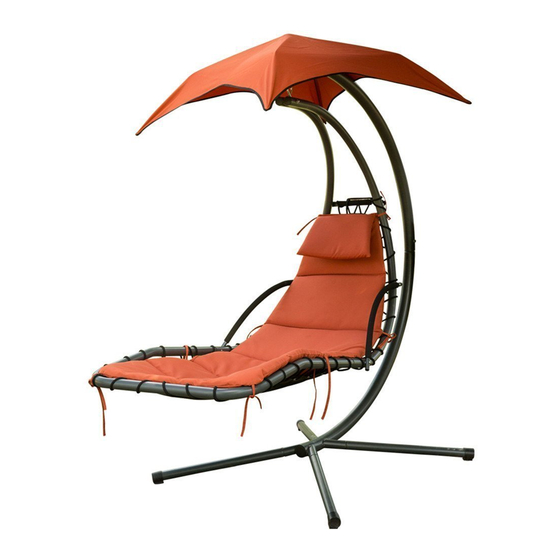
Summary of Contents for BCP SKY1829
- Page 1 INSTRUCTION MANUAL Hanging Chaise Lounge Chair SKY1829 + SKY1831 + SKY1839 + SKY3553 Ver. 3...
- Page 2 TOOLS REQUIRED ALLEN WRENCH WRENCH 2 PERSON APPROXIMATELY (PROVIDED) (PROVIDED) ASSEMBLY 1 HOUR ASSEMBLY HARDWARE 10x95mm 8x81mm 8x70mm 8x75mm 8x50mm 1 PC 1 PC 1 PC 4 PCS 2 PCS 8x20mm 2 PCS 1 PC 1 PC 1 PC PARTS TOP CURVED CURVED BACK MIDDLE...
- Page 3 PRODUCT ASSEMBLY Please retain these instructions for future reference. Attach the Part E legs with the knobs provided on the legs. Assemble the outer frame. Slide on the part J canopy frame before connecting part A to part C. END RESULT Place part 8 between the two part D seat frame curved pipes and secure with the part 1 bolt set.
- Page 4 REAR VIEW Assemble the seat frame. Lay the part I seat inside the seat frame. Using the part 9 rope, tie a firm knot joining the frame and seat together. Continue weaving the rope in and out until the entire seat is attached, making sure the rope is pulled tight and snug.
- Page 5 Tighten Close & secure Secure the part M canopy onto the part J canopy frame. Use the carabiner to hang the seat frame from the outer frame. Tie the part N cushion to the seat frame. Place a part O nut cap on every exposed nut. WARNING To prevent potential injury, please DO NOT enter from the front of the seat;...
- Page 6 NOTICE • Do not stand on or use any part of this product as a step ladder. • Firmly secure all bolts, screws and knobs before use. • Reconfirm that all bolts, screws, and knobs are secure every 90 days. •...
Need help?
Do you have a question about the SKY1829 and is the answer not in the manual?
Questions and answers