Table of Contents
Advertisement
Advertisement
Table of Contents

Subscribe to Our Youtube Channel
Related Manuals for Chauvet Geyser P7


Summary of Contents for Chauvet Geyser P7
- Page 1 User Manual...
-
Page 2: Table Of Contents
Configuration (DMX) ..................Starting Address......................DMX Channel Assignments and Values ................ Configuration (Standalone) ................Geyser Wireless Remote Control................... 5. Maintenance and Storage............Fog Machine Maintenance................Storage......................6. Technical Specifications ............Returns.................... Contact Us ..................Geyser P7 User Manual Rev. 1... -
Page 3: Before You Begin
Chauvet reserves the right to revise the content of this document without any obligation to notify any person or company of such revision, however, Chauvet has no obligation to make, and does not commit to make, any such revisions. Download the latest version from www.chauvetdj.com. -
Page 4: Safety Notes
• Do not use for space heating purposes. • Use only CHAUVET® DJ water-based fog fluid. • Drain the tank before transporting the product. • Always make sure that the voltage of the outlet to which you are connecting the product is within the range stated in the decal or rear panel of the product. -
Page 5: Introduction
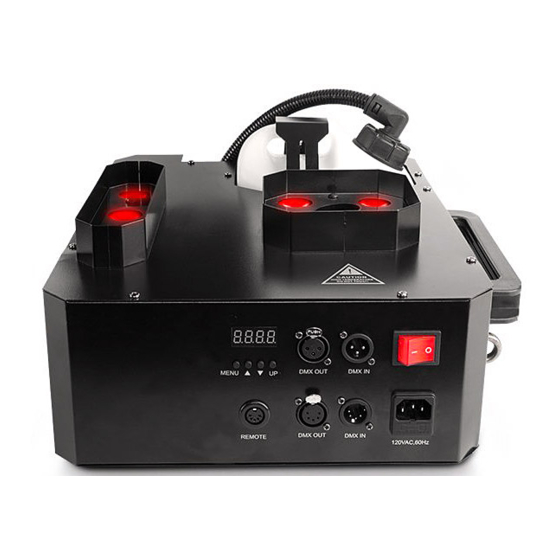
Power Buttons Rubber Feet for Surface Mounting Controller Fuse (x4) Holder DMX In/Out (3- and 5-pin) Product Dimensions 14.2 in 15.7 in 362 mm 400 mm 8.2 in 210 mm Geyser P7 User Manual Rev. 1 Page 3 of 12... -
Page 6: Setup
3. Setup AC Power The Geyser P7 has a fixed voltage power supply and it can work with an input voltage of either 120 VAC, 60 Hz or 230 VAC, 50 Hz, depending on the specific model. To determine the product’s power requirements (circuit breaker, power outlet, and wiring), use the current value listed on the label affixed to the product’s back panel, or refer to the product’s specifications chart. -
Page 7: Inverting The Tank
To prevent leaking or spilling, always position the fluid tank with its cap in the uppermost position, above the fog fluid line. When mounting the Geyser P7 overhead, invert the fluid tank by doing the following: Detach the removable shield by removing the thumb-screw. -
Page 8: Operation
Zone 1 amber, zone 2 magenta Co18 Zone 1 blue, zone 2 magenta Co19 Zone 1 magenta, zone 2 amber Co20 Zone 1 hot pink, zone 2 blue rand Random color output Page 6 of 12 Geyser P7 User Manual Rev. 1... -
Page 9: Configuration (Dmx)
Operation Configuration (DMX) The Geyser P7 works with a DMX controller. Information about DMX is in the CHAUVET DMX Primer, which is available from the Chauvet website http://www.chauvetlighting.com/downloads/ DMX_Primer_rev05_WO.pdf. Starting Address When selecting a starting DMX address, always consider the number of DMX channels the selected DMX mode uses. -
Page 10: Configuration (Standalone)
Operation Configuration (Standalone) After connecting power, allow 4 to 5 minutes for the Geyser P7 to heat up before triggering fog output. Geyser Wireless Remote Control The included Geyser wireless remote control and receiver allows up to 4 preset colors or programs to be triggered from up to 100 ft (30 m) away. -
Page 11: Maintenance And Storage
Fog Machine Maintenance Do not allow the fog machine to become clogged. After every 40 hours of continuous operation, use CHAUVET Fog Cleaner Quart (FCQ) through the system to prevent the accumulation of particulate matter in the heating element. The recommended cleaning procedure is as follows. -
Page 12: Technical Specifications
Maximum External Temperature Cooling System 104 °F (40 °C) Fan-assisted convection Ordering Product Name Item Code UPC Number Geyser P7 (120 V) 05071331 781462216795 Geyser P7 (230 V) 05071332 781462216801 Page 10 of 12 Geyser P7 User Manual Rev. 1... -
Page 13: Returns
Send the merchandise prepaid, in its original box, and with its original packing and accessories. Chauvet will not issue call tags. Clearly label the package with the RMA number. Chauvet will refuse any product returned without an RMA number. Write the RMA number on a properly affixed label. DO NOT write the RMA number directly on the box. -
Page 14: Contact Us
Outside the U.S., United Kingdom, Ireland, Mexico or Benelux, contact the dealer of record. Follow the instructions to request support or to return a product. Visit our website for contact details. Page 12 of 12 Geyser P7 User Manual Rev. 1...
Need help?
Do you have a question about the Geyser P7 and is the answer not in the manual?
Questions and answers