Table of Contents
Advertisement
TABLE OF CONTENTS
1 Safety Precautions----------------------------------------------- 2
2 Specifications ----------------------------------------------------- 5
3 Technical Descriptions ----------------------------------------- 6
4 Location of Controls and Components ------------------- 7
5 Installation Instructions ---------------------------------------- 9
6 Operating Instructions-----------------------------------------11
7 Service Mode -----------------------------------------------------14
8 Troubleshooting Guide ----------------------------------------19
9 Disassembly and Assembly Instructions ---------------25
10 Schematic Diagram ---------------------------------------------38
11 Exploded View and Replacement Parts List -----------39
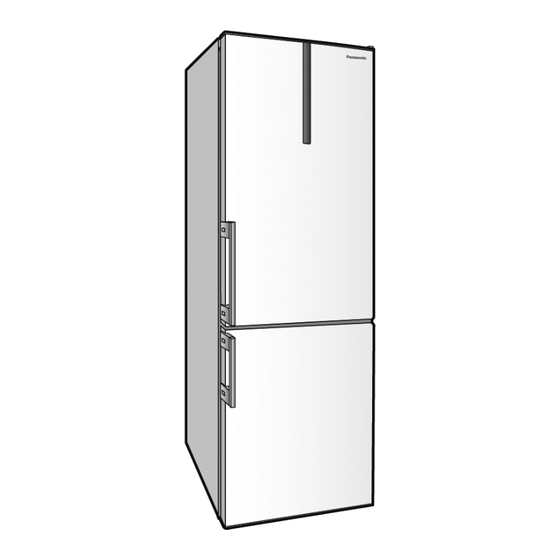
REFRIGERATOR-FREEZER
Model No.
Model No.
Product-Color X:Stainless
Destination E(Europe Continental)
PAGE
© Panasonic Corporation 2016 Unauthorized copy-
ing and distribution is a violation of law.
Order Number GORR1606001CE
NR-BN31EX2
NR-BN31EW2
W:White
PAGE
Advertisement
Table of Contents

Related Manuals for Panasonic NR-BN31EX2


Summary of Contents for Panasonic NR-BN31EX2
-
Page 1: Table Of Contents
7 Service Mode -----------------------------------------------------14 8 Troubleshooting Guide ----------------------------------------19 9 Disassembly and Assembly Instructions ---------------25 10 Schematic Diagram ---------------------------------------------38 11 Exploded View and Replacement Parts List -----------39 © Panasonic Corporation 2016 Unauthorized copy- ing and distribution is a violation of law. -
Page 2: Safety Precautions
1 Safety Precautions... -
Page 5: Specifications
2 Specifications Product fiche (EU Regulation 1060/2010) SUPPLIER'S NAME Panasonic NR-BN31EX2-E MODEL NR-BN31EW2-E CATEGORY 7 (Refrigerator-Freezer) ENERGY EFFICIENCY CLASS A+++ ANNUAL ENERGY CONSUMPTION 166 kWh/year*1 NET FRIDGE VOLUME 207 L NET CHILL VOLUME 16 L NET FREEZER VOLUME 80 L... -
Page 6: Technical Descriptions
3 Technical Descriptions 3.1. Compressor Operation Compressor is controlled by the difference between detected temperature of the freezer temperature sensor and preset tempera- ture of the freezer compartment. It runs for 10 minutes when plugged in, but it is forced to be stopped for 10 minutes once plugged off to prevent failure. Input Output •... -
Page 7: Location Of Controls And Components
4 Location of Controls and Components 4.1. Display and Control Panel... - Page 8 4.2. Components...
-
Page 9: Installation Instructions
5 Installation Instructions... -
Page 11: Operating Instructions
6 Operating Instructions 6.1. Setting the temperature 6.1.1. Fridge compartment (PC) 6.1.2. Freezer compartment (FC) 6.1.3. Humidity control of “Vitamin Safe” Crisper 6.2. Functions 6.2.1. Vitamin Safe Mode... - Page 12 6.2.2. Super Cool Mode 6.2.3. Super Freeze Mode 6.2.4. Flash Freeze Mode...
- Page 13 6.2.5. ECO Mode 6.2.6. Holiday Mode 6.2.7. Alarm Mode 6.2.8. Child safety lock...
-
Page 14: Service Mode
7 Service Mode 7.1. How to start Press both of the alarm button and the lower fridge temperature button for more than 3 seconds. 7.2. How to end 15 minutes have passed after service mode starts. Press both of the alarm button and the lower fridge temperature button for more than 3 seconds. - Page 15 7.4. Service Mode [00] (Software Version of Power Board) When [00] is displayed on fridge temperature display, software version of power board can be confirmed on freezing temperature display by pressing the alarm button. If the alarm button is pressed when the software version is displayed, indication of the software version is returned to the initial. (Example) Software version: 70E / Display: [ 0] →...
- Page 16 7.15. Self Diagnosis Code Error code is displayed on fridge or freezer temperature display when failure causes. [E0] and [E1] are displayed on the fridge temperature display. [E3] is displayed on the freezer temperature display. 7.16. Measuring Points on Main PCB Box Note: For more detail, refer to the Schematic Diagram on page 38.
- Page 17 7.17. Value of Temperature sensors 7.18. Operation in case of failure Failure of magnetic switch (LED Lamp) In case of failure of magnetic door switch, the LED Lamp stays switched on for 10 minutes, even when door is closed. During this time the appliance is operating normally and in accordance with the settings. Failure of Temperature Sensors Fridge compartment (PC) Failure of PC sensor in fridge compartment: time algorithm is installed which sets and deletes the request for...
- Page 18 Failure of fridge and freezer compartment Temperature sensor at the same time In this case the display of temperature in fridge compartment shows "E1" and the display of temperature in freezer compartment shows "E3". On models with one-digit temperature display in fridge compartment, "E" and "1" are shown alternately, with 1-second interval while the regulations function each one in accordance with their time regime.
-
Page 19: Troubleshooting Guide
8 Troubleshooting Guide 8.1. Not cooling at all [ Both PC & FC (compressor does not operate)]... - Page 20 8.2. PC is not cooling or poor cooling. [ FC cooling condition is normal]...
- Page 21 8.3. FC is not cooling. [ Compressor operate]...
- Page 22 8.4. Cooling system trouble.
- Page 23 8.5. Communication trouble. 8.6. Temperature sensor trouble.
-
Page 25: Disassembly And Assembly Instructions
9 Disassembly and Assembly Instructions Note: Before taking any action, please be sure to unplug the power supply. 9.1. Display Panel A’ssy (Display and Control Panel) Note: Please wear electrostatic discharge band. 1. Insert flat screw driver into the bottom of the Display 2. - Page 26 9.2. LED Lamp PC 9.3. Main PCB LED Lamp is installed at the ceiling of PC 1. Main PCB is installed at the upper side of refrigerator. Unhook the hook and push the LED cover to the left. 2. Slide both the Head Panel Cover R and the Head Panel Cover L to remove.
- Page 27 9.4. Air Flow Ins. PC 5. While unhooking the rib at the upper center of PCB box by inserting the screwdriver, draw out the PCB box 1. First, remove the Glass Shelves, Bottle Support and toward you. Drawers, then unscrew the two screws. 6.
- Page 28 9.5. Fan Assy 4. Remove the PC Duct Upper, then the Air Flow Ins. PC can be seen. 1. First, remove the FC Drawers, then unscrew the four screws. 2. Pull out the FC Air Duct Cover so that you can see the connector of Fan Motor.
- Page 29 9.6. Door Switch FC 4. Unhook the hook, then remove the Door Switch FC. 1. First, remove the FC Drawers, Disconnect the connector. 2. Unscrew the screw fixing the Door Switch Cover. Open the Door Switch Cover.
- Page 30 9.7. Replacement of PC temperature sensor 1. Release the latches by screwdriver and remove the cover 4. First crimp the enclosed end splices on conductor of the by hand. new sensor. Note: The sensor cover is hooked at two position as Place the enclosed thermo-shrinkable bushing.
- Page 31 9.8. Inverter PCB Assy. 4. Unhook the hook, then remove the cover. Note : Before taking any action, please be sure to unplug the power supply. 5. Remove the all connectors. 1. Unscrew the screw fixing the Inverter PCB Assy.. 2.
- Page 32 9.9. Positions of Temperature Sensors, Thermal Fuse, Defrost Heater and PC Door Switch...
- Page 33 9.10. Changing The doorway Direction Warning: Make sure the unit is unplugged Remove the Hinge Cover Upper. Remove the PC Door. Remove the PC Door Edge Cover Left. Remove the PC Hinge Cover VC. Disconnect the Display Connector. Slide the Head Panel Cover Right and Head Panel Cover Left then remove its.
- Page 34 9. While unhooking the rib at the center of PCB box by using 13. Unscrew the Middle Hinge fixing screw and remove it. the screwdriver Remove the FC Door. 10. Draw out the PCB box toward you and change the elec- tric wire direction.
- Page 35 Lie down the appliance to the back. (min 600mm) Replace the Door Bushing and the FC Door Plug. CAUTION: Do not damage the outer condenser. Remove the PC Door Limiter Right, then install PC Door Limiter Left. (You can find the PC Door Limiter Replace the Levelling Leg Right with the Lower Left in the user manual bag) Hinge and the Levelling Leg Left.
- Page 36 Remove the PC Door Edge Cover Left. Install the Hinge Cover. Install the upper Hinge. Fix the Hinge Cover VC and the PC Door Edge Cover Right. Connect the Display Connector. Remove the display panel by using a small flat-blade screwdriver. (Refer to the Replacement of Display) Screw the Upper Hinge fixing screws.
- Page 37 Remove the Filling Plugs. Unscrew the Handles fixing Torx screws using the Torx screwdriver. Screw the Handles to the right side. Install the Filling Plugs to the left side.
-
Page 38: Schematic Diagram
10 Schematic Diagram... -
Page 39: Exploded View And Replacement Parts List
11 Exploded View and Replacement Parts List 11.1. Interior Parts... - Page 40 11.2. Interior Parts List NR-BN31EX2 NR-BN31EW2 New parts Safety Ref. No. Part No. Part Name & Description Remarks ( N ) CNR-420268 MIDDLE HINGE PLUG CNR-474360 LEVELLING LEG CNR-697782 LEVELLING LEG M8X40 CNR-421098 SCREW CAP CNR-377549 SCREW CAP CNR-108164 SENSOR...
- Page 41 11.3. Drawer Parts...
- Page 42 11.4. Drawer Parts List NR-BN31EX2 NR-BN31EW2 New parts Safety Ref. No. Part No. Part Name & Description Remarks ( N ) CNR-420335 ICE TRAY 1125 CNR-498656 DRAWER SUPPORT RIGHT PC 1126 CNR-498658 DRAWER SUPPORT LEFT PC 1318 CNR-433234 GLASS SHELF UPPER ASSY PC...
- Page 43 11.5. Door Assy Parts...
- Page 44 11.6. Door Assy Parts List NR-BN31EX2 NR-BN31EW2 New parts Safety Ref. No. Part No. Part Name & Description Remarks ( N ) CNR-480718 NAME PLATE CNR-449209 DOOR PLUG FC CNR-449363 DOOR PLUG FC CNR-442916 DOOR LIMITER CNR-449210 FILLING PLUG CNR-420247...
- Page 45 11.7. Multiflow Parts 11.8. Multiflow Parts List NR-BN31EX2 NR-BN31EW2 New parts Safety Ref. No. Part No. Part Name & Description Remarks ( N ) 1360 CNR-510276 PC AIR DUCT LOWER 1361 CNR-436878 AIR FLOW INS PC 1362 CNR-562042 FC AIR DUCT WITH FAN...
- Page 46 11.9. Unit Parts...
- Page 47 11.10. Unit Parts List NR-BN31EX2 NR-BN31EW2 New parts Safety Ref. No. Part No. Part Name & Description Remarks ( N ) CNR-260862 DRYER WITH TUBE ENDS CNR-441328 CONDENSER CNR-462752 TERMAL FUSE WITH HARNESS CNR-561517 SUPPLY CORD CNR-491419 COMPRESSOR 1212 CNR-516340...
Need help?
Do you have a question about the NR-BN31EX2 and is the answer not in the manual?
Questions and answers