Table of Contents
Advertisement
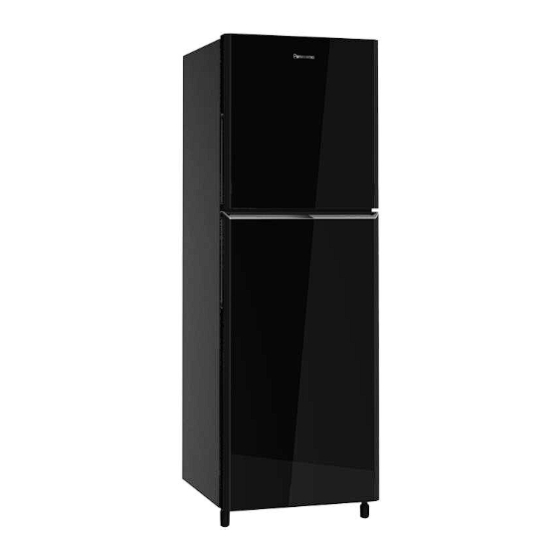
SERVICE MANUAL
GLASS DOOR
NR-BN211GKMY
( JET BLACK )
CFC & HCFC have been used in refrigerant as refrigerator and the insulation materials for many years. But it is now known that these compounds which once
seemed so ideal for use as cleaning agents and in refrigeration systems, destroy the earth's ozone layer as a result, an international body decided on a total
worldwide ban of harmful CFCs by the end of 1995.
This service information is designed for experienced repair technicians only and is not designed for use by the general public. It does not contain warnings or
cautions to advise non-technical individuals of potential dangers in attempting to service a product. Products powered by electricity should be serviced or repaired
only by experienced professional technicians. Any attempt to service or repair the product or products dealt with in this service information by anyone else could
result in serious injury or death.
There are special components used in this equipment which are important for safety. These parts are marked by
essential that these critical parts should be replaced with manufacturer's specified parts to prevent shock, fire or other hazards. Do not modify the original design without permission
of manufacturer.
Note :
This service manual handbook can be owned but can not be reproduced without permission from Refrigerator Business Unit, PT Panasonic Manufacturing Indonesia.
GLASS DOOR
NR-BN211GAMY
( GALLANT BLUE )
WARNING
IMPORTANT SAFETY NOTICE
PT Panasonic Manufacturing Indonesia
Jl. Raya Bogor km. 29, Pekayon, Pasar Rebo, Jakarta 13710, Indonesia
- 1 -
Order No. : PMIRF1609006C3
Refrigerator
NR-BN211GKMY
NR-BN211GAMY
NR-BN211GRMY
Product Color
Glass Jet Black ( K )
Glass Gallant Blue ( A )
Glass Wine Red ( R )
Destination
Malaysia
GLASS DOOR
NR-BN211GRMY
( WINE RED )
PS
in the Exploded Views and Replacement Parts List. It is
Advertisement
Table of Contents

Related Manuals for Panasonic NR-BN211GKMY


Summary of Contents for Panasonic NR-BN211GKMY
- Page 1 Note : This service manual handbook can be owned but can not be reproduced without permission from Refrigerator Business Unit, PT Panasonic Manufacturing Indonesia. PT Panasonic Manufacturing Indonesia Jl. Raya Bogor km. 29, Pekayon, Pasar Rebo, Jakarta 13710, Indonesia...
-
Page 2: Table Of Contents
CONTENTS : Item Pages Content Safety Cautions for Repairing Specification and Components Wiring Diagram and Wiring Connection Cooling Performance Data Cooling Circulation and Main Component Function Function of Each Component Reparation Standard Repairing Devices Which are Exclusive - Use for HFC-134a Refrigerant Repairing Standard of Refrigerating Unit HFC-134a Tool for Repairing Refrigerating Unit HFC-134a Refrigerating Unit Repairing Procedure... -
Page 3: Safety Cautions For Repairing
I. SAFETY CAUTIONS FOR REPAIRING When you repair refrigerator, please kindly take care of following cautions. a) Warning Before repairing unit, unplug power supply cord Before you repair refrigerator, unplug the power supply cord. ● Use authentic parts when repairing When you replace the parts, please use authentic parts to replace defective parts. -
Page 4: Specification And Components
2. Specification and Components NR-BN211GKMY, NR-BN211GAMY, NR-BN211GRMY Model NR-BN211GKMY, NR-BN211GAMY, NR-BN211GRMY Malaysia Destination Plug Voltage / Frequency 240V~/50Hz Specification Input 97 W Ampere 0.60 A Capacity 210 Liter Inside Dimension ( mm ) FC = ( W ) 404 x ( D ) 335.5 x ( H ) 411.5, PC = ( W ) 460 x ( D ) 435 x ( H ) 827... -
Page 5: Wiring Diagram And Wiring Connection
3. Wiring Diagram dan Wiring Connection NR-BN211GKMY, NR-BN211GAMY, NR-BN211GRMY a) Wiring Diagram b) Wiring Connection... -
Page 6: Cooling Performance Data
4. Performance Data NR-BN211GKMY, NR-BN211GAMY, NR-BN211GRMY "3" "2" "1" Control Setting Freezer Max Medium Refrige Max Mean fresh food compartment 1.0±2.5 3.0±2.5 5.5±2.5 Mean freezer compartment -22.5±2.5 -18.0±2.5 -12.0±2.5 Vegetable case 6.0±2.5 Tray egg 9.0±2.5 PC door shelf 4.0±2.5 Running Ratio 100-15% 60.0±15%... -
Page 7: Reparation Standard
6. Reparation Standard 6.1. REPAIRING DEVICES WHICH ARE EXCLUSIVE - USE FOR HFC-134a REFRIGERANT This refrigerator use compressor with Freol Oil. Freol Oil employed as new compressor oil for refrigerant HFC-134a. Freol oil is characteristic of higher hyroscopicity. When moisture leaks into the refrigerating unit, it will chemically react with the moisture and solid substance clogging the pipe will form It is also characteristic of less stability when chlorine is contain. -
Page 8: Tool For Repairing Refrigerating Unit Hfc-134A
6.3. TOOL FOR REPAIRING REFRIGERATING UNIT HFC-134a Caution : Conventional repairing devices for CFC-12 can not connect with repairing devices for HFC- 134a. Because of the shape of fitting for HFC-134A (M10 x P1.5 mm) is different from conventional ones. Be sure to connect the adaptor with vacuum pump, so that it can be used for both CFC-12 and HFC-134a. -
Page 9: Refrigerating Unit Repairing Procedure
6.4. REFRIGERATING UNIT REPAIRING PROCEDURE STANDARD PROCEDURE IMPORTANT THINGS Diagnosing the trouble Refer to the TROUBLESHOOTING Discharging the refrigerant * At first, remove the refrigerant by cutting gas Removing the Compressor charge pipe. Checking the compressor oil Check compressor oil A little discoloration Severe discoloration (light yellow) -
Page 10: Method To Repairing Regrigerating Unit
6.5. METHOD TO REPAIRING REFRIGERATING UNIT CONDITION I. NOT COLD Compressor not run CHECK CAUSE SUSPECT ANALYSIS ACTION Release socket CN 201 and connect black Compressor run Pas Control broken Check with M Tester Change PAS Control - brown wire and grey - blue wire, then connect Check with M Tester on AC Cord with electric... - Page 11 1. TROUBLESHOOTING Symptom : No cooling at all or insufficient cooling Check starting Replace faulty electric Does compressor run ? No good circuit parts (PCB, thermistor, starting relay, motor protector, running capacitor) Check Oil Compressor Check resistance Compressor of motor winding locking with ohm meter Pipe Cleaning...
- Page 12 METHOD TO REPLACE LED LAMP MINUS SCREW DRIVER LED COVER DIAL LAMP Picture 1 Picture 2 1. Use minus screw driver by pushing and grubbing to release the hook of LED cover with mark as Picture 1. 2. Change LED Lamp by releasing wire joint behind it as Picture 2. Picture 3 3.
-
Page 13: Check Pressure At High Pressure Side
6.6. Check pressure at high pressure side Install pierching plier with pressure gauge at discharge near compressor, then check pressure from compressor running. If compressor stop, start compressor again about ± 5 minutes until stable pressure, then check pressure. Note : Before measuring, make sure the pressure gauge at "... - Page 14 2. PREPARATION 1. Remove protector cover from compressor. Compressor 2. Replace PTC Relay. 3. Replace motor protector. 3. DISCHARGING THE REFRIGERANT Cut the compressor charge pipe and capillary pipe near dryer to discharge refrigerant. 4. REMOVING THE COMPRESSOR Disconnect the discharge pipe from the compressor with brazing.
- Page 15 High pressure side Connect the process - tube - fitting with the inlet pipe of dryer by wrenches. Note : Do not purge the pipe at high pressure side from compressor side so that no deteriorated oil can flow into the condenser. Connect the charge cylinder (for HFC-134a) with the process - tube - fitting.
- Page 16 7. ASSEMBLING THE COMPRESSOR AND THE DRYER General Clause > It should be finished within 30 minutes. When pipe purging no need From the process of removing compressor until the process of setting compressor and dryer (just before vacuum pumping process). When pipe purging has need From the time just after pipe cleaning is completed until the process of setting compressor and dryer (just before vacuum pumping process).
- Page 17 8. VACUUM PUMPING General Clause: a Vacuum pumping should be done more than 60 minutes from 2 portions. One portion at high - pressure side and one portion at low - pressure side. b Be sure the Adaptor good connect to vacuum pump. The Adaptor can stop oil flow from Vacuum Pump to Cooling Unit HFC-134a, after Manifold Gauge and Charge Hose vacuum condition.
- Page 18 9. MEMASUKKAN REFRIGERANT DARI CYLINDER KEDALAM CHARGE CYLINDER REFRIGERANT CHARGING FROM CYLINDER TO INSIDE OF CYLINDER CHARGE Preparation: Before vacuum pumping process, it should charging the refrigerant from Cylinder HFC-134a to inside of Cylinder Charge. b. Connect Cylinder Charge and Control Valve. Fix the Adaptor Charge at Cylinder HFC-134a.
- Page 19 5. Close quickly the valve as soon as the set amount is charged. Set the starting relay and the overload protector and run the compressor until pressure reading at the low pressure gauge shows 0 so that remaining refrigerant in the charge hose is taken in the refrigerating unit.
-
Page 20: Safety Check
6.7. SAFETY CHECK Make sure that the refrigerator repaired is secure and works properly. 1. INSULATION TEST Connect the Power Supply Cord pin positive and negative except grounding. Connect the grounding pin and insulation tester power supply cord Refrigerator. Connect positif pin Insulation tester to body of Refrigerating Unit. -
Page 21: Instruction To Assembly Parts 21
7. Instruction to Assembly Parts NR-BN211GKMY NR-BN211GAMY NR-BN211GRMY NR -BB278X SW A Voltage : 220-240 V C urrent : 1.2 A Frequency : 50 H z D efros t Input : 130-155 W NR-BN211 D efros t H eater : 130-155 W... - Page 22 7. Instruction to Assembly Parts NR-BN211GKMY NR-BN211GAMY NR-BN211GRMY INDICATED SAFETY PART - 22 -...
-
Page 23: Part List 23
8. Part list Important safety notices: Components identified by the mark "PS" have special characteristics important for safety. When replacing parts, use parts in accordance with manufacturers' specifications. NR-BN211GKMY NR-BN211GAMY NR-BN211GRMY Model / Model / Model / QTY / QTY /... - Page 24 8. Part list Important safety notices: Components identified by the mark "PS" have special characteristics important for safety. When replacing parts, use parts in accordance with manufacturers' specifications. NR-BN211GKMY NR-BN211GAMY NR-BN211GRMY Model / Model / Model / QTY / QTY /...
- Page 25 8. Part list Important safety notices: Components identified by the mark "PS" have special characteristics important for safety. When replacing parts, use parts in accordance with manufacturers' specifications. NR-BN211GKMY NR-BN211GAMY NR-BN211GRMY Model / Model / Model / QTY / QTY /...
-
Page 26: Packing Instruction
9. Packing Instruction CARTON BOX NR-BN269S SERIES INSTRUCTION BOOK NR-BN211G SERIES AK-176321 AK-176334 AK-176331 AK-176330 TOP CUSHION R/L AK-174340 STRAPPING BAND SB15X07YL REFRIGERATOR COVER AJ-173790 AJ-169700 CARTON PROTECTOR FRONT AK-174781 FRONT CUSHION AK-170910 BOTTOM TRAY AS. BK-144100 - 26 -...
Need help?
Do you have a question about the NR-BN211GKMY and is the answer not in the manual?
Questions and answers