Table of Contents
Advertisement
Advertisement
Table of Contents

Related Manuals for Dell Latitude 7380


Summary of Contents for Dell Latitude 7380
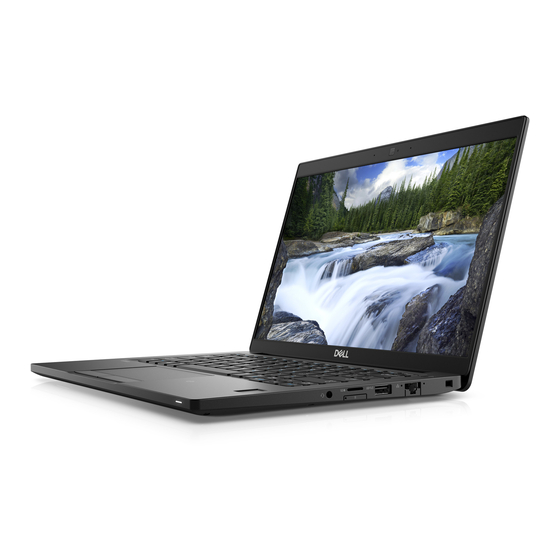
- Page 1 Dell Latitude 7380 Owner's Manual Regulatory Model: P28S Regulatory Type: P28S001...
- Page 2 A WARNING indicates a potential for property damage, personal injury, or death. © 2017 Dell Inc. or its subsidiaries. All rights reserved. Dell, EMC, and other trademarks are trademarks of Dell Inc. or its subsidiaries. Other trademarks may be trademarks of their respective owners.
-
Page 3: Working On Your Computer
Due to the increased density of semiconductors used in recent Dell products, the sensitivity to static damage is now higher than in previous Dell products. For this reason, some previously approved methods of handling parts are no longer applicable. - Page 4 • Transporting Sensitive Components – When transporting ESD sensitive components such as replacement parts or parts to be returned to Dell, it is critical to place these parts in anti-static bags for safe transport. Working on your computer...
-
Page 5: Before Working Inside Your Computer
It is recommended that all field service technicians use the traditional wired ESD grounding wrist strap and protective anti-static mat at all times when servicing Dell products. In addition, it is critical that technicians keep sensitive parts separate from all insulator parts while performing service and that they use anti-static bags for transporting sensitive components. -
Page 6: After Working Inside Your Computer
CAUTION: To avoid damage to the computer, use only the battery designed for this particular Dell computer. Do not use batteries designed for other Dell computers. Connect any external devices, such as a port replicator or media base, and replace any cards, such as an ExpressCard. -
Page 7: Table Of Contents
The procedures in this document require the following tools: • Phillips #0 screwdriver • Phillips #1 screwdriver • Small plastic scribe Screw size list Table 1. Latitude 7380 - screw size list Component M2.5x 6.0 M2.0 x 5.0 M2.5 x 4.0 M2.0x3.0 M2.0 x 2.5 M2.0 x 2.0... - Page 8 Subscriber Identification Module (SIM) card Removing SIM card or SIM card tray NOTE: SIM card or SIM card tray removal is only available on systems that are shipped with WWAN module. Hence, removing procedure is only applicable for systems that are shipped with WWAN module. CAUTION: Removing the SIM card when the computer is On, may cause data loss or damage the card.
-
Page 9: Base Cover
Slide the dummy SIM card tray out of the system. Base cover Removing base cover Follow the procedure in Before working inside your computer. To release the base cover: Remember: Exercise caution when loosening the screws. Angle the screw driver to match the head of the screw to avoid a possible stripped screw head. - Page 10 Lift the base cover from the computer. Installing base cover Align the base cover tabs to the slots on the edges of the computer. Press the edges of the cover until it clicks into place. Tighten the M2.5 x 6.0 captive screws to secure the base cover to the computer. Remember: Exercise caution when tightening the screws.
- Page 11 Installing 3-cell battery Insert the battery into the slot on the computer. Route the battery cable through the routing clip and connect the battery cable to the connector on the system board. NOTE: Route the battery cable, if the cable at the base of the battery is unrouted. Tighten the M2.0 x 5.0 screw to secure the battery to the computer.
- Page 12 Installing 4-cell battery Insert the battery into the slot on the computer. Route the battery cable through the routing clip and connect the battery cable to the connector on the system board. NOTE: Route the battery cable, if the cable at the base of the battery is un routed. Tighten the two M2.0 x 5.0 screws to secure the battery to the computer.
- Page 13 Installing PCIe SSD Insert the PCIe SSD card into the connector. Install the SSD bracket over the PCIe SSD card. NOTE: When installing the SSD bracket, ensure that the tab on the bracket is held securely with the tab on the palm rest.
-
Page 14: Speaker
Installing SATA SSD Insert the SATA SSD card into the connector. Tighten the screw to secure the SATA SSD to the system board. Install the base cover. Follow the procedure in After working inside your computer. Speaker Removing speaker module Follow the procedure in Before working inside your computer. - Page 15 Remove the tape that secures the speaker cables to the touchpad board [4]. To remove the speaker module: Remove the M2.0x3.0 screws that secure the speaker module to the computer [1]. NOTE: Refer the speaker screw list b Lift the speaker module from the computer . Removing and installing components...
- Page 16 Installing speaker module Place the speaker module into the slots on the computer. Tighten the M2.0x3.0 screws to secure the speaker to the computer. Route the speaker cable through the retention clips on the computer. Connect the speaker cable to the connector on the system board. Install the: battery base cover...
-
Page 17: Wwan Card
Installing coin cell battery Affix the coin cell battery on the slot inside the computer. Route the coin cell battery cable through the routing channel before connecting the cable. Connect the coin cell battery cable to the connector on the system board. Install the base cover. -
Page 18: Wlan Card
Installing WWAN card Insert the WWAN card into the connector on the system board. Connect the WWAN cables to the connectors on the WWAN card. Place the metal bracket and tighten the M2.0 x 3.0 screw to secure it to the computer. Install the base cover. -
Page 19: Removing Memory Module
Installing WLAN card Insert the WLAN card into the connector on the system board. Connect the WLAN cables to the connectors on the WLAN card. Place the metal bracket and tighten the M2.0 x 3.0 screw to secure it to the computer. Install the base cover. -
Page 20: System Fan
Installing memory module Insert the memory module into the connector until snaps in. Install the base cover. Follow the procedures in After working inside your computer. Heat sink Removing heat sink assembly Heat sink assembly comprises of heat sink and the system fan. Follow the procedure in Before working inside your computer. -
Page 21: Power Connector Port
Installing heat sink assembly Heat sink assembly comprises of heat sink and the system fan. Align the heat sink assembly with screw holders on the system board. Tighten the M2.0 x 3.0 screws to secure the heat sink to the system board. NOTE: Tighten the screws in the order of the callout numbers [1, 2, 3, 4] as indicated on the heat sink. -
Page 22: Led Board
d Lift the power connector port from the computer [4]. Installing power connector port Install the power connector port into the slot on the computer. Place the metal bracket on the power connector port. Tighten the M2.0x3.0 screw to secure the power connector port to the computer. Connect the power connector port cable to the connector on the system board. - Page 23 Remove the M2.0 x 2.5 screw that secures the LED board to the computer [3] d Lift the LED board from the computer [4]. Installing LED board Insert the LED board into the slot on the computer. Tighten the M2.0 x 2.5screw to secure the LED board. Route the LED cable through the routing channel.
- Page 24 b Lift the smart card cable that is affixed to the touchpad module [2]. To remove the smart card cage: Remove the M2.0 x 3.0 screws that secure the smart card cage to the computer [1]. b Slide and lift the smart card cage from the computer [2]. Removing and installing components...
- Page 25 Installing smart card cage Slide the smart card cage into the slot to align with the tabs on the computer. Tighten the M2.0 x 3.0 screws to secure the smart card cage to the computer. Affix the smart card cable and connect it to the connector on the computer . Install the: PCIe SSD card battery...
- Page 26 Disconnect the smart card cable [1]. b Lift the smart card cable that is affixed to the computer [2] to reveal the touchpad buttons board cable. Remove the adhesive tape that secures the speaker cable to the touchpad panel [3]. To remove the touchpad buttons board: Disconnect the touchpad buttons board cable from the touchpad board [1].
- Page 27 Installing touchpad buttons board Insert the touchpad buttons board into the slot to align the tabs with the grooves on the computer. Tighten the M2.0 x 2.5screws to secure the touchpad buttons board to the computer. Connect the touchpad buttons board cable to the connector on the touchpad board. Affix the smart card cable and connect it to the connector on the computer Install the: speaker...
- Page 28 NOTE: To identify the number of screws, see screw list To remove the display assembly: Un route the WLAN and WWAN cables from the routing channels [1]. b Remove the M2.0 x 5.0 screws that secures the eDP bracket [2]. Lift the eDP bracket from the eDP cable [3].
-
Page 29: Display Hinge
Installing display assembly Place the base of the computer on a plane surface of a table and position it closer to the edge of the table. Install the display assembly to align it with the display hinge holders on the system. Holding the display assembly, tighten the M2.5 x 4.0 screws to secure the display hinges on the system display assembly with the system unit. - Page 30 base cover WLAN card WWAN card display assembly NOTE: To identify the number of screws, see screw list Push the display hinge cap to the right. Remove the display hinge cap. Installing display hinge Cap Insert the display hinge cap to the display assembly. Push the display hinge cap to the left to secure it.
-
Page 31: System Board
System board Removing system board Follow the procedure in Before working inside your computer. If your computer is shipped with a WWAN card, then the removal of a blank SIM card tray is a requirement. Remove the: SIM card dummy SIM card tray base cover battery memory module... - Page 32 To disconnect the eDP cable: NOTE: If your system is shipped with an IR camera, then the IR cable must be disconnected. The IR cable is located beneath the eDP cable connector Un route the WLAN and WWAN cables from the routing channels [1]. b Remove the M2.0 x 3.0 screws that secure the eDP cable [2].
- Page 33 To disconnect the cables: NOTE: To disconnect the speaker, LED board, coin cell battery and the power connector port cables, use a plastic scribe to release the cable from the connector. Do not pull the cable as it may result in breakage speaker cable [1] b LED board cable [2] coin cell battery cable [3]...
- Page 34 To remove the system board: Disconnect the M2.0x3.0 screws that secure the system board to computer [1]. NOTE: Refer system board screw list b Lift the system board away from the computer. Removing and installing components...
- Page 35 Installing system board Align the system board with the screw holders on the computer. Tighten the M2.0 x 5.0 screws to secure the system board to the computer. Connect the speaker, power connector, LED board, touchpad, and USH cables to the connectors on the system board. Connect the eDP cable to the connector on the system board.
-
Page 36: Removing And Installing Components
Keyboard assembly Removing keyboard assembly NOTE: The keyboard and the keyboard tray together are called the keyboard assembly. Follow the procedure in Before working inside your computer. Remove: base cover battery memory module PCIe SSD WLAN card WWAN card heat sink assembly system board Disconnect the cables from the palmrest end: touchpad and USH board cables [1]... -
Page 37: System Board
Remove the M2.0 x 2.5 screws that secure the keyboard [1]. b Lift the keyboard assembly from the chassis [2]. Installing keyboard assembly NOTE: The keyboard and the keyboard tray together are called the keyboard assembly. Align the keyboard assembly with the screw holders on the computer. Tighten the M2.0 x 2.5 screws that secure the keyboard to the chassis. - Page 38 Keyboard Removing keyboard from keyboard tray Follow the procedure in Before working inside your computer. Remove the keyboard assembly Remove the M2.0 x 2.0 screws that secure the keyboard to the keyboard assembly [1]. Lift the keyboard away from the keyboard tray [2]. Installing keyboard to keyboard tray Align the keyboard with the screw holders on the keyboard tray.
-
Page 39: Palm Rest
Palm rest Replacing palm rest Follow the procedure in Before working inside your computer. Remove the: base cover battery memory module PCIe SSD WLAN card WWAN card power connector port heat sink assembly coin cell battery speaker display assembly system board keyboard The component you are left with is the palm rest. - Page 40 speaker coin cell battery heatsink power connector port WLAN card WWAN card PCIe SSD memory battery base cover Follow the procedure in After working inside your computer. Removing and installing components...
-
Page 41: Usb Features
Technology and components This chapter details the technology and components available in the system. Topics: • USB features • HDMI 1.4 USB features Universal Serial Bus, or USB, was introduced in 1996. It dramatically simplified the connection between host computers and peripheral devices like mice, keyboards, external drivers, and printers. - Page 42 commonly known as USB 2.0 and 1.1 respectively, the slower modes still operate at 480Mbps and 12Mbps respectively and are kept to maintain backward compatibility. USB 3.0/USB 3.1 Gen 1 achieves the much higher performance by the technical changes below: •...
- Page 43 Compatibility The good news is that USB 3.0/USB 3.1 Gen 1 has been carefully planned from the start to peacefully co-exist with USB 2.0. First of all, while USB 3.0/USB 3.1 Gen 1 specifies new physical connections and thus new cables to take advantage of the higher speed capability of the new protocol, the connector itself remains the same rectangular shape with the four USB 2.0 contacts in the exact same location as before.
- Page 44 Key Features of Thunderbolt 3 over USB Type-C Thunderbolt, USB, DisplayPort and power on USB Type-C on a single cable (features vary between different products) USB Type-C connector and cables which are compact and reversible Supports Thunderbolt Networking (*varies between different products) Supports up to 4K displays Up to 40 Gbps NOTE:...
- Page 45 • Content Type - Real-time signaling of content types between display and source devices, enabling a TV to optimize picture settings based on content type • Additional Color Spaces - Adds support for additional color models used in digital photography and computer graphics •...
-
Page 46: Supported Operating Systems
Intel 6th Gen Core I processors only) • Microsoft Windows 8.1 Professional 64 bit, (available through downgrade rights from Windows 10 Pro License only through Dell Configuration Services) (Available with Intel 6thGen Core I only) Other • Ubuntu 16.04 LTS SP1 64 bit •... -
Page 47: Chipset Driver
Chipset driver The chipset driver helps the system identify the components and install necessary drivers accurately. Verify that the chipset was installed in the system by checking the below controllers. Many of the common devices are visible under Other Devices if no drivers are installed. The unknown devices disappear once you install the chipset driver. - Page 48 Management Engine Interface drivers Serial IO driver Verify if the drivers for Touchpad, IR camera, and keyboard and are installed. Figure 3. Serial IO driver Graphics controller driver Verify if the graphics controller driver is already installed in the computer. Table 4.
- Page 49 Network drivers Install the WLAN and Bluetooth drivers from the Dell support site. Table 5. Network drivers Before installation After installation Realtek Audio Verify if audio drivers are already installed in the computer. Table 6. Realtek audio Before Installation After Installation...
- Page 50 Serial ATA drivers Install the latest Intel Rapid Storage driver for best performance. Using the default Windows storage drivers is not recommended. Verify if the default serial ATA drivers are installed in the computer. Security drivers This section lists the security devices in the Device Manager. Security device drivers Verify if the security device drivers are installed in the computer.
- Page 51 System specifications NOTE: Offerings may vary by region. The following specifications are only those required by law to ship with your computer. For more information about the configuration of your computer, go to Help and Support in your Windows operating system and select the option to view information about your computer.
-
Page 52: Audio Specifications
Memory specifications Feature Specification Memory connector One SO-DIMM slot Memory type DDR4 SDRAM—2133 MHz Minimum memory 4 GB Maximum memory 16 GB Video specifications Feature Specification Type Integrated on system board UMA controller • Intel Integrated HD Graphics 620 • Intel Integrated HD Graphics 520 (available with Intel 6th Gen Core I only) External display •... - Page 53 Feature Specification Length 200.5 mm (7.89 inches) Width 95.9 mm (3.78 inches) Height 5.7 mm (0.22 inch) Weight 185.0 g (0.41 lb) Voltage 11.4 VDC 60 WHr (4–cell): Length 238 mm (9.37 inches) Width 95.9 mm (3.78 inch) Height 5.7 mm (0.22 inch) Weight 270 g (0.6 lb) Voltage...
- Page 54 Port and connector specifications Feature Specification Audio Microphone-in, stereo headphones, and headset combo connector Video HDMI 1.4 Network adapter One RJ-45 connector • Two USB 3.1 Gen1 ports - one PowerShare capable • Type-C USB 3.1 Display port (optional Thunderbolt 3 controller) Memory card reader one Micro SD 4.0 Micro Subscriber Identity Module...
- Page 55 Table 7. Camera specifications Camera features 13 HD/FHD 13" FHD 13" FHD touch Camera Type HD fixed focus HD fixed focus HD fixed focus IR Camera Sensor Type CMOS sensor technology CMOS sensor CMOS sensor technology technology Resolution: Motion Video Up to 1280x720 (0.92MP) Up to 1280x720 Up to 1280x720...
-
Page 56: Dimensions And Weight
• Diagonal: 13.3” Native Resolution 1920 x 1080 Megapixels 2.07 Pixels per Inch (PPI) Contrast Ratio (min) 800:1 Response Time (max) 35msec rise/fall Refresh Rate 60 Hz Horizontal View Angle +/- 80 degrees Vertical View Angle +/- 80 degrees Pixel Pitch 0.153 mm Power Consumption (maximum) 5.2 W... - Page 57 Altitude— Specifications maximum Operating –15.2 m to 3048 m (–50 to 10,000 ft) 0°C to 35°C Non-operating –15.24 m to 10,668 m (–50 ft to 35,000 ft) Airborne G2 or lower as defined by ISA S71.04–1985 contaminant level System specifications...
-
Page 58: System Setup
Boot menu Press <F12> when the Dell™ logo appears to initiate a one-time boot menu with a list of the valid boot devices for the system. Diagnostics and BIOS Setup options are also included in this menu. The devices listed on the boot menu depend on the bootable devices in the system. -
Page 59: Navigation Keys
• Windows Boot Manager • Other Options: • BIOS Setup • BIOS Flash Update • Diagnostics • Change Boot Mode Settings Navigation keys NOTE: For most of the System Setup options, changes that you make are recorded but do not take effect until you restart the system. - Page 60 Option Description • CD/DVD/CD-RW Drive • Onboard NIC Boot sequence • Windows boot manager options • WindowsIns Advanced Boot list • Legacy options • UEFI—selected by default Advanced Boot This option allows you the legacy option ROMs to load. By default, the Enable Attempt Legacy Boot is disabled. Options UEFI boot path These options control whether or not the system will prompt the user to enter the Admin password (if set) when...
-
Page 61: Security Screen Options
Allows you to enable option- Always Allow Dell Docks. configuration • When set to enabled, allows connection to the Dell WD and TB family of docks (Type-C docks) independent of USB and Thunderbolt Adapter configuration settings. • When set to disabled, the docks will be controlled via the USB and Thunderbolt Adapter configuration settings. - Page 62 Option Description NOTE: Successful password changes take effect immediately. Default setting: Not set System Password Allows you to set, change, or delete the system password. NOTE: Successful password changes take effect immediately. Default setting: Not set Mini SATA SSD-2 Allows you to set, change or delete the password on the mini card Solid State Drive (SSD). Password NOTE: Successful password changes take effect immediately.
- Page 63 Option Description NOTE: To upgrade or downgrade TPM1.2/2.0, download the TPM wrapper tool (software). Computrace Allows you to activate or disable the optional Computrace software The options are: • Deactivate • Disable • Activate (default) NOTE: The Activate and Disable options will permanently activate or disable the feature and no further changes will be allowed CPU XD Support Allows you to enable the Execute Disable mode of the processor.
- Page 64 Option Description • Delete All Keys—Deletes all the keys NOTE: If you disable the Custom Mode, all the changes made will be erased and the keys will restore to default settings. Intel Software Guard Extensions screen options Option Description Intel SGX Enable This field specifies you to provide a secured environment for running code/storing sensitive information in the context of the main OS.
- Page 65 • Enable USB Wake Support • Wake on Dell USB-C Dock - The option is selected by default. Wireless Radio This feature will sense the connection of the system to a wired network and subsequently disable the selected Control wireless radios (WLAN and/or WWAN) Upon disconnection from the wired network, the selected wireless radios will be re-enabled.
- Page 66 Configuration • Standard — Fully charges your battery at a standard rate. • ExpressCharge — The battery charges over a shorter period of time using Dell’s fast charging technology. This option is enabled by default. • Primarily AC use •...
- Page 67 Option Description Numlock Enable Allows you to enable the Numlock option when the computer boots. This option is enabled by default. Fn Key Emulation Allows you to set the option where the Scroll Lock key is used to simulate the Fn key feature. Enable Fn Key Emulation (default) Fn Lock Options Allows you to let hot key combinations Fn + Esc toggle the primary behavior of F1–F12, between their standard...
- Page 68 Wireless screen options Option Description Wireless Switch Allows to set the wireless devices that can be controlled by the wireless switch. The options are: • WWAN • GPS (on WWAN Module) • WLAN/WiGig • Bluetooth All the options are enabled by default. NOTE: For WLAN and WiGig enable or disable controls are tied together and they cannot be enabled or disabled independently.
- Page 69 Insert the USB Flash drive into the system that requires the BIOS update. Restart the system and press F12 when the Dell Splash logo appears to display the One Time Boot Menu. Using arrow keys, select USB Storage Device and press Return.
-
Page 70: System And Setup Password
Figure 4. DOS BIOS Update Screen System and setup password You can create a system password and a setup password to secure your computer. Password type Description System password Password that you must enter to log on to your system. Setup password Password that you must enter to access and make changes to the BIOS settings of your computer. - Page 71 Deleting or changing an existing system and/or setup password Ensure that the Password Status is Unlocked (in the System Setup) before attempting to delete or change the existing System and/or Setup password. You cannot delete or change an existing System or Setup password, if the Password Status is Locked. To enter the System Setup, press F2 immediately after a power-on or reboot.
-
Page 72: Troubleshooting
Troubleshooting Dell Enhanced Pre-Boot System Assessment (ePSA) diagnostic 3.0 You can invoke the ePSA diagnostics by either: • Press the F12 key when the system boots and choosing Diagnostics option. • Press Fn+PWR when the system boots. For more details, see Dell EPSA Diagnostic 3.0. - Page 73 Real Time Clock (RTC) reset The Real Time Clock (RTC) reset function allows you or the service technician to recover the recently launched model Dell Latitude and Precision systems from select No POST/No Boot/No Power situations. You can initiate the RTC reset on the system from a power off state only if it is connected to AC power.
Need help?
Do you have a question about the Latitude 7380 and is the answer not in the manual?
Questions and answers