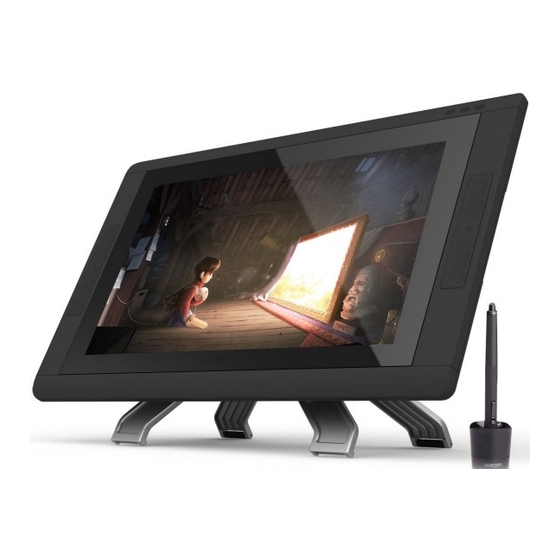
Wacom Cintiq 22HD touch Quick Start Manual
Hide thumbs
Also See for Cintiq 22HD touch:
- User manual (111 pages) ,
- User manual (4 pages) ,
- Important product information (32 pages)
Advertisement
Available languages
Available languages
Quick Links
Download this manual
See also:
User Manual
Advertisement

Related Manuals for Wacom Cintiq 22HD touch


Summary of Contents for Wacom Cintiq 22HD touch
- Page 1 Quick start guide 퀵 스타트 가이드 快速入門指南 快速安装指南 WTC_book.indb 2012-11-29 16:07:52...
-
Page 2: Federal Communication Commission Interference Statement
Federal Communication Commission Interference Statement This equipment has been tested and found to comply with the limits for a Class B digital device, pursuant to Part 15 of the FCC Rules. These limits are designed to provide reasonable protection against harmful interference in a residential installation. This equipment generates, uses and can radiate radio frequency energy and, if not installed and used in accordance with the instructions, may cause harmful interference to radio communications. - Page 3 Important information • Install the driver software for correct operation. Compatible operating systems: Windows 8 Windows 7 (SP1 or later) Mac OS X 10.6.8 or later • The following items provide help and support information for the Cintiq. Help and support information Description Provides a general overview of the Cintiq.
-
Page 4: Welcome Message
Even if you are familiar with other Cintiq models, there are various enhancements and improvements in the Cintiq 22HD, so we encourage you to take a few minutes to read this Quick Start Guide and the User's Manual. We wish you the best of success in your creative endeavors. Sincerely, The Wacom Cintiq Team. WTC_book.indb 2012-11-29 16:08:00... -
Page 5: Supplied Accessories
Supplied accessories Some accessories not supplied with all models. AC power adapter Power cable Installation CD See the User's Manual to replace the pen nib and personalize your pen. Pen stand, and cable includes replacement Pen, with personalization rings Grip, wide-bodied nibs and nib extraction tool Rotation lock screws for locking the stand. - Page 6 Handling the stand When the legs are open, do not under any circumstances attempt to carry the stand by holding the right incline lever or underneath the discs. WTC_book.indb 2012-11-29 16:08:00...
- Page 7 How to close the stand Be sure to close the legs of the stand before carrying or moving the stand. Hold the disc still with your left hand. Hold the right incline lever and pull it towards you gradually. The legs of the stand start moving. While holding the disc still with your left hand, close the stand slowly.
- Page 8 Mounting the Cintiq • Before unpacking the Cintiq, place a cloth or a smooth pad or cushion on a fl at, stable surface, to prevent the front of the Cintiq from being damaged. Remove the Cintiq from the box and lay it face down on the protected surface. •...
- Page 9 Connect the DVI-D cable to the corresponding connector on your computer. Analog connections can also be made with a DVI-I to VGA cable (sold separately). Note that Wacom recommends a digital connection for the best results. Mac users can connect to DisplayPort using a DVI to DisplayPort adapter (sold separately).
- Page 10 Plug the power cable into the power adapter and then into an AC outlet. WTC_book.indb 2012-11-29 16:08:02...
-
Page 11: Software Installation
Turn on the Cintiq. The power LED will light up orange. When a video signal is detected, the LED turns blue. Turn on your computer. Software installation Save your work and close all open applications. Insert the Cintiq installation CD. If the software installer menu is not automatically displayed, double-click on the Install icon located on the CD. -
Page 12: Calibrating The Cintiq
You may want to re-calibrate whenever you signifi cantly change your working position or viewing angle. Open the Wacom tablet control panel. Windows 7 - Click Start > (All) Programs > Wacom Tablet > Wacom Tablet Properties. Windows 8 - Start screen > Wacom Tablet Properties (Tile). - Page 13 Changing the angle of the Cintiq Use the left incline lever to lower the Cintiq. Use the right incline lever to raise the Cintiq. WTC_book.indb 2012-11-29 16:08:03...
- Page 14 Turn the LCD display to accommodate your work The LCD display of the Cintiq can be turned 180° both clockwise and counterclockwise. The pen display cannot be turned any further if the edge comes in contact with the stand. Adjust the angle of the Cintiq or your working position.
- Page 15 3 4 5 1. Status LED 2. Power LED 3. Show Settings button 4. Wacom Tablet Properties button 5. LCD Settings button Pressing the LCD Settings button activates a menu that allows you to adjust the LCD settings, such as color, contrast, or brightness. Use the ExpressKeys on the upper right side of the LCD display to navigate the menu.
- Page 16 8. Power button 9. VESA mount holes 10. Touch strip Sliding your fi ngertip on the Touch strip executes functions such as zooming, scrolling or allotted key strokes. See the User's Manual for details. 11. Screw holes for locking the stand See the User's Manual to learn how to install the support arms.
- Page 17 Multi-touch enables you to interact with a computer using only your fi ngertips on the pen display screen. Refer to your User's Manual to learn about using touch with your pen display. Also, you can download the Wacom Gesture Guide from www.wacom.com.
- Page 18 중요 정보 올바른 작동을 위해 드라이버 소프트웨어를 설치하십시오 . • 호환 운영 체제 : Windows 8 Windows 7 (SP1 이상 ) Mac OS X 10.6.8 이상 다음 항목은 Cintiq 도움말 및 지원 정보를 제공합니다 . • 도움말 및 지원 정보 설명...
- Page 19 시작 메시지 친애하는 고객 여러분께 , Cintiq 인터렉티브 펜 디스플레이를 구입해 주셔서 감사합니다 . 많은 고객들이 Cintiq 덕분에 생산성과 창의성을 모두 끌어올릴 수 있었다고 말씀해 주셨습니다 . Cintiq 은 이들 고객의 워크플로우에 필수적 인 부분으로 자리잡았습니다 . 믿음을 주신 데 대해 깊은 감사를 드리며 최신 Cintiq 으로 생산성을 한차원 더 높이 끌어올리시기 바랍니다 . 다른...
- Page 20 부속품 일부 모델에서만 제공되는 부속품이 있습니다 . AC 전원 어댑터 전원 케이블 설치 CD 펜심을 교체하고 펜을 개인 설정하려면 사용설명서를 참조하십시오 . 펜 스텐드 는 교환용 펜심 및 펜심 추출 펜 , 개인 설정 링 포함 두꺼운 그립 , 사이드 스위치 홀 없음 도구...
- Page 21 스탠드 취급하기 다리가 벌어져 있으면 어떠한 경우에도 오른쪽 기울기 조정 레버나 디스크 아래 부분을 잡고 스탠드를 옮기려고 하지 마십 시오 . WTC_book.indb 2012-11-29 16:08:06...
- Page 22 스탠드를 접는 방법 스탠드를 휴대하거나 옮기기 전에 스탠드 다리를 접어야 합니다 . 왼손으로 디스크를 흔들리지 않게 잡습니다 . 오른쪽 기울기 조정 레버를 쥐고 , 서서히 잡아당깁니다 . 그러면 스탠드 다리가 움직이기 시작합니다 . 왼손으로 디스크를 흔들리지 않게 잡고 스탠드를 서서히 접습니다 . WTC_book.indb 2012-11-29 16:08:06...
- Page 23 Cintiq 장착하기 Cintiq 포장을 풀기 전에 평평하고 안정적인 표면위에 천 , 부드러운 패드나 쿠션을 놓아 Cintiq 앞 부분이 손상되지 않도 • 록 합니다 . 박스에서 Cintiq 을 꺼내 보호된 부분을 아래로 내려놓습니다 . Cintiq 을 스탠드에 장착하기 전에 스탠드를 접어야 합니다 . 스탠드를 접는 방법은 4 페이지를 참조하십시오 . •...
- Page 24 컴퓨터에 Cintiq 연결하기 컴퓨터를 끕니다 . DVI-D 케이블을 컴퓨터의 해당 커넥터에 연결합니다 . DVI-I 대 VGA 케이블 ( 별매 ) 을 사용하여 아날로그 연결을 할 수도 있습니다 . 최상의 결과를 얻으려면 디지털 연결을 사용하 는 것이 좋습니다 . Mac 사용자는 DVI 대 DisplayPort 어댑터 ( 별매 ) 를 사용하여 DisplayPort 에 연결할 수 있습니다 . USB 커넥터를...
- Page 25 전원 케이블을 전원 어댑터와 AC 콘센트에 차례로 꽂습니다 . WTC_book.indb 2012-11-29 16:08:08...
- Page 26 Cintiq 을 켭니다 . 그러면 전원 LED 가 주황색으로 켜집니다 . 비디오 신호가 감지되면 LED 가 파랑색으로 바뀝니다 . 컴퓨터를 켭니다 . 소프트웨어 설치 작업 내용을 저장하고 열려 있는 애플리케이션을 모두 닫습니다 . Cintiq 설치 CD 를 넣습니다 . 소프트웨어 설치 관리자 메뉴가 자동으로 표시되지 않으면 CD 의 Install( 설치 ) 아이콘 을...
- Page 27 작업 위치나 보기 각도를 크게 변경할 때마다 다시 보정해야 합니다 . 와콤 타블렛 제어판을 엽니다 . Windows 7 - 시작 > ( 모든 ) 프로그램 > Wacom Tablet > Wacom Tablet 등록정보를 클릭합니다 . Windows 8 - 시작 화면 > Wacom Tablet 등록정보 ( 바둑판식으로 배열 ).
- Page 28 Cintiq 각도 변경하기 왼쪽 기울기 조정 레버를 사용하여 Cintiq 을 내립니다 . 오른쪽 기울기 조정 레버를 사용하여 Cintiq 을 올립니다 . WTC_book.indb 2012-11-29 16:08:09...
- Page 29 작업하기 편하도록 LCD 디스플레이 돌리기 Cintiq 의 LCD 디스플레이를 시계 방향과 시계 반대 방향으로 180° 돌릴 수 있습니다 . 모서리가 스탠드에 닿으면 펜 디스플레이를 더 돌릴수 없습니다 . Cintiq 각도나 작업 위치를 조정하십시오 . 최대한으로 돌리려면 디스플레이 스탠드 기울기를 가장 낮은 위치로 조정하십시오 . 각도...
- Page 30 1. 상태 LED 3 4 5 2. 전원 LED 3. 설정 표시 버튼 4. Wacom Tablet 등록정보 버튼 5. LCD 설정 버튼 LCD 설정 버튼을 누르면 색 , 대비 , 밝기 등의 LCD 설정을 조정할 수 있는 메뉴가 활성화됩니다 . LCD 디스플레이...
- Page 31 8. 전원 버튼 9. VESA 마운트 구멍 10. 터치 스트립 손가락 끝을 터치 스트립에 대고 밀면 확대 / 축소 , 스크롤 , 할당된 키 입력 등의 기능이 실행됩니다 . 자세한 내용은 사용설명서를 참조 하십시오 . 11. 회전 잠금 나사 구멍 지지대...
- Page 32 펜 디스플레이 터치 사용 멀티 터치는 펜 디스플레이 화면에서 손가락 끝만을 사용하여 컴퓨터와 상호작용 할 수 있습니다 . 펜 디스플레이 터치를 사용하는 방법은 사용설명서를 참조하십시오 . www.wacom.com 에서 Wacom Gesture Guide( 와콤 제스처 가이드 ) 를 다 운로드 할 수도 있습니다 .
- Page 33 重要資訊 使用之前,先安裝驅動程式軟體。 • 相容的作業系統: Windows 8 Windows 7(SP1 或更新版本) Mac OS X 10.6.8 或更新版本 以下項目提供 Cintiq 的說明與支援資訊。 • 說明與支援資訊 說明 快速入門指南(本指南) 提供 Cintiq 的一般概述,其中包括關於連接及使用 Cintiq 的資訊。 安裝了驅動程式軟體後,使用手冊會下載到電腦。 使用手冊 請參閱使用手冊來瞭解更換纜線、使用 VESA 安裝座、疑難排解等實用資訊。 隨附於安裝光碟內。其中包括注意事項、產品規格及其他重要資訊。 重要產品資訊 使用 Cintiq 前,請務必閱讀本指南。 WTC_book.indb 2012-11-29 16:08:11...
- Page 34 歡迎訊息 親愛的客戶, 感謝您購買 Cintiq 液晶數位板。 許多客戶認為 Cintiq 對提高工作效率及獲取更多創意至關重要。因此 Cintiq 已成為其工作流程中不可或缺的一部分。非常感謝您對我們的信 任,希望本次最新款 Cintiq 可以激勵您展現最新創意。 儘管您對其他 Cintiq 機型很熟悉,但在 Cintiq 22HD 中加入多項增強和改良功能,建議您在使用之前,花幾分鐘閱讀本快速入門指南及使用 手冊。 我們至誠敬祝您的業務成功順利。 謝謝! Wacom Cintiq 小組 WTC_book.indb 2012-11-29 16:08:12...
- Page 35 隨附配件 並非所有型號均附帶配件。 AC 電源變壓器 電源線 安裝光碟 請參閱使用手冊來更換筆尖和個人化數位筆。 筆座,附替換筆尖與筆尖卸除工具的纜線 畫筆,附個性筆環 筆握,寬筆身版 鎖定腳座專用的旋轉鎖定螺絲,2 個 顯示器腳座 WTC_book.indb 2012-11-29 16:08:13...
- Page 36 操作腳座 支腳打開時,在任何狀況下都不能嘗試握住右側角度調整桿或碟座下方而攜帶腳座。 WTC_book.indb 2012-11-29 16:08:13...
- Page 37 闔上腳座 攜帶或移動腳座之前,請務必闔上腳座的支腳。 用左手按住碟座。 握住右側角度調整桿,慢慢將其往自身方向拉動。腳座的支腳開始移動。 用左手按住碟座的同時,慢慢闔上腳座。 WTC_book.indb 2012-11-29 16:08:14...
- Page 38 安裝 Cintiq 打開 Cintiq 包裝之前,在平坦、穩固的表面上鋪一塊布或軟墊或泡棉,以免 Cintiq 的正面損壞。從包裝箱中取出 Cintiq, • 將其正面朝下平放在受保護的表面上。 將 Cintiq 安裝到腳座之前,請務必闔上腳座。關於如何闔上腳座的指示,請參閱第 4 頁。 • 將腳座放在穩固的表面上。抬起 Cintiq 機身,將軸承裝入腳座中。 如果對腳座施力過重,開閉機制可能會損壞。抬起 Cintiq 時,請握住機身,而非腳座。 軸承 WTC_book.indb 2012-11-29 16:08:14...
- Page 39 將 Cintiq 連接到電腦 關閉電腦電源。 將 DVI-D 纜線連接至電腦上對應的連接頭。 也可以使用 DVI-I 轉 VGA 纜線(另售)進行類比連接。請注意,Wacom 建議使用數位連接可獲得最佳效果。Mac 使用者可 以使用 DVI 轉影像連接埠變壓器(另售)來連接至影像連接埠。 將 USB 連接頭插入電腦上的 USB 埠。 WTC_book.indb 2012-11-29 16:08:15...
- Page 40 將電源線插入電源變壓器,再插入 AC 電源插座。 WTC_book.indb 2012-11-29 16:08:15...
- Page 41 開啟 Cintiq。電源指示燈亮起橙色。偵測到視訊信號時,指示燈呈藍色。 開啟電腦電源。 安裝軟體 請儲存您的工作並關閉所有開啟的應用程式。 插入 Cintiq 安裝光碟。若未自動顯示軟體安裝程式選單,請按兩下光碟上的安裝圖示。 按一下安裝數位板,然後根據提示操作。 按一下對話方塊中的重要產品資訊選單以檢視 Cintiq 的重要產品資訊指南。 其中包括產品安全注意事項、規格及其他重要資訊。 安裝了驅動程式軟體後,使用手冊會下載到電腦。 WTC_book.indb 2012-11-29 16:08:16...
- Page 42 為獲得最佳效能,您必須校正 Cintiq,讓螢幕游標與顯示器螢幕上的數位筆位置對齊。若要調整視差,就必須進行此動作。以 您方便的角度來擺放 Cintiq,然後依照以下程序進行校正。 當您想要變更工作位置或檢視角度時,可能需要重新校正。 開啟 Wacom 數位板控制台。 Windows 7 - 按一下開始 > 程式集(所有程式)> Wacom 數位板 > Wacom 數位板屬性。 Windows 8 - [ 開始 ] 畫面 > Wacom 數位板屬性(並排顯示) 。 Mac – 打開 系統偏好 > Wacom 數位板。 按一下 校正 標籤。...
- Page 43 調整 Cintiq 的角度 用左側角度調整桿降下 Cintiq。 用右側角度調整桿升起 Cintiq。 WTC_book.indb 2012-11-29 16:08:17...
- Page 44 轉動 LCD 顯示器以配合工作 Cintiq 的 LCD 顯示器可以順時針及逆時針旋轉 180°。 如果數位板的邊緣接觸到腳座,表示無法再旋轉數位板。請調整 Cintiq 的角度或工作位置。 如需獲得最大旋轉角度,將顯示器腳座角度調整至其最低位置。 關於角度與工作位置調整,請參見第 10 頁。 WTC_book.indb 2012-11-29 16:08:17...
- Page 45 瞭解 Cintiq 1. 狀態指示燈 3 4 5 2. 電源指示燈 3. [ 顯示設定 ] 按鈕 4. [Wacom 數位板屬性 ] 按鈕 5. [LCD 設定 ] 按鈕 按下 [LCD 設定 ] 按鈕可啟用一個選單,讓您調整 LCD 設定,例如色彩、對比度或亮度。使用 LCD 顯示器右上角的快速鍵來導覽選單。若要關閉功選 單,再按一次 [LCD 設定 ] 按鈕。 6. 快速鍵...
- Page 46 8. [ 電源 ] 按鈕 9. VESA 安裝座孔 10. 觸控條 在觸控條上滑動指尖可執行例如縮放、捲 動或分配按鍵等功能。 如需細節資訊,請參閱使用手冊。 11. 用於鎖定腳座的螺絲孔 請參閱使用手冊以瞭解如何安裝撐 臂。 12. DVI-D 纜線 13. USB 連接線 14. 電源線 15. 安全槽 WTC_book.indb 2012-11-29 16:08:18...
- Page 47 自訂 Cintiq Windows 7 - 按一下開始 > 程式集(所有程式)> Wacom 數位板 > Wacom 數位板屬性。 Windows 8 - [開始] 畫面 > Wacom 數位板屬性(並排顯示)。 Mac – 打開 系統偏好 > Wacom 數位板。 使用觸控方式操作數位板 多點觸控功能,讓您只需在數位板螢幕表面上使用指尖即能與電腦互動。請參閱使用手冊以瞭解如何使用觸控方式操作數 位板。您還可從 www.wacom.com 下載 Wacom 觸控指南。 註冊 Cintiq 當安裝驅動程式時,將有機會註冊 Cintiq。在某些地區,您必須註冊,才能存取隨時可能變更的額外功能。還可造訪 http:// www.wacom.asia/tw/cintiq...
- Page 48 重要信息 安装正确操作所需的驱动程序软件。 • 兼容的操作系统: Windows 8 Windows 7(SP1 或更高版本) Mac OS X 10.6.8 或更高版本 以下项目提供有关 Cintiq 的帮助和支持信息。 • 帮助和支持信息 描述 《快速安装指南》 (此指南) 提供对 Cintiq 的总体概述。它包含关于连接及使用 Cintiq 的信息。 安装驱动程序软件时将下载到计算机。 用户手册 请参考用户手册,以了解如更换线缆、使用 VESA 固定架、排除故障等实用信息。 含在安装光盘上。它包含注意事项、产品规格和其他重要信息。 重要产品信息 使用 Cintiq 前,请务必阅读本指南。 WTC_book.indb 2012-11-29 16:08:19...
- Page 49 欢迎信息 亲爱的客户: 感谢购买此款 Cintiq 交互式笔触控显示屏。 许多客户告诉我们,它们的 Cintiq 在帮助其提高工作效率和创意方面至关重要。对于他们,Cintiq 已经成为其工作流程一个必不可少的部分。 对于您给予我们的信任,我们感激不尽,希望这款最新的 Cintiq 产品将激发您获得更多的灵感。 即使您已熟悉其他型号的 Cintiq 产品,但 Cintiq 22HD 中有各种功能增强和改进之处;因此,我们期望您花费几分钟的时间阅读此《快速安 装指南》和用户手册。 我们希望您在创意工作中大展宏图。 谨启 Wacom Cintiq 团队 WTC_book.indb 2012-11-29 16:08:20...
- Page 50 随附的配件 有些配件并非所有型号均附带。 AC 电源适配器 电源线 安装光盘 有关更换笔尖以及个性化您的笔,请参考用户手册。 笔座 , 包括更换用笔尖和笔尖取出工具的线缆 笔,包括个性化笔环 笔握,宽体 用于锁定支架的旋转锁定螺丝,2 个 数位屏支架 WTC_book.indb 2012-11-29 16:08:20...
- Page 51 操作支架 支承脚打开时,在任何情况下均请勿尝试抓住右斜杆或抓在磁盘下方来搬运支架。 WTC_book.indb 2012-11-29 16:08:21...
- Page 52 如何关闭支架 搬运或移动支架之前,请务必关闭支架的支承脚。 用左手固定磁盘不动。 握住右侧倾斜调节杆,慢慢地朝自身方向拉动。支架的支承脚开始移动。 用左手固定磁盘不动的同时,缓慢关闭支架。 WTC_book.indb 2012-11-29 16:08:21...
- Page 53 安装 Cintiq 打开 Cintiq 的包装前,请在平坦、稳固的表面上放置一块软布或软护垫或弹性垫,以防止 Cintiq 的正面损坏。从包装箱 • 中取出 Cintiq,将其正面朝下放在有保护措施的表面上。 在支架上安装 Cintiq 之前,请务必关闭支架。有关如何关闭支架的指示,请参考第 4 页。 • 将支架放于平坦的表面。抬起 Cintiq 机身,将轴承装入支架。 如果对支架用力过大,则其开关机构可能受损。抬起 Cintiq 时,请抓住机身,而不是支架。 轴承 WTC_book.indb 2012-11-29 16:08:21...
- Page 54 将 Cintiq 连接到计算机 关闭计算机。 将 DVI-D 线缆连接到计算机上相应的接头。 也可用 DVI-I 至 VGA 线缆(单独销售)进行模拟连接。请注意,Wacom 推荐进行数字连接,以获得最佳效果。Mac 用户可 使用 DVI 至显示端口适配器(单独销售)连接显示端口。 将 USB 接头插入计算机上的 USB 端口。 WTC_book.indb 2012-11-29 16:08:22...
- Page 55 将电源线插入电源适配器,然后插入电源插座。 WTC_book.indb 2012-11-29 16:08:22...
- Page 56 开启 Cintiq。电源指示灯将亮橙色。检测到视频信号时,指示灯将变蓝色。 开启计算机。 软件安装 保存工作成果并关闭打开的所有应用程序。 插入 Cintiq 安装光盘。如果不自动显示软件安装程序菜单,则双击光盘上的安装图标。 点击安装数位板并按照提示操作。 点击对话中的重要产品信息可查看 Cintiq 的重要产品信息指南。 它包含产品的安全注意事项、规格和其他重要信息。 安装驱动程序软件时用户手册将下载到计算机。 WTC_book.indb 2012-11-29 16:08:23...
- Page 57 校准 Cintiq 为了获得最佳性能,必须校准 Cintiq,在显示屏幕上将屏幕光标与笔的位置对准。这对于补偿视角以及调节视差必不可少。将 Cintiq 设置在一个舒适的角度,然后按照以下校准步骤操作。 一旦明显改变操作位置或视角时,即可能需要重新校准。 打开 Wacom 数位板控制面板。 Windows 7 - 点击启动 >(所有)程序 > Wacom 数位板 > Wacom 数位板属性。 Windows 8 - “开始”屏幕 > Wacom 数位板属性(平铺) 。 Mac - 打开 系统首选项 > Wacom 数位板。 点击 校准 标签。 点击 校准…。...
- Page 58 改变 Cintiq 的角度 使用左斜杆可降低 Cintiq。 使用右斜杆可升起 Cintiq。 WTC_book.indb 2012-11-29 16:08:24...
- Page 59 转动液晶显示屏以方便工作 Cintiq 的液晶显示屏可顺时针和逆时针转动 180°。 如果数位屏的边缘与支架接触,则不能继续旋转数位屏。请调整 Cintiq 的角度或您的工作位置。 为了实现最大角度的旋转,请将显示屏支架的斜面调到其最低位置。 有关角度和操作位置的调节,请参考第 10 页。 WTC_book.indb 2012-11-29 16:08:24...
- Page 60 了解 Cintiq 1. 状态指示灯 3 4 5 2. 电源指示灯 3. “显示设置”按钮 4. “Wacom 数位板属性”按钮 5. “液晶显示屏设置”按钮 按下“液晶显示屏设置”按钮将激活可以调节如颜 色、对比度或亮度等液晶显示屏设置的菜单。使用 液晶显示屏右上侧的 ExpressKeys 可对此菜单导 航。如需关闭菜单,请再次按下“液晶显示屏设置” 按钮。 6. ExpressKeys 7. “触控列模式”按钮 若需快速检查 ExpressKeys 的设置,请按住“触 • 控列模式”按钮 2 秒以上。 有关上述以及其他功能的详情,请参考用 户手册。 WTC_book.indb 2012-11-29 16:08:24...
- Page 61 8. 电源按钮 9. VESA 固定架孔位 10. 触控列 在触控列滑动手指将执行如缩放、滚动或 规定按键敲击力道等功能。 有关详情,请参考用户手册。 11. 锁定支架的螺丝孔 有关支撑杆的安装信息,请参考用 户手册。 12. DVI-D 线缆 13. USB 线缆 14. 电源线 15. 安全锁孔 WTC_book.indb 2012-11-29 16:08:25...
- Page 62 自定义 Cintiq Windows 7 - 点击启动 >(所有)程序 > Wacom 数位板 > Wacom 数位板属性。 Windows 8 - “开始”屏幕 > Wacom 数位板属性(平铺)。 Mac - 打开 系统首选项 > Wacom 数位板。 使用数位屏的触摸功能 安通过多指触摸功能, 您只需用指尖轻触数位屏, 即可轻松操作电脑。若要了解如何使用数位屏的触摸功能, 请参考用户手册。 还可以通过 www.wacom.com 下载 Wacom 手势指南。 注册 Cintiq 安装驱动程序时,将有机会注册 Cintiq。在有些地区,为了享受更多可能时时更新的好处,这将必不可少。也可以访问...
- Page 63 WTC_book.indb 2012-11-29 16:08:26...
- Page 64 WTC_book.indb 2012-11-29 16:08:26...
- Page 65 Other names of product or company are trademarks or registered trademarks of the respective companies. © 2013 Wacom Co., Ltd. All rights reserved. Wacom 및 Cintiq 은 Wacom Co., Ltd. 의 상표 및 / 또는 등록 상표입니다 . 기타 제품 또는 회사 이름은 해당 회사의 상표 또는 등록 상표입니다 .
Need help?
Do you have a question about the Cintiq 22HD touch and is the answer not in the manual?
Questions and answers