
Related Manuals for Kicker KXMA800.5


Summary of Contents for Kicker KXMA800.5
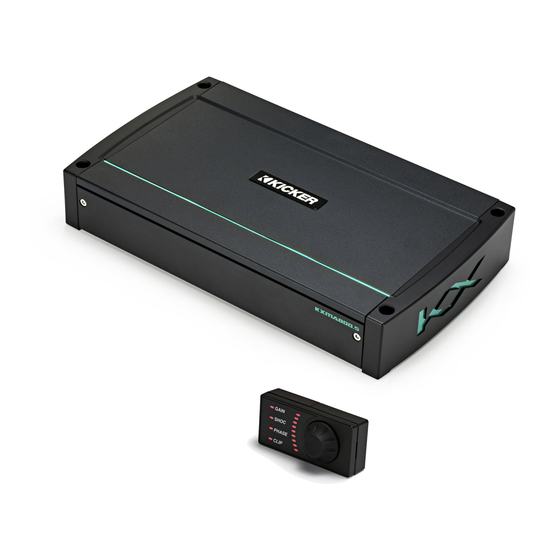
- Page 1 AMPLIFIERS Owner’s Manual 2017 KXM 5ch Amps Rev H.indd 1 2017 KXM 5ch Amps Rev H.indd 1 4/25/2017 1:07:45 PM 4/25/2017 1:07:45 PM...
-
Page 2: Installation
NOTE: 2017 KXM amplifi er subwoofer channels are 1Ω stable - power rating equivalent to 2Ω operation, +/- 10% INSTALLATION Mounting: Choose a structurally sound location to mount your KICKER amplifi er. Make sure there are no items behind the area where the screws will be driven. Choose a location that allows at least 4” (10cm) of open ventilation for the amplifi... -
Page 3: Power Wiring
A high-level signal can be run from the source unit’s speaker outputs to the stereo RCA input on the end panel of the amplifi er using the KICKER KISL as shown. Alternatively, the signal can be delivered to the amplifi er using the low-level RCA outputs on the source unit. Keep the audio signal cable away from factory wiring harnesses and other power wiring. - Page 4 The new extended warranty applies only to KICKER amplifi ers and accessories sold to consumers by Authorized KICKER Dealers in the United States of America or its possessions. It also only applies to the original purchaser of KICKER amplifi ers and accessories.
-
Page 5: Bridged Operation
FOUR CHANNEL OPERATION with SUBWOOFER minimum impedance of 2 ohm per channel (AMP1, AMP2) and 1 ohm for SUB channels) RADIO DETECT BRIDGED OPERATION minimum impedance of 4 ohms bridged. RADIO DETECT 2017 KXM 5ch Amps Rev H.indd 5 2017 KXM 5ch Amps Rev H.indd 5 4/25/2017 1:08:00 PM 4/25/2017 1:08:00 PM... -
Page 6: Operation
OPERATION Mini-USB for internal use only; do NOT remove or tamper. KICKER is not responsible for any damage to equipment resulting from connections made to this port. PAIRING GAIN GAIN GAIN MATCH MATCH MATCH Automatic Turn-On Selection: The KXM series offers three different automatic turn-on modes that can be selected on the end panel;... -
Page 7: Gain Matching
In any audio system, the goal is to reach maximum input and output levels without distortion or clipping. The engineers at KICKER have taken the guesswork, and hassle, out of matching the output voltage of your source unit to the amplifi er with the Gain Matching feature. To begin, you’ll need to download the KICKER test tones from www.kicker.com/test-tones. -
Page 8: Flush Mounting
KXARC REMOTE INSTALLATION FLUSH MOUNTING mounting depth: 3/4” [19.5mm] mounting dimensions: 3 3/4”[99mm] x 2 1/8” [55mm] Secure the Mounting Brackets, Bezel, and Surface Mount Cup to the desired location using the included screws SURFACE MOUNTING Secure the Surface Mount Cup to the desired location using the included screws. 2017 KXM 5ch Amps Rev H.indd 8 2017 KXM 5ch Amps Rev H.indd 8 4/25/2017 1:08:00 PM... -
Page 9: Replacing The Battery
REPLACING THE BATTERY model: CR2450 (3V) On the back of the KXARC, slide the battery cover off in the manner shown. This will expose the battery holder. Slide the battery out of the batter holder from the top. Replace the battery and battery cover in the same manner in which they were removed. - Page 10 KXARC REMOTE OPERATION ® BLUETOOTH PAIRING To place the KXARC in pairing mode, insert a pin, paperclip or other available skinny, pointy object into the inconspicuous little hole on the back of the remote and press for 1 second. If the KXMA amplifi er is also in pairing mode, the devices will connect.
- Page 11 CLIP Press the KXARC knob to cycle through GAIN, SHOC, PHASE, and CLIP settings, then rotate the knob to adjust the corresponding values. The KXARC supports up to 4 KICKER KXMA amplifi ers featuring a subwoofer channel. Gain: The KXARC gain control is a gain attenuator from -26dB to 0dB. This will allow you to conveniently adjust the gain of the subwoofer channel on the fl...
-
Page 12: Troubleshooting
There is a Protection (PRT) LED on the side panel of your Kicker KXM series amplifi er. Depending on the state of the amplifi er and the vehicle’s charging system, the LED will either glow red or be off. -
Page 13: Instalación
2 Ω +/- 10% INSTALACIÓN Montaje: Escoja un lugar estructuralmente sólido para montar el amplifi cador KICKER. Asegúrese de que no haya nada por detrás de dónde van a entrar los tornillos. Escoja un lugar en que queden por lo menos 4 plg. -
Page 14: Cableado De Alimentación
RCA del estéreo en el panel inferior del amplifi cador utilizando el KICKER KISL, como se muestra en la imagen. Alternativamente, la señal se puede transmitir hacia el amplifi cador utilizando las salidas RCA de bajo nivel en la unidad fuente. Mantenga el cable de señal de audio lejos de los arneses de cableado de fábrica y de otros cables eléctricos. - Page 15 Para varias instalaciones de amplifi cadores donde se utilizan bloques de distribución, cada amplifi cador debe poseer su fusible de grado apropiado, o interruptor, instalado entre el amplifi cador y el bloque de distribución a siete pulgadas del bloque, o sobre el bloque de distribución si admite fusibles. El principal cable de alimentación también debe fusionarse entre la batería y el bloque de distribución, a siete pulgadas del terminal B+ de la batería, con un fusible o interruptor con una clasifi...
- Page 16 FUNCIONAMIENTO POR CUATRO CANALES CON SUBWOOFER impedancia mínima de 2 ohmios por canales (AMP1, AMP2) y 1 ohmios por SUB canales) RADIO DETECT FUNCIONAMIENTO EN PUENTE impedancia mínima de 4 ohmios en puente RADIO DETECT 2017 KXM 5ch Amps Rev H.indd 16 2017 KXM 5ch Amps Rev H.indd 16 4/25/2017 1:08:01 PM 4/25/2017 1:08:01 PM...
- Page 17 fi jado correctamente. Detección de radio: Las entradas RCA de los amplifi cadores KICKER KXM pueden recibir señales de alto o bajo nivel desde la unidad fuente. Si usa entradas de alto nivel, pero su unidad fuente no puede detectar un sistema de audio presente o rechaza la reproducción de audio en uno o más altavoces, es probable que deba activar la...
- Page 18 En un sistema de audio, el objetivo es lograr los niveles máximos de entrada y salida sin distorsión ni recortes. Con la función “Sincronización de ganancia”, los ingenieros de KICKER lograron que no sea necesario hacer conjeturas ni complicarse a la hora de sincronizar el voltaje de salida de su unidad de alimentación con el amplifi...
-
Page 19: Montaje En Superficie
KXARC INSTALACIÓN REMOTA EMPOTRADO profundidad de instalación: 3/4” [19.5 mm] dimensiones de instalación: 3 3/4” [99 mm] x 2 1/8” [55 mm] Asegure las abrazaderas de montaje, el bisel y la taza de montaje de superfi cie a la ubicación deseada usando los tornillos incluidos. -
Page 20: Reemplazo De Batería
REEMPLAZO DE BATERÍA modelo: CR2450 (3 V) En la parte posterior del KXARC, deslice hacia afuera la cubierta de la batería como se muestra en la imagen. Esto expondrá al sujetador de la batería. Deslice la batería hacia afuera del sujetador desde la parte superior. Reemplace la batería y la cubierta de la misma manera en que se retiraron. - Page 21 OPERACIÓN REMOTA DEL KXARC ® SINCRONIZACIÓN CON BLUETOOTH Para colocar el KXARC en modo de sincronización, inserte una clavija, clip u otro objeto delgado y puntiagudo que tenga disponible en el orifi cio pequeño y discreto que se encuentra detrás del control remoto y presione durante 1 segundo.
-
Page 22: Resolución De Problemas
Su amplifi cador modelo KXM de KICKER cuenta con los LED de protección (PRT) y de encendido (PWR) en el panel de alimentación lateral. Dependiendo del estado del amplifi cador y del sistema de carga del vehículo, los LED se iluminarán en verde o en rojo. - Page 23 Si tiene más preguntas sobre la instalación de su nuevo producto KICKER, vaya al distribuidor autorizado de KICKER donde lo compró. Si necesita más consejos sobre la instalación, haga clic en la lengüeta SUPPORT (apoyo) de la página Web de KICKER, www.KICKER.com.
-
Page 24: Installation
équivalente à 2 Ω +/-10 % INSTALLATION Montage: Choisissez un emplacement de structure saine pour monter votre amplifi cateur KICKER. Assurez-vous que l’arrière de l’emplacement où vous allez enfoncer les vis ne comporte aucun élément. Choisissez un endroit assurant au moins 10 cm (4 po) de dégagement de ventilation ouverte pour l’amplifi... -
Page 25: Câblage De L'alimentation
Il est possible de connecter les sorties des haut-parleurs de l’autoradio à l’entrée stéréo RCA sur le panneau latéral de l’amplifi cateur à l’aide du câble KICKER KISL, comme illustré. Une autre option consiste à connecter le signal à l’amplifi cateur en utilisant les sorties RCA de bas niveau sur l’autoradio. - Page 26 Pour des installations à plusieurs amplifi cateurs où des répartiteurs sont mis en œuvre, chaque amplifi cateur doit avoir son propre fusible correctement calibré, ou un coupe-circuit, installé entre l’amplifi cateur et le répartiteur à moins de 18 cm du répartiteur ou sur le répartiteur lui-même s’il sert de fusible.
- Page 27 FONCTIONNEMENT À QUATRE CANAUX AVEC CAISSON DE GRAVES impédance minimum de 2 ohms par canal (AMP1, AMP2) et le 1 ohms par SUB canaux RADIO DETECT FONCTIONNEMENT PONTÉ impédance minimum de 4 ohms RADIO DETECT 2017 KXM 5ch Amps Rev H.indd 27 2017 KXM 5ch Amps Rev H.indd 27 4/25/2017 1:08:02 PM 4/25/2017 1:08:02 PM...
- Page 28 Détection radio : les entrées RCA des amplifi cateurs KICKER KXM peuvent recevoir des signaux de niveau haut ou bas en provenance de votre source sonore. Si vous utilisez des entrées de niveau haut, mais si votre appareil source ne peut pas détecter la présence d’un système audio ou refuse de jouer l’audio sur l’un au moins des haut-parleurs,...
- Page 29 L’objectif de tout système audio est d’atteindre les niveaux d’entrée et de sortie maximaux sans distorsion ni écrêtement. Les ingénieurs de KICKER ont éliminé les hasards et les soucis de faire correspondre la tension de sortie de votre unité source avec l’amplifi cateur grâce à la fonction de correspondance de gain. Pour commencer, vous devez télécharger les tonalités d’essai de KICKER sur www.kicker.com/test-tones.
-
Page 30: Montage Encastré
KXARC INSTALLATION À DISTANCE MONTAGE ENCASTRÉ Profondeur de montage : 19,5 mm (4 po) Dimensions de montage : 99 mm [3 3/4 po] x 55 mm [2 1/8 po] Fixez les supports de fi xation, le cadre et la coupelle de montage en surface à... -
Page 31: Remplacement De La Pile
REMPLACEMENT DE LA PILE Modèle : CR2450 (3 V) Sur l’arrière de la télécommande KXARC, faites glisser et retirez le couvercle de la pile, comme illustré. Cela permet d’accéder au logement de la pile. Retirez la pile de son logement en tirant sur sa partie supérieure. Remettez la pile et le couvercle du logement de la pile en inversant la procédure que vous avez utilisée pour les retirer. - Page 32 TÉLÉCOMMANDE KXARC ® APPARIEMENT BLUETOOTH Pour placer la télécommande KXARC en mode d’appairage, insérez une épingle, un trombone ou tout autre objet fi n et pointu dans le petit trou discret à l’arrière de la télécommande et appuyez pendant 1 seconde.
-
Page 33: En Cas De Difficulté
Se présentent également des DEL d’alimentation (PWR) et de protection (PRT) sur le panneau d’alimentation latéral de votre amplifi cateur KICKER de série KXM . Selon l’état de l’amplifi cateur et le système de charge du véhicule, les DEL clignotent en vert ou rouge. Lorsque la DEL vert est allumée, cela indique que l’amplifi cateur est en marche et qu’il n’y a pas de problème. - Page 34 L’amélioration des graves indique que le haut-parleur était déphasé. Bruit de fond ? Les amplifi cateurs KICKER ont été étudiés pour être entièrement compatibles avec les unités de tête de tous les fabricants. Certaines unités de tête peuvent exiger une mise à la masse supplémentaire pour éviter toute interférence avec le signal audio.
- Page 35 2-Ω-Betrieb, +/- 10 % INSTALLATION Befestigung: Wählen Sie für die Installation des KICKER-Verstärkers eine strukturell stabile Stelle. Vergewissern Sie sich, dass sich hinter der Einschraubposition der Schrauben nichts befi ndet. Wählen Sie eine Stelle, die mindestens 10 cm Lüftungsfreiraum für den Verstärker bietet. Installieren Sie, wenn möglich, den Verstärker im klimatisierten Fahrgastraum.
- Page 36 Anschluss: Die Cinch-Eingänge (RCA) der KXM-Verstärker können Signale mit niedrigem oder hohem Spannungspegel vom Ausgangsgerät Ihres Autoradios verarbeiten. Indem Sie den KICKER KISL wie angezeigt verwenden, können Sie ein Signal mit hohem Spannungspegel von den Lautsprecherausgängen des Ausgangsgeräts zum Stereo-Cinch-Eingang an der Rückseite des Verstärkers leiten.
- Page 37 Beim Einbau mehrerer Verstärker unter Verwendung von Verteilerblöcken sollte jeder Verstärker eine ordnungsgemäß zugelassene Sicherung oder Stromunterbrechung haben, die zwischen Verstärker und Verteilerblock angebracht wird, in einer Entfernung von 18 cm (7 Zoll) vom Block bzw. auf dem Verteilerblock, falls dieser Platz für Überstromschutz bietet. Das Hauptstromkabel sollte ebenfalls zwischen Batterie und Verteilerblock gesichert werden, und zwar mit einem Abstand von 18 cm (7 Zoll) zum Pluspol der Batterie mit einer Sicherung oder Stromunterbrechung, die mindestens für die Summe der Sicherungswerte der einzelnen Verstärker zugelassen ist, jedoch die Summe der...
- Page 38 VIERKANALBETRIEB MIT SUBWOOFER Minimal impedanz von 2 Ohm pro Kanal (AMP1, AMP2) und 1 Ohm pro SUB Kanäle RADIO DETECT BRÜCKENBETRIEB (MONO) Minimalimpedanz von 4 Ohm RADIO DETECT 2017 KXM 5ch Amps Rev H.indd 38 2017 KXM 5ch Amps Rev H.indd 38 4/25/2017 1:08:03 PM 4/25/2017 1:08:03 PM...
-
Page 39: Betrieb
Sie es auf 25). Drehen Sie dann langsam (im Uhrzeigersinn) den Pegel am Verstärker auf, bis die Gain- LED aufl euchtet oder Sie eine hörbare Verzerrung wahrnehmen. KICKER empfi ehlt, die Testtöne unter www. kicker.com/support/ zu nutzen, um die genauesten und leistungsstärksten Einstellungen zu erhalten. Drehen Sie ihn dann ein wenig zurück. - Page 40 Bei jedem Audiosystem besteht das wichtigste Ziel stets darin, maximale Eingangs- und Ausgangspegel ohne Verzerrung oder Clipping zu erreichen. Dank dem Gain Matching Feature konnten sich die Techniker von KICKER bei der Anpassung der Ausgangsleistung Ihres Quellgeräts an den Verstärker jede Menge Rätselraten und Ärger ersparen.
- Page 41 KXARC FERNBEDIENUNG BÜNDIGER EINBAU Einbautiefe: 3/4 Zoll [19,5 mm] Einbaumaße: 3 3/4 Zoll [99 mm] x 2 1/8 Zoll [55 mm] Befestigen Sie mit den mitgelieferten Schrauben die Halteklammer, die Einfassung und den Aufputzbecher an der gewünschten Stelle. NICHTBÜNDIGER EINBAU Befestigen Sie den Aufputzbecher mit den beiliegenden Schrauben an der gewünschten Stelle.
- Page 42 BATTERIEWECHSEL Modell: CR2450 (3V) Schieben Sie die Batterieabdeckung auf der Rückseite der KXARC zur Seite, wie angezeigt. Dadurch legen Sie das Batteriefach frei. Schieben Sie die Batterie von oben her aus dem Batteriefach. Tauschen Sie die Batterie aus und schließen Sie das Batteriefach auf dieselbe Weise, wie Sie es geöffnet haben. Stellen Sie sicher, dass die Batterie nicht verkehrt ins Batteriefach eingelegt wird.
- Page 43 VERWENDUNG DER KXARC-FERNBEDIENUNG ® BLUETOOTH -KOPPLUNG Um den KXARC im Kopplungsmodus zu platzieren, stecken Sie einen Stift, eine Büroklammer oder ein anderes verfügbares dünnes, spitzes Objekt in die unauffällige kleine Öffnung auf der Rückseite der Fernbedienung ein und drücken Sie sie für 1 Sekunde. Wenn der KXMA-Verstärker sich ebenfalls im Kopplungsmodus befi...
-
Page 44: Problembehebung
Wenn der Verstärker nicht zu funktionieren scheint, sollten Sie zuerst offensichtliche Faktoren prüfen, wie durchgebrannte Sicherungen, schlechte oder fehlerhafte Verkabelung, inkorrekte Einstellung des Crossover-Schalters und der Verstärkungsregler etc. Am seitlichen Einschaltfeld des KICKER KXM-Verstärkers befi nden sich eine Netz-LED (PWR) und eine Schutz-LED (PRT). Abhängig vom Einschaltzustand des Verstärkers und des Ladesystems des Fahrzeugs leuchten die LED-Anzeigen grün oder rot. - Page 45 Falsche Anschlüsse können zu einem Durchbrennen der Verstärkersicherung und einem Ausfall anderer wichtiger Systeme im Fahrzeug führen. Wenn Sie weitere Fragen zur Installation oder zum Betrieb Ihres neuen KICKER-Produkts haben, setzen Sie sich bitte mit Ihrem autorisierten KICKER-Fachhändler in Verbindung. Weitere Installationshinweise fi nden Sie, indem Sie auf der KICKER-Startseite (www.KICKER.com) auf die Registerkarte SUPPORT klicken.
- Page 46 ELECTRONICS LIMITED WARRANTY When purchased from an Authorized KICKER Dealer, KICKER warrants this product to be free from defects in material and workmanship under normal use for a period of TWO (2) YEARS from date of original purchase with receipt. If this product is identifi...
-
Page 47: International Warranty
Sea precavido cuando controle el volumen. La frase “combustible para vivir la vida Livin’ Loud™ a todo volumen” se refi ere al entusiasmo por la vida que la marca KICKER de estéreos de automóvil representa y a la recomendación a nuestros clientes de que vivan lo mejor posible (“a todo volumen”) en todo sentido. - Page 48 Company Name: Grupo Monsiry S. de R.L. de C.V. Address: Ave. Baburias #14171 int. B Fracc. Jose Sandoval Tijuana, B.C. Mexico cp 22105 ©2016 Stillwater Designs 2017 KXM 5ch Amps Rev H.indd 48 2017 KXM 5ch Amps Rev H.indd 48 4/25/2017 1:08:04 PM 4/25/2017 1:08:04 PM...
Need help?
Do you have a question about the KXMA800.5 and is the answer not in the manual?
Questions and answers