
Related Manuals for Amica EWA 34657 W


Summary of Contents for Amica EWA 34657 W
-
Page 1: Washing Machine
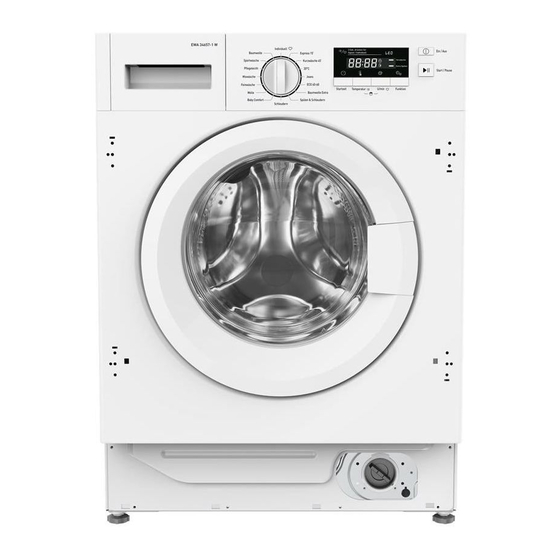
EWA 34657 W USER MANUAL WASHING MACHINE Please read these instructions carefully before you start using the washing machine! IO-WMS-0112 (01.2016) -
Page 2: Table Of Contents
CONTENTS Basic information ........................3 Safety instructions ........................4 Install the washing machine ....................8 Explanation of the laundry symbols on clothes labels ..........10 Description of control panel and display .................13 Special programmes ....................17 Operate the washing machine ....................18 Table of washing programmes ..................19 Troubleshooting ........................20 Maintenance and cleaning ..................22 Practical advice ....................23... -
Page 3: Basic Information
BASIC INFORMATION Dear Customer, from now on washing will be easier than ever. Your washing machine combines very easy operation and perfect washing performance. After reading these instructions, operating the appliance will be easy. Before being packaged and leaving the factory, the washing machine was thoroughly checked with regard to safety and functionality at test stations. -
Page 4: Safety Instructions
SAFETY INSTRUCTIONS If the power cable is damaged, it must be exchanged. To avoid hazards the exchange must be performed by the manufacturer or by an expert in an authorized workshop. Use only laundry and care products intend- lLaundry ed for washing machines. In particular in detergents the COLOUREDS wash programme. - Page 5 SAFETY INSTRUCTIONS Protect the control panel from water. lControl panel Do not deposit wet laundry on the appli- ance! Disconnect the washing machine from the lTransport power supply before transporting it. The washing machine must be adequately se- cured for transport (use transport safety de- vices).
- Page 6 SAFETY INSTRUCTIONS Checking the stability After positioning and levelling the washing machine you must check, if the machine stands firmly on all four feet. To do so, press down on each corner of the washing machine to see, if it moves. The correct horizontal position of the washing machine is an essential condition for a safe, reliable and smooth operation.
- Page 7 SAFETY INSTRUCTIONS This appliance can be used by children from the age of eight (8) years or persons with physical, sensory or mental handicaps, or those who are inexperienced or unfamiliar with the appliance, provided they are supervised or have been instructed how to safely use the appliance and understand the possible hazards.
-
Page 8: Install The Washing Machine
INSTALL THE WASHING MACHINE I. Remove the transport safety devices (keep the transport safety devices, for example in case of a removal). Unscrew the 4 blocking screws Close the holes with the stoppers with a screwdriver. supplied in the bag with the Take out the transport supports accessories. - Page 9 INSTALL THE WASHING MACHINE III. Water connection Use new and complete hoses including the nec- essary equipment. Do not re-use old hoses. The water supply hose with the seals is in the washing drum. Min. water pressure 0.05 MPa (0.5 bar), max. water pressure 1 MPa (10 bar). Supply the washing machine with cold water only.
-
Page 10: Explanation Of The Laundry Symbols On Clothes Labels
EXPLANATION OF THE LAUNDRY SYMBOLS ON LABELS VON KLEIDUNG Normal wash Normal wash Normal wash I. Washing DO NOT at 60 at 40 ° at 90 ° wash! ° Delicates Handwash II. Dry-cleaning any solvent any solvent petroleum DO NOT except solvent only dry clean! - Page 11 EXPLANATION OF THE LAUNDRY SYMBOLS ON LABELS Detergent dispenser Control panel Power plug Handle Drain hose Pump filter Cover Detergent dispenser Accessories: Accessories Water supply Cover for the Cover for the Water supply Elbow fitting for transport opening pipe C pipe H the drain hose opening...
- Page 12 EXPLANATION OF THE LAUNDRY SYMBOLS ON LABELS 10. Push the Start/Pause 1. Installation of the washing machine button 9. Select the programme. 2. Open the door and put in the laundry. 3. Measure off 8. Push the On/Off button the detergent 4.
-
Page 13: Description Of Control Panel And Display
DESCRIPTION OF CONTROL PANEL AND DISPLAY ■ ■ ■ ■ ■ ■ ■ ■ ■ 1. Programme button 2. Display 3. On/Off button 4. START/PAUSE 5. Button for the additional function Time delay 6. Button for the selection of the Temperature 7. -
Page 14: Programme Button
DESCRIPTION OF CONTROL PANEL AND DISPLAY 1. Programme button The user can select an appropriate wash programme according to the degree of soiling, the type and amount of the laundry in order to ensure a better and more efficient result. Once the programme has started, the parameters of the selected wash programme can no longer be changed by setting the programme button in a different position. -
Page 15: Temperature Selection Button
DESCRIPTION OF CONTROL PANEL AND DISPLAY 5. Time delay button This button serves to delay the start of the wash programme. The delay can be set from 0 to 24 hours. Note! In case of a power outage during the countdown of the delay time, the function will resume the countdown as soon as the power supply is restored. - Page 16 DESCRIPTION OF CONTROL PANEL AND DISPLAY 6 + 7 Child Lock The child lock blocks the function buttons, so that children cannot inadvertently change the settings. In order to activate the child lock during the washing, push the buttons (Temperature selection) and (Spin speed) simultaneously and hold them for about 3 seconds.
-
Page 17: Special Programmes
SPECIAL PROGRAMMES 1. Wash programme Baby comfort: This wash programme is intended for children and persons with sensitive skin. The main wash is always at 60°C (possible temperatur settings are 90/60/40/30/20—“cold”). 2. Wash programme Mixed laundry: Standard wash programme at a standard temperature of 40°C with a standard spin speed of 1000 rotations/minute. -
Page 18: Operating The Washing Machine
OPERATING THE WASHING MACHINE I. Select the wash programme 1. Set the programme button to the required position (see: table of the wash pro- grammes further on in the manual). 2. In order to adapt the wash programme to the individual requirements, you can change the spin speed and the temperature setting. -
Page 19: Table Of Washing Programmes
TABLE OF THE RINSE PROGRAMMES Use a detergent or a softener, if required. l A detergent must be used for efficient washing. It is impossible to use a detergent or a softener. * - Standard cotton wash programmes at 60°C and 40°C. These wash programmes are suitable for normally soiled laundry. -
Page 20: Troubleshooting
TROUBLESHOOTING Problem Probable cause / Solution The washing machine does not - Open the water tap. - Clean the filter on the water supply hose. work. - Close the door of the washing machine. - Push the Start/Pause button. Water runs out - Connect the water hose correctly. - Page 21 TROUBLESHOOTING Display of the error codes of the washing machine The washing machine has an alarm system, which helps solving minor problems connected with incorrect operation by means of “ERROR CODES” indicated in the display. With the ERROR CODES you can locate the defect and establish the cause. If an error is found, the display shows information in accordance with the following table: Display Cause...
-
Page 22: Maintenance And Cleaning
CLEANING AND MAINTENANCE Do not use any solvents or abrasive cleaners (e.g. cleaning agents or creams) for cleaning the housing and the plastic components of the washing machine! Use only gentle liquid agents and soft cloths. Do not use sponges. Clean the pump filter after about every 20 wa- I. -
Page 23: Practical Advice
PRACTICAL ADVICE We recommend the use of common powder or liquid detergents for all temperature ranges in accordance with the instructions of the manufacturer of the respective detergent indicated on the packaging. I. Detergents and Follow the instructions of the detergent manufacturer. Fill the detergent into the dispenser compartment marked with care products the symbol... - Page 24 PRACTICAL ADVICE V. Water hardness Hard water causes limescale formation in the washing machine. Your waterworks will inform you about the hardness of your water. We recommend to use a water softening agent for each washing. VI. Power outage The programme is not deleted by disconnecting the washing machine from the power supply or a power outage.
- Page 25 PRACTICAL ADVICE The washing machine is equipped with a locking system which pre- IX. Door lock vents the opening of the door during the wash cycle. At the end of the wash programme, the machine automatically unlocks the door. In order to open the door of the washing machine during the wash programme, push the PAUSE button and wait about 2 minutes.
-
Page 26: Technical Data
TECHNICAL DATA Model EWA 34657 W Rated voltage 220-240V / ~50Hz. Rated power 2000 W Overload protection 10 A Drum capacity max. 8 kg Water pressure min. 0.05 MPa (0.5 bar) max. 1 MPa (10 bar) Dimensions H x W x D... -
Page 27: Product Data Sheet
Regulation (EU) no. 1015/2010 implementing Directive 2009/125/EC of the European Parliament and of the Council with regard to ecodesign requirements for household washing machines). Name or trademark of the supplier EWA 34657 W Name of the model Rated capacity 8.0 kg... -
Page 28: Built-In Installation
BUILT-IN INSTALLATION lOverview Before you install the washing machine, please read these instructions carefully and keep them for future reference. This appliance has been designed to be built into the kitchen furniture. The recess should have the dimensions shown in Fig. WARNING When installing the appliance into the kitchen furniture, ensure that the hoses are placed in either of the two recesses on the back of the appliance. - Page 29 BUILT-IN INSTALLATION lAppendix 1. Self-tapping screws (ST4*12) 2. Self-tapping screws (M5*15) 3. Hinges 4. Counter magnet 5. Spacer 6. Paper template lTools 1. Screwdriver 2. Power screwdriver...
- Page 30 BUILT-IN INSTALLATION lBuilt-In Installation Prepare and assemble the door The appliance may be assembled with the door opening from right to left or from left to right. (Fig.1) The door opens from left to right The door opens from right to left Fig.1 lPrepare the paper template 1.
- Page 31 BUILT-IN INSTALLATION lDrill hole in the door 1. Drill the hole in the door according to the paper template (Fig.3). Fig.3 2. Install the hinges and spacer Attach the hinges to the machine by means of the M5*15 screws. Adjust the hinges to compensate for possible uneven thickness of the door.
- Page 32 BUILT-IN INSTALLATION lInstall the magnets The appliance is designed with magnetic door lock. To enable a correct operation of the magnetic door lock, screw the magnet to the inner side of the door. (Fig.5) Fig.5 lInstall the door (Fig.6) Fig.6...
Need help?
Do you have a question about the EWA 34657 W and is the answer not in the manual?
Questions and answers