Table of Contents
Advertisement
Advertisement
Table of Contents

Related Manuals for GVA GVAPP240


Summary of Contents for GVA GVAPP240
- Page 1 244L All Refrigerator GVAPP240 Instruction Manual...
-
Page 2: Table Of Contents
Contents General Safety Instructions Parts List Getting Started Instructions Revising the Door Swing Care and Maintenance Responsible Disposal Troubleshooting... -
Page 3: General Safety Instructions
General Safety Instructions Read this manual thoroughly before first use, even if you are familiar with this type of product. We have provided many important safety statements in this manual concerning the use of this appliance. Always read and observe all safety statements. They reduce the risk of fire, electric shock and injury when correctly adhered to. -
Page 4: Electrical Safety
General Safety Instructions (Cont.) Installation • Heavy: This appliance is heavy, take care when moving it. To avoid back or other injury, consider a two person lift or mechanical aid when installing it. • Moisture: Install the fridge in an indoor area protected from wind, rain, water spray or drips. -
Page 5: Cleaning And Maintenance
General Safety Instructions (Cont.) Usage conditions and restrictions • Indoor domestic use only: This appliance is intended for indoor household use only. It is not suitable for commercial, industrial or outdoor use. • Intended purpose: Do not use this appliance for anything other than its intended purpose, and only use it as described in this manual. -
Page 6: Parts List
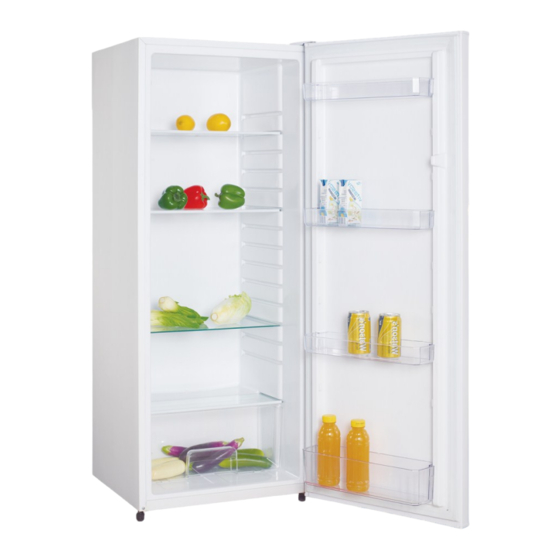
Parts List NOTE: Due to the production’s improvement, the unit you purchased may vary slightly from below sketch. NAMES OF THE PARTS 1. Temperature Control Box 2. Shelves Temperature control box 3. Crisper cover Shelves 4. Crisper Crisper cover 5. Adjustable foot Crisper 6. -
Page 7: Getting Started
Getting Started Before first use • Unpack the appliance but keep all packaging materials until you have made sure your new fridge is undamaged and in good working order. • Plastic wrapping can be a suffocation hazard for babies and young children, so ensure all packaging materials are out of their reach. - Page 8 Getting Started (Cont.) • Allow at least 12cm clear space between the back and sides of the unit and your wall or another appliance to ensure proper air circulation, which is necessary to cool the compressor and condenser. • Before plugging in your new fridge, let it stand upright for approximately 2 hours.
-
Page 9: Instructions
Temperature Control Instructions To control the internal temperature, adjust the thermostat dial. “ the coldest. The Dial may be set any place on the scale. It does Setting the temperature control number. To make ice cubes in the freezer compartment, adjus To adjust the temperature of the fridge, turn the setting. - Page 10 Instructions (Cont.) The refrigerator compartment is for storing food that doesn’t need to be frozen. Different areas of the fridge have different temperatures, e.g. the top of the crisper drawer has the lowest temperature. Shelves and crisper drawers • The shelves and door racks are adjustable. You can adjust them to fit the size or the quantity of food you want to store.
-
Page 11: Energy Saving Advice
Instructions (Cont.) • Place food in your fridge as soon as possible after buying. • Ensure that food placed in the fridge is dated and labelled, so that food is consumed at its best. • Do not place food on the temperature sensor or the inner back wall of the refrigerator. -
Page 12: Moving Your Unit
Instructions (Cont.) Moving your unit • If you must move the appliance, remove all food and wipe the inside dry. • Securely tape down all loose items inside the appliance (shelves, racks, etc.), turn the levelling feet up to the base and tape the door shut. •... -
Page 13: Reversing The Door Swing
Reversing the Door Swing This upright fridge can be opened from either the left side or right side to suit your individual installation requirements. If you want to open the door from the other side, follow the instructions below and opposite to reverse the door swing (the numbers in brackets refer to the parts in the illustrations). - Page 14 Reversing the Door Swing (Cont.) Position the door and align bottom hinge pin sleeve (7) on to the bottom hinge (9) on the opposite side. Secure with screw (8). Remove the plug cover (5) on top of the unit, then secure the door hinge pin (3) with screws (2, 4).
-
Page 15: Care And Maintenance
Care and Maintenance Defrosting In the event that frost starts to build up, you may need to manually defrost. If this is necessary, you can quicken the process by putting bowls of hot (not boiling) water into the fridge, and loosening the frost with a suitable plastic scraper. Cleaning the appliance Before carrying out any maintenance or cleaning work, DISCONNECT the appliance from the electricity supply. -
Page 16: Responsible Disposal
Responsible Disposal Responsible disposal • At the end of its working life, do not throw this appliance out with your household rubbish. Electrical and electronic products contain substances that can have a detrimental effect on the environment and human health if disposed of inappropriately. -
Page 17: Troubleshooting
Troubleshooting If you experience a problem with your fridge, check in the following table for solutions to help you solve the problem. If after these checks you still have a problem with your fridge, call the after sales support line for advice. Problem Solution The unit does not work... - Page 18 Troubleshooting (Cont.) Problem Solution Outside surfaces of the fridge are This is not a malfunction. There are becoming warm. condensers inside two sides and the front frame of the fridge. They may become warm when the fridge is operating. The unit turns on and off, or operates The temperature of the fridge may be inefficiently.
- Page 19 Note...
Need help?
Do you have a question about the GVAPP240 and is the answer not in the manual?
Questions and answers