Table of Contents
Advertisement
Advertisement
Table of Contents

Related Manuals for MartinLogan Cadence


Summary of Contents for MartinLogan Cadence
- Page 1 u s e r ’ s m a n u a l...
- Page 2 18. To prevent overheating, do not cover the apparatus. Install in accordance with the manufacturer’s instructions. CADENCE 19. No naked flame sources, such as candles, should be placed on the product. Tested to comply with FCC standards.
- Page 3 However, there is no guarantee that interfer- ence will not occur in a particular installation. If this equipment does cause harmful MODEL NUMBER : CADENCE interference to radio or television reception, which can be determined by turning the...
-
Page 4: Weee Notice
MHz and that these radars could cause interference and/or damage to LE-LAN devices. ful interference to co-channel mobile satellite systems.(ii) high-power radars are CE: Hereby, MartinLogan, Ltd., declares that this CADENCE is in compliance with the allocated as primary users (i.e. priority users) of the bands 5,250-5,350 MHz and... - Page 5 Blue- Manufactured under license from Dolby Laboratories. Dolby, Dolby Audio tooth SIG, Inc. and any use of such marks by MartinLogan, Ltd. is under license. and the double-D symbol are trademarks of Dolby Laboratories.
-
Page 6: Table Of Contents
Introduction and Overview ....8 Source Name ....29 Placement and Mounting . - Page 7 wall mount installation template power cord 79 inch wall bracket (North America only) (200 cm) ARC™ USB cable 79 inch subwoofer calibrated for ARC (200 cm) receiver microphone 96 inch subwoofer remote IR emitter (244 cm) receiver power adapter control shoulder bolts Europe...
-
Page 8: Introduction And Overview
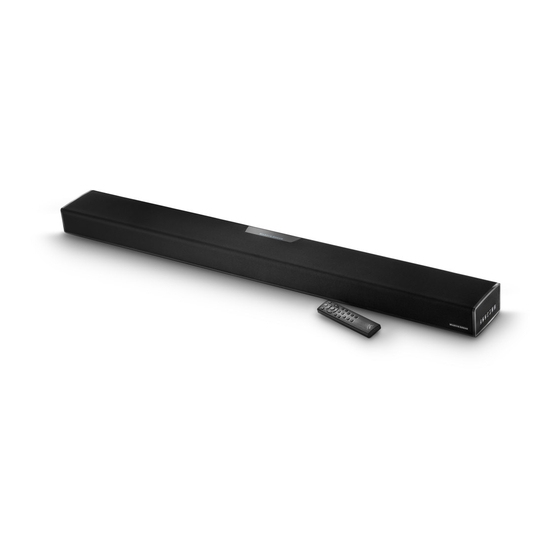
DTS Play-Fi™, Apple AirPlay™, a diverse variety of environments—whether table and Bluetooth™, guarantees compatibility with or wall mounted. The Cadence produces an envel- wireless streaming applications. oping field of richly detailed audio for both music and movies. -
Page 9: On-Wall Installation
ON-WALL INSTALLATION WARNING! We strongly recom- The soundbar can be mounted above or below a mend locating the wall bracket so television with the feedback display and rear connec- at least one of the screw locations attaches to a stud. WARNING! tion panels orientated towards the bottom or top of the soundbar (depending on your specific installation To prevent injury, this apparatus must be secure-... - Page 10 3 Using a stud finder, determine if there is a wall dropped fully into the keyholes and is held firm- stud directly behind one of the three center ly in place (fig. 3). screw locations (fig. 2a). If no stud is found: use the center most screw Fig.
-
Page 11: Connection
Fig. 3 13.7mm ONNECTION WARNING! Turn your soundbar Fig. 4 off before making or breaking any signal connections! WARNING! The power cord should not be installed, removed, or left detached from the soundbar while the other end is connected to an AC power source. -
Page 12: Signal Connection
If you remove your soundbar from the country of Please note, if your soundbar is being used in an original sale, be certain that AC power supplied on-wall installation you may find it helpful to use 90° in any subsequent location is suitable before con- RCA adapters, 90°... -
Page 13: Network Connection
PCM off to configure for multi-channel encoded nection. We, of course, recommend using a superb sound. Please refer to your player’s manual. MartinLogan subwoofer. • In a setup where HDMI is used to connect your audio/video source component(s) directly to your... -
Page 14: Ir Outputs
IR signals from any remote control to a teth- Please note: The subwoofer wireless transmitter ered device—allowing control of equipment in built in to this soundbar is not compatible with locations a remote would normally not reach. MartinLogan’s SWT-1 or SWT-2 subwoofer wire-... - Page 15 Fig. 6 Network Connection: Audio Only Sources: Non Multi-Channel Audio/Video Sources: Use Ethernet as an alternative MP3 Player, VCR, Older Game Console, Etc. to a Wi-fi connection. CD Player, Etc. network: audio: audio: audio: Ethernet analog digital optical analog [W-Fi [Wi-Fi [IR Out] [Ethernet]...
-
Page 16: An Introduction To Audio Connections
NTRODUCTION TO UDIO ONNECTIONS HDMI: HDMI utilizes one cable to pass high-definition video signals and multi- channel encoded digital audio between a source component and television or soundbar. Your soundbar is equipped with multiple inputs. These inputs should be used whenever possible for maximum fidelity. Digital Optical: Digital optical utilizes one cable to pass digital audio information (no video). -
Page 17: Volume Behavior By Input
NTRODUCTION UDIO TREAMING ONNECTIONS Ethernet: This cable allows you to physically connect a device to a LAN (local area network). When connected to a LAN, audio information can be sent to this speaker using various protocols (such as Play-Fi ® or AirPlay). -
Page 18: Control Panel
ONTROL ANEL Your soundbar features seven buttons that control MUTE: Mutes the soundbar. When muted, the the following functions: soundbar will display ‘Mute’. Pressing this button a second time or pressing either volume button will POWER/STANDBY: Turns the soundbar on/off. restore the previous volume setting. -
Page 19: Changing The Remote's Battery
CHANGING THE REMOTE’S BATTERY Fig. 9 The remote control for your speaker uses two AAA type batteries. Access the battery compartment by using a Phillips screwdriver to remove the screw lo- cated on the bottom of the remote. Caution! Danger of explosion if bat- tery is incorrectly replaced. -
Page 20: Display
ISPLAY Fig. 10 [Wi-Fi Status] [Audio Codec Status] [Current Input] [Volume Level] [Current Input [Anthem Room Custom Name] Correction Status] Your soundbar displays the following information: Volume Level: Displays the current volume level. Wi-Fi Status: The Wi-Fi icon displays when Current Input: This icon indicates the input that a Wi-Fi conneciton is established. -
Page 21: The Menu System
YSTEM Fig. 11 [Menu] [Enter/Select] [Menu Down] [Menu Up] Fig. 12 enter button. Installation > Shelf Mount: This option config- ures the soundbar’s audio output to sound best in shelf mount installations. The direction of the display screen is also adjusted. Activate by pressing the enter button and the soundbar will respond with ‘Saved’. -
Page 22: An Overview Of The Menu Structure
an external subwoofer, you must choose either a Subwoofer > No Sub: This option configures wireless connection or a wired connection. Your the soundbar to handle all bass information and will soundbar does not simultaneously output via both not output information via the subs wired or wireless connections. - Page 23 VERVIEW OF THE TRUCTURE ONTINUED –› Set –› Input: Optical 1 –› Max through –90dB [* † – › Input: Optical 2 default = –35dB] – › Last Used [volume at power on is equal to previous level] – › Input: Analog 1 –...
-
Page 24: Menu Options (Continued) Bass Level
Activate by pressing the enter button and the soundbar enter button. Here you can configure bass output will respond with ‘Saved’. With this option, the wireless by ±10dB in increments of 2dB. sub transmitter is turned off. Reference your subwoofer’s manual to learn how to properly adjust the sub’s level Bass Level >... -
Page 25: Stereo Mode
MENU OPTION: STEREO MODE MENU OPTION: DISPLAY Stereo Mode: Enter the submenu by pressing the Display: Enter the submenu by pressing the enter enter button. Here, you may set how the soundbar button. The settings in this menu allow you to adjust reproduces audio from 2-channel (stereo) sources. -
Page 26: Anthem Room Correction
soundbar. This is useful if you have multiple sources or HDMI 3: This option turns on the standby HDMI hooked up to both your television and your soundbar Bypass feature and passes audio/video from the and always want your soundbar to play audio. HDMI 1, HDMI 2, or HDMI 3 input while the sound- bar is in standby mode. -
Page 27: Power Settings
ing ARC on and off only makes a difference if ARC Power Settings > Power-On Volume > corrections have not been loaded on the soundbar. Set: Enter the submenu by pressing the enter but- ton. Here you choose set the power-on volume. MENU OPTION: POWER SETTINGS Power Settings >... -
Page 28: Wireless Setup
MENU OPTION: WIRELESS SETUP Not all commands have to be programmed. Some remotes offer ‘function’ buttons (F1, F2, etc.) that can Wireless Setup: Enter the submenu by pressing be used to program unique soundbar commands such the enter button. Here you may setup a Wi-Fi and as ‘Bass Mode: Night’... -
Page 29: Source Name
Using the up/down directional buttons, you can • Input: HDMI 2 select and program the following input names: • Input: HDMI 3 • HDMI 1 • Optical 1 • Input: HDMI ARC • Input: Bluetooth • HDMI 2 • Optical 2 •... -
Page 30: Surround Sound Decoding
sion for the mac address of the soundbar’s MCU. Service > Factory Reset > At Home > No: Activate by pressing the enter button. Choosing this Service > Firmware > MAC LAN: Pressing option will exit without performing a reset. the enter button will display the current firmware ver- sion for the mac address of the soundbar’s LAN. -
Page 31: Dts Play-Fi And Network Connection
DTS P ® ETWORK ONNECTION NETWORK REQUIREMENTS Wi-Fi STATUS LED You must have the following to connect your soundbar The Wi-Fi Status LED tells you what your soundbar to your network: is doing. • A wireless router. • Rapid Blinking: booting up. •... -
Page 32: Connecting To A Wireless Network: Wi-Fi Protected Setup (Wps)
show up under the heading ‘ the Wi-Fi Status LED will start pulsing slowly. If SET UP NEW ...’ the soundbar is already configured to connect AIRPLAY SPEAKER to a Wi-Fi network, the LED will turn solid c) Select your soundbar from the list. It will (connected) or blink rapidly (not connected). -
Page 33: Connecting To A Wired Network
wireless routers that allows your soundbar product to 7. Connect your mobile device or PC to the securely and automatically connect without needing to same network as your soundbar. Launch the enter a password. WPS is not a standard feature on DTS Play-Fi ®... -
Page 34: Playing Audio Using Play-Fi
your soundbar is plugged in, the Wi-Fi Status http://192.168.0.1/index.html in the address LED will start pulsing slowly. If the soundbar bar. You will see a web page from your is already configured to connect to a Wi-Fi soundbar. network, the LED will turn solid (connected) or blink rapidly (not connected). -
Page 35: Additional Play-Fi Features
of the app. PC Users: open the Play-Fi program module requires a primary device be selected. using the icon in your system tray. This maximizes synchronization between multiple devices simultaneously streaming the same content. 2. Select additional devices to play audio from. PC Users: The free version of the Windows app Select the DTS Play-Fi device with the strongest signal may not allow streaming to multiple speakers. -
Page 36: Soundbar Firmware Update
SOUNDBAR FIRMWARE UPDATE update is needed, the DTS Play-Fi app will notify you Your soundbar MCU may occasionally require and guide you through the update process. firmware updates. Please check www.martinlogan. com for the latest firmware updates. DTS PLAY-FI ®... -
Page 37: General Information
(parts, labor, transportation) must be Certificate of Registration with your new soundbar, borne by the owner of the MartinLogan product. you cannot be assured of having received new units. If this is the case, please contact your autho- 3 If, after owning your speaker for six months, rized MartinLogan dealer. -
Page 38: Frequently Asked Questions
This could be caused by any number of things. with a mounting bracket that pivots? Review the “Connection” section of this manual MartinLogan does not provide a pivoting wall- for a better understanding of recommended con- bracket for this soundbar. Aftermarket options may... -
Page 39: Troubleshooting
ROUBLESHOOTING I’m having trouble using the Play-Fi ® app. • Verify you are within the recommended range • For information on the DTS Play-Fi app, please of your wireless router. visit: https://play-fi.com/faq • Verify your mobile device or PC has its Wi-Fi enabled or is otherwise connected to your Soundbar does not turn on. - Page 40 MartinLogan is supported. If so, instead of impact the soundbar’s ability to receive multi- ‘learning’ with the soundbar, use the code...
- Page 41 the soundbar and television are both on at the • If utilizing a wireless connection, move the sub- same time. woofer closer to the soundbar. • Turn the soundbar off and on using the remote No sound coming from external sub control or control panel power button.
-
Page 42: Specifications
PECIFICATIONS Frequency Response ..... 65–20,000 Hz (± 2 dB 1/3 octave smoothing on channel axis) Amplifier Power ......135 Watts (270 Watts peak) combined total out- put across 9 amplifiers. -
Page 43: Dimensional Drawings
IMENSIONAL RAWINGS WALL MOUNT CONFIGURATION 3.9” (9.9cm) 46.1” (117cm) 5” (12.7cm) FRONT VIEW 0.4” AUDIO & POWER (1.1cm) VIDEO 9.2” 3.8” CONNECTIONS (23.4cm) (9.6cm) 18.7” (47.5cm) 8.9” (22.7cm) 32” (81.3cm) 18.3” (46.4cm) 12” (30.5cm) BACK VIEW 3.8” 9.2” (9.6cm) (23.4cm) 18.7”... - Page 44 IMENSIONAL RAWINGS TABLE MOUNT CONFIGURATION 5” (12.7cm) 46.1” (117cm) 3.5” (8.9cm) FRONT VIEW AUDIO & POWER VIDEO 9.2” 3.8” CONNECTIONS (23.4cm) (9.6cm) 18.7” (47.5cm) 8.9” (22.7cm) BACK VIEW 3.8” 9.2” (9.6cm) (23.4cm) 18.7” (47.5cm) 8.9” (22.7cm)
- Page 45 IMENSIONAL RAWINGS SUBWOOFER WIRELESS RECEIVER 1.3” (3.3cm) 3.1” 3.6” (9.2cm)
- Page 46 7 8 5 . 7 4 9 . 5 3 2 0 w w w . m a r t i n l o g a n . c o m ©2017 MartinLogan Ltd. All rights reserved.
Need help?
Do you have a question about the Cadence and is the answer not in the manual?
Questions and answers