
Related Manuals for Blaupunkt Rio de Janeiro 120


Summary of Contents for Blaupunkt Rio de Janeiro 120
- Page 1 OWNER’S MANUAL Mobile Audio System RIO DE JANEIRO 120BT PLL Synthesizer Stereo Radio MP3/WMA Player Full Detachable Panel USB/ SD Interface 3.5mm Jack Input Bluetooth function Remote control function...
-
Page 2: Table Of Contents
CONTENTS Installation ........... 3 Bluetooth operation ....... 13 Take out screw before installation ..3 Remote control ........15 DIN Front-Mount (Method A) ....3 Specification ........17 Trouble shooting ......... 18 Installing the unit ....... 3 Removing the unit ......4 DIN Rear-Mount (Method B) .... -
Page 3: Installation
INSTALLATION Notes: Choose the mounting location where DIN FRONT-MOUNT (Method A) the unit will not interfere with the normal driving function of the driver. Installation Opening Before finally installing the unit, connect This unit can be installed in any dashboard the wiring temporarily and make sure it having an opening as shown below: is all connected up properly and the... -
Page 4: Removing The Unit
terminal of the mounting bolt to the back of the unit and the other long threading terminal to INSTALLATION 6. Mount the sleeve by inserting the sleeve the dashboard. into the opening of the dashboard and Hex Nut Spring Washer bend open the tabs located around the Metal Strap sleeve with a screwdriver. -
Page 5: Din Rear-Mount (Method B)
INSTALLATION DIN REAR-MOUNT (Method B) If your vehicle is a Nissan, Toyota, follow these mounting instructions. Use the screw holes marked T (Toyota), N (Nissan) located on both sides of the unit to fasten the unit to the factory radio mounting brackets supplied with your vehicle. -
Page 6: Using The Detachable Front Panel
USING THE DETACHABLE FRONT PANEL REMOVING THE FRONT PANEL Press the release button ( ) on the Precautions when handling front panel and pull off the front panel. Do not drop the front panel. Do not put pressure on the display or control buttons when removing or installing the front panel. -
Page 7: Wiring Connection
WIRING CONNECTION ISO CONNECTION... -
Page 8: Operation
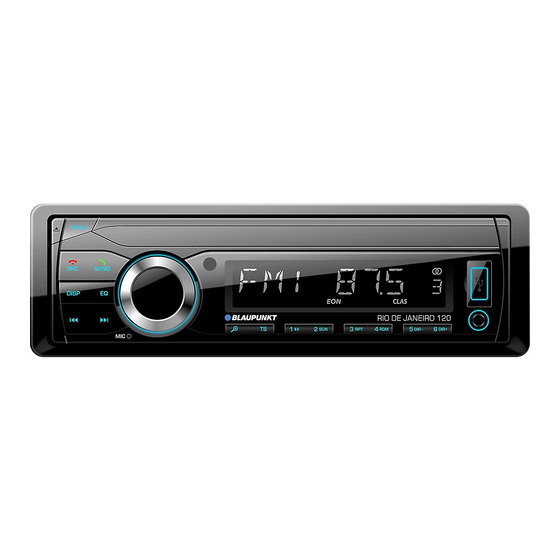
OPERATION LOCATION OF KEYS 1. “DISP” button. 13. “3 RPT ” button. 2. “SRC(source)”/ button. 14. “2 SCN ” button. 3. “ ” (panel release) button. 15. “1 ” button. 4. “MENU” button. 16. “TS” button. 5. “BAND/ ” button.“ 17. -
Page 9: Switching On/Off The Unit
OPERATION TURN ON/OFF THE UNIT Turn on the unit by pressing button(19). When system is on. Press and hold BEEP on/off: button (19) for 2 seconds to turn off the unit. The car audio device is equipped with 2 beep tone modes. Rotate the volume MUTE knob to choose one. -
Page 10: Display Information
To receive a RDS station which has good region. You have to setting the clock format signal(The AF symbol of the LCD does not again. flashing). Several minutes later the time will AREA: be synchronized to the correct time by the In the AREA item of the menu. -
Page 11: Selecting Station
to select the desired band. (1~6) to directly listen the station that The reception band will change in saved in the corresponding preset button. following order: →FM1→ FM2→ FM3 → MW1(AM1)→ MW2(AM2) (RADIO DATA SYSTEM) OPERATION Setting RDS mode SELECTING STATION In AF item of RDS menu rotating the audio Press... -
Page 12: Usb Play Operation
switching, which EON TA information was (22) to move to the previous file or the received from current station and the radio followingfile. File number shows on the display. switched to that EON linked station, but no Hold button (20) or button (22) Information could not be received because to fast reverse or fast forward. -
Page 13: Tf Card Operation
(Windows Media Audio) decoding modes also can select the file by following as below. direct numeric buttons: 1-6 button: 1-6 Bit Rate Supports EQ button: 7 Standard (kbps) Mode button MPEG1 Audio 32,48,64,96, Stereo button Layer 3 128,192,256, DISP button: 0. If the file number was selected. - Page 14 PAIRING In BT mode. Press and hold key for 2 seconds it will redial the last phone number. 1) On the mobile phone, select the Bluetooth set up. (Please refer to the Transfer the call between mobile instruction manual of your mobile phone on phone and unit how to operate Bluetooth.) During the talking mode, you can press...
-
Page 15: Remote Control Handset
REMOTE CONTROL HANDSET FUNCTION & CONTROL Power ON/OFF Button. 2. VOL+: Volume up button. 3. BAND: To select FM1/FM2/FM3/MW1/MW2 band in RADIO mode. It is key in BT mode. In RADIO mode: Press it shortly for seek down function. Press and hold it for manual turn down. -
Page 16: Specification
11. SRC: It is SRC/ key. When no coming call, it is SRC function. When incoming a call or finish a call. It is key. Press it to mute/recover the sound. In RADIO mode: It is TS function (See page 11). In MP3/WMA mode: It is file searching function. -
Page 17: Trouble Shooting
TROUBLE SHOOTING Before going through the checklist, check wiring connection. If any of the problems persist after checklist has been made, consult your nearest service dealer. Symptom Cause Solution The car ignition switch is power supply No power. not on. connected to the car accessory circuits, but the engine is not moving, switch the ignition key... -
Page 18: Fcc Statement
FCC Statement This equipment has been tested and found to comply with the limits for a Class B digital device, pursuant to Part 15 of the FCC Rules. These limits are designed to provide reasonable protection against harmful interference in a residential installation. This equipment generates uses and can radiate radio frequency energy and, if not installed and used in accordance with the instructions, may cause harmful interference to radio communications.
Need help?
Do you have a question about the Rio de Janeiro 120 and is the answer not in the manual?
Questions and answers
Como conectar al Bluetooth
To connect Bluetooth on the Blaupunkt Rio de Janeiro 120:
1. Enter BT mode on the unit.
2. On your mobile phone, go to Bluetooth settings.
3. Select “CAR KIT” from the list of available devices.
4. Enter the password “0000” when prompted.
For best call quality, keep the phone within 3 meters of the unit and avoid metal objects or obstacles between them.
This answer is automatically generated
Hola 3 cosas necesito saber, como regular el balance de parlantes Necesito saber como resetear el equipo Necesito saber como conectar bluetooth, gracias