Table of Contents
Advertisement
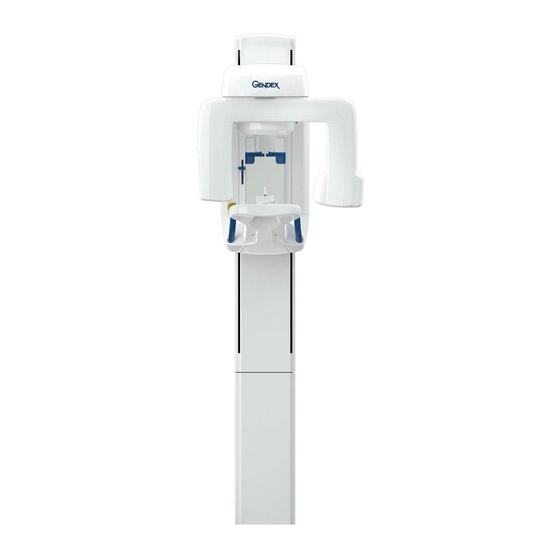
Digital Panoramic X-ray Unit
Digital Panoramic X-ray Unit
REF DP300UMEW ver 1
REF DP300UMEW ver 1
206259 rev 1
206259 rev 1
Reviewed: Westling Lauri 22.06.11 11:27:45
Approved: Weckman Janne 22.06.11 13:46:25
See the PaloDEx Group Oy PDM system to determine the status of this document. Printed out: 05.09.11 15:25:27
User Manual
User Manual
D506222
Advertisement
Table of Contents

Related Manuals for Gendex GXDP-300


Summary of Contents for Gendex GXDP-300
- Page 1 User Manual User Manual Digital Panoramic X-ray Unit Digital Panoramic X-ray Unit REF DP300UMEW ver 1 REF DP300UMEW ver 1 206259 rev 1 206259 rev 1 Reviewed: Westling Lauri 22.06.11 11:27:45 Approved: Weckman Janne 22.06.11 13:46:25 See the PaloDEx Group Oy PDM system to determine the status of this document. Printed out: 05.09.11 15:25:27 D506222...
- Page 2 Reviewed: Westling Lauri 22.06.11 11:27:45 Approved: Weckman Janne 22.06.11 13:46:25 See the PaloDEx Group Oy PDM system to determine the status of this document. Printed out: 05.09.11 15:25:27 D506222...
- Page 3 Gendex Dental Systems. ® ® Gendex Gendex and Gendex GXDP-300 and Gendex GXDP-300 are registered trademarks of Gendex Dental are registered trademarks of Gendex Dental Systems Systems Language Language The original language of this manual is English. The original language of this manual is English.
- Page 4 Reviewed: Westling Lauri 22.06.11 11:27:45 Approved: Weckman Janne 22.06.11 13:46:25 See the PaloDEx Group Oy PDM system to determine the status of this document. Printed out: 05.09.11 15:25:27 D506222...
-
Page 5: Table Of Contents
Contents Contents 1. Introduction ....................... 1 1. Introduction ....................... 1 ® ® 1.1 GXDP-300 1.1 GXDP-300 X-ray unit ................... 1 X-ray unit ................... 1 1.2 About this manual ..................1 1.2 About this manual ..................1 1.3 Setup properties .................... 1 1.3 Setup properties .................... - Page 6 ® ® Contents Contents GXDP-300 GXDP-300 User Manual User Manual Reviewed: Westling Lauri 22.06.11 11:27:45 Approved: Weckman Janne 22.06.11 13:46:25 See the PaloDEx Group Oy PDM system to determine the status of this document. Printed out: 05.09.11 15:25:27 D506222...
-
Page 7: Introduction
GXDP-300 GXDP-300 ® ® 1. Introduction 1. Introduction 1. Introduction 1. Introduction ® ® 1.1 GXDP-300 1.1 GXDP-300 X-ray unit X-ray unit ® ® The GXDP-300 The GXDP-300 (the unit) is a digital panoramic (the unit) is a digital panoramic... -
Page 8: Unit Description
2. Unit description 2. Unit description GXDP-300 GXDP-300 ® ® 2. Unit description 2. Unit description 2.1 Main parts 2.1 Main parts Column Column Motorized carriage Motorized carriage Rotating unit Rotating unit Exposure warning lights Exposure warning lights Emergency stop button - Press to stop, rotate to release. - Page 9 GXDP-300 GXDP-300 ® ® 2. Unit description 2. Unit description Head support Head support Midsagittal laser Midsagittal laser Mirror Mirror Frankfort laser and laser positioning knob Frankfort laser and laser positioning knob Cuspid positioning knob Cuspid positioning knob Chin rest...
-
Page 10: Unit Controls
2. Unit description 2. Unit description GXDP-300 GXDP-300 ® ® 2.2 Unit controls 2.2 Unit controls A. Side control panel A. Side control panel Lasers key - switches the patient positioning lasers on and off Lasers key - switches the patient positioning lasers on and off... -
Page 11: Accessories
GXDP-300 GXDP-300 ® ® 2. Unit description 2. Unit description 2.3 Accessories 2.3 Accessories Chin rest Chin rest Bite guide Bite guide Bite rod 71 mm Bite rod 71 mm Chin support Chin support Partial edentulous bite positioner Partial edentulous bite positioner... -
Page 12: Using The Unit
3. Taking an Exposure 3. Taking an Exposure GXDP-300 GXDP-300 ® ® 3. Using the Unit 3. Using the Unit IMPORTANT NOTE: IMPORTANT NOTE: If the unit is being used for the fi rst time or if you are If the unit is being used for the fi rst time or if you are using the unit for the fi... -
Page 13: Taking Exposures
GXDP-300 GXDP-300 ® ® 3. Taking an Exposure 3. Taking an Exposure 3.2 Taking Exposures 3.2 Taking Exposures Panoramic adult, child and bitewing Panoramic adult, child and bitewing 1. Slide the chin rest on to the support holder. 1. Slide the chin rest on to the support holder. - Page 14 3. Taking an Exposure 3. Taking an Exposure GXDP-300 GXDP-300 ® ® 3. Place the appropriate hygienic barrier on to the 3. Place the appropriate hygienic barrier on to the patient support you are using. patient support you are using.
- Page 15 GXDP-300 GXDP-300 ® ® 3. Taking an Exposure 3. Taking an Exposure 7. Press the Up/Down keys to adjust the height of 7. Press the Up/Down keys to adjust the height of the chin rest so it is slightly higher than the pa- the chin rest so it is slightly higher than the pa- tient’s chin so that the patient will have to stretch...
- Page 16 3. Taking an Exposure 3. Taking an Exposure GXDP-300 GXDP-300 ® ® 10. Look at the refl ection of the patient in the mir- 10. Look at the refl ection of the patient in the mir- ror and position the midsagittal plane of the...
- Page 17 GXDP-300 GXDP-300 ® ® 3. Taking an Exposure 3. Taking an Exposure CAUTION: CAUTION: When pressing the Up/Down keys to adjust the When pressing the Up/Down keys to adjust the tilt of the patient’s head take care not to cause tilt of the patient’s head take care not to cause...
- Page 18 3. Taking an Exposure 3. Taking an Exposure GXDP-300 GXDP-300 ® ® 13. Carefully push the head support towards the 13. Carefully push the head support towards the patient (A). Make sure that patient’s neck is patient (A). Make sure that patient’s neck is stretched and straight.
- Page 19 GXDP-300 GXDP-300 ® ® 3. Taking an Exposure 3. Taking an Exposure 17. Press and hold down the exposure button for 17. Press and hold down the exposure button for the duration of the exposure. During the ex- the duration of the exposure. During the ex-...
- Page 20 3. Taking an Exposure 3. Taking an Exposure GXDP-300 GXDP-300 ® ® 20. Press the Return key to drive the unit to the 20. Press the Return key to drive the unit to the patient entry position. patient entry position.
-
Page 21: Temporomandibular Joint (Tmj)
GXDP-300 GXDP-300 ® ® 3. Taking an Exposure 3. Taking an Exposure Temporomandibular Joint (TMJ) Temporomandibular Joint (TMJ) 1. Slide the nose support into the support holder. 1. Slide the nose support into the support holder. Use the short version for large and medium... - Page 22 3. Taking an Exposure 3. Taking an Exposure GXDP-300 GXDP-300 ® ® 6. Ask the patient to remove any eye glasses, false 6. Ask the patient to remove any eye glasses, false teeth, jewellery and hair clips and pins. Place a teeth, jewellery and hair clips and pins.
- Page 23 GXDP-300 GXDP-300 ® ® 3. Taking an Exposure 3. Taking an Exposure 9. Press the Lasers key to switch the patient po- 9. Press the Lasers key to switch the patient po- sitioning lasers on. They will remain on for two sitioning lasers on.
- Page 24 3. Taking an Exposure 3. Taking an Exposure GXDP-300 GXDP-300 ® ® 12. Carefully push the head support towards the 12. Carefully push the head support towards the patient (A). Make sure that patient’s neck is patient (A). Make sure that patient’s neck is stretched and straight.
- Page 25 GXDP-300 GXDP-300 ® ® 3. Taking an Exposure 3. Taking an Exposure 16. Press and hold down the exposure button for 16. Press and hold down the exposure button for the duration of the exposure. During the ex- the duration of the exposure. During the ex-...
- Page 26 3. Taking an Exposure 3. Taking an Exposure GXDP-300 GXDP-300 ® ® 19. Turn the head support knob (B) counterclock- 19. Turn the head support knob (B) counterclock- wise to open the temple supports. Press the wise to open the temple supports. Press the...
-
Page 27: Operating The Unit Without X-Rays
GXDP-300 GXDP-300 ® ® 4. Operating the unit without x-rays 4. Operating the unit without x-rays 4. Operating the unit without x-rays 4. Operating the unit without x-rays In some situations, for example with nervous pa- In some situations, for example with nervous pa-... -
Page 28: Troubleshooting And Maintenance
5. Troubleshooting and Maintenance 5. Troubleshooting and Maintenance GXDP-300 GXDP-300 ® ® 5. Troubleshooting and Maintenance 5. Troubleshooting and Maintenance 5.1 Error messages and symbols 5.1 Error messages and symbols If the unit is not used correctly or the unit malfunc-... -
Page 29: Error Symbols
GXDP-300 GXDP-300 ® ® 5. Troubleshooting and Maintenance 5. Troubleshooting and Maintenance Error symbols Error symbols REASON REASON The PC connected to the unit is not on. The PC connected to the unit is not on. GxPicture in the PC is not open. -
Page 30: System Errors
5. Troubleshooting and Maintenance 5. Troubleshooting and Maintenance GXDP-300 GXDP-300 ® ® System errors System errors REASON REASON Tubehead too hot or too cold. Tubehead too hot or too cold. SOLUTION SOLUTION When the error message automatically clears the tubehead has reached the cor- When the error message automatically clears the tubehead has reached the cor- rect operating temperature. -
Page 31: Care And Maintenance
GXDP-300 GXDP-300 ® ® 5. Troubleshooting and Maintenance 5. Troubleshooting and Maintenance 5.2 Care and Maintenance 5.2 Care and Maintenance Cleaning and disinfecting the unit Cleaning and disinfecting the unit Warning Warning Switch the unit off before cleaning it. Switch the unit off before cleaning it. -
Page 32: Correct Operation Of The Unit
5. Troubleshooting and Maintenance 5. Troubleshooting and Maintenance GXDP-300 GXDP-300 ® ® Correct operation of the unit Correct operation of the unit If any of the unit’s controls, displays or functions fail If any of the unit’s controls, displays or functions fail... -
Page 33: Warnings And Precautions
If this device will be used with 3rd party imag- • • ing application software not supplied by Gendex ing application software not supplied by Gendex Dental Systems (Gendex), the 3rd party imag- Dental Systems (Gendex), the 3rd party imag-... -
Page 34: User / Patient Warnings
6. Warnings and precautions 6. Warnings and precautions GXDP-300 GXDP-300 ® ® 6.2 User / patient warnings 6.2 User / patient warnings • • The unit may be dangerous to the user and the The unit may be dangerous to the user and the... - Page 35 Contact a service person approved by Gendex Contact a service person approved by Gendex Dental Systems (Gendex) and get them to repair Dental Systems (Gendex) and get them to repair or replace any damaged, loose or removed cov- or replace any damaged, loose or removed cov- ers or parts before reusing the unit.
-
Page 36: Disposal
7. Disposal 7. Disposal GXDP-300 GXDP-300 ® ® 7. Disposal 7. Disposal At the end of useful service life of the device, its At the end of useful service life of the device, its spare parts, its replacement parts and its acces-... - Page 37 GXDP-300 GXDP-300 ® ® 7. Disposal 7. Disposal User Manual User Manual Reviewed: Westling Lauri 22.06.11 11:27:45 Approved: Weckman Janne 22.06.11 13:46:25 See the PaloDEx Group Oy PDM system to determine the status of this document. Printed out: 05.09.11 15:25:27...
-
Page 38: Appendix A. Technical Information
GXDP-300 GXDP-300 Appendix A. Technical Information Appendix A. Technical Information Appendix A. Technical Information Appendix A. Technical Information A.1 Technical specifi cations A.1 Technical specifi cations Type Type GXDP-300 GXDP-300 Classifi cation Classifi cation Complies with IEC 60601-1/1995, IEC 60601-2-7/1998, IEC 60601-2-28/1993 and... - Page 39 Appendix A. Technical Information Appendix A. Technical Information GXDP-300 GXDP-300 TARGET MATERIAL TARGET MATERIAL Tungsten Tungsten NOMINAL X-RAY TUBE VOLTAGE NOMINAL X-RAY TUBE VOLTAGE 66, 70, and 73 kV ±4 kV @ 8 mA 66, 70, and 73 kV ±4 kV @ 8 mA...
- Page 40 GXDP-300 GXDP-300 Appendix A. Technical Information Appendix A. Technical Information LINE SAFETY SWITCH (when required) LINE SAFETY SWITCH (when required) 100 - 120 VAC 100 - 120 VAC Approved type, min. 16 A 250 VAC Approved type, min. 16 A 250 VAC...
- Page 41 Appendix A. Technical Information Appendix A. Technical Information GXDP-300 GXDP-300 Leakage technique factors Leakage technique factors PANORAMIC PANORAMIC 4800 mAs/h, exposure with maximum values 4800 mAs/h, exposure with maximum values (73 kV, 8 mA, 12 s) according to the 1:5 duty cycle...
- Page 42 GXDP-300 GXDP-300 Appendix A. Technical Information Appendix A. Technical Information System requirements and connections System requirements and connections The PC and any other external device(s) connected to the system must meet The PC and any other external device(s) connected to the system must meet the IEC 60950 standard (minimum requirements).
- Page 43 Appendix A. Technical Information Appendix A. Technical Information GXDP-300 GXDP-300 Tube housing assembly cooling/heating characteristics Tube housing assembly cooling/heating characteristics Tube rating chart Toshiba D-052 SB Tube rating chart Toshiba D-052 SB Reviewed: Westling Lauri 22.06.11 11:27:45 Approved: Weckman Janne 22.06.11 13:46:25 See the PaloDEx Group Oy PDM system to determine the status of this document.
- Page 44 GXDP-300 GXDP-300 Appendix A. Technical Information Appendix A. Technical Information Anode thermal characteristics Anode thermal characteristics Reviewed: Westling Lauri 22.06.11 11:27:45 Approved: Weckman Janne 22.06.11 13:46:25 See the PaloDEx Group Oy PDM system to determine the status of this document. Printed out: 05.09.11 15:25:27...
-
Page 45: Unit Dimensions
Appendix A. Technical Information Appendix A. Technical Information GXDP-300 GXDP-300 A.2 Unit dimensions A.2 Unit dimensions Reviewed: Westling Lauri 22.06.11 11:27:45 Approved: Weckman Janne 22.06.11 13:46:25 See the PaloDEx Group Oy PDM system to determine the status of this document. Printed out: 05.09.11 15:25:27... -
Page 46: Symbols That Appear On The Unit
GXDP-300 GXDP-300 Appendix A. Technical Information Appendix A. Technical Information A.3 Symbols that appear on the unit A.3 Symbols that appear on the unit Reviewed: Westling Lauri 22.06.11 11:27:45 Approved: Weckman Janne 22.06.11 13:46:25 See the PaloDEx Group Oy PDM system to determine the status of this document. Printed out: 05.09.11 15:25:27... - Page 47 Appendix A. Technical Information Appendix A. Technical Information GXDP-300 GXDP-300 A-10 A-10 Reviewed: Westling Lauri 22.06.11 11:27:45 Approved: Weckman Janne 22.06.11 13:46:25 See the PaloDEx Group Oy PDM system to determine the status of this document. Printed out: 05.09.11 15:25:27...
-
Page 48: Emc Declaration
The GXDP-300 is intended for use in the electromagnetic environment specified below. The customer or the user of the GXDP-300 should assure that it is used in such an environment. customer or the user of the GXDP-300 should assure that it is used in such an environment. - Page 49 The GXDP-300 is intended for use in the electromagnetic environment specified below. The customer or the user of the GXDP-300 should assure that it is used in such an environment. customer or the user of the GXDP-300 should assure that it is used in such an environment.
- Page 50 The GXDP-300 is intended for use in the electromagnetic environment specified below. The customer or the user of the GXDP-300 should assure that it is used in such an environment. customer or the user of the GXDP-300 should assure that it is used in such an environment.
- Page 51 GXDP-300. equipment and the GXDP-300. The GXDP-300 is intended for use in an electromagnetic environment in which radiated RF The GXDP-300 is intended for use in an electromagnetic environment in which radiated RF disturbances are controlled. The customer or the user of the GXDP-300 can help prevent disturbances are controlled.
Need help?
Do you have a question about the GXDP-300 and is the answer not in the manual?
Questions and answers
need part 0.805.2380 rocker on/off illuminated switch