Arjohuntleigh Nimbus 4 Instructions For Use Manual
Pressure relieving mattress
Hide thumbs
Also See for Nimbus 4:
- Instructions for use manual (348 pages) ,
- Quick reference manual (2 pages) ,
- Quick reference manual (2 pages)

Related Manuals for Arjohuntleigh Nimbus 4


Summary of Contents for Arjohuntleigh Nimbus 4
- Page 1 Nimbus 4 Nimbus Professional Instructions for Use ...with people in mind 649933EN Rev 3 • 09/2015...
- Page 2 Mandatory to read the Instructions for Use Design Policy and Copyright ® and ™ are trademarks belonging to the ArjoHuntleigh group of companies. © ArjoHuntleigh AB 2015. As our policy is one of continuous improvement, we reserve the right to modify designs without prior notice.The content of this publication may not be copied either whole or in...
-
Page 3: Table Of Contents
Intended use ............1 About Nimbus 4 and Nimbus Professional ....... . 1 Nimbus Pump . - Page 4 Routine Maintenance ..........23 Nimbus 4 and Nimbus Professional Systems ......23 Nimbus Pump .
-
Page 5: General Safety
• When not fitted to a bed, the bed hooks on the pump may present a hazard to small children. Store the pump in a safe place. • Only the pump and mattress or seat combination as indicated by ArjoHuntleigh should be used. The correct function of the product cannot be guaranteed if incorrect pump and mattress or seat combinations are used. - Page 6 ArjoHuntleigh. Do NOT use unapproved accessories or attempt to modify, disassemble or otherwise misuse the Nimbus 4 and Nimbus Professional system. Failure to observe this caution could result in injury, or in extreme cases, death. Design Policy and Copyright ®...
-
Page 7: Introduction
1. Introduction About this Manual This manual is your introduction to the Nimbus 4 and Nimbus Professional systems. You must read and fully understand this manual before using the system. Use this manual to initially set up the system, and keep it as a reference for day-to-day routines and as a guide to maintenance. -
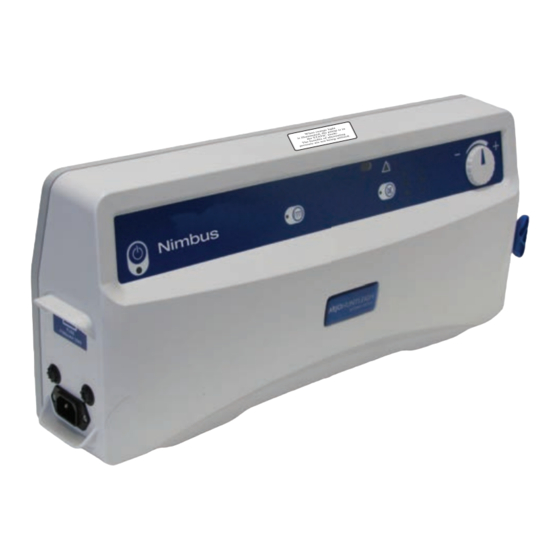
Page 8: Nimbus Pump
If cardiac arrest occurs, the mattresses can be rapidly deflated using the CPR (Cardio-Pulmonary Resuscitation) control to allow cardiac resuscitation procedures to be performed. A full technical description of the Nimbus 4 Nimbus Professional system can be found in the Service Manual, part No. SER0007, available from ArjoHuntleigh. -
Page 9: Nimbus 4 Mattress
FAST DEFLATE NORMAL TRANSPORT TRANSPORT Tubeset Connector Pump Tubeset These controls are common to both Nimbus 4 and Nimbus Professional mattresses, and are located at the foot end of the mattress on the opposite side to the Vent Valves. -
Page 10: Nimbus Professional Mattress
Nimbus Professional Mattress ® 5 Heelguard Cells Shoulder Support (4th) Cell (Alternating, No Vent Valve) 3 Thigh Cells CPR/Transport Control 8 Torso 3 Head Section Cells Cells (Alternating Pressure) FOOT END HEAD END 19 Vent Valves Carry Handle Securing Strap Drag Handle Detachable Cover Cable Management Flap... -
Page 11: Clinical Applications
2. Clinical Applications Indications The Nimbus 4 and Nimbus Professional systems are indicated for the prevention and/or management of all categories of pressure ulcer, when combined with an individualised, comprehensive pressure ulcer protocol: for example, repositioning, nutritional support, skin care. Selection should be based upon a holistic assessment of the patient’s individual care needs. -
Page 12: Installation
3. Installation The Nimbus 4 and Nimbus Professional systems are simple to install using the following guidelines. Refer to Section 4, Page 10 “Controls, Alarms and Indicators” for a comprehensive description of the controls and indicators on the pump. -
Page 13: Installing The Pump
6. Make sure the CPR control is closed and locked in position and the Transport control is set to NORMAL. NORMAL FAST DEFLATE NORMAL TRANSPORT TRANSPORT CPR Control Transport Control Installing the Pump 1. If the pump is to be hung from the end of the bed, make sure that the bed bracket is securely attached to the pump, and then attach the pump and bed bracket to the bed frame. -
Page 14: Testing The Power Fail Alarm
3. Run the mains power cable along the side of the mattress securing the flap round the cable using the press studs. Press Stud Cable Management Flap Testing the Power The Power Fail Alarm is powered by an internal rechargeable battery. The duration of the alarm will Fail Alarm depend on the level of charge in the battery, which also depends on the age and condition of the battery. -
Page 15: Connecting The Tubeset
approximately two minutes to ensure that it has been adequately recharged. 7. If the alarm does not operate for two minutes, call the service engineer. If the Power Fail Alarm does not operate after this test and a service engineer has been called, the pump can continue to be used with regular checks of the Power-On status. -
Page 16: Controls, Alarms And Indicators
4. Controls, Alarms and Indicators Run/Standby Mute Control Alarm High Pressure Low Pressure Button & Indicator Indicator Indicator Indicator Run Mode Wait Service Comfort Indicator Indicator Indicator Control Static Mode Control Power Fail Pump Fault & Indicator Indicator Indicator Pump Controls The pump front panel has the following controls: Press the Run/Standby button to put the pump into the Run/Standby Button Run mode;... -
Page 17: Pump Indicators
The Nimbus 4 and Nimbus Professional systems Comfort Control automatically compensate for patient weight distribution and position, to optimise the mattress pressure relieving performance. However, the mattress cell pressure can be manually adjusted for patient comfort using the rotary Comfort Control. - Page 18 pressing the Alarm Mute button for a minimum of 3 seconds (Refer to “Alarm Mute” on page 10). The triangular Alarm symbol is displayed with one or more of the following indicators: • Low Pressure (refer to “Low Pressure” on page 11). •...
-
Page 19: Operation
DO NOT PLACE THE PATIENT ON THE MATTRESS UNTIL IT IS FULLY INFLATED AND NORMAL OPERATING PRESSURE HAS BEEN REACHED. Installing the System Before using the Nimbus 4 or Nimbus Professional system make sure that it has been installed correctly in accordance with Section 3, Page 6 “Installation”. -
Page 20: Comfort Control
• If the pump needs to be completely isolated from the mains power supply, remove the plug from the mains power socket. Mattress Vent Valves On the Nimbus 4 and Nimbus Professional mattresses, the Vent Valves along the side of the mattress enable individual cells to be deflated: 1. -
Page 21: Guidelines For Selecting Mattress Vent Valves To Open
Cells Cells Shoulder Support Cell Guidelines for The following guidelines should be adhered to when selecting Vent Valves to open on the Nimbus 4 and Selecting Mattress Nimbus Professional mattresses: Vent Valves to Open 1. For permanent off-loading/pressure relief: • Select no more than one cell directly under the area you want to relieve (head, torso, calf or heel section). -
Page 22: Transport Control
Transport Control This sets the mattress into Transport mode where the mattress is sealed and the support surface is equally pressurised; the pump and/or tubeset can then be removed. In this mode the mattress will support the patient for up to 12 hours. To set Transport mode: 1. -
Page 23: Cpr Control
CPR Control IMPORTANT IN THE EVENT OF CARDIAC ARREST. In the event of a patient suffering cardiac arrest and CPR needing to be administered: 1. Lift the red CPR handle at the foot end of the To Activate the CPR mattress. -
Page 24: Nimbus Professional Mattress: Patient Positioning Guide
6. Nimbus Professional Mattress: Patient Positioning Guide The Nimbus Professional mattress allows the patient to be placed in either the Supine (face up) or Prone (face down) positions. WARNING A full patient assessment, as to the suitability for Prone Nursing, is essential before commencing the procedure. -
Page 25: General
General In both the Supine and Prone positions, patients should be positioned on the mattress so that the shoulders are in line with the Shoulder Support (4th) cell. It is important for the optimal use of the system that patients are positioned correctly on the mattress. -
Page 26: Prone Position (Face Down) - Not For Homecare Environment
Prone Position (face down) - Not for Homecare Environment • Prone nursing is usually prescribed as an emergency therapy for patients in acute respiratory distress or to manage extensive wounds on the dorsum, such as pressure ulcers or burns. • The decision to adopt the prone position must be authorised by the clinician responsible for the patient’s care. -
Page 27: Decontamination
Healthcare Facility or the country of use. If you are uncertain, you should seek advice from your local Infection Control Specialist. The Nimbus 4 and Nimbus Professional system should be routinely decontaminated between patients and at regular intervals while in use; as is good practice for all reusable medical devices. - Page 28 If an alternative disinfectant is selected from the wide variety available, we recommend that suitability for use is confirmed with the chemical supplier prior to use. DO NOT WRING/MANGLE, AUTOCLAVE OR USE PHENOLIC BASED SOLUTIONS. For information for the mattress top cover, including Thermal Disinfection laundering guidelines, refer to “COVER SPECIFICATION”...
-
Page 29: Routine Maintenance
ArjoHuntleigh trained personnel to repair the system. ArjoHuntleigh recommend that the Nimbus 4 and Service Period Nimbus Professional systems should be serviced after 12 months continuous running time, by an ArjoHuntleigh authorised service agent. -
Page 30: Troubleshooting
9. Troubleshooting The following table provides a troubleshooting guide for the Nimbus 4 and Nimbus Professional systems in the event of malfunction. Refer to Section 4, Page 10 “Controls, Alarms and Indicators” for a comprehensive description of the alarms and indicators on the pump. - Page 31 a. If the pump has not been used for a long period, the internal battery which provides the Power Fail Alarm indication may be discharged. Run the pump for a few hours to recharge the internal battery, and the Power Fail Alarm indication will be provided as normal. To check that the Power Fail Alarm is operating correctly, refer to “Testing the Power Fail Alarm”...
-
Page 32: Technical Specification
10. Technical Specification PUMP Model: Nimbus UK/AUS Euro Part Number 649010 (649STD) 649023 649003 649014 649028 (649STD) Supply Voltage: 230 V 230 V 120 V 230 V Supply Frequency: 50 Hz 60 Hz 60 Hz 50 Hz Power Input: 35 VA 35 VA 35 VA 35 VA... - Page 33 PUMP SYMBOLS The operator must read this document Do not dispose of in (Instructions for Use) Type BF domestic refuse before use. Note: This symbol is blue on the product label. With respect to electric shock, fire and mechanical hazards only in accordance with CAN/ Serial Number Ref:...
- Page 34 MATTRESS SPECIFICATION Nimbus 4 Standard Width Narrow Width 650001DAR 650201DAR Reliant IS Standard Cover 650001ADV 650201ADV Glide IS Cover 650001EVE 650201EVE Ventilate IS Fabric Cover Length 2085 mm (82”) Height: 215 mm (8.5”) Width: 890 mm (35”) 800 mm (31.5”) Weight: 11.5 kg (25.3 lb.)
- Page 35 Chlorine concentrations may vary from 250ppm to 10,000ppm depending on local policy and contamination status. If an alternative disinfectant is selected from the wide variety available, ArjoHuntleigh recommend that suitability for use is confirmed with the chemical supplier prior to use.
- Page 36 Guidance and manufacturer’s declaration - electromagnetic emissions The pump is intended for use in the electromagnetic environment specified below. The customer or the user of the pump should assure that it is used in such an environment. Emissions Test Compliance Electromagnetic environment - guidance RF emissions Group 1...
- Page 37 Guidance and manufacturer’s declaration - electromagnetic immunity The pump is intended for use in the electromagnetic environment specified below. The customer or the user of the pump should assure that it is used in such an environment. Immunity IEC 60601 Test Compliance Electromagnetic environment - guidance Test...
- Page 38 Intentionally left blank...
- Page 39 AUSTRALIA FRANCE POLSKA ArjoHuntleigh Pty Ltd ArjoHuntleigh SAS ArjoHuntleigh Polska Sp. z o.o. 78, Forsyth Street 2 Avenue Alcide de Gasperi ul. Ks Piotra Wawrzyniaka 2 O’Connor CS 70133 PL-62-052 KOMORNIKI (Poznan) AU-6163 Western Australia FR-59436 RONCQ CEDEX Tel: +48 61 662 15 50 Tel: +61 89337 4111 Tél: +33 (0) 3 20 28 13 13...
- Page 40 Getinge Group is a leading global provider of products and systems that contribute to quality three brands of ArjoHuntleigh, Getinge and Maquet Getinge provides solutions for infection Maquet specializes in solutions, therapies and products for surgical interventions, interventional cardiology and...
Need help?
Do you have a question about the Nimbus 4 and is the answer not in the manual?
Questions and answers