Viessmann VITODENS 200 Start-Up And Service Instructions
Wb2 series
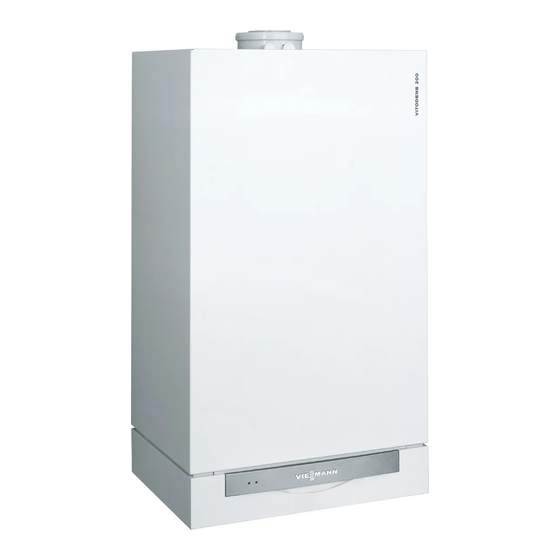
wall-mounted, gas-fired condensing boiler
Hide thumbs
Also See for VITODENS 200:
- Installation manual ,
- Technical manual (180 pages) ,
- Installation instructions manual (148 pages)
Table of Contents
Advertisement
Start-up/Service Instructions
for use by heating contractor
Vitodens 200
WB2 Series
Wall-mounted, gas-fired condensing boiler
For natural gas and liquid propane
Heating input NG 55 to 230 MBH
16 to
Heating input LP
55 to 214 MBH
16 to
VITODENS 200
5285 961 v1.3 09/2008
67 kW
63 kW
Vitodens 200, WB2-44/60
(with preinstalled vent pipe adaptor)
Vitodens 200, WB2-44/60
(with preinstalled vent pipe adaptor)
IMPORTANT
Read and save these instructions
for future reference.
Advertisement
Chapters
Table of Contents

Related Manuals for Viessmann VITODENS 200


Summary of Contents for Viessmann VITODENS 200
- Page 1 67 kW Heating input LP 55 to 214 MBH 16 to 63 kW VITODENS 200 Vitodens 200, WB2-44/60 (with preinstalled vent pipe adaptor) Vitodens 200, WB2-44/60 (with preinstalled vent pipe adaptor) IMPORTANT Read and save these instructions for future reference.
-
Page 2: Safety, Installation And Warranty Requirements
Failure to do so renders warranty see the Installation Instructions of the null and void. Vitodens 200 Venting System. HProduct documentation WARNING Read all applicable documentation before commencing installation. Store Installers must follow local... -
Page 3: Table Of Contents
Parts Lists H Vitodens 200, WB2 .................. -
Page 4: Important Regulatory And Installation Requirements
- Operating Instructions and User’s Information Manual This product comes with several - System Design Guidelines safety instruction labels attached. - Instructions of other Viessmann Do not remove! products utilized and installed Contact Viessmann immediately if - Installation codes mentioned replacement labels are required. -
Page 5: About These Start-Up/Service Instructions
About these Start-up/Service Instructions Take note of all symbols and notations intended to draw attention to potential hazards or important product information. These include ”WARNING”, ”CAUTION”, and ”IMPORTANT”. See below. Warnings draw your attention to the WARNING presence of potential hazards or important product information. -
Page 6: Necessary Tools
General Information Necessary Tools Special items H Approved leak detection fluid for natural gas and propane gas H Pipe joint sealant Use only calibrated equipment. Testing/analysis equipment H Multimeter to measure 0 - 230 V, 0 - 12 A AC and 0 - 100 μA DC H Flue gas analyzer to measure % CO or O (i.e. -
Page 7: Removing And Reinstalling Front Enclosure Panel And Cover Panel
General Information Removing and Reinstalling Front Enclosure Panel and Cover Panel Some of the following start-up/service steps require the removal of the front enclosure panel and the cover panel. To avoid personal injury and/or product damage of any kind please follow the instructions below carefully when removing or reinstalling the front enclosure panel and cover panel. -
Page 8: Procedure (Overview)
................. 7. How the Vitodens 200 boiler operates... -
Page 9: Steps
Initial Start-up and Service Steps 1. Fill heating system with water nitial start-up 1. Open system isolation valves (if Please note: installed). Before filling the heating system with water, check that all necessary flow check valves are installed. 2. Check inlet pressure of the If the nitrogen pressure of the diaphragm expansion tank. - Page 10 Initial Start-up and Service Steps (continued) 1. Fill heating system with water (continued) nitial start-up 5. Check system pressure and open ball valve 6. Shut off the boiler from the heating system on heating water side (close shutoff valve 7. Connect drain hose to drain valve 8.
- Page 11 CSA C22.1 Part 1 and/or step-up transformer to power the local codes. In the U.S. use the Vitodens 200 with 230 VAC. Refer to National Electrical Code ANSI/NFPA the Installation Instructions shipped 70. The heating contractor must also...
- Page 12 Menu-driven programming unit. This option allows the system user to access name and telephone number of the heating contractor on the display (see Vitodens 200 Operating Instructions) almost immediately after a system fault has occurred. Open the cover:...
- Page 13 2. Record fuel type in Maintenance Record on page 70. The Vitodens 200 boiler is for use with gases whose characteristics fall within the following ranges. Do not use any other types of gas.
- Page 14 Initial Start-up and Service Steps (continued) 6. Measure static pressure and running pressure (continued) nitial start-up ervice Running pressure 8. Measure the running pressure; value Use suitable measuring instruments must be: calibrated with a minimum resolution of 0.04 “w.c. for measuring the running pressure.
- Page 15 Initial Start-up and Service Steps (continued) 7. How the Vitodens 200 boiler operates... nitial start-up ervice The MatriX burner blower and the combination gas valve are factory calibrated and pre-adjusted for optimum boiler performance at all firing rates through a non-mechanical, pneumatic modulating link between combustion air and gas flows.
- Page 16 “Technical Data” on page 46 of this IMPORTANT manual). H Check the venting system for leaks The MatriX burner of the Vitodens 200 (see subsection entitled “Check is preset for the entire gas group. No venting system for leaks” on page 18 adjustment or readjustment of the of this manual).
- Page 17 Ensure all other gas equipment For example: IMPORTANT served by the meter is turned off A Vitodens 200, WB2 11-44 boiler during timing of gas input to the (172 000 Btu/h input) requires 209 Vitodens 200 boiler. seconds to use 10 cu. ft. of natural A boiler underfired by 5% is gas.
- Page 18 Maintenance Record on page 70 in this manual. 13. Check venting system for leaks (circular air gap measurement) nitial start-up For sealed combustion, coaxial vent only. Viessmann strongly recommends that If higher CO values or lower O values the heating contractor perform a...
- Page 19 Initial Start-up and Service Steps (continued) 14. Disassemble burner and check burner gasket ervice 1. Remove burner cover panel (if still installed) as per the removal and reinstallation instructions on page 7 in this manual, and reinstall panel upon completion of service work. 2.
- Page 20 Initial Start-up and Service Steps (continued) 17. Check and adjust ignition and ionization electrode ervice 1. Remove burner cover panel (if still installed) as per the removal and reinstallation instructions on page 7 in this manual, and reinstall panel upon completion of service work. 2.
- Page 21 Initial Start-up and Service Steps (continued) 19. Check neutralization unit (if applicable) Accessory ervice 1. Check the pH value of the IMPORTANT condensate with pH measuring strip. If the pH value is less than 6.5, pH measuring strip must be field replace granulate.
- Page 22 Initial Start-up and Service Steps (continued) 21. Check diaphragm expansion tank and system pressure nitial start-up ervice Perform check with the system cold. 1. Drain boiler/system and reduce pressure until the manometer reading is ”0”. 2. If the nitrogen pressure of the Example precharged expansion tank is less Static head of 33 ft./10 m...
- Page 23 Initial Start-up and Service Steps (continued) 23. Check electrical connections nitial start-up ervice Ensure all plug-in connectors and strain Installation Instructions reliefs make positive contact and are Power/Pump Module seated properly. 24. Check gas pipes and fittings for leaks nitial start-up ervice WARNING CAUTION...
- Page 24 Initial Start-up and Service Steps (continued) 25. Measure ionization current ervice IMPORTANT Switch off heating system on the control unit before connecting the measuring instrument. 1. Remove burner cover panel (if still installed) as per the removal and reinstallation instructions on page 7 in this manual, and reinstall panel upon completion of service work.
- Page 25 The extension kit is only recog- heating system type (see page 49). nized when connected via the KM-BUS, not when connected via the Viessmann 2-wire BUS. Check mixing valve motor Please note: 1. Select rotational direction of the Please reference Installation mixing valve motor.
- Page 26 1. Check via Scan 2 on the Expansion module programming unit whether the The last-placed digit has the following connected expansion module is meaning: recognized. 2____0 =Viessmann 2-wire BUS expansion module not Calling up Scan 2 recognized 21 23 Open the cover: 2____1 =Viessmann 2-wire BUS...
-
Page 27: Troubleshooting Steps
Troubleshooting Troubleshooting Steps Diagnosis 1. Establish fault message or diagnose behavior of system. 2. Look for corresponding cause of fault in the diagnostics table. Diagnosis H for faults with fault display on control unit (see below). Please note: See page 28 for retrieval of fault codes from the fault memory. H for faults without fault display on control unit (page 38). - Page 28 Troubleshooting Diagnosis (continued) Retrieval of fault codes from the fault memory 1. Open the cover: Please note: Menu option Button All settings are made in the ”Installer → SYSTEM ”D” Setup” menu, containing ”Coding 1” → INSTALLER SETUP ”C” (the main coding addresses in plain →...
- Page 29 Troubleshooting Diagnosis (continued) Sequence of operation and potential faults during each start-up cycle...
- Page 30 Troubleshooting Diagnosis (continued) Display window Reset button Burner fault indicator Control unit for weather-responsive operation with programming unit Diagnostics table: Faults with fault display on control unit Fault message in display window Burner System behavior fault indicator (red) Control unit for weather-responsive operation with programming unit FAULT:...
- Page 31 Troubleshooting Cause of fault Corrective action Short circuit – outdoor temperature sensor Check outdoor temperature sensor (see page 40). Open circuit – outdoor temperature sensor Check outdoor temperature sensor (see page 40). Short circuit – low-loss header temperature sensor Check supply temperature sensor (see page 40). Open circuit –...
- Page 32 Troubleshooting Diagnosis (continued) Diagnostics table: Faults with fault display on control unit (continued) Fault message in display window Burner fault System behavior indicator (red) FAULT: 70 Operates based on 68 ºF/20 ºC desired daytime WS REMOTE temperature, 58 ºF/14 ºC desired nighttime temperature. CONTROL FAULT: 78 Operates based on 68 ºF/20 ºC desired daytime...
- Page 33 Troubleshooting Cause of fault Corrective action Short circuit – WS/RS remote control unit Check WS/RS remote control unit (see page 44). Open circuit – WS/RS remote control unit or wrong Check WS/RS remote control unit (see page 44). coding Check proper system coding. Internal BUS fault Verify connections X5.3 and X5.4 for mixing valve (if applicable).
- Page 34 Troubleshooting Diagnosis (continued) Diagnostics table: Faults with fault display on control unit (continued) Fault message in display window Burner fault System behavior indicator (red) FAULT: FE Burner control switches to lockout (254 FAULT: 02 Burner control switches to lockout. (002 FAULT: 04 Burner control switches to lockout.
- Page 35 Troubleshooting Cause of fault Corrective action Internal fault burner control unit or interference Check electrode settings. Check wiring harness plug X13 for proper connection or damage. Check whether flue gas system is leak-tight. If after corrective action fault “FE” still appears on display replace LGM 29.
- Page 36 Troubleshooting Diagnosis (continued) Diagnostics table: Faults with fault display on control unit (continued) Fault message in display window Burner fault System behavior indicator (red) FAULT: 25 Boiler operates with high boiler water temperature. FAULT: 26 Boiler operates with continuous relay test. FAULT: 35 Boiler does not activate.
- Page 37 Troubleshooting Cause of fault Corrective action Emissions test switch ”S” turned to ”h” for 30 minutes Turn emissions test switch ”S” to ”a”. already. Setting mode for maximum or minimum rated input active Set heating program selector switch to required operating for 30 minutes already.
- Page 38 Troubleshooting Diagnosis (continued) Diagnostics table: Faults without fault display on control unit System behavior Cause of fault Corrective action Supply temperature too cold or too warm. Fuse Check fuse (see page 43). Variable speed heating circuit Check coding of heating circuit pump pump (see page 52).
-
Page 39: Correction
Troubleshooting Correction Page Sensors Check outdoor temperature sensor ............. Check boiler temperature sensor . -
Page 40: Sensors
Troubleshooting Correction (continued) Scanning the actual and desired temperatures Check outdoor temperature sensor 1. Disconnect connector ”X6” from the control unit. 2. Measure resistance of outdoor temperature sensor at the disconnected connector between ”X6.3” and ”X6.4”, and compare with resistance/outdoor temperature curve shown on the left. -
Page 41: Check Dhw Tank Temperature Sensor Or Low-Loss Header Temperature Sensor
Troubleshooting Correction (continued) Check DHW tank temperature sensor or low-loss header temperature sensor 1. Disconnect connector ”X7” from the control unit. 2. Measure resistance of the tank temperature sensor and compare with the curve. 3. If the value measured differs significantly, replace the sensor. -
Page 42: Relay Test
Troubleshooting Correction (continued) Relay test DIAGNOSIS/RELAYS Open cover: Please note: Menu option Button Those relays which are not 02: HEATING CIRCUIT PUMP A → SYSTEM ”D” mentioned have no significance. <PL. 20> ON → INSTALLER SETUP ”C” When the relay is selected, only the →... -
Page 43: Check Safety Fixed High Limits
Troubleshooting Correction (continued) Check safety fixed high limits (FHL) If the safety fixed high limits cannot be reset after an automatic lockout of the burner control unit, even though the boiler water temperature is below approx. 194 ºF/90 ºC, perform the following steps: H Disconnect the cables from the fixed high limit switch A. -
Page 44: H Check Ws Remote Control Unit (Accessory)
Troubleshooting Correction (continued) Check WS remote control unit (Accessory) Check RS remote control unit (Accessory) The WS remote control unit is used for setting the desired room temperature values from any room in the building. The RS remote control unit is used for setting the desired room temperature values from the main living room (with room temperature dependent control). -
Page 45: Overview
....................... Vitodens 200, WB2 . -
Page 46: Technical Data
Additional Information Technical Data Rated voltage: 230 VAC Max. ambient Setting of fixed high limit Rated frequency: 60 Hz temperature safety cut-out: 210 ºF Rated current: 2.5 A~ H at operation: 32 to 104 ºF (fixed setting) 99 ºC –0 to +40 ºC H when storing Main fuse: max. -
Page 47: Burner Control Unit Lgm 29.Xx
Additional Information Burner Control Unit LGM 29.XX Program sequence Call for heat Ionization Safety chain (FHL) Gas combi valve Ignition transformer Combustion air modulation Modulation range Time in sec. < 71 < 5 Heating mode max. 51 signal required signal invalid signal required for transition to next phase Standby Burner operation (green LED is lit) -
Page 48: Control Unit For Weather-Responsive Operation
Additional Information Control Unit for Weather-Responsive Operation with programming unit Functional description Space heating mode Domestic hot water supply Additional heating function (anti - The control unit calculates a boiler with gas-fired space heating boiler legionnaire-function) for domestic hot water setpoint temperature based on Domestic hot water heating is water production the outdoor or room temperature... -
Page 49: Heating System Types
If only heating circuit B with mixing valve is connected (i.e. there is no direct-connected heating circuit), coding address ”008” must be set to value ”001”. Refer to the Vitodens 200 Installation Instructions for piping layout details. System type ”000:000”... -
Page 50: Accessing Coding Addresses
Additional Information with programming unit Control Unit for Weather-Responsive Operation (continued) Accessing coding addresses The coding of the programming unit is Please note: performed by using the ”A”, ”B”, ”C” All the settings are performed in the and ”D” buttons and the ”G” ”Installer Setup”... -
Page 51: Heating Curve
Additional Information with programming unit Control Unit for Weather-Responsive Operation (continued) Heating curve Slope The heating curves represent the relationship between the outdoor ºF ºC temperature and the boiler water or supply temperature. Put simply: The lower the outdoor temperature, the higher the boiler water or supply temperature. -
Page 52: Overview Of Coding Addresses
Additional Information with programming unit Control Unit for Weather-Responsive Operation (continued) Overview of coding addresses Coding addresses not discussed in this section must not be changed. See page 50 for information of how to access coding addresses. Coding (factory Function mode Coding Possible change default setting) - Page 53 Additional Information with programming unit Control Unit for Weather-Responsive Operation (continued) Overview of coding addresses (continued) Coding (factory Function mode Coding Possible change default setting) change Address: Value Address: Value 016:000 Do not change 017:001 Do not change 018:000 Circulating pump with time 018:001 Circulating pump without time delay function delay function...
- Page 54 Additional Information with programming unit Control Unit for Weather-Responsive Operation (continued) Overview of coding addresses (continued) Coding (factory Function mode Coding Possible changes default setting) change Address: Value Address: Value 042:070 Boiler water temperature in heating mode 000 to 82 Max.
- Page 55 Additional Information with programming unit Control Unit for Weather-Responsive Operation (continued) Overview of coding addresses (continued) Coding (factory Function mode Coding Possible changes default setting) change Address: Value Address: Value 0A4:255 Do not change 0A5:255 Do not change 0A6:255 Do not change 0A7:060 Setpoint value for ”Additional A07:061...
- Page 56 Additional Information with programming unit Control Unit for Weather-Responsive Operation (continued) Overview of coding addresses (continued) Coding (factory Function mode Coding Possible changes default setting) change Address: Value Address: Value 0A9:098 Circulating Max. rotational speed of cir- 0A9:001 Lowest value for rotational speed of pump culating pump for DHW pro- circulating pump for DHW production...
- Page 57 Additional Information with programming unit Control Unit for Weather-Responsive Operation (continued) Overview of coding addresses (continued) Coding (factory Function mode Coding Possible change default setting) change Address: Value Address: Value 0C6:000 Do not change 0C7:003 Resetting Automatic 0C7:000 Manual resetting to s/w / date change blocked 0C7:001 Automatic resetting to s/w summer/...
-
Page 58: Accessing Temperature Settings
Additional Information with programming unit Control Unit for Weather-Responsive Operation (continued) Accessing temperature settings The following desired and actual Depending on the coding, the boiler temperature values can be accessed water temperature or the outdoor and shown on the display of the temperature is shown in the first programming unit: menu on the display. -
Page 59: Jumper Assignment And Codings
Factory default setting without Viessmann 2-wire BUS expansion module: Two plug-in jumpers connected as shown. With Viessmann 2-wire BUS expansion module: Both plug-in jumpers removed. External switching of the heating program (telephone contact) With programming unit Change coding address ”011:000” to ”011:001”. -
Page 60: External Disable
Additional Information Jumper Assignment and Codings (continued) External disable field supplied 1. Remove circuit board VR20 A. 2. Reverse plug-in jumper ”X6” B. 3. Insert circuit board A again. Boiler shutdown takes place in accordance with the settings selected in coding address ”0A8”. -
Page 61: Replacement Of Circuit Board Vr20
Additional Information Replacement of Circuit Board VR20 IMPORTANT Before replacing circuit board VR20, record actual system addresses (in particular coding addresses 000, 0B8, 042, 045, 015, 017, 0A2) and their corresponding values, heating curves and DHW settings. Removing circuit board VR20 1. -
Page 62: Replacement Of Burner Control Unit Lgm 29
Additional Information Replacement of Burner Control Unit LGM 29 Removing the circuit board 1. Unlock hooks located on both sides of the control unit and remove the control housing of the control unit. 2. Remove pressure gage 3. Loosen the two screws located underneath the control unit carefully fold down the control unit. - Page 63 Additional Information Replacement of Burner Control Unit LGM 29 (continued) Setting the dip switch Boiler model no. Dip switch setting WB2 11-44 3 4 5 6 7 8 WB2 15-60 3 4 5 6 7 8 Installing the replacement circuit board 1.
-
Page 64: Wiring Diagram
Installing the replacement circuit board (continued) 10. Reinstall front enclosure panel. 11. Start up boiler and check for proper functioning of the circuit board and the heating system. Vitodens 200 Start-up/Service Instructions IMPORTANT If “FAULT : FE“ appears in the display... -
Page 66: Parts Lists
Ordering Replacement Parts: Please provide boiler Model and Serial Number from rating plate when ordering replacement parts. Order replacement components from your Viessmann distributor. Parts 001 Profile gasket 043 Connecting pipe extension (return) 093 Heat exchanger assembly ASME 016 Air vent without shut-off, R 3/8”... - Page 67 089 Cap for vent pipe adaptor 210 Flow check valve DN25 200 Fastening bracket (10 pack) 305 Drain valve kit, ¾” 205 Cap G 3/4 SW30 306 Power conditioner 307 Accessory pack (strain reliefs) 400 Service tool set ”Vitodens 200”...
-
Page 68: Installation Fittings (Models Wb2 11-44 And 15-60)
Additional Information Parts List (continued) Installation fittings Parts Gasket, 32 x 44 x 2mm Adaptor (pair with gasket) 1½ - 1¼” Tee, 1¼” x 1¼” x ¾” Nipple, 1¼ NPTM x 2½” Full port ball valve, 1¼” FBV (T) Nipple, ¾” x 3½ Brass tee, ¾”... -
Page 69: Alphabetical Index
Additional information, 45 Heating system types Adjusting the CO value, 16 H with programming unit, 49 Assembly of burner, 21 Viessmann 2-wire BUS expansion module, 25, 59 H with programming unit, 26 Ignition, 20 Boiler temperature sensor, 40 Important Regulatory and Installation... -
Page 70: Maintenance Record
Additional Information Maintenance Record... -
Page 71: Lighting And Operating Instructions
Lighting and Operating Instructions FOR YOUR SAFETY READ BEFORE OPERATING W A R N I N G: If you do not follow these instructions exactly, a fire or explosion may result causing property damage, personal injury or loss of life. A. - Page 72 Viessmann Manufacturing Company (U.S.) Inc. Viessmann Manufacturing Company Inc. 45 Access Road 750 McMurray Road Warwick, Rhode Island • 02886 • USA Waterloo, Ontario • N2V 2G5 • Canada Tel. (401) 732-0667 • Fax (401) 732-0590 Tel. (519) 885-6300 • Fax (519) 885-0887 www.viessmann-us.com •...
Need help?
Do you have a question about the VITODENS 200 and is the answer not in the manual?
Questions and answers