Viessmann Vitodens 200 Installation Instructions
Vent pipe adaptor, replacement heat exchangers
Hide thumbs
Also See for Vitodens 200:
- Installation manual ,
- Technical manual (180 pages) ,
- Installation instructions manual (148 pages)
Advertisement
Quick Links
Installation Instructions
Vent Pipe Adaptor
for Vitodens 200, WB2 6-24C, 6-24, 8-32 replacement heat exchangers, Part No. 7134 787, 7134 788
Safety and Installation Requirements
Please ensure that these instructions are read and understood before commencing installation. Failure to comply with the
instructions listed below can cause product/property damage, severe personal injury, and/or loss of life.
Working on the equipment
The installation, adjustment, service,
and maintenance of this product must
be done by a licensed professional
heating contractor who is qualified and
experienced in the installation, service,
and maintenance of hot water boilers.
There are no user serviceable parts on
the boiler, burner, or control.
Product Information
Applicability
Inner flue gas pipe adaptor
H for Vitodens 200 boilers with
Serial Numbers starting with:
- 7167063xxxxxxxxx
- 7167064xxxxxxxxx
- 7167065xxxxxxxxx
5347 711 v1.1 03/2011
Ensure main power supply to
equipment, the heating system, and all
external controls has been deactivated.
Close main gas supply valve. Take
precautions in all instances to avoid
accidental activation of power during
service work.
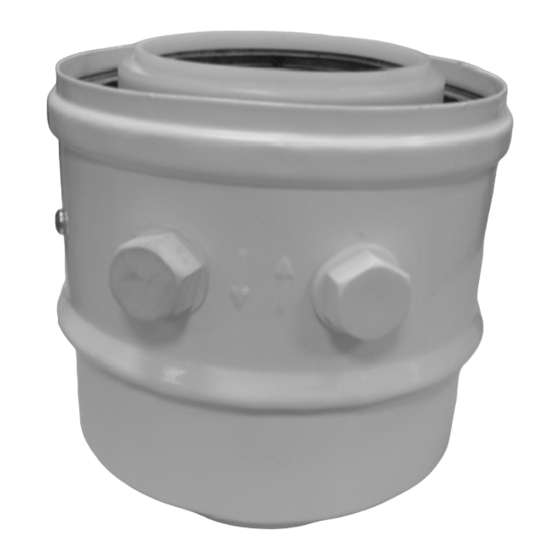
Replacement heat exchangers for the Vitodens 200, WB2 6-24C, 6-24 and 8-32
boilers are shipped with a long inner flue gas pipe adaptor (Fig. 1). When
replacing an existing heat exchanger (Fig. 5), ensure that the inner flue gas pipe
adaptor is replaced with the one supplied with the new replacement heat
exchanger (Fig. 4).
It is not permissible to perform service
work on any component parts ensuring
safe operation of the heating system.
When replacing parts, use original
Viessmann or Viessmann approved
replacement parts.
Ensure that the installation
literature of other components
of the Vitodens 200 boiler is
referenced.
WARNING
Failure to properly connect the
replacement heat exchanger with the
vent pipe adaptor may result in flue
gas leakage which could cause
property damage, personal injury or
loss of life.
Advertisement

Related Manuals for Viessmann Vitodens 200


Summary of Contents for Viessmann Vitodens 200
-
Page 1: Installation Instructions
Installation Instructions Vent Pipe Adaptor for Vitodens 200, WB2 6-24C, 6-24, 8-32 replacement heat exchangers, Part No. 7134 787, 7134 788 Safety and Installation Requirements Please ensure that these instructions are read and understood before commencing installation. Failure to comply with the instructions listed below can cause product/property damage, severe personal injury, and/or loss of life. - Page 2 Installation Vitodens Vent Pipe Adaptor Details Supplied long inner flue gas pipe adaptor for use with new replacement heat exchangers (see Fig. 4). Fig. 1 Inner flue gas pipe adaptor Do not change inner flue gas pipe adaptor if boiler vent pipe adaptor appears as in picture on left (Fig.
- Page 3 Installation Vitodens Vent Pipe Adaptor Details Change inner flue gas pipe adaptor only if boiler vent pipe adaptor features a metal stopper ring (see Fig. 3), and the replacement heat exchanger appears as in Fig 4. Fig. 3 Boiler vent pipe adaptor - older models Replacement heat exchanger.
- Page 4 Installation steps 1. Remove metal stopper ring. 2. Remove boiler vent pipe adaptor. 3. Remove all metal and plastic screws. 4. Insert long inner flue gas pipe adaptor. 5. Reinstall screws. 6. Ensure adaptor is properly sealed and tight. 7. Ensure the test plugs are facing to the front. 8.
Need help?
Do you have a question about the Vitodens 200 and is the answer not in the manual?
Questions and answers