MAKERGEAR M2 User Manual
Hide thumbs
Also See for M2:
- User manual (24 pages) ,
- User manual (20 pages) ,
- Beginner's manual (26 pages)
Advertisement
Advertisement
Table of Contents

Related Manuals for MAKERGEAR M2


Summary of Contents for MAKERGEAR M2
- Page 1 MAKERGEAR USER GUIDE V4 Rev. E Made in the USA since 2009...
-
Page 2: Table Of Contents
8 - Slicing .STL or .OBJ Files 10 - Changing Filament 11 - M2 Features 15 - What's The Function? 16 - Maintenance & Technical Support 17 - Shutdown & Storage18-Warranty 19 - What Does "M2 V4 Rev. E" Mean? 20 - About Us... -
Page 3: Welcome
WELCOME Your MakerGear M2 3D Printer has arrived! With the exception of minimal set up, your M2 is ready to print out-of-the-box. To ensure both safety and high quality printing, carefully follow the Set Up instructions included in this booklet. This machine was... - Page 4 PLEASE READ ALL INSTRUCTIONS CAREFULLY BEFORE PRINTING! SAFETY FIRST, INSTRUCTIONS SECOND!
- Page 5 Important Safeguards 1. To protect against electrical shock, do not put the machine body, cord or electrical plug in liquid. If your printer falls into liquid, do not touch it. Instead, unplug the unit, then remove it immediately. Do not reach into the liquid without unplugging the unit first.
-
Page 6: What's Included
4 extra bed hold-down clips. Two 1 kg spools of 1.75 mm PLA (color may vary). Spool holders with screws and a sample print, both of which were printed on your M2 using files on the included SD card. -
Page 7: Set Up
Set Up Carefully remove the foam from the top of the printer and from inside the printer frame. Remove the HBP from its slot in the foam and place it on the 4 legged “Spider” inside the frame, with the glass facing up. Remove the printer from the bottom foam. - Page 8 Use your feeler gauge to ensure that Extruder 2 is at the correct position. After you've placed Extruder 2 in the correct position, tighten the screw to secure it in place. To access the M2 Quick Start App Tutorial, visit http://www.makergear.com/pages/quickstart-app...
- Page 9 Printing - Dual Extruder Both Pronterface and Simplify3D work with Dual Extruder units with only minor changes. In S3D, to control the second extruder, you need only select "Tool 1" from the "Active Toolhead" drop-down menu in the Machine Control Panel;...
- Page 10 If you try to download and print a file from the internet, you’ll notice its format is either .STL or .OBJ, which your M2 is unable to read. In order to print these files, you must use special software designed to “slice” them into “.g”...
- Page 11 Use your printer control software (e.g., Printrun by Pronterface, available at http://www.pronterface.com/#download) to instruct your M2 to print "myMGkey.g" from your SD card. If this print does not have similar strength and appearance to the sample print included with your M2e Dual, reference the online resources offered by your slicing...
-
Page 12: Changing Filament
* If unable to feed filament properly, then try cutting the tip at an angle before feeding it into the filament drive. *The M2 allows you to print with many different filament materials; however, we recommend using non-experimental filament materials provided by MakerGear. -
Page 13: M2 Features
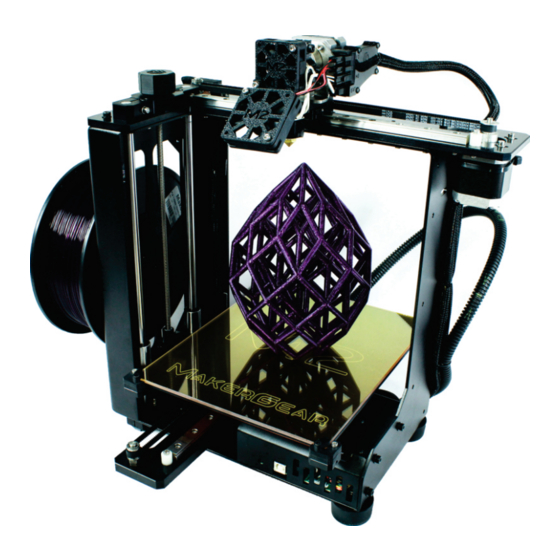
M2 Features Z-Fine Adjust Knob Z-Axis Limit Switch Heated Build Platform SD Card Reader Slot Manual Reset Button X-Axis Rail USB Port X-Axis Belt Spool Holder Z-Axis Leadscrew 10mm Linear Rods... - Page 14 M2 Features 50 mm Fan 40 mm Fan Filament Drive Extruder Wire Mount V4 Hot End...
- Page 15 M2 Features X-Axis Limit Switch Y-Axis Belt Filament Guide 6 Position Electronics Connector Y-Axis Rail Y-Axis Limit Switch...
- Page 16 M2 Features...
-
Page 17: What's The Function
What's The Function? Simple explanations of M2 Features. 6 Position Electronics Connector Brings power to your M2. 10 mm Linear Rods Guide your bed up & down. 40 mm Fan Cools your filament drive. 50 mm Fan Helps solidify printed layers (as needed). -
Page 18: Maintenance & Technical Support
Weekly (every 50 hours) Ensure that your bed is at the correct hight and properly leveled. To do so, open the MakerGear Quick Start application and follow the commands within the Set Up process in order to complete the following steps:... - Page 19 AND store the filament spool in its original bag (fully sealed, with the desiccant packet inside). If storing your M2 for a period of 2 weeks or more, follow the instructions listed above THEN cover your entire machine in order to protect it from the buildup of dust and other airborne particles.
- Page 20 Exceptions The M2 has an open design (no proprietary cartridges) and M2 owners are free to use 3rd party filament. However, the MakerGear hot end is only covered when MakerGear filament and authentic MakerGear components are used.
-
Page 21: What Does "M2 V4 Rev. E" Mean
What does "M2 V4 Rev. E" mean? Technical Support lives on our website at www.makergear.com/pages/support... -
Page 22: About Us
3D printing community. Today, we apply strict standards to our machines, which are made and tested in the USA using domestic and foreign parts. Despite numerous improvements and advancements during the years since MakerGear’s humble beginnings, our dedication to quality and community remains unchanged. Our work... - Page 23 Thanks for choosing MakerGear. MakerGear Team Please register as an M2 owner so that we can contact you with important information about your machine when necessary - THIS IS NOT OUR EMAIL SUBSCRIBER LIST - To register, visit www.MakerGear.com/register...
- Page 24 What are you making? Tag made with MAKER GEAR for a chance to be featured! MAKERGEAR ©2016 MakerGear. MakerGear LLC 23632 Mercantile Road Unit G Beachwood, Ohio, US 44122...
Need help?
Do you have a question about the M2 and is the answer not in the manual?
Questions and answers