Table of Contents
Advertisement
Available languages
Available languages
Quick Links
Advertisement
Chapters
Table of Contents

Related Manuals for GBC Magnapunch 2.0


Summary of Contents for GBC Magnapunch 2.0
- Page 1 Magnapunch 2.0 Heavy Duty Punch INSTALLATION & OPERATION MANUAL MANUAL DE INSTALACIÓN Y FUNCIONAMIENTO MANUEL D’INSTALLATION ET D’UTILISATION Document Number: 80120510 Rev. A Do not duplicate without written permission from ACCO Brands.
- Page 2 Delagacion Gustavo A. Madero, CP 07700 © 2011 ACCO Brands. All rights reserved. ACCO® is a registered trademark of 800.263.1063 México, DF. (55) 1500-5578 ACCO Brands. GBC® is a registered trademark of General Binding Corporation. www.gbccanada.com www.gbc.com.mx 80120510 Rev. A...
-
Page 3: Table Of Contents
Magnapunch 2.0 – Installation and Operating Instructions able of onTenTs 1. Safety Installing Die Sets ..........6-6 Removing Punch Pins ........6-7 General Safeguards ..........1-1 Job Setup ............... 6-7 Die Set Cautions ..........1-2 Using the LCD User Interface ......6-7 Electrical ..............1-2... - Page 4 Magnapunch 2.0 – Installation and Operating Instructions Page iii...
-
Page 5: Safety
Failure to observe these warnings could result in severe bodily damage or death. This safety notice means that you could be seriously hurt or killed if you open the Magnapunch 2.0 and eneRal afeGUaRds expose yourself to hazardous voltage. Do not open the Magnapunch 2.0. -
Page 6: Die Set Cautions
Magnapunch 2.0. Contact an electrician should the attachment plug provided with the Magnapunch CAUTION: When choosing a detachable 2.0 not match the receptacles at your location. line cord for use with your Magnapunch 2.0, always observe the following. • The cordset consists of three parts;... -
Page 7: Gbc Technical Service
(5525) 1500-5741 Other Sources For service facilities in other regions, please visit: www.gbcconnect.com/contact_us.aspx Also use your mobile phone to scan the QR code on the side of the Magnapunch 2.0 for a list of authorized service providers. Page 1-3... -
Page 8: Safety Label Locations
Magnapunch 2.0 – Installation and Operating Instructions afety aBel oCations Figure 1. Magnapunch 2.0 Safety Label Locations. Page 1-4... -
Page 9: Warranty
Magnapunch 2.0 – Installation and Operating Instructions 2. W aRRanty 90-d TO THE EXTENT ALLOWED BY APPLICABLE iMited aRRanty LAW, THIS WARRANTY IS IN LIEU OF ALL OTHER EXPRESSED WARRANTIES. REPRESENTATIONS ACCO Brands USA LLC, 300 Tower Parkway, OR PROMISES INCONSISTENT WITH OR... - Page 10 Magnapunch 2.0 – Installation and Operating Instructions Page 2-2...
-
Page 11: Specifications
YP-24 R NEMA 5-15R Refer to the nomenclature plate located Refer to the nomenclature on the rear of the Magnapunch 2.0 for the plate located on the rear of the specific electrical rating applicable to the Magnapunch 2.0 for the specific unit. -
Page 12: Punching Dimensions
Magnapunch 2.0 – Installation and Operating Instructions UnChinG iMensions Punch Pattern Maximum Punch Length Number of Punch Pins Center to Center Hole Spacing Plastic binding 14 in. (356 mm) 0.5625 in. (14.29 mm) Plastic Color Coil, GBC 4:1 (C4) 14 in. (356 mm) 0.2475 in. - Page 13 Magnapunch 2.0 – Installation and Operating Instructions Page 3-3...
-
Page 14: Fcc Class A Notice
Magnapunch 2.0 – Installation and Operating Instructions fCC C lass otiCe odifiCations This device complies with Part 15 of the FCC Rules. Any modifications made to this device that are not Operation is subject to the following two conditions: approved by ACCO Brands Corporation may void the authority granted to the user by the FCC and/or by •... -
Page 15: Installation
The first time the Magnapunch 2.0 is powered-up, a setup screen appears. Select Also use your mobile phone to scan the QR code the language and then measurement units. on the side of the Magnapunch 2.0 for a list of authorized service providers. RioR to nstallation Inspect the packaging and Magnapunch 2.0 for... - Page 16 Magnapunch 2.0 – Installation and Operating Instructions Page 4-2...
-
Page 17: Feature Guide
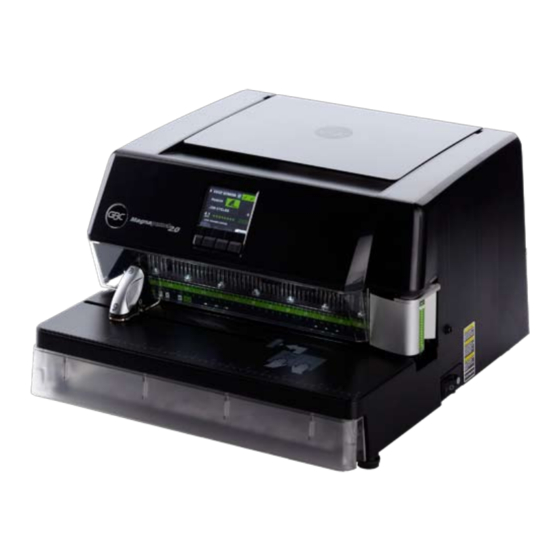
Magnapunch 2.0 – Installation and Operating Instructions 5. f eatURe GUide This chapter helps you identify the main components of the Magnapunch 2.0. Lift picker User Interface Edge Guide and Tabletop Trigger Die Set Punching Table Fuse Chip Drawer Punching Throat ON/OFF switch Figure 4. -
Page 18: Lift Picker
1/4 turn to lock the Edge Guide in place. Figure 7. Start Up Screen. The LCD provides continuous status of the Magnapunch 2.0 and includes step by step instructions on how to use your Magnapunch 2.0. Figure 9. Edge Guide Unlocked. Page 5-2... -
Page 19: Tabletop Trigger
Magnapunch 2.0 – Installation and Operating Instructions aBletop RiGGeR The Tabletop Trigger is incorporated into the Edge Guide. The Tabletop Trigger is used to automatically punch without the use of the Foot Pedal. The Tabletop Trigger is activated on the Home screen of the User Interface. - Page 20 Magnapunch 2.0 – Installation and Operating Instructions Page 5-4...
-
Page 21: Operation
The Magnapunch 2.0 uses a variety of easily interchangeable Die Sets for different binding styles. By selecting the appropriate Die Set, you can use your Magnapunch 2.0 to punch documents in any of the binding styles indicated in the following table. Table 1. -
Page 22: User Interface
LCD. To set the language and units: Turn On the Magnapunch 2.0. When the Magnapunch 2.0 is turned on, the Start up screen briefly displays, followed by the Home screen. Figure 12. Language Setup Screen. -
Page 23: Operation
After the Magnapunch 2.0 has been turned on, the Home screen displays. It is the menu from which you set up and operate the Magnapunch 2.0. To return to this menu from any other screen, press HOME. CReen The Home screen displays the current status and Figure 15. -
Page 24: Menu
Die Indicator The Die Indicator displays which Die Set is currently Select Media Length in the Magnapunch 2.0. The Magnapunch 2.0 will Select SELECT STANDARD LENGTH to go to that report one of the following errors if the Die Set was screen. -
Page 25: Help + Tips
Also see “Troubleshooting”. Custom Use the Custom screen to set the Magnapunch 2.0 for other sizes of media. Select the size and then use UP and DOWN to increase or decrease the size. Briefly press and release UP and DOWN to scroll in small increments and press and hold for to scroll in large increments. -
Page 26: Changing The Interchangeable Die Sets
2.0 is located on the right front side of the Set’s handle. Failure to observe these precautions Magnapunch 2.0. If a Die Set is already installed in may result in injury. your Magnapunch 2.0, you can easily remove the Die •... -
Page 27: Removing Punch Pins
You can easily remove and replace punch pins Before beginning a punching job, ensure the for proper punching some combinations of paper Magnapunch 2.0 is setup properly. Use the LCD user sizes and punching patterns. The Magnapunch 2.0 interface (UI) to guide you through the setup process. - Page 28 Die Set and shows where the left Edge Guide should be placed. Figure 30. Pin Configuration Screen. Reinsert the Die Set into the Magnapunch 2.0. Figure 28. Set Side Screen. To leverage Die Set markings for common paper...
-
Page 29: Testing The Job
Because of its open-end Punch Throat design, you greater on the left, move the Edge Guide can use your Magnapunch 2.0 to punch sheet sizes to the right. Then punch another five test that are larger than the maximum width of paper that sheets and re-check the spacings. -
Page 30: Punching Operation
For Punching Margin Setting 1, continue to are ready to begin punching. The following sections pull gently outward. The Control Lever will indicate how to activate the Magnapunch 2.0. Read click into place when this position is reached. these sections completely to become familiar with unique Die Set features and helpful punching tips. -
Page 31: Punch Activation
Ctivation aBletop RiGGeR The Tabletop Trigger allows you to quickly punch The Magnapunch 2.0 can be activated using either stacks of sheets. Pressing the stack against the the Foot Pedal or the Tabletop Trigger. The activation Trigger, activates the punch. -
Page 32: Punching Tips
Magnapunch 2.0 base. The Chip Drawer should be periodically emptied to avoid jamming and damage For typical maximum punching capacities for the Magnapunch 2.0 using 20 lb. (75 g/m 2 ) bond sheets, to the Magnapunch 2.0 and Die Sets. refer to “Table 3. -
Page 33: Hole Quality
Magnapunch 2.0 – Installation and Operating Instructions Uality The following table is a guide to help you determine how many sheets of paper you can punch in each cycle. This is based on 20 lb. (75 g/m 2 ) bond. - Page 34 Magnapunch 2.0 – Installation and Operating Instructions Page 6-14...
-
Page 35: Operator Maintenance
• Do not attempt to service or repair the Magnapunch 2.0. • Do not open the Magnapunch 2.0. There are no user serviceable parts inside. • Refer service to qualified service personnel. Failure to observe these warnings could result in severe personal injury or death. - Page 36 Magnapunch 2.0 – Installation and Operating Instructions RoUBleshootinG Symptom Possible Cause Corrective Action Read error, punch is The barcode on the Die Set was not read Remove and reinsert the Die Set. operable successfully. The bar code reader is malfunctioning Contact your service provider.
- Page 37 Magnapunch 2.0 – Installation and Operating Instructions otes Date purchased: Serial number: Page 7-3...
- Page 40 Delagacion Gustavo A. Madero, CP 07700 © 2011 ACCO Brands. All rights reserved. ACCO® is a registered trademark of 800.263.1063 México, DF. (55) 1500-5578 ACCO Brands. GBC® is a registered trademark of General Binding Corporation. www.gbccanada.com www.gbc.com.mx Doc 80120510 Rev. A...
- Page 41 Magnapunch 2.0 Perforadora de gran capacidad MANUAL DE INSTALACIÓN Y FUNCIONAMIENTO Documento número: 80120510 Rev. A Está prohibido realizar copias sin el permiso por escrito de ACCO Brands.
- Page 42 Delagacion Gustavo A. Madero, CP 07700 © 2011 ACCO Brands. Todos los derechos reservados. ACCO® es una marca comercial registrada 800.263.1063 México, DF. (55) 1500-5578 de ACCO Brands. GBC® es una marca comercial registrada de General Binding Corporation. www.gbccanada.com www.gbc.com.mx 80120510 Rev. A 11-2011 Página i...
- Page 43 Magnapunch 2.0: Instrucciones de instalación y funcionamiento abla de conTenidos 1. Seguridad Pantallas de notificación ........6-6 Cómo cambiar los juegos de matrices Medidas de seguridad generales ......1-1 intercambiables ............6-6 Precauciones para los juegos de matrices ..1-2 Cómo extraer los juegos de matrices....6-6 Energía eléctrica ............1-2...
- Page 44 Magnapunch 2.0: Instrucciones de instalación y funcionamiento Página iii...
-
Page 45: Seguridad
Si no respeta las advertencias, se pueden producir Este aviso de seguridad significa que puede resultar lesiones físicas graves e incluso la muerte. gravemente herido o morir si abre Magnapunch 2.0 y se expone al voltaje peligroso. No abra Magnapunch 2.0. edidas de seguRidad geneRales No contiene piezas que puedan ser reparadas por el usuario. -
Page 46: Precauciones Para Los Juegos De Matrices
En caso de que le suceda lo siguiente, desconecte el ReCauCiones PaRa los juegos de enchufe del tomacorriente y comuníquese con su prove- matRiCes edor o distribuidor, o con el Servicio técnico de GBC. • Si el cable de alimentación o el enchufe están dañados. -
Page 47: Servicio Técnico De Gbc
Para obtener información sobre el servicio técnico en otras regiones, visite: www.gbcconnect.com/contact_us.aspx También puede utilizar su teléfono móvil para escanear el código QR al costado de la perforadora Magnapunch 2.0 y obtener una lista de proveedores de servicios autorizados. Página 1-3... -
Page 48: Ubicaciones De La Etiqueta De Seguridad
Magnapunch 2.0: Instrucciones de instalación y funcionamiento BiCaCiones de la etiqueta de seguRidad Figura 1. Ubicaciones de la etiqueta de seguridad de la perforadora Magnapunch 2.0. Página 1-4... -
Page 49: Garantía
Magnapunch 2.0: Instrucciones de instalación y funcionamiento 2. g aRantía EN LA MEDIDA PERMITIDA POR LAS LEYES aRantía limitada de días CORRESPONDIENTES, ESTA GARANTÍA REEMPLAZA A TODA OTRA GARANTÍA EXPRESA. NO ESTÁN ACCO Brands USA LLC, 300 Tower Parkway, Lincolnshire, AUTORIZADAS LAS REPRESENTACIONES O IL 60069 (en Canadá, ACCO Brands Canada Inc., 5... - Page 50 Magnapunch 2.0: Instrucciones de instalación y funcionamiento Página 2-2...
-
Page 51: Especificaciones
Magnapunch 2.0: Instrucciones de instalación y funcionamiento 3. e sPeCifiCaCiones Artículo Especificación Patrón de perforación Capacidad de perforación: cantidad máxima de hojas con una densidad de 20 lb (75 g/m 2 ). • Encuadernación con anillas de plástico • Espiral de color de plástico, GBC y estándar industrial 4:1 (C4) -
Page 52: Dimensiones De Las Perforaciones
Magnapunch 2.0: Instrucciones de instalación y funcionamiento imensiones de las PeRfoRaCiones Patrón de perforación Longitud máxima de Cantidad de punzones Distancia entre los orificios perforación (de centro a centro) Encuadernación con anillas de plástico 14 in (356 mm) 0,5625 in (14,29 mm) Espiral de color de plástico, GBC 4:1 (C4) -
Page 53: Aviso De Fcc Clase A
Magnapunch 2.0: Instrucciones de instalación y funcionamiento viso de Clase odifiCaCiones Este dispositivo cumple con lo dispuesto en la Sección 15 Toda modificación que se realice a este dispositivo y que de las normas de la FCC. El funcionamiento depende de no sea autorizada por ACCO Brands anulará... - Page 54 Magnapunch 2.0: Instrucciones de instalación y funcionamiento Página 3-4...
-
Page 55: Instalación
Conecte el pedal a la parte posterior de la perforadora www.gbcconnect.com/contact_us.aspx Magnapunch 2.0 y coloque el pedal sobre el suelo al alcance del pie. También puede utilizar su teléfono móvil para escanear el código QR al costado de la perforadora Magnapunch 2.0 y obtener una lista de proveedores de servicios autorizados. -
Page 56: Prueba
Magnapunch 2.0: Instrucciones de instalación y funcionamiento RueBa Después de haber instalado correctamente la perforadora Magnapunch 2.0, se debe realizar una prueba para asegurarse de que funcione correctamente. Notas: • La primera vez que se enciende la perforadora Magnapunch 2.0, aparece una pantalla de configu- ración. -
Page 57: Guía De Funciones
Magnapunch 2.0: Instrucciones de instalación y funcionamiento 5. g uía de funCiones Este capítulo le permitirá identificar los componentes principales de la perforadora Magnapunch 2.0. Bandeja para almacenar hojas Interfaz de usuario Guía de papel y Activador de tablero Juego de matrices Tablero de perforación... -
Page 58: Bandeja Para Almacenar Hojas
Magnapunch 2.0: Instrucciones de instalación y funcionamiento andeja PaRa almaCenaR hojas otones Los botones se relacionan con los comandos ubicados Levante la tapa de la bandeja para almacenar hojas que se en la parte inferior de la pantalla. La acción que realiza el han perforado o que se van a perforar. -
Page 59: Activador De Tablero
LCD que le avisa que debe vaciar el cajón. uego de matRiCes Magnapunch 2.0 ofrece trece juegos de matrices distintos para todos los requisitos de perforación para sus docu- mentos. Para cambiar un juego de matrices, consulte “Cómo cambiar los juegos de matrices... - Page 60 Magnapunch 2.0: Instrucciones de instalación y funcionamiento Página 5-4...
-
Page 61: Funcionamiento
Magnapunch 2.0 utiliza una variedad de juegos de matrices fácilmente intercambiables para lograr distintos estilos de encuader- nación. Si selecciona el juego de matrices apropiado, puede utilizar Magnapunch 2.0 para perforar documentos en cualquiera de los estilos de encuadernación que se indican en la siguiente tabla: Tabla 1. -
Page 62: Interfaz De Usuario
Magnapunch 2.0: Instrucciones de instalación y funcionamiento Si Magnapunch 2.0 ha estado inactiva por más de 30 nteRfaz de usuaRio minutos, en la pantalla LCD aparece la pantalla Start Up (Inicio) y entra en estado de suspensión. Para volver a La pantalla LCD y la fila de botones ubicada debajo activar la pantalla, presione cualquier tecla. -
Page 63: Funcionamiento
Pantalla Edge Sensor (Sensor de bordes) Cuando el sensor de bordes está activado, la perforadora Magnapunch 2.0 detecta si el material está colocado debidamente en la boca de perforación. En la interfaz de usuario aparecen barras verdes que indican que los bordes izquierdo y derecho del material se encuentran colocados correctamente. -
Page 64: Menú
Magnapunch 2.0: Instrucciones de instalación y funcionamiento Para reiniciar el contador de ciclos de tareas: enú En la pantalla Home (Principal), desplácese hasta Utilice la pantalla Menu (Menú) para acceder a otras JOB CYCLES (Ciclos de tareas). funciones importantes de la perforadora Magnapunch 2.0. -
Page 65: Instrucciones De Uso
Seleccione el tamaño y use UP(Arriba) y y configuración de Magnapunch 2.0. Algunas de las DOWN (Abajo) para aumentar o disminuir el tamaño. Para pantallas presentan animaciones, son explicativas y cambiar la medida a incrementos pequeños, presione... -
Page 66: Pantallas De Notificación
Guarde el juego extraído en un sitio adecuado (protegido del polvo, la tierra, las caídas, etc.) Magnapunch 2.0 ofrece la ventaja de usar juegos de matrices intercambiables, lo que le permite perforar Consejo útil: El dispositivo de almacenamiento para económicamente documentos para una gran variedad de... -
Page 67: Cómo Extraer Los Punzones
Sujete el mango con los dedos y empuje el juego de onfiguRaCión de la taRea matrices con firmeza hacia dentro de la ranura para los juegos de matrices de Magnapunch 2.0. Se podrá Antes de comenzar una tarea de perforación, asegúrese escuchar un clic cuando se trabe el mecanismo de de que Magnapunch 2.0 esté... - Page 68 Magnapunch 2.0: Instrucciones de instalación y funcionamiento Siga las instrucciones indicadas en la UI de la pantalla LCD, extraiga el juego de matrices de Magnapunch 2.0, asegúrese de que todos los punzones estén en su lugar y luego extraiga los punzones identificados en la UI de la pantalla LCD.
-
Page 69: Cómo Probar La Tarea
Gracias al diseño abierto de la boca de perforación, puede Si el margen es más grande en la izquierda, utilizar Magnapunch 2.0 para perforar hojas de un tamaño deslice la guía de papel hacia la derecha. Luego más grande que el ancho máximo de papel que se puede perfore otras cinco hojas de prueba y vuelva perforar durante una tarea. -
Page 70: Proceso De Perforación
Después de colocar el juego de matrices adecuado en con cuidado. Escuchará un clic cuando la palanca Magnapunch 2.0 y de haber seguido las instrucciones de control haya logrado ubicarse en esa posición. de configuración en las secciones “Configuración de... -
Page 71: Activación De La Perforadora
CtivaCión de la PeRfoRadoRa CtivadoR de taBleRo El Activador de tablero le permite perforar las hojas La perforadora Magnapunch 2.0 se puede activar por rápidamente. Si presiona el material contra el Activador, medio del Pedal o el Activador de tablero. El modo de la perforadora se activa. -
Page 72: Consejos Para La Perforación
El cajón de residuos está ubicado en la parte frontal de la máxima de hojas que se pueden perforar al mismo tiempo. base de Magnapunch 2.0. El cajón de residuos de debe vaciar periódicamente para evitar atascos y daños en la Consulte la “Tabla 3. -
Page 73: Calidad De Los Orificios
Magnapunch 2.0: Instrucciones de instalación y funcionamiento alidad de los oRifiCios La siguiente tabla es una guía que le permitirá determinar cuántas hojas de papel puede perforar en cada ciclo. Estos cálculos están hechos tomando como ejemplo el papel con una densidad de 20 lb (75 g/m 2 ) . - Page 74 Magnapunch 2.0: Instrucciones de instalación y funcionamiento Página 6-14...
-
Page 75: Mantenimiento Del Operador
ómo manteneR la PeRfoRadoRa ómo limPiaR agnaPunCh agnaPunCh Solamente limpie el exterior de Magnapunch 2.0. Puede utilizar un paño suave y húmedo para limpiar el exterior de El mantenimiento principal que el operador debe realizar Magnapunch 2.0. No utilice detergentes ni solventes, ya es vaciar el cajón de residuos periódicamente y mantener... -
Page 76: Solución De Problemas
Magnapunch 2.0: Instrucciones de instalación y funcionamiento oluCión de PRoBlemas Síntoma Causa probable Acción correctiva Error de reconocimiento, se No se reconoció correctamente el código de Extraiga y vuelva a colocar el juego de matrices. puede utilizar la perforadora barras en el juego de matrices. - Page 77 Magnapunch 2.0: Instrucciones de instalación y funcionamiento otas Fecha de la compra: N.º de serie: Página 7-3...
- Page 80 Delagacion Gustavo A. Madero, CP 07700 © 2011 ACCO Brands. Todos los derechos reservados. ACCO® es una marca comercial registrada 800.263.1063 México, DF. (55) 1500-5578 de ACCO Brands. GBC® es una marca comercial registrada de General Binding Corporation. www.gbccanada.com www.gbc.com.mx Doc. 80120510 Rev. A...
- Page 81 Magnapunch 2.0 Perforateur à usage intensif MANUEL D’INSTALLATION ET D’UTILISATION Numéro du document : 80120510 Rév. A Reproduction interdite sans la permission écrite de ACCO Brands.
- Page 82 Magnapunch 2.0 – Instructions relatives à l’installation et à l’utilisation ACCO Brands se réserve le droit de modifier cette onventions utilisées dans le publication, ainsi que les produits ci-décrits, sans avis présent manuel préalable. Les spécifications et informations relatives à ces produits sont sujettes à...
- Page 83 Magnapunch 2.0 – Instructions relatives à l’installation et à l’utilisation able des maTières 1. Sécurité Installer les blocs à colonne ......6-6 Retrait des poinçons .......... 6-7 Mesures de sauvegarde générales ......1-1 Configuration de la tâche ........6-7 Mises en garde relatives aux blocs à colonne ...1-2 Utiliser l’interface utilisateur LCD .......
- Page 84 Magnapunch 2.0 – Instructions relatives à l’installation et à l’utilisation Page iii...
-
Page 85: Sécurité
Magnapunch 2.0 – Instructions relatives à l’installation et à l’utilisation 1. s éCurité Votre sécurité, ainsi que celle des autres, est importante. avertissements Avant d’installer ou d’utiliser le Magnapunch 2.0, veuillez attentivement lire et respecter les avis de sécurité présents dans ce chapitre. Vous trouverez dans ce manuel •... -
Page 86: Mises En Garde Relatives Aux Blocs À Colonne
Magnapunch 2.0 – Instructions relatives à l’installation et à l’utilisation Débranchez le cordon de la prise de courant et contactez ises en garde relatives aux bloCs votre vendeur/distributeur ou le Service technique de GBC à Colonne dans les cas suivants : •... -
Page 87: Service Technique De Gbc
Magnapunch 2.0 – Instructions relatives à l’installation et à l’utilisation erviCe teChnique de Pour obtenir des accessoires, des pièces, un dépannage ou un Contrat pour l’entretien du matériel, veuillez contacter le Service et l’aide technique de GBC : États-Unis GBC Technical Service and Support – 3rd Floor... -
Page 88: Emplacements Des Étiquettes De Sécurité
Magnapunch 2.0 – Instructions relatives à l’installation et à l’utilisation mplaCements des étiquettes de séCurité Figure 1. Emplacements des étiquettes de sécurité du Magnapunch 2.0. Page 1-4... -
Page 89: Garantie
Magnapunch 2.0 – Instructions relatives à l’installation et à l’utilisation 2. g arantie DANS LA MESURE AUTORISÉE PAR LA LOI arantie limitée de jours APPLICABLE, LA PRÉSENTE GARANTIE REMPLACE TOUTE AUTRE GARANTIE EXPLICITE. TOUTE ACCO Brands USA LLC, 300 Tower Parkway, Lincolnshire, REPRÉSENTATION/PROMESSE AJOUTÉE OU QUI NE... - Page 90 Magnapunch 2.0 – Instructions relatives à l’installation et à l’utilisation Page 2-2...
-
Page 91: Spécifications
Magnapunch 2.0 – Instructions relatives à l’installation et à l’utilisation 3. s péCifiCations Article Spécification Motif de perforation Quantité maximum de feuilles pour une capacité de perforation sur papier bond de 20 livres (75 g/m 2 ). • Reliure plastique •... -
Page 92: Dimensions De Perforation
Magnapunch 2.0 – Instructions relatives à l’installation et à l’utilisation imensions de perforation Motif de perforation Longueur maximum de Nombre de poinçons Espacement des trous perforation entre axes Reliure plastique 14 po. (356 mm) 0,5625 po. (14,29 mm) Bobine couleur en plastique, GBC 4:1 (C4) 14 po. -
Page 93: Avis Fcc Classe A
Magnapunch 2.0 – Instructions relatives à l’installation et à l’utilisation fCC C lasse odifiCations Cet appareil est en conformité avec la Section 15 du Toutes modifications apportées à ce dispositif et non règlement FCC. Son fonctionnement est soumis aux approuvées par ACCO Brands Corporation annuleront le deux conditions suivantes : droit accordé... - Page 94 Magnapunch 2.0 – Instructions relatives à l’installation et à l’utilisation Page 3-4...
-
Page 95: Installation
Magnapunch 2.0 – Instructions relatives à l’installation et à l’utilisation 4. i nstallation nstallation AVERTISSEMENT : Ne pas essayer de dépanner ou de réparer le Magnapunch 2.0. Le non-respect de Pour déballer le Magnapunch 2.0 : cet avertissement pourrait provoquer des blessures Couper les sangles en plastique et le ruban corporelles graves, voire mortelles. -
Page 96: Test De Fonctionnement
Magnapunch 2.0 – Instructions relatives à l’installation et à l’utilisation est de fonCtionnement Après que le Magnapunch 2.0 ait correctement été installé, il est nécessaire d’effectuer un test pour vérifier son bon fonctionnement. Remarques : • L’écran de configuration apparaît la première fois que le Magnapunch est mis sous tension. -
Page 97: Guide Des Fonctionnalités
Magnapunch 2.0 – Instructions relatives à l’installation et à l’utilisation 5. g uide des fonCtionnalités Ce chapitre vous permet d’identifier les composants principaux du Magnapunch 2.0. Compartiment à feuilles Interface utilisateur Guide de bord de feuille et déclencheur-plateau Bloc à colonne... -
Page 98: Interface Utilisateur
Magnapunch 2.0 – Instructions relatives à l’installation et à l’utilisation ompartiment à feuilles outons poussoirs Les boutons-poussoirs sont associés aux commandes en Soulever le couvercle du compartiment à feuilles pour y bas de l’affichage LCD. L’action d’un bouton change en poser les feuilles qui ont été... -
Page 99: Déclencheur-Plateau
Magnapunch 2.0 – Instructions relatives à l’installation et à l’utilisation éClenCheur plateau Le déclencheur-plateau est intégré au guide de bord de feuille. Le déclencheur-plateau sert à perforer automatique- ment sans avoir à utiliser la pédale. Le déclencheur-plateau s’active via l’écran d’accueil de l’interface utilisateur. - Page 100 Magnapunch 2.0 – Instructions relatives à l’installation et à l’utilisation Page 5-4...
-
Page 101: Fonctionnement
0,282 po. (7,2 mm) CombBind ® Cerlox (anneaux plastiques, reliure plastique) 4:1 GBC (4 trous par pouce (25,4 mm), 0,2475 pouce (6,3 mm) d’espacement 0,092 po. (2,6 mm) Color Coil ® entre axes des trous) 4:1 Norme industrielle (4 trous par pouce (25,4 mm), 0,2500 pouce (6,35 mm) 0,040 po. -
Page 102: Interface Utilisateur
Magnapunch 2.0 – Instructions relatives à l’installation et à l’utilisation églage initial nterfaCe utilisateur La première fois que le Magnapunch 2.0 démarre, il est L’interface utilisateur (UI) est composée de l’affichage LCD et nécessaire de configurer la langue et les unités de mesure de la rangée de boutons qui l’accompagne. -
Page 103: Fonctionnement
Magnapunch 2.0 – Instructions relatives à l’installation et à l’utilisation onCtionnement Lorsqu’on allume le Magnapunch 2.0, l’écran d’accueil s’affiche. Il s’agit du menu à partir duquel l’utilisateur configure et utilise le Magnapunch 2.0. Pour revenir à ce menu à partir de tout autre écran, appuyer sur HOME (ACCUEIL). -
Page 104: Menu
Magnapunch 2.0 – Instructions relatives à l’installation et à l’utilisation Pour réinitialiser le compteur des cycles des tâches : Sur l’écran d’accueil, faire défiler les options jusqu’à JOB CYCLES (CYCLES DES TÂCHES). Appuyer sur SELECT (SÉLECTIONNER). Figure 17. Écran des menus. - Page 105 Magnapunch 2.0 – Instructions relatives à l’installation et à l’utilisation Figure 18. Écran Instructions d’utilisation. Figure 20. Écran Sélectionner longueur personnalisée. Instructions étape par étape Conseils Sélectionner STEP BY STEP INSTRUCTIONS Utiliser les écrans HELP + TIPS (AIDE + CONSEILS) (INSTRUCTIONS ÉTAPE PAR ÉTAPE) permet...
-
Page 106: Écrans De Notification
Le logement du bloc à colonne interchangeable du blocs à colonne. Magnapunch 2.0 est situé sur le côté droit de l’appareil. Si un bloc à colonne est déjà installé dans le Magnapunch 2.0, il est facile de le retirer. -
Page 107: Retrait Des Poinçons
Magnapunch 2.0 – Instructions relatives à l’installation et à l’utilisation Pour installer un bloc à colonne : Pour remettre des poinçons : Saisir la poignée du bloc à colonne en plaçant la Retirer l’arrêtoir de poinçon aimanté. paume de la main sur l’avant de la poignée et en Insérer les poinçons dans les orifices adéquats. - Page 108 Magnapunch 2.0 – Instructions relatives à l’installation et à l’utilisation Appuyer sur NEXT (SUIVANT). L’écran LCD affiche une image similaire à la règle qui est sur le bloc à colonne et montre où placer le guide de bord gauche. Figure 30.
-
Page 109: Effectuer Un Essai
Magnapunch 2.0 – Instructions relatives à l’installation et à l’utilisation Formats de feuille supérieurs à la largeur de Pour vérifier l’alignement du guide de bord, suivre l’une des procédures suivantes. perforation maximum Pour tous les motifs de perforation, sauf Grâce à la conception « extrémité libre » de l’ouverture de SureBind : Retirer les feuilles perforées de... -
Page 110: Perforation
Magnapunch 2.0 – Instructions relatives à l’installation et à l’utilisation erforation Pour modifier la marge de perforation des blocs à colonne pour reliure plastique : Suivre l’une des procédures suivantes : erforation pour une tâChe spéCifique • Pour la Marge de perforation 3, saisir fermement le Remarque : Avant toute modification des réglages... -
Page 111: Activation Du Perforateur
Magnapunch 2.0 – Instructions relatives à l’installation et à l’utilisation Appuyer et relâcher la pédale. Ctivation du perforateur Retirer la pile de feuilles. On peut activer le Magnapunch 2.0 soit à l’aide de la pédale soit à l’aide du déclencheur-plateau. On accède éClenCheur plateau au mode d’activation via l’écran HOME (ACCEUIL). -
Page 112: Conseils De Perforation
Magnapunch 2.0 – Instructions relatives à l’installation et à l’utilisation onseils de perforation ouvertures en plastique Le Magnapunch 2.0 s’utilise aussi pour perforer des Cette section fournit des informations supplémentaires couvertures en plastique. Il est important de respecter les concernant la perforation du papier et le fonctionnement directives suivantes pour éviter tout endommagement du... -
Page 113: Qualité Des Trous
Magnapunch 2.0 – Instructions relatives à l’installation et à l’utilisation ualité des trous Le tableau suivant vous aidera à déterminer combien de feuilles de papier peuvent être perforées par cycle. Basé sur du papier bond de 20 livres (75 g/m 2 ) . - Page 114 Magnapunch 2.0 – Instructions relatives à l’installation et à l’utilisation Page 6-14...
-
Page 115: Entretien Effectué Par L'utilisateur
Magnapunch 2.0 – Instructions relatives à l’installation et à l’utilisation 7. e ’ ntretien effeCtué par l utilisateur ntretien du agnapunCh ettoyage du agnapunCh Nettoyer uniquement l’extérieur du Magnapunch 2.0 Utiliser L’entretien principal consiste à vider périodiquement le un chiffon doux et humide pour essuyer l’extérieur du bac à... -
Page 116: Dépannage
Magnapunch 2.0 – Instructions relatives à l’installation et à l’utilisation épannage Symptôme Cause possible Mesure corrective Erreur de lecture, perforateur Échec de lecture du code barre du bloc à Retirer et réinsérer le bloc à colonne. utilisable colonne. Le lecteur de code barres est défectueux Contactez votre fournisseur de service. - Page 117 Magnapunch 2.0 – Instructions relatives à l’installation et à l’utilisation emarques Date d’achat : Numéro de série : Page 7-3...
- Page 120 Delagacion Gustavo A. Madero, CP 07700 © 2011 ACCO Brands. Tous droits réservés. ACCO® est une marque déposée de 800.263.1063 México, DF. (55) 1500-5578 ACCO Brands. GBC® est une marque déposée de General Binding Corporation. www.gbccanada.com www.gbc.com.mx Doc 80120510 Rév. A...
Need help?
Do you have a question about the Magnapunch 2.0 and is the answer not in the manual?
Questions and answers